Make Easy No-Bake Vegan Orange Almond Cheesecake for Shavuot, Yum
At the end of my junior year of college, an observant Jewish friend and I were about to move into a summer sublet together. When we thanked the women’s rugby team for moving our very heavy boxes down many flights of stairs and back up more stairs, my new roommate offered an additional payment: leftover cheesecake from Shavuot. This wasn’t a holiday I grew up observing, and she patiently explained the origins and traditions, but the only thing I remember year-to-year is: we have a cheesecake holiday. We have a holiday where a significant part of the traditional observance is eating cheesecake, and I didn’t know!
I don’t observe any of the other traditions for Shavuot, but I’ve been happy to adopt this one. So, my lactose-intolerant self is offering a vegan orange-almond cheesecake with a gingersnap crust and an orange-chocolate ganache. As a bonus: the flavor combination was inspired by classic queer YA book Oranges Are Not the Only Fruit by Jeanette Winterson.
Many vegan cheesecake recipes are frozen, including previous Autostraddle features like Triple Threat Vegan Cheesecake, but my freezer is already over-stuffed, and it was too hot to turn on the oven. So, I experimented with agar agar for the first time. Agar agar is a vegan gelatin alternative derived from algae, and I’ve been wanting to try it out for a while now. It’s easily found at natural food stores, Chinese and Korean groceries, and online.
No-Bake Vegan Orange Almond Cheesecake Recipe
Makes one 10 inch cheesecake in a springform pan or 4-6 tarts
Ingredients
Crust
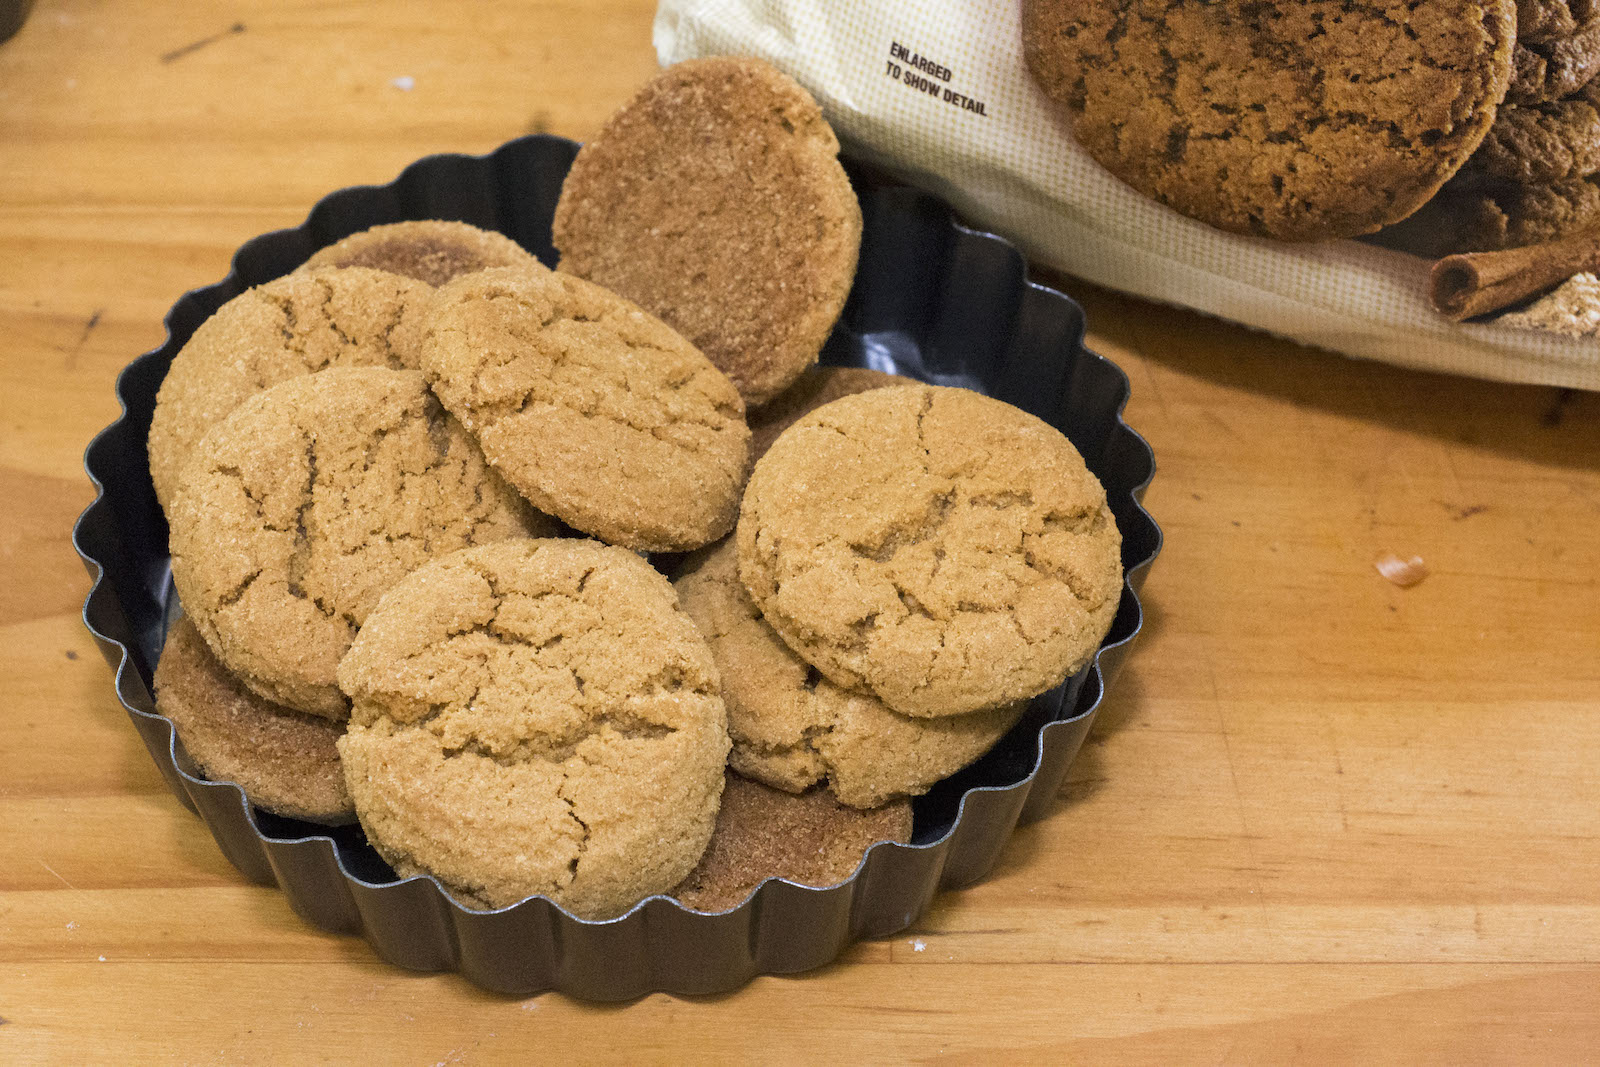
2 – 2 1/2 cups vegan gingersnaps (I used the entire bag I bought; depending on what you buy, this can flexibly either cover only the bottom of the pan, or go up the sides as well)
1/4-1/3 cup vegan butter, melted
1/4 cup brown sugar
Filling
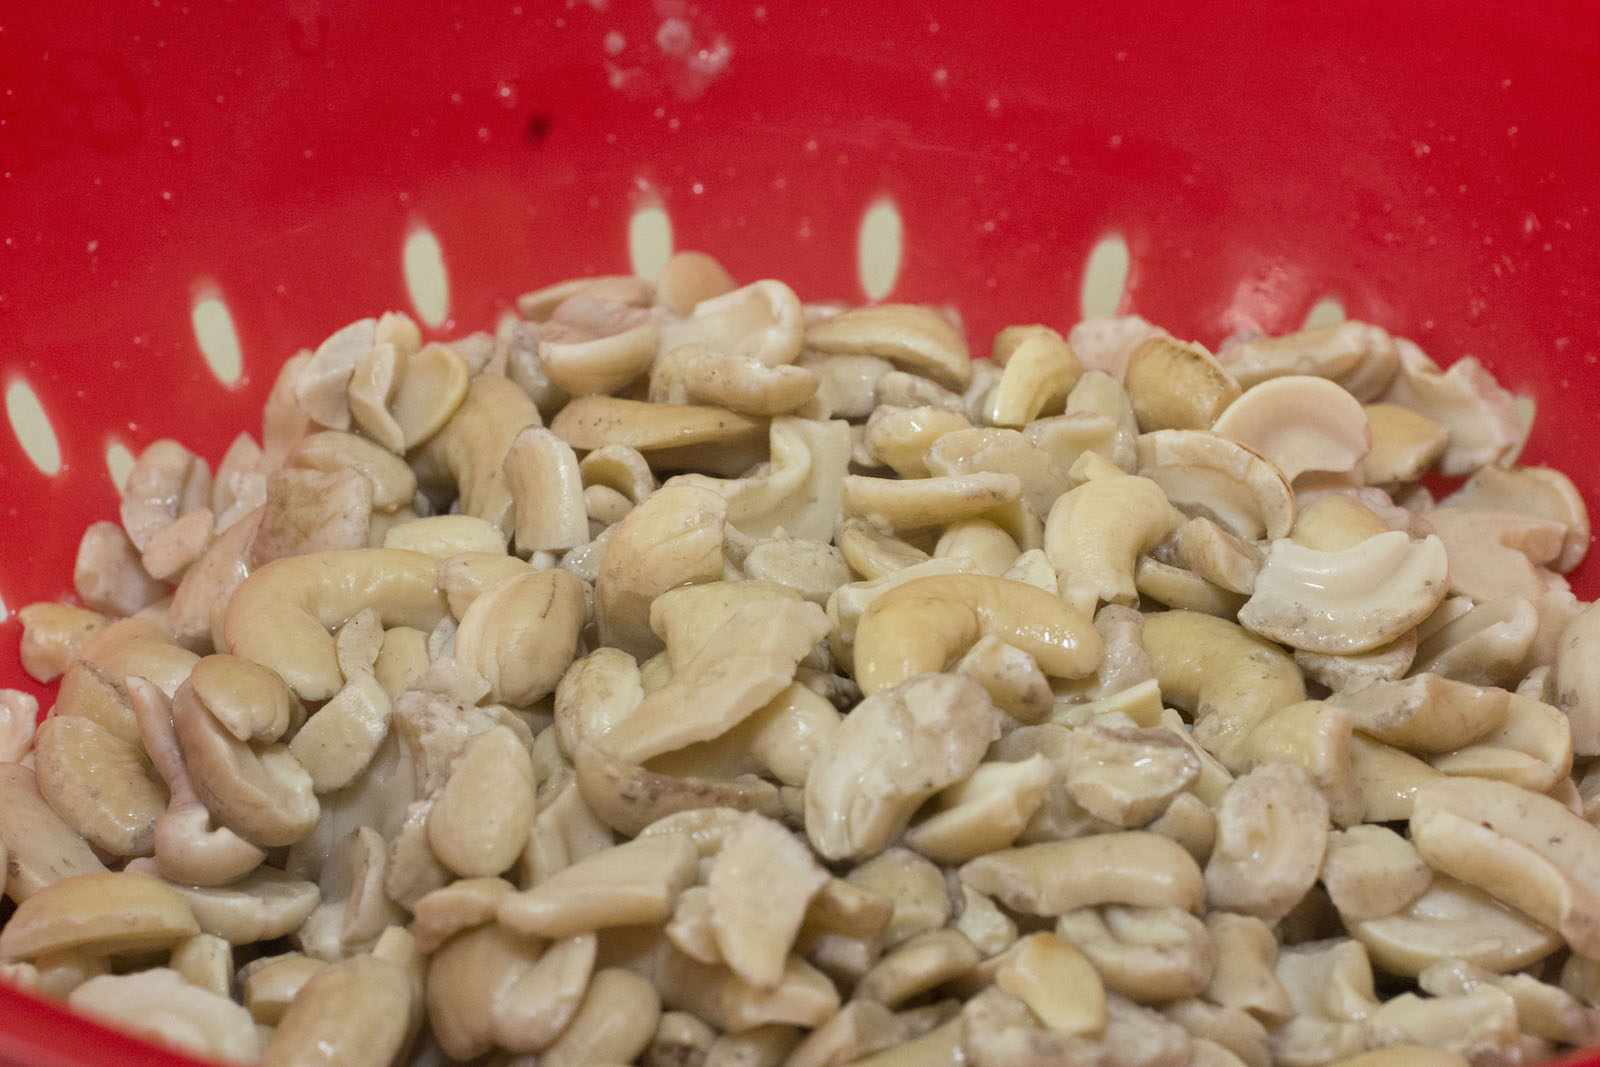
2 cups raw unsalted cashews
Lemon juice (option)
1/8 tsp salt
1/3 cup maple syrup
2 1/2 tsp corn starch
2 1/2 tsp agar agar powder
1 1/3 cup soy milk
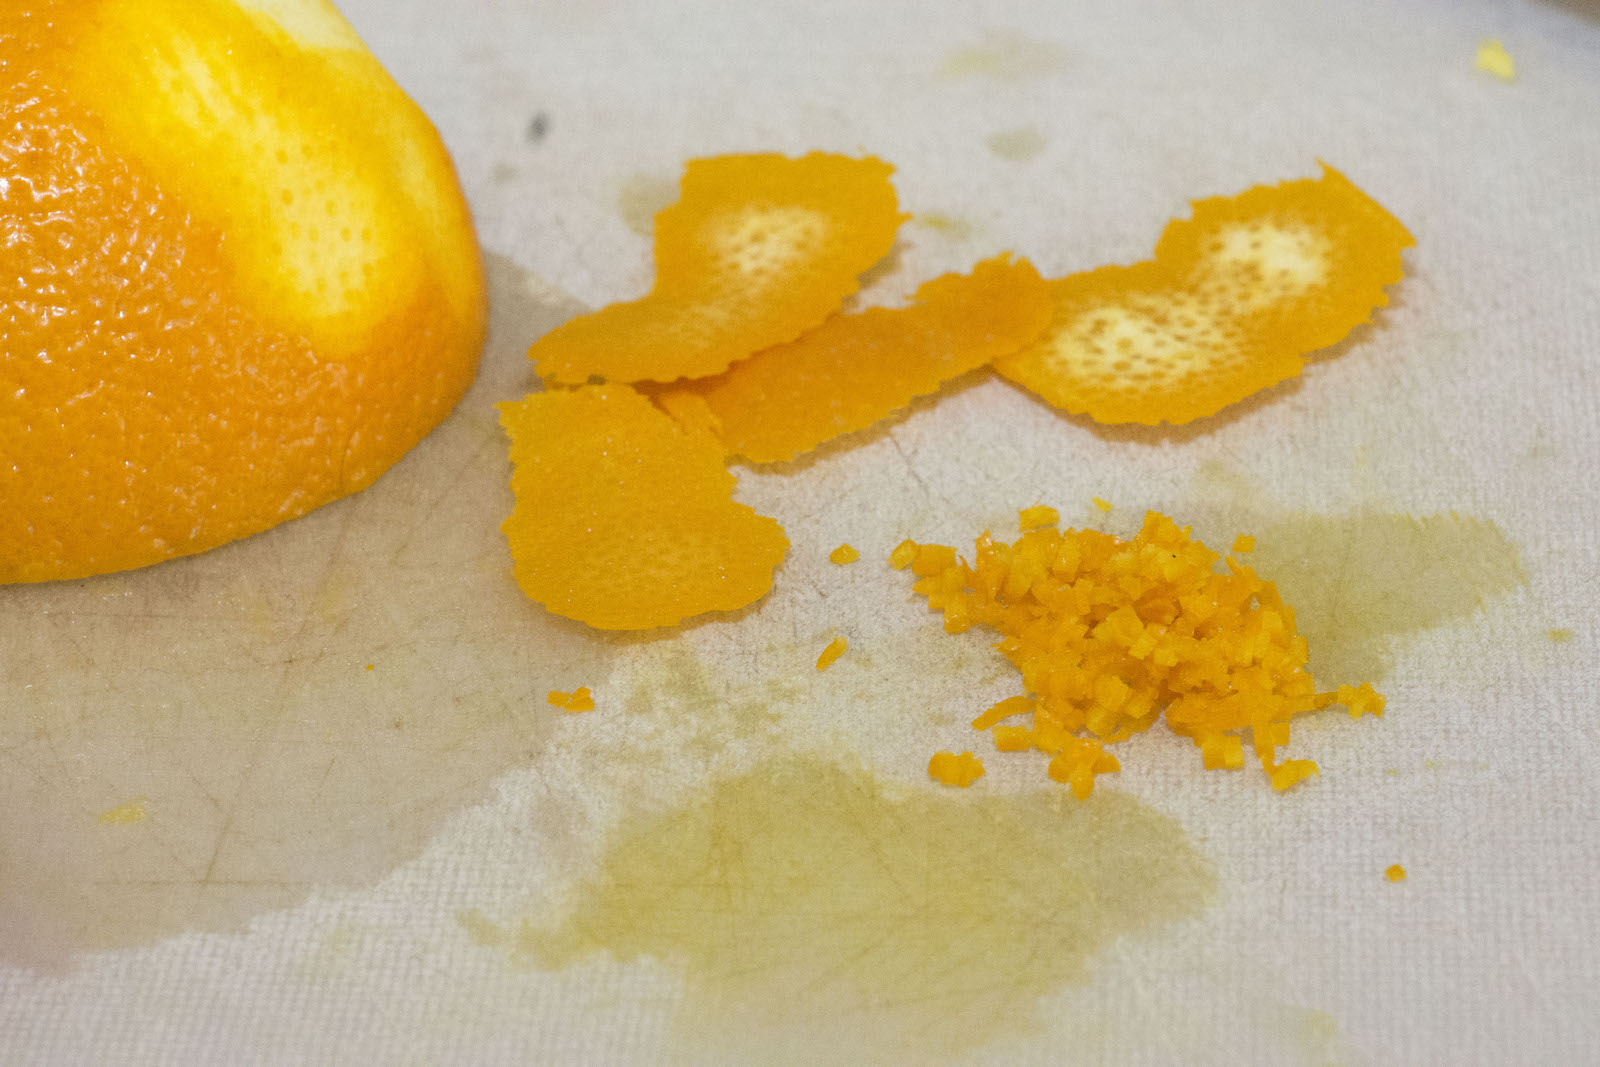
2 tbsp orange zest
1/2 cup orange juice (or however much juice 1 orange produces; adjust orange extract accordingly)
1 1/2 tsp orange extract (adjust to taste)
1 tsp almond extract
Topping
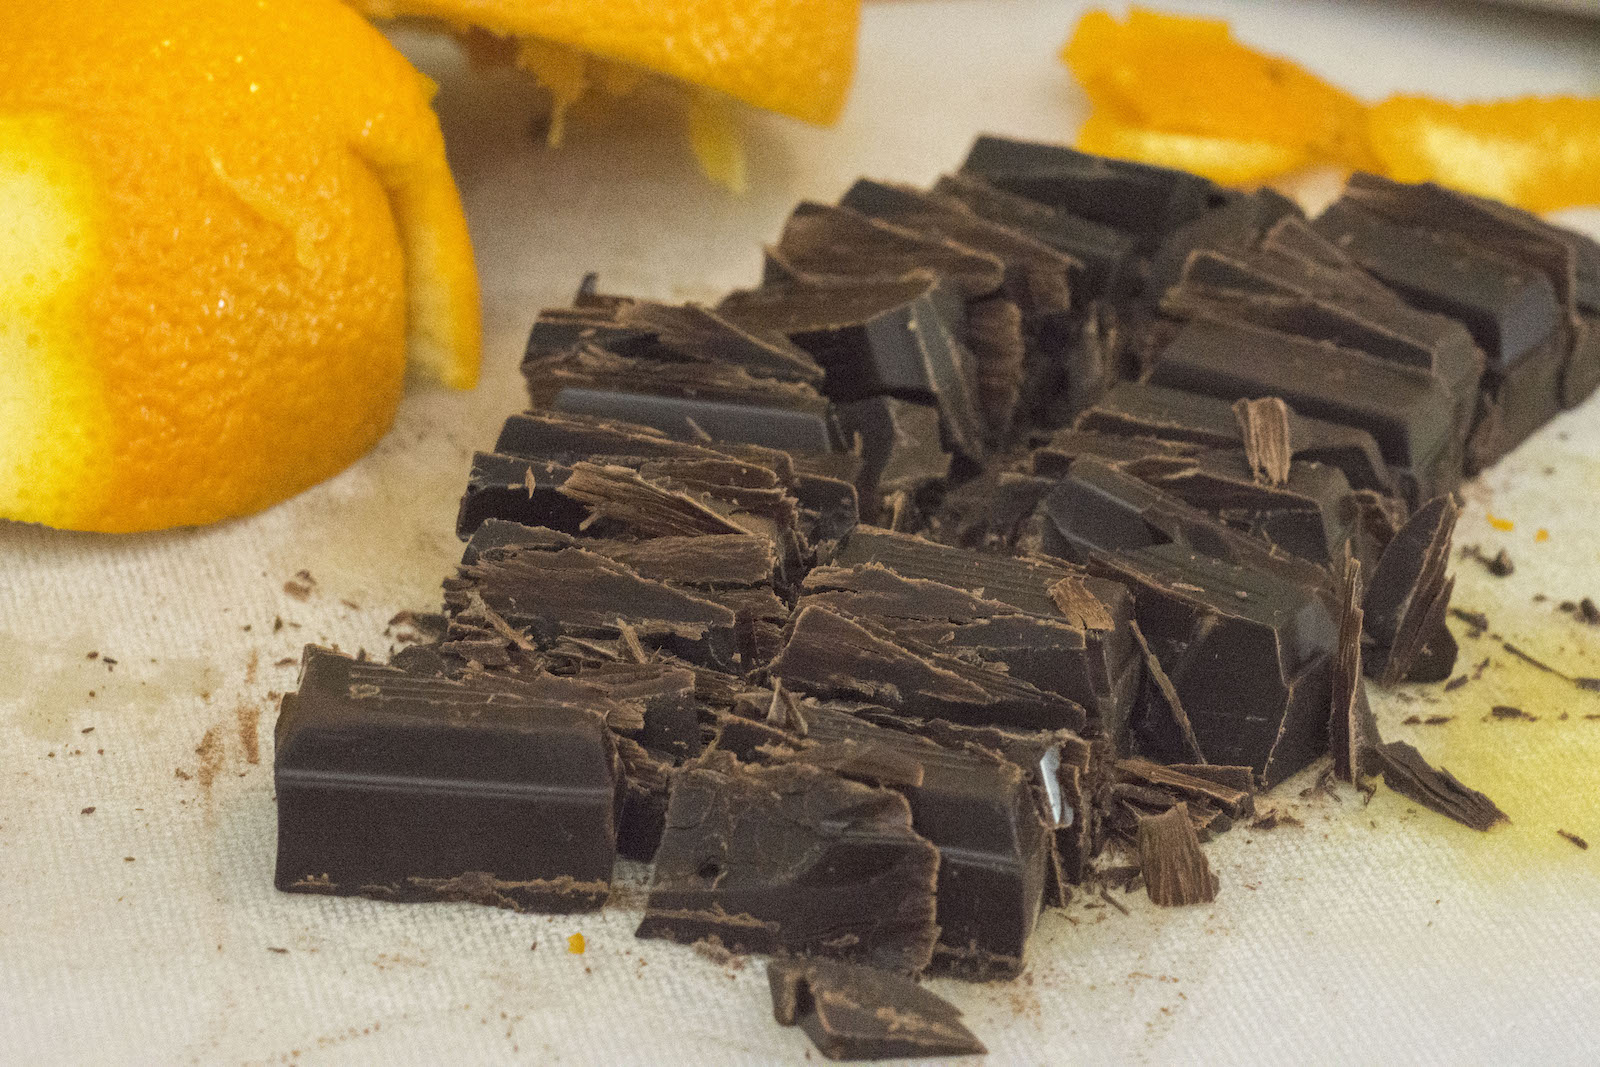
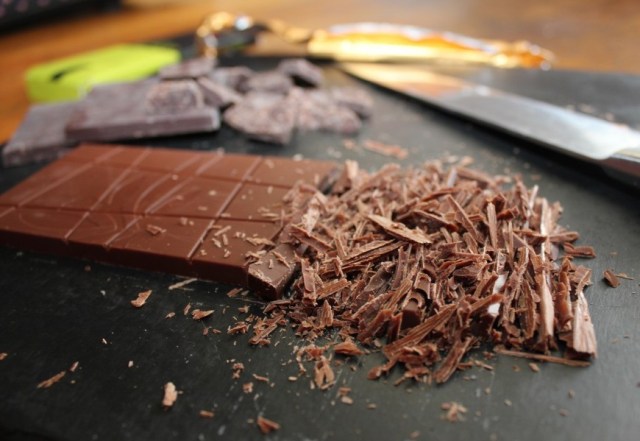
2/3 cup roughly chopped dark chocolate or chocolate chips
1/3 cup soy milk
3 heaping tbsp of orange marmalade
1/3 cup powdered sugar
1/2 tsp orange extract
Instructions
1. Quick-soak cashews using Pasta-based’s method: Cover raw cashews with water in a small pot. Bring water to boil and optionally add a squirt of lemon juice. Once boiling, cover and remove from heat and let sit for 15 minutes before draining.
2. While the cashews cool, make the crust. In a blender, pulse about 1 1/2 cups of vegan gingersnaps until finely ground. Remove from blender into a bowl and stir in 1/4 cup of melted vegan butter and 1/4 cup maple syrup to create a final texture of approximately wet sand.
3. Pour into your springform pan and pressdown with fingers or a measuring cup with a flat bottom until firm.

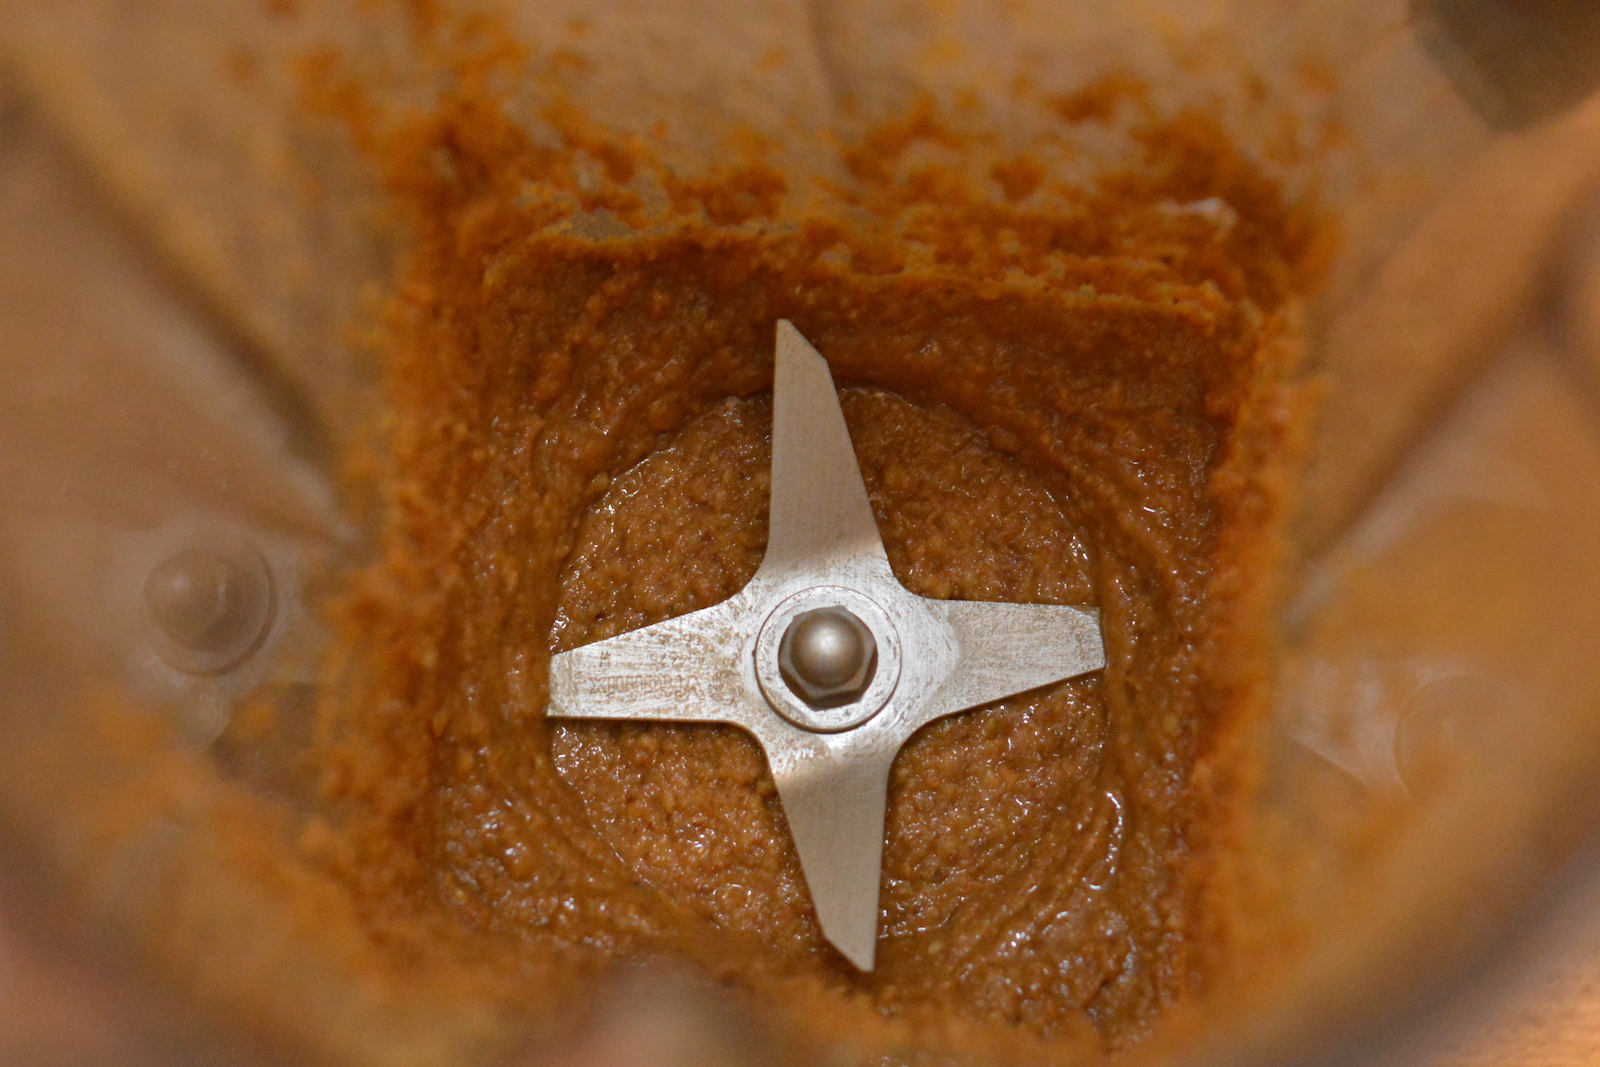
4. Pour cashews, salt, corn starch maple syrup, soy milk, orange zest, agar agar and orange juice into blender and blend until very smooth. Share the leftover oranges with your cat as an offering to try to get forgiveness for the loud noises coming from the blender.

5. Pour into a small saucepan and bring to a boil at medium heat, stirring constantly with a whisk. Once it starts to bubble, stir for another minute. Add almond extract and orange extract; adjust to taste.
6. Pour into prepared crust and let cool for half an hour in fridge.
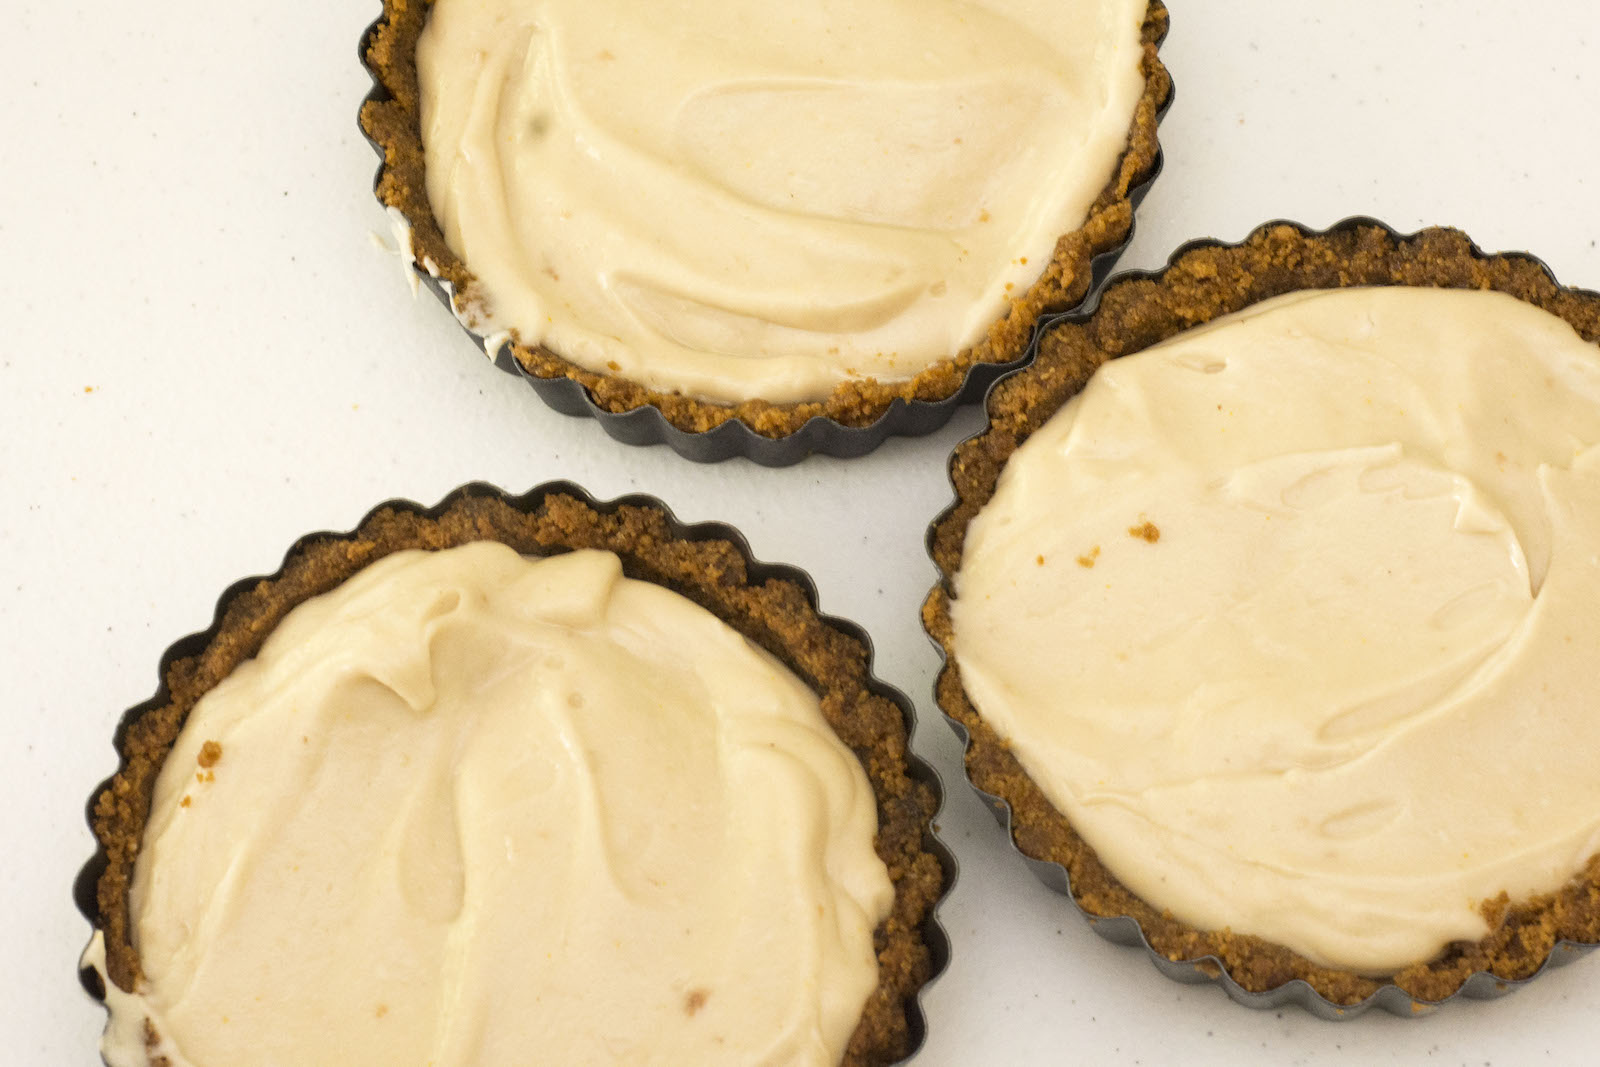
7. Make the ganache! Add soy milk and chocolate to a small pot and melt over medium-low heat, stirring regularly. Add powdered sugar, then mix in marmalade. Add orange extract. Pour gently over cooled cheesecake and let cool in the fridge until solid.
8. Optionally, top with dried or candied oranges (I like the ones at Trader Joe’s) or decorative orange peel.

This year, Shavuot will begin in the evening of Saturday, June 8 and ends in the evening of Monday, June 10.
Vegetarian Chopped Liver and Pynk Pickled Eggs for Passover: A Two-Part Recipe
Chag Pesach sameach!
Passover is my favorite Jewish holiday. I like it even more than the festivities of Purim. Autostraddle has published seven articles by seven people about Passover, so I get the sense that I’m not alone.
If you need a refresher on the holiday, I recommend The Prince of Egypt, which includes an obnoxiously catchy soundtrack. The traditional observance is to host at least one seder (a festive meal that takes unfolds in a particular order) and to not eat chametz – products of wheat, spelt (farro), barley, oats, and rye that aren’t made into unleavened matzo – for eight days. For many people of Ashkenazi (Eastern European) descent, the tradition also includes avoiding kitniyot – a broad category of things possibly similar to grains including rice, beans, lentils, and soy.
Yup. No grains, legumes, or rice for eight days. Add being a vegetarian and… ouch. The annoying thing is that kitniyot don’t even have a good justification – a 13th century Rabbi called it a “stupid custom” (translated, I assume), and Mizrahi and Sephardi Jews don’t have a practice of avoiding them. It’s absurd!
And yet. I can’t imagine Passover without those restrictions, for all that I would never impose them on anyone else. I rant about it annually, and while writing this article, decided to see if there are any other secular Jews who are keeping this up, and found a great article from Dara Lind:
“Maybe it’s just that “kvetching about it” is my preferred way of responding to this particular set of illogical rules: I’ve managed to learn how to follow them, how hard can it be? What I suspect, though, is that I’m worried about maintaining the upside of orthopraxy: the way an action forces your attention to a thought, or a value.”
I had never heard the term orthopraxy before, but I like it: the idea of a behavior or action forcing your attention to a particular value or thought, for eight days, through intentional restrictions or choices, at every meal. It’s so far outside my normal routine that it’s impossible to forget that it’s Passover, and it’s an excuse to cook lots of delicious food because buying lunch at work that isn’t a plain salad becomes pretty impossible.
So, on to the recipe. No grains, no legumes, no rice: yes, we’re going to find something delicious, savory, and vegetarian following the Ashkenazi traditions.
This recipe for vegetarian chopped liver is actually a mushroom-and-walnut pate. I grew up eating chopped liver (even as baby food!) and genuinely love the taste. I don’t eat meat anymore though, so I’ve made this recipe for a few years and it feels really homey and comfortable and hearty and celebratory. There are many vegetarian chopped liver recipes that are based on green beans and walnuts, but green beans are kitniyot, so I adapted Deb Perelman’s mushroom pâté recipe with roasted walnuts.
Vegetarian chopped liver
Ingredients:
1 ounce dried mushrooms (preferably porcini, about as much as fit into a cup)
1 cup boiling water
1/4 cup olive oil
3 tablespoons butter or earth balance, divided
1 1/2 cups diced onion
Salt and pepper to taste
1 1/2 lbs fresh mushrooms (2-3 packages in my supermarket), preferably of two or more different types – I tend to use one of white button mushrooms and one of baby bella; if you can afford nice wild mushrooms, I’m sure they’d be delicious
1/2 tsp dried thyme or 1 tsp fresh thyme
1/2 cup white wine
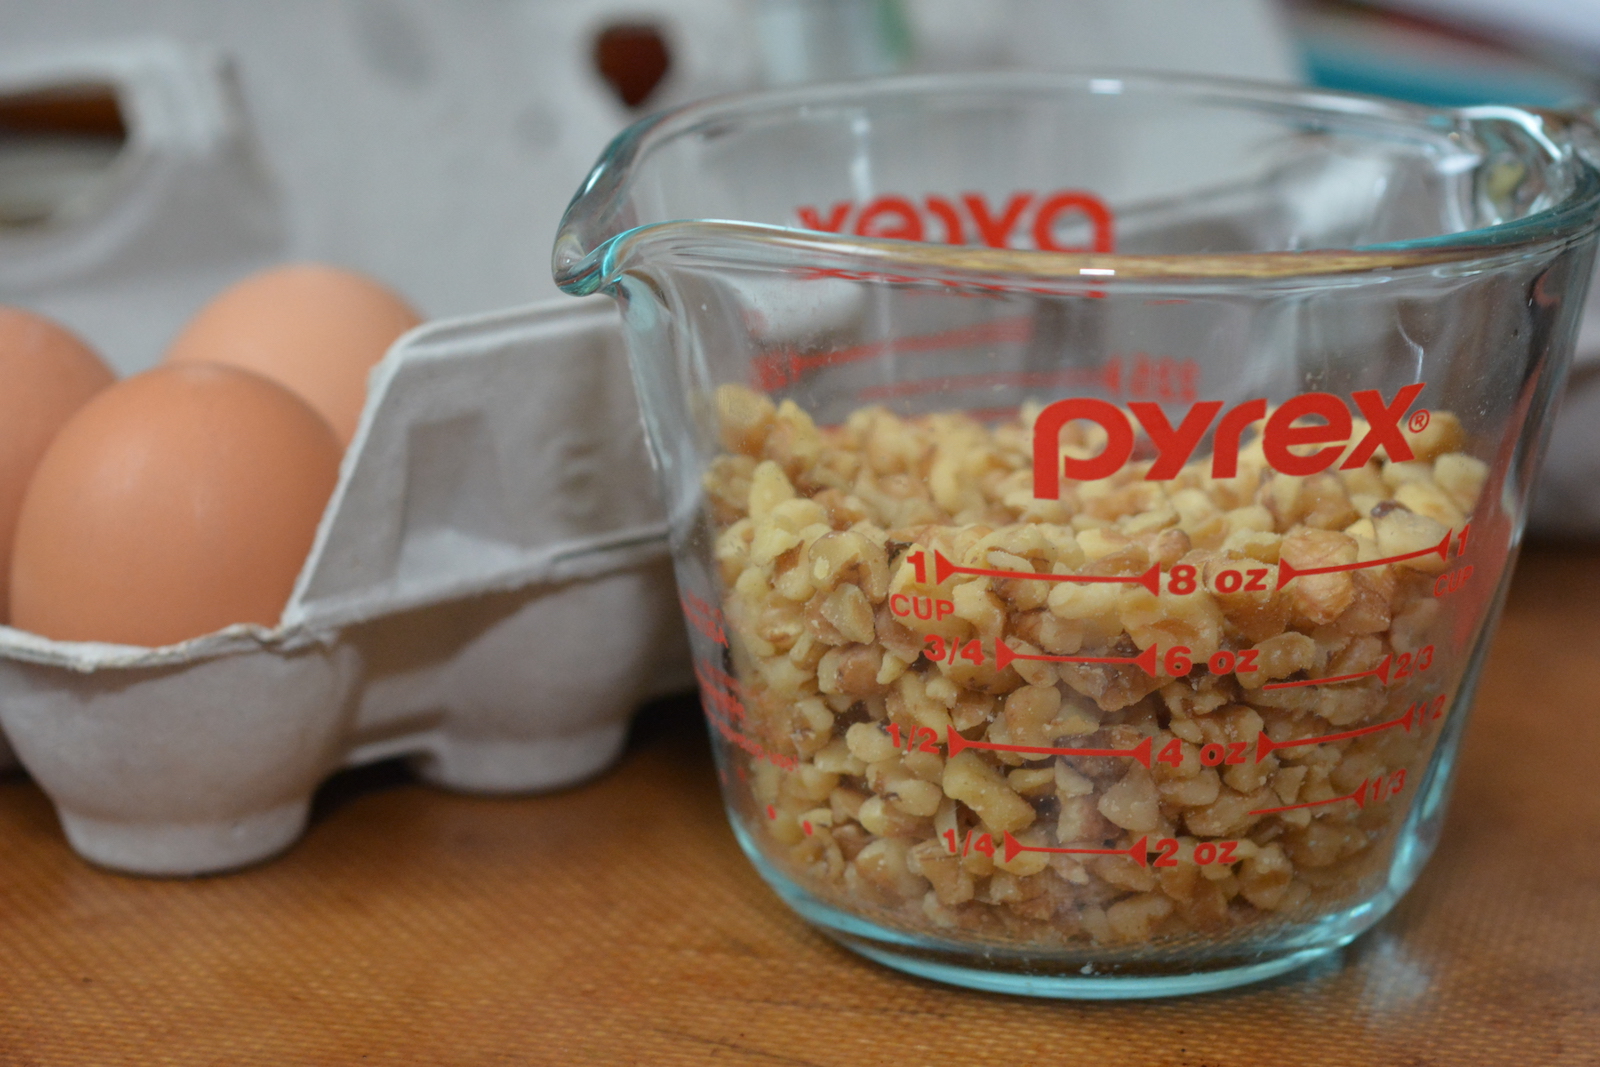
1/4 cup chopped walnuts, roasted and ground in a food processor (optional)
Directions:
1. If using walnuts, roast in a 350°F oven for 8-10 minutes, until lightly toasted and fragrant. Let cool, and grind in a food processor until natural oils are released. If having trouble getting it to stick together, add a small amount of neutral vegetable oil (1-2 tsp, in increments).
2. Place dried mushrooms in a small bowl with 1 cup of boiling water and let soak for at least 30 minutes while other preparations occur.
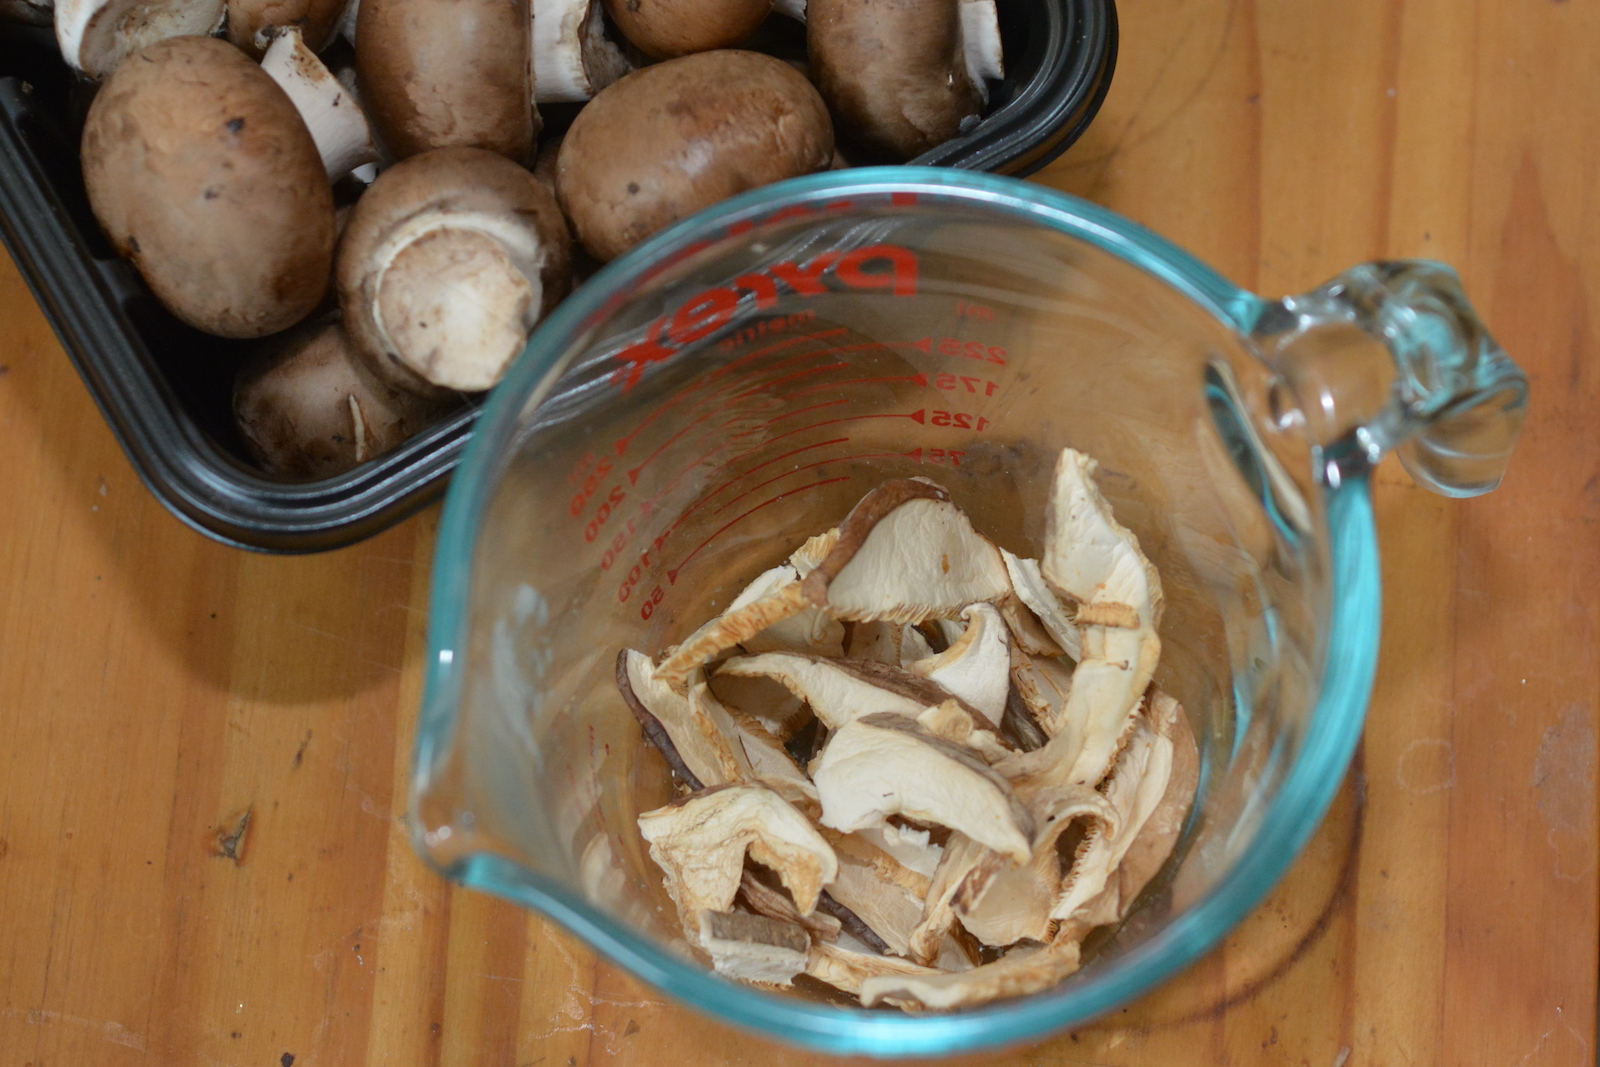
3. Wash fresh mushrooms thoroughly, remove rough stems and chop or slice evenly.
4. Heat 1/4 cup olive oil and 2 Tbsp butter or earth balance over medium heat in a pan large enough to hold all the mushrooms. Yes, it’s a lot of oil, and it is delicious and the correct amount. Add onions, and cook for 7-8 minutes until slightly brown at the edges.
5. Raise heat to high and add the fresh mushrooms, thyme, salt, and pepper.
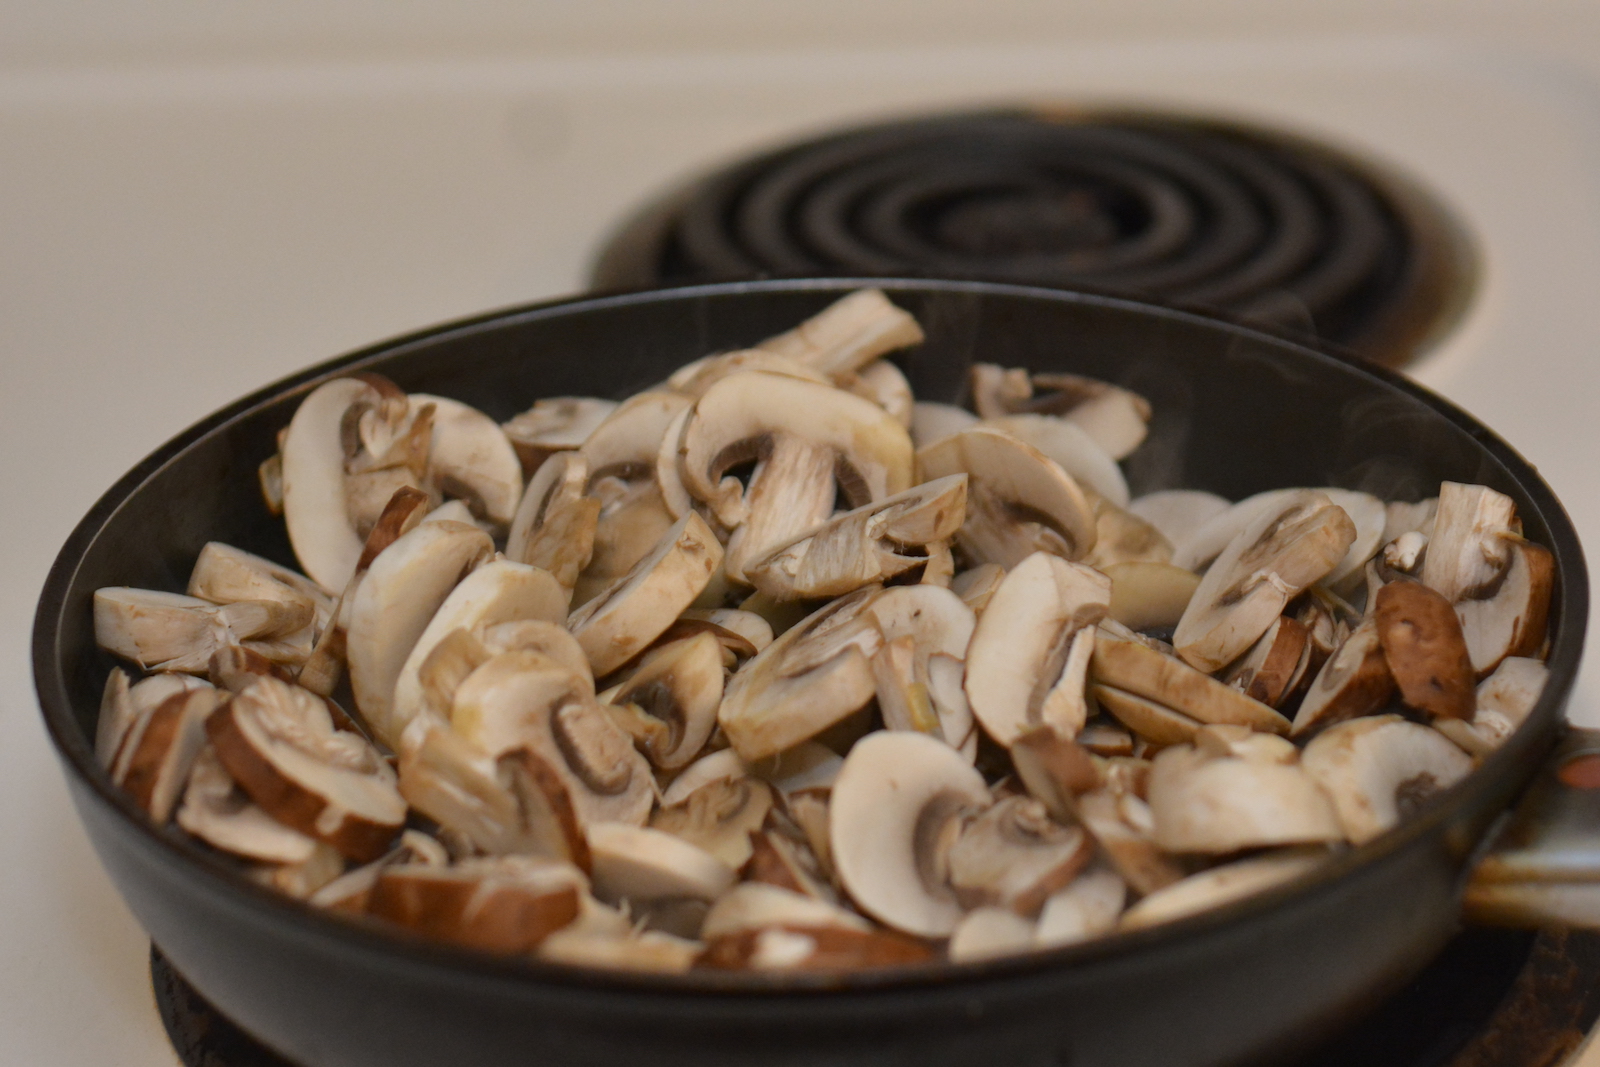
6. Cook, stirring regularly, until mushrooms shrink, brown further, and release their liquid. There will be a surprising amount of liquid. Continue cooking until no more liquid is left, and then add the wine. Again, cook until dry.

7. Remember the soaking, dried mushrooms? Add them and the soaking liquid, but holding back the last bit with all the grit. If you want to be extra careful, strain the liquid before adding. Cook the mushrooms back down again, until there is no liquid on the pan when you drag your spatula through the mushrooms.

8. Taste the mushrooms – add more salt, pepper, or thyme to taste. Add the last tablespoon of butter and stir again.
9. Let the mushrooms cool a bit, then blend in a food processor. While waiting, see if the cat has climbed into a grocery bag. Pick up the bag at your own risk.

10. You have two options here: the more work-intensive but flexible option is to do the walnuts and mushrooms separately, and add them in a ratio that feels right to you (I tried 3 different ratios with my taste-testers, and got three different preferences, although this was our consensus). Alternatively, throw it all in at once. The mushrooms are fairly dense, so you may have to use a spoon to get the larger bits back in. I blend until mostly smooth but slightly grainy, like what I remember liver to be. You can go completely smooth if you like!
11. Let cool in the fridge for at least a few hours before serving.

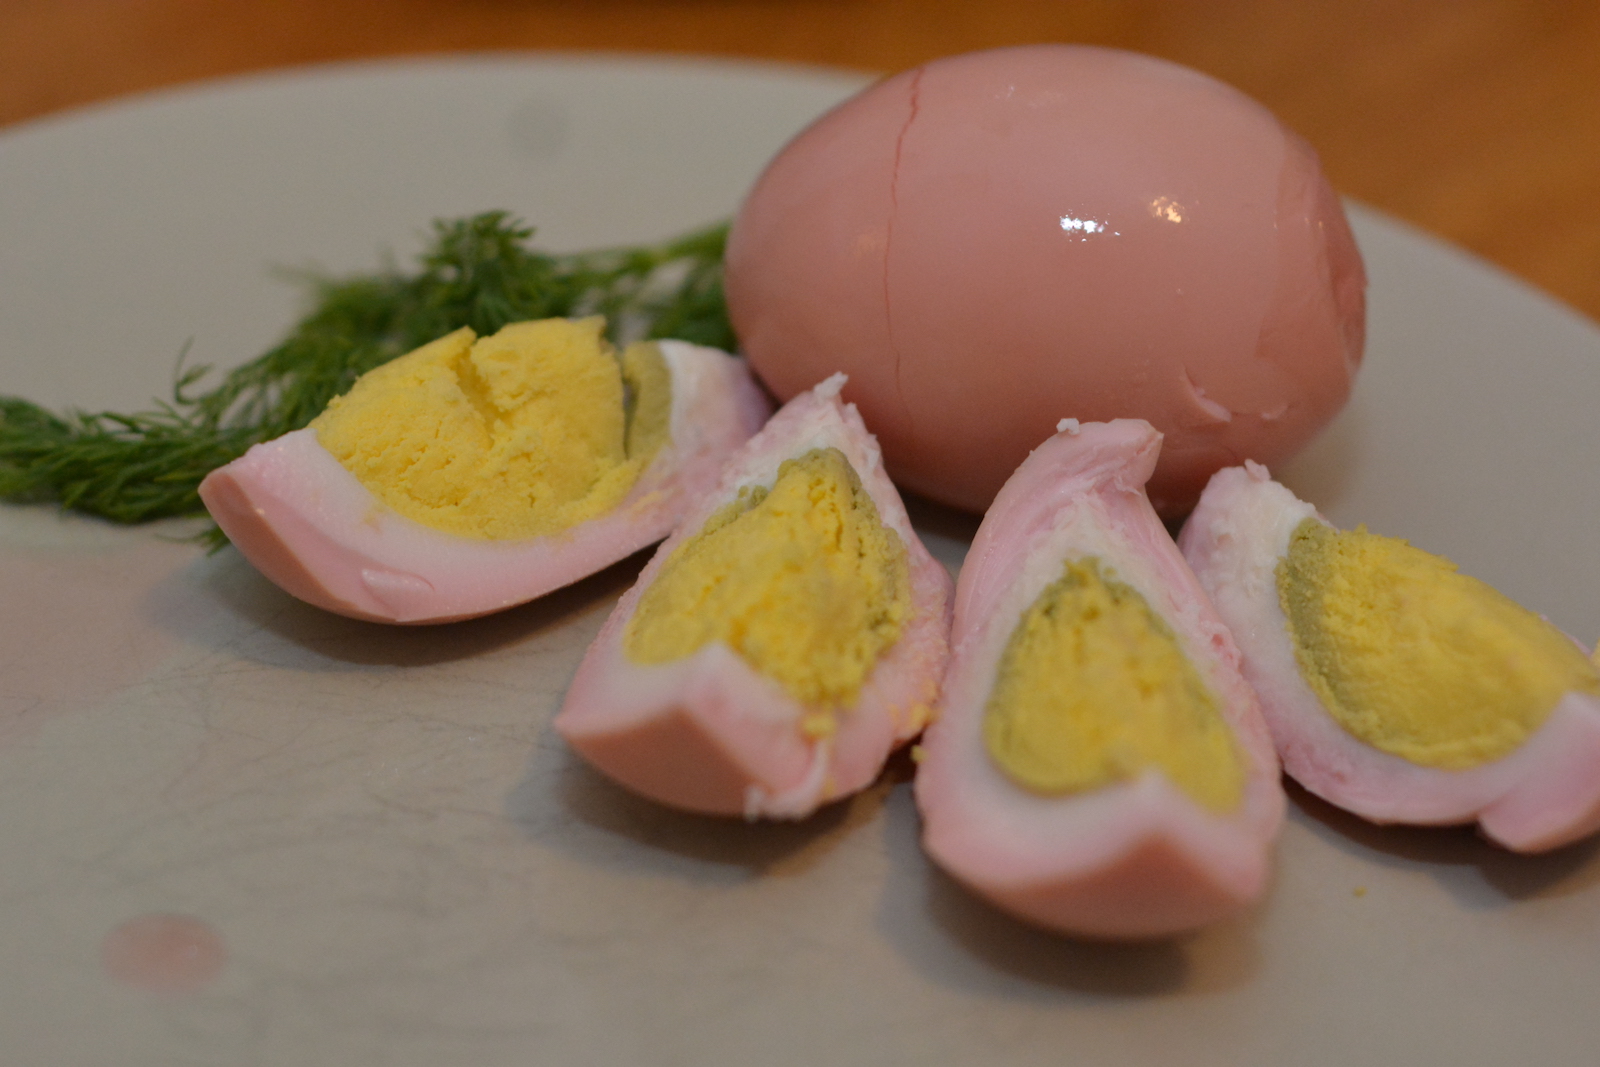
I like to eat it spread on matzo, with a beet-pickled egg and some pickled onion.
Pynk Pickled Eggs
Yes friends, this is a two-for-one recipe post! These beet-pickled eggs are as beautiful as they are delicious, and would probably be great for folks who do other spring holidays as well. This recipe was shared with me by Traci L. and Ian K., and I make it mostly as written.
Ingredients:
6-12 hard boiled eggs
1 cup vinegar
1 cup water
1 tablespoon pickling spices
1 teaspoon salt
3-4 cloves of garlic
4-5 sprigs of fresh dill
1 can of beets (original recipe calls for fresh beets, boiled for 30 minutes, but I’m lazy)
3 onions, preferably red, sliced into strips
Directions:
1. Boil eggs. Feel free to use your preferred method, but the strategy I use for easy-to-peel eggs – a must at Passover – is to put eggs into cold water, bring to a boil, cover, and leave to cool until the water is cold.
2. When cool, peel eggs.
3. If using fresh beets, boil for 30 minutes and remove skins; otherwise open a can of beets and drain about half of the liquid.
4. Thoroughly clean a glass jar and put in peeled eggs, beets and remaining liquid, sliced red onion, and dill.
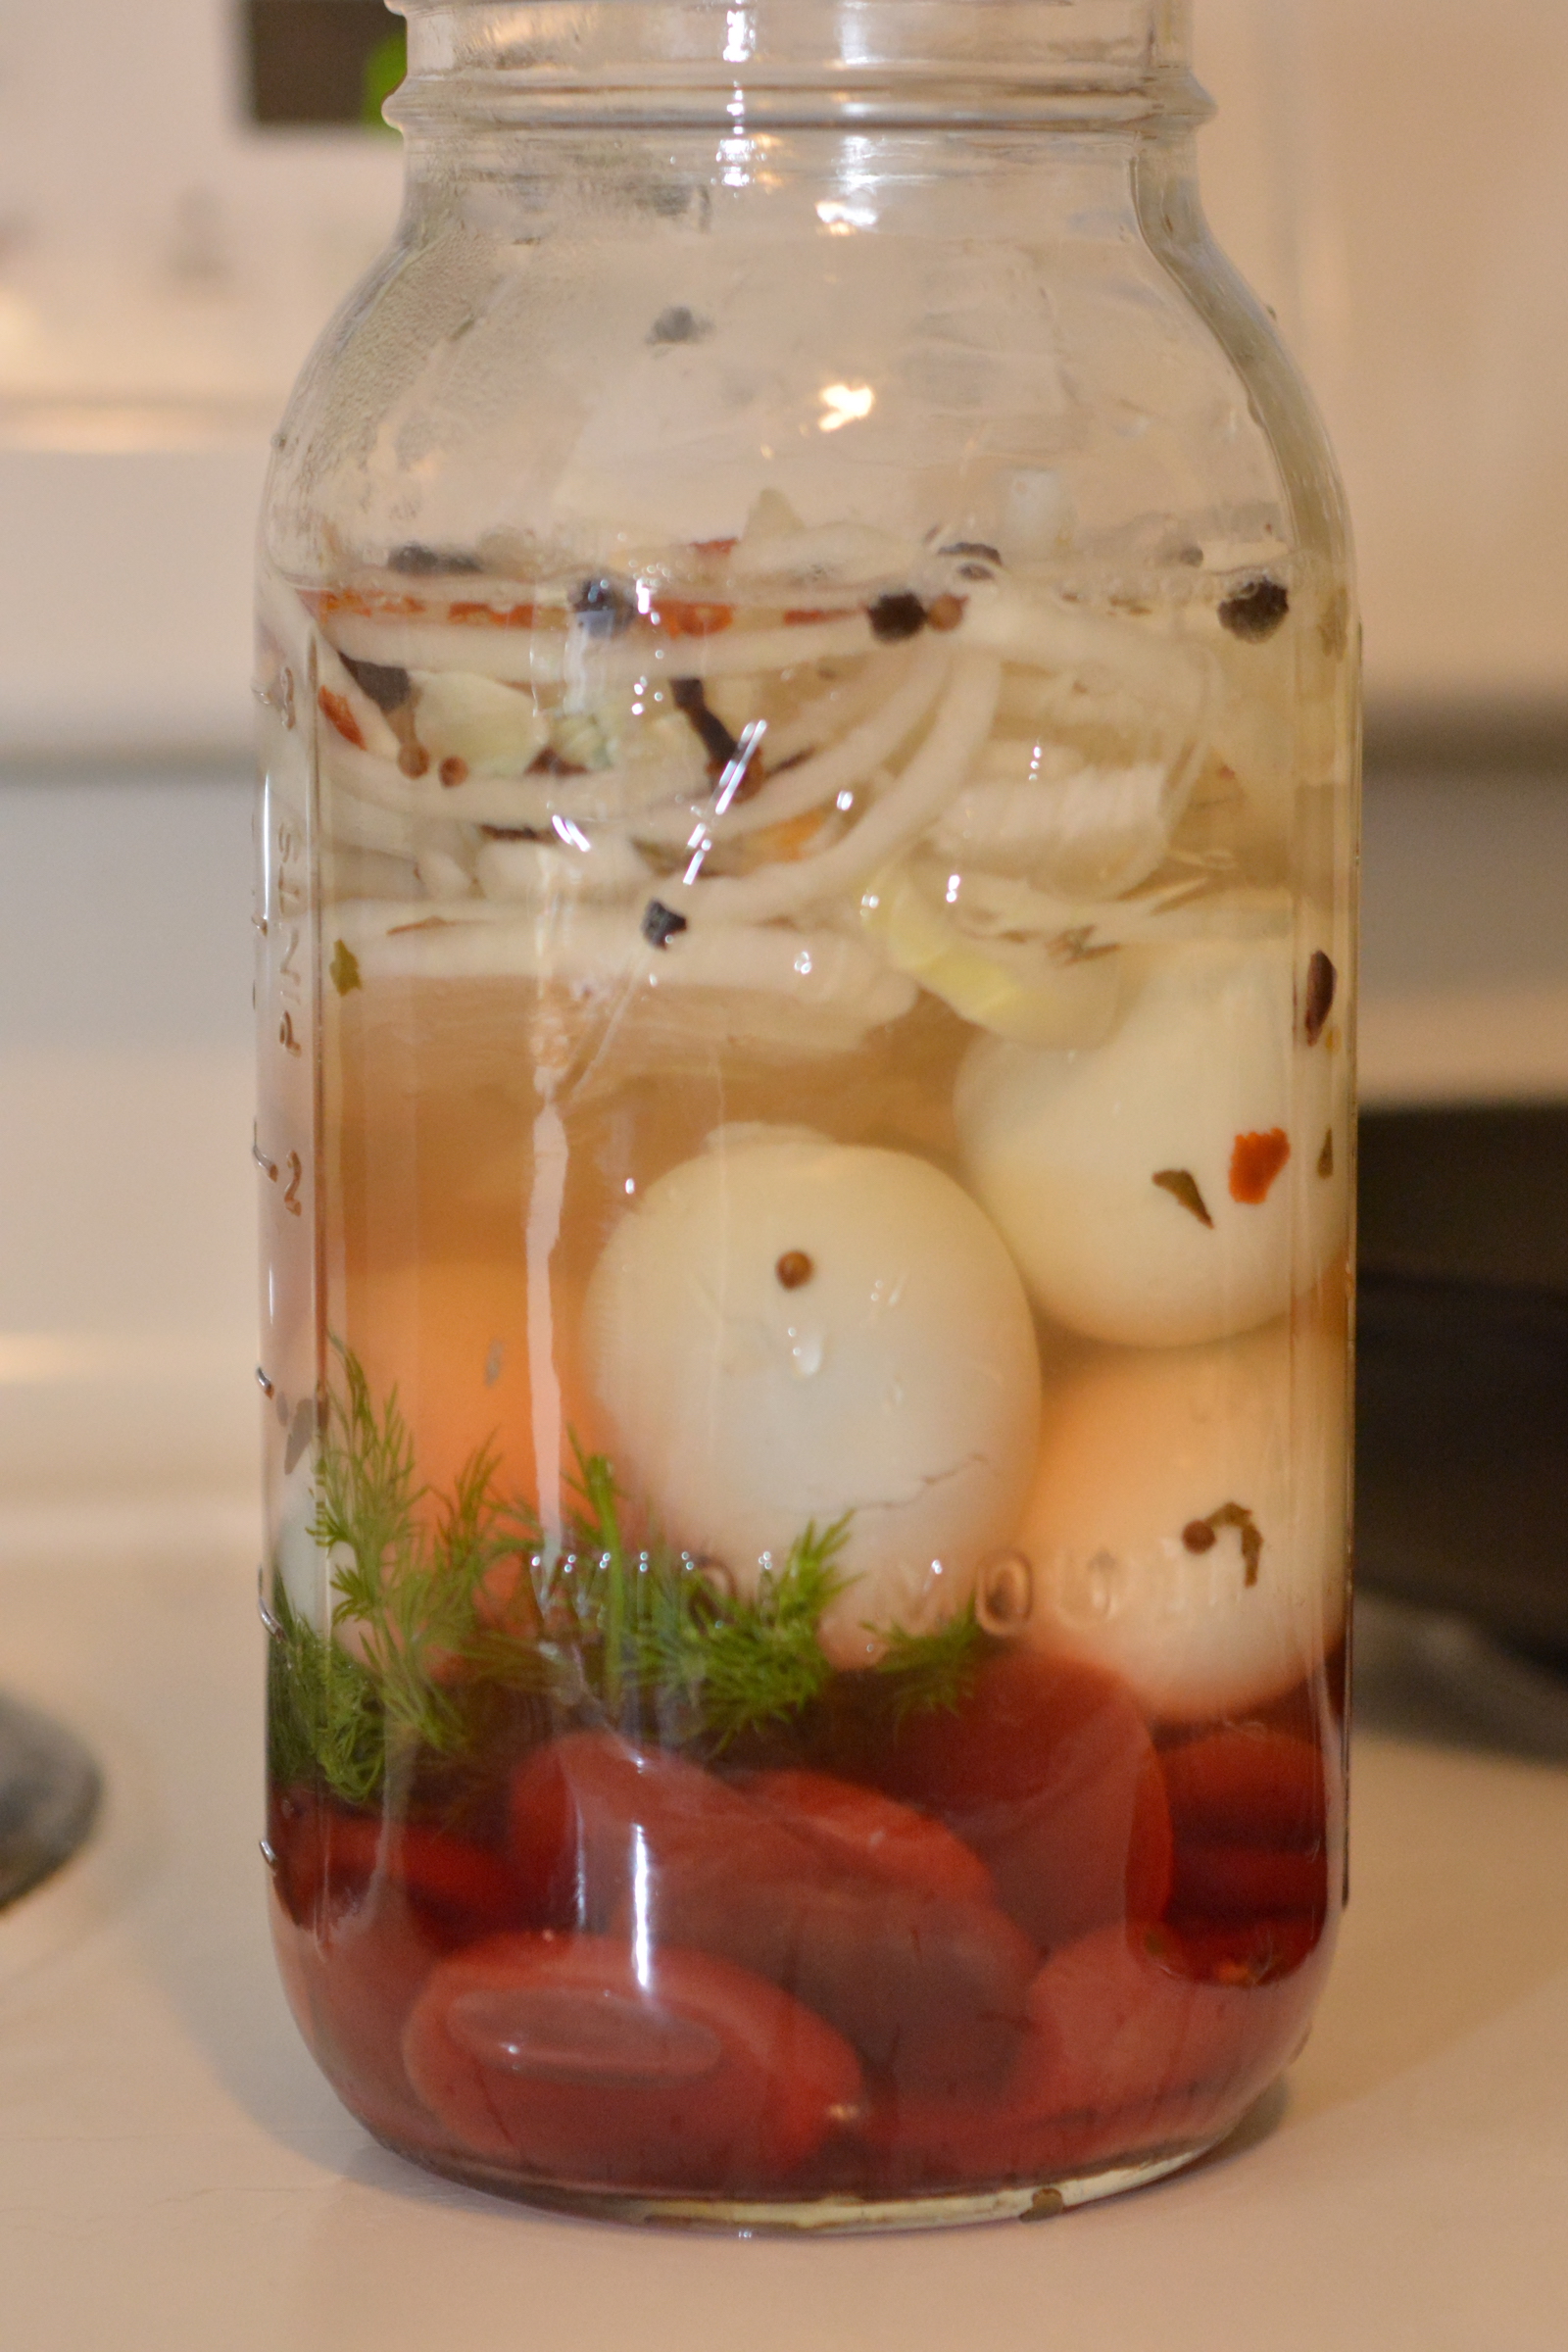
5. In a small pot, bring vinegar, water, garlic, spices and salt to a boil. Pour into the stuffed jar. Let cool, secure lid tightly, and shake gently before placing in fridge. They’re edible and tasty as soon as they are cold, but the eggs will turn a stunning pink in 2-4 days, and it’s worth the wait.
This year, Passover will begin in the evening of Friday, April 19 and end in the evening of Saturday, April 27.
The Lazy Jewish Queer’s Guide to Rainbow Hamantaschen for Purim
all photos by Ari Gofman
Happy Purim!
Purim is a celebration: the traditional holiday involves retelling the Book of Esther, dressing in costume, getting so drunk that you can’t tell Mordechai from Haman (one of the heroes and one of the villains, respectively), and eating hamantaschen.

Purim, as far as Jewish holidays go, is extremely queer. The costumes people wear on Purim are a celebration of gender fuckery; even many observant Jews who otherwise dress strictly in the gender binary will cross dress for this holiday. For me personally, performing last year in a Purim Spiel (play) was the first time I intentionally dressed as a man while exploring my changing gender presentation. It felt like an opportunity to push my boundaries in public and to play a role without feeling like anyone expected me to know what I wanted to do with gender. This year, it was an excuse to finally buy a suit for my now openly-genderqueer self. In the spirit of gender fuckery, let’s make our Purim hamantaschen look as queer and delightful as our beautiful selves.
Autostraddle posted a delicious vegan hamantaschen recipe a few years ago, so this time I’m bringing you a recipe with conventional dough (both homemade and quick options) and rainbow sprinkle filling!
There is a beautiful recipe for rainbow hamantaschen floating around the internet, but having made rainbow cookies with a similar dough once, I knew I didn’t have time to go in that direction. Instead, we’re going to make a simple dough and use color in the filling. The rainbow effect will be in the whole group – Purim is a party, so we’ll make these for a crowd!

Ingredients & Instructions for Dough
There are a few options here, and like most hamantaschen, this recipe is mix-and-match. Feel free to adapt, improvise, and have fun!
Home Made
Feel free to use your favorite hamantaschen dough recipe; I suggest this recipe from Genius Kitchen for its good flavor and tendency to unfurl less than other recipes.
3⁄4 cup margarine or Earth Balance, softened
3⁄4 cup sugar
1 egg (or egg replacer if vegan)
1 tsp grated lemon or orange zest, or a squirt of lemon or juice
1 tsp vanilla
1⁄4 tsp salt
1 tsp water
2 1⁄4 cups flour
1. Cream margarine/Earth Balance in mixer bowl.
2. Add sugar and beat till fluffy.
3. Beat in egg, lemon/orange peel, and vanilla.
4. Add in flour and salt.
5. Beat in water a few drops at a time until dough starts to come away from sides of bowl.
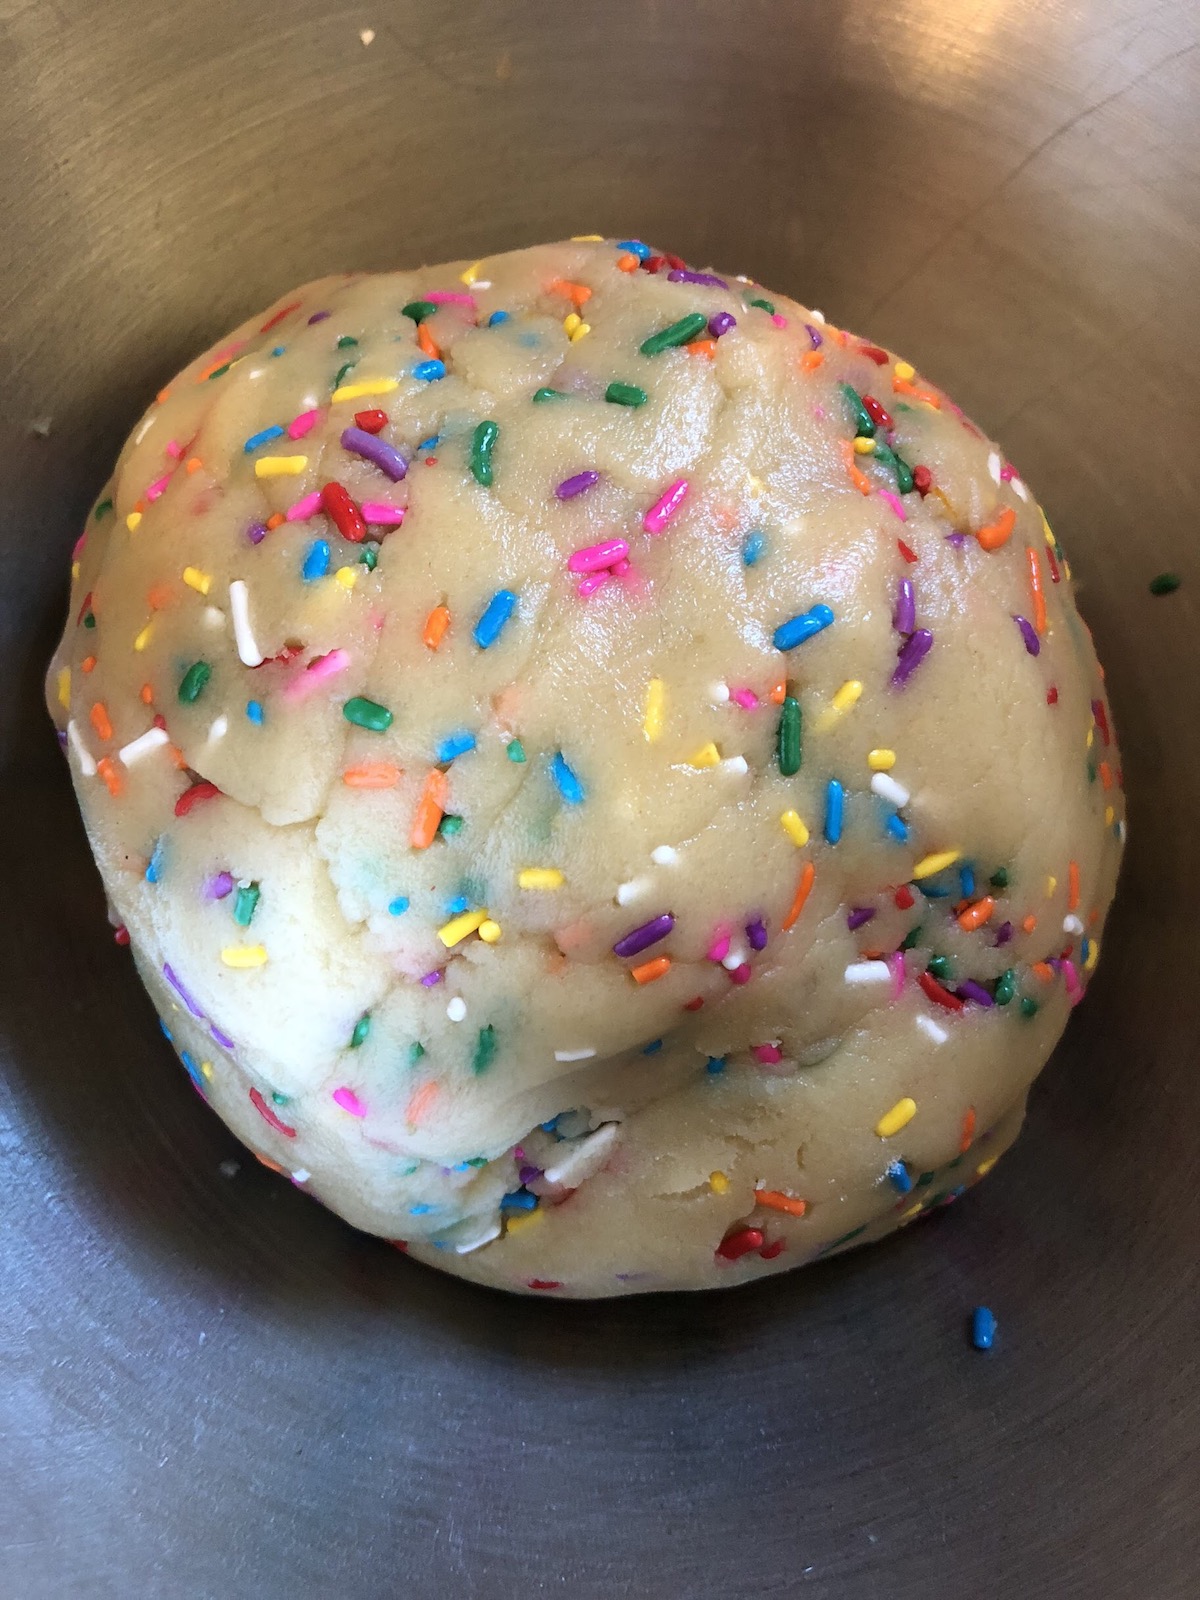
6. Add sprinkles – more than you expect. I used about ⅓ cup.
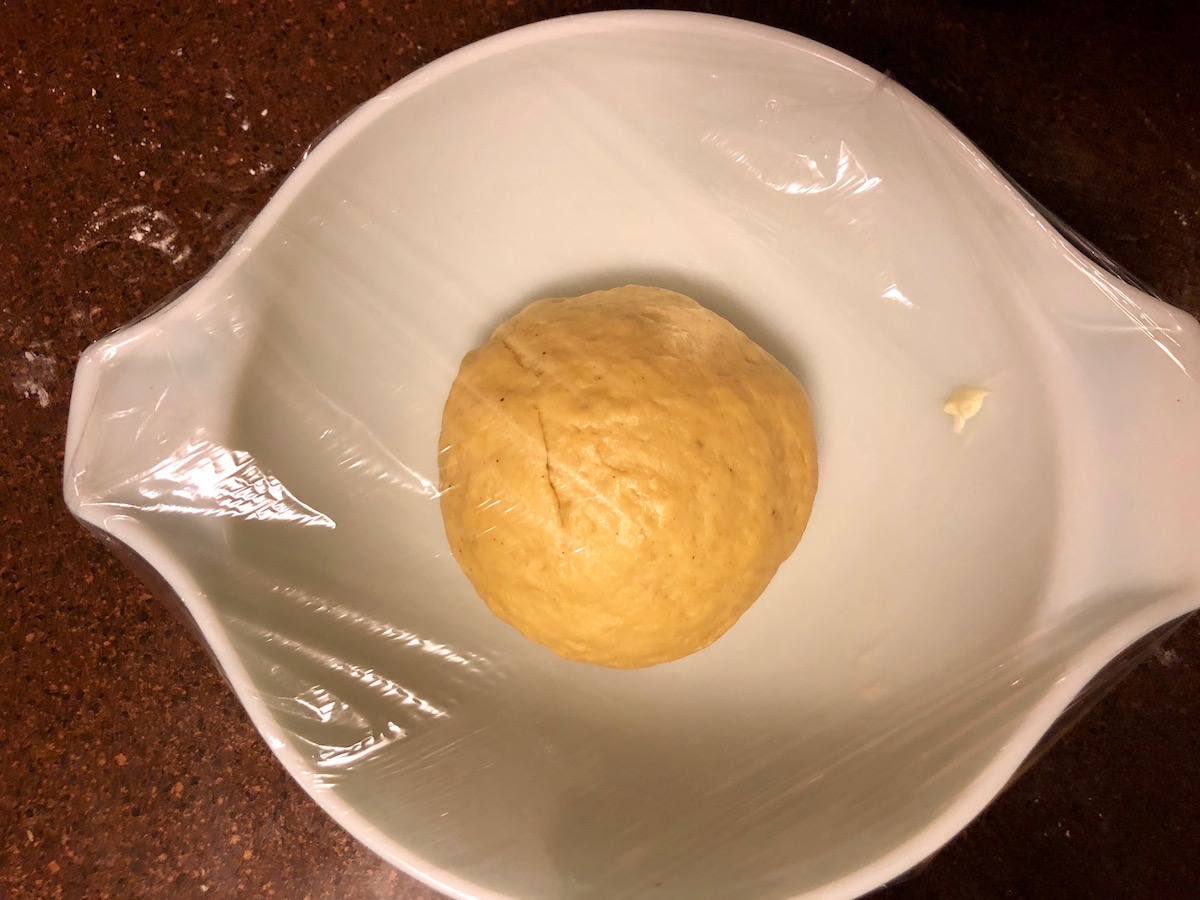
7. Form into a disk.
8. Refrigerate for a few hours (at least one).
Lazy Queer’s Version
This option is new to me, suggested by my A-camp cabin-mate Maddy Jennewein, and is my new go-to for hamantaschen forevermore. All you do is lay out a pre-made rolled pie crust. Optional: to have a rainbow exterior, create a solid, even layer of sprinkles on your counter or on a cookie sheet and gently roll the crust out until the sprinkles are thoroughly adhered. The sprinkles will go on the outside (ie, sprinkle side down) when folding.
Ingredients & Instructions for Filling
1 7oz package marzipan/almond paste (or smaller if you can find it)
Food coloring
Large container of sprinkles that don’t melt in the oven; I used standard rainbow cylinder sprinkles
Jam of your choice; I use raspberry, strawberry should also work great. Blackberry? Blueberry? Boysenberry? Go for it!
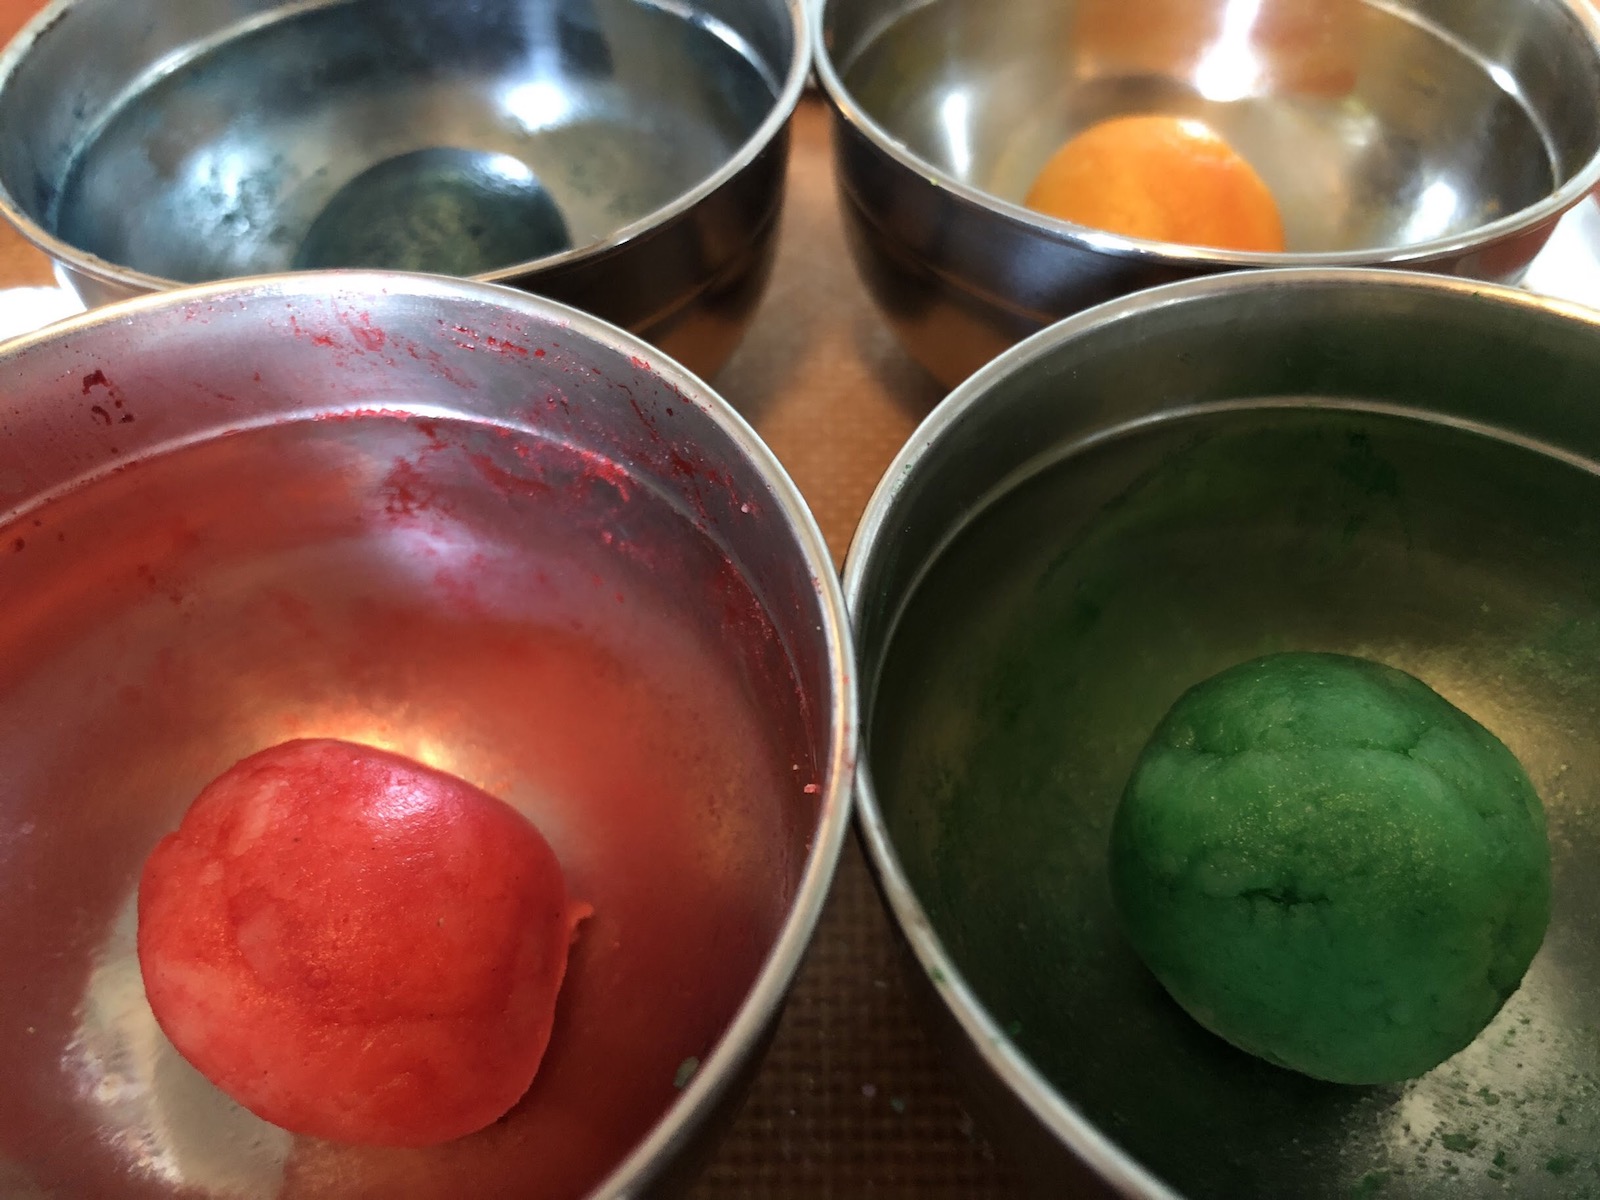
1. I used about a third of a package of almond paste per batch. Cut off the piece you will be using and cut into portions with a knife. I made four colors and cut into fourths, but feel free to use a different number of colors. Divide into four small bowls. Drop three drops of food coloring into each and use a spoon to thoroughly mix in the color. Use a fresh spoon for each color, or wash very thoroughly in between.
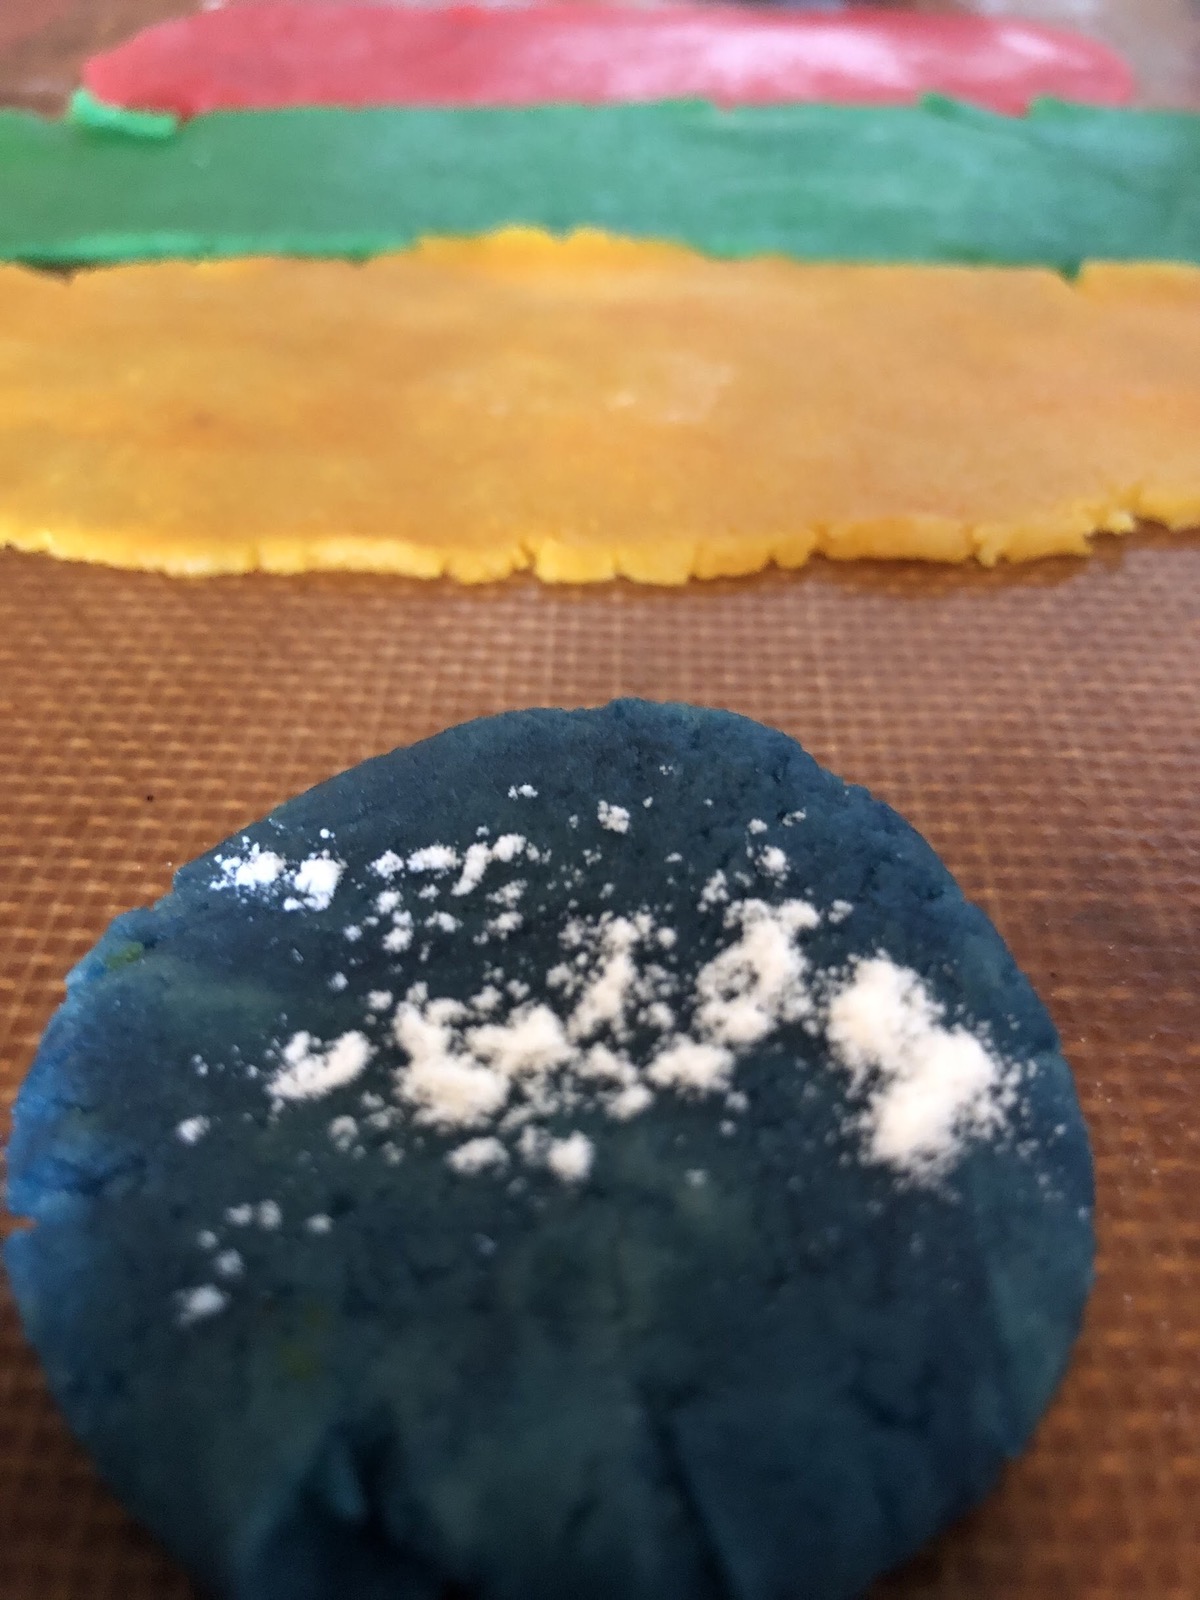
2. Roll into a small ball and place on a lightly floured surface. Lightly smush and put some flour on before rolling out to about 1/4 inch thick. Cut into triangles about one inch per side and set aside, covering with cling wrap to avoid drying out.
Assembly & Baking Instructions
1. Preheat oven to 350°F.
2. Regardless of what dough you’re using, roll it out to about 1/4 – 1/8 inch thick. Cut out circles about three inches thick (I use a standard mason jar lid as a cookie cutter). Combine scraps and re-roll out until dough is all used.


3. Use a piping bag or spoon to put about 1 teaspoon jam in the center of each cookie.

4. Place a marzipan triangle on top of the jam.

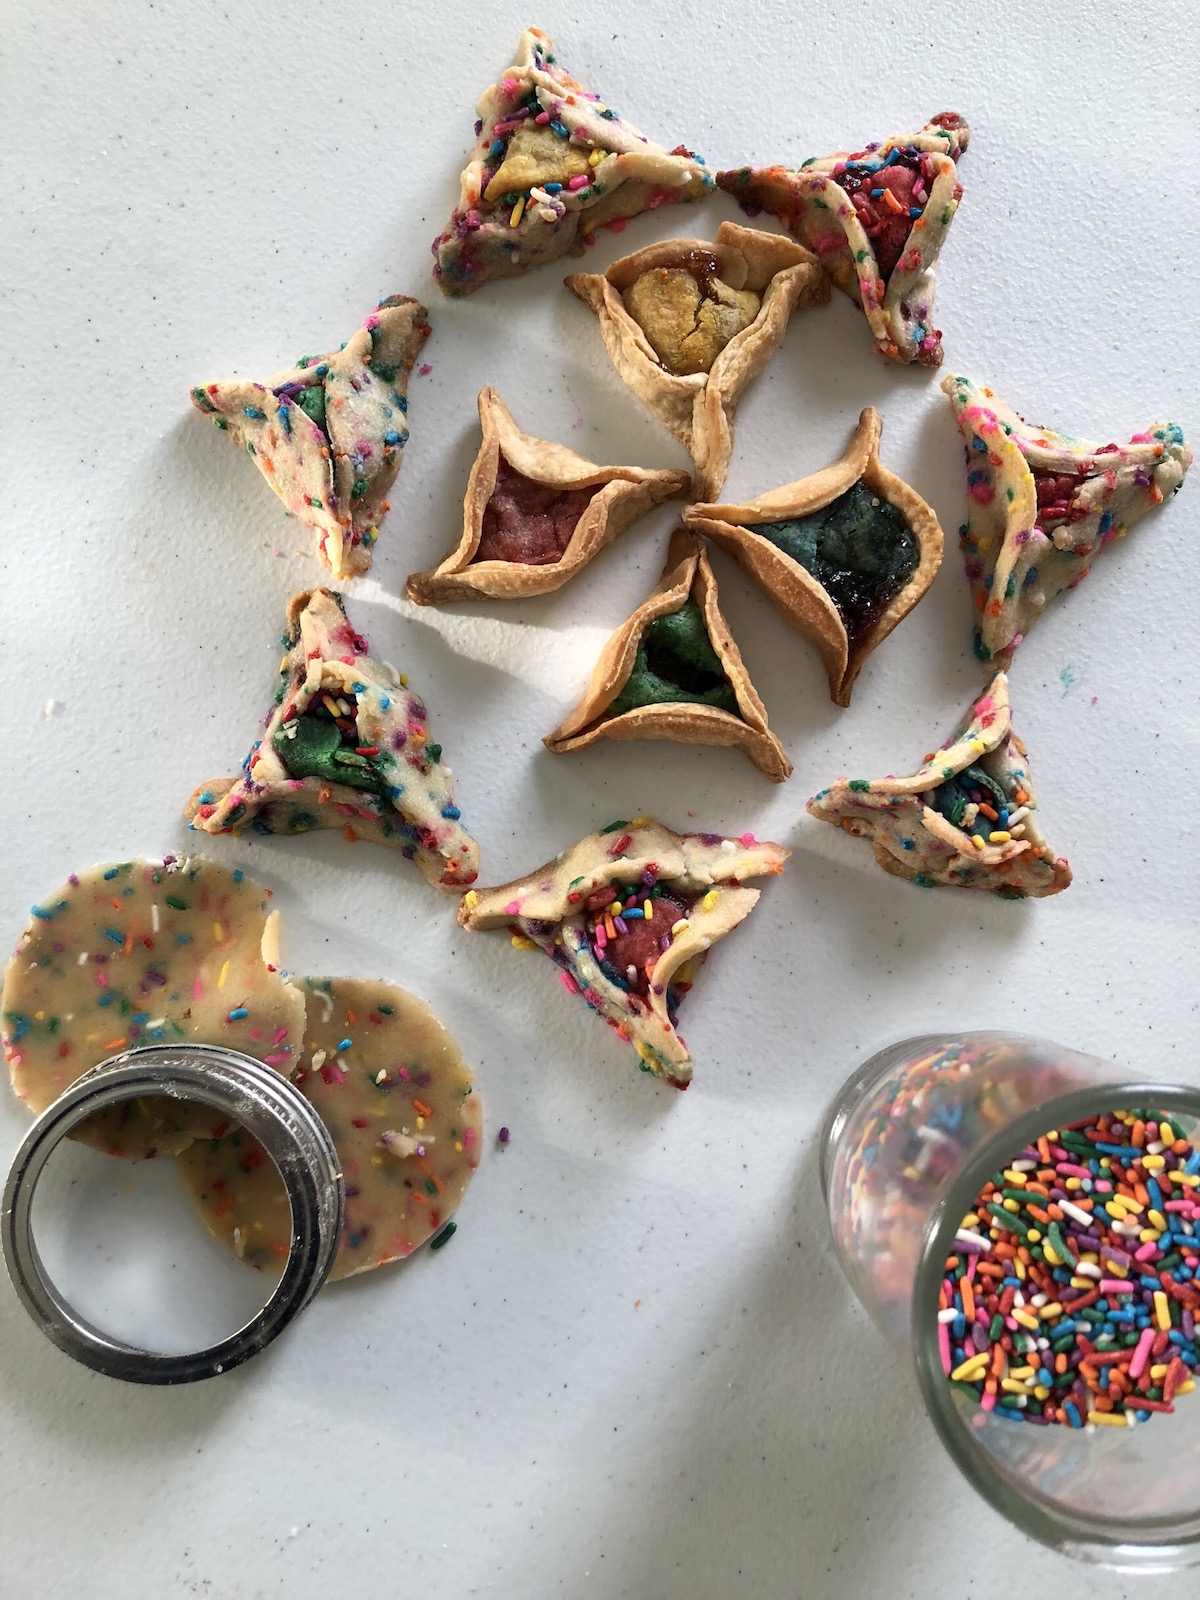
5. Fold the circle into a triangle, one side at a time – I swear it works. Try to fold around the shape of the triangle marzipan, but it’s fine if that doesn’t work out. Pinch the corners TIGHTLY – hamantaschen have a habit of unfurling, and they’re much less fun when they’re not in their traditional hat shape, although equally delicious. The filling should still be visible when you’re done folding.

6. Optional: Pour some more sprinkles into the pocket formed for the filling.
7. Make sure oven has reached 350°F and bake for about 15 minutes.
8. Let cool, serve, and enjoy – or use as optional cat hat!

This year, Purim starts at sundown on Wednesday, March 20 and ends at sundown on Thursday, March 21.
Femme Brûlée: Eggnog Cinnamon Rolls
Welcome to 2019!! I don’t know about you but I’m ECSTATIC that we finally got to kick 2018 to the curb. I’m looking forward a new year, a clean slate, and working on my resolution to spend more time creating in my kitchen. Cooking is so healing for me. Every time I put down my phone, tie on my apron and disconnect from the world in order to focus on a dish I get a rush of happiness and sense of accomplishment that no likes on social media can ever compare to. If you read the new year roundtable you may know that I chose the word abundance for the year which is part of the reason I decided to resolve to cook more. I want to end this year with such an abundance of recipes that maybe just maybe the idea of writing a cookbook wouldn’t seem impossible. I also want to feed people more often, as the only thing better than making food is watching other people enjoy it. I want all the culinarily-derived sweet tooth smiles, finger licks, and deep sighs of satisfaction my friends can handle and these cinnamon rolls have already delivered in a big way.
There’s a lot of sexy things going on in these cinnamon rolls but before we get into the recipe I know I have to address the eggnog debate. I learned in Laneia’s open thread that a whole lot of our readers don’t get down with eggnog. I understand it’s a really weird drink if you think about it, and maybe the only way to truly deeply enjoy it is if you’re able to not think about it. I love eggnog though, so I’ve taken it upon myself to write a recipe that I think even its most loyal haters will love. There’s no drinking the eggnog here, just using it to infuse the dough and glaze with warm winter spices and vanilla. The brown butter doesn’t hurt either; in fact, it makes the eggnog dough so mouthwateringly luscious with the cinnamon sugar swirl that our beloved Robin Roemer left this glowing review:
https://twitter.com/robinshoots/status/1078005697327947776
I really don’t think I could write a better endorsement than that so I’m not gonna try! I’ll just suggest that you get your hands on some eggnog – it’s all on sale now, or if you really want to take things over the edge you can make my recipe from the aforementioned roundtable – then get your roll on. I do think these turn out better with homemade eggnog since it’s often much more flavorful than store brands. If you’d rather buy the eggnog look for one that has multiple spices and vanilla listed in the ingredients or add them when you get home! Now, unlike my last few recipes which have been all about short-term gratification, these eggnog cinnamon rolls are a labor of love. Ingredients need to cool and bloom, the dough needs to rise twice, and the best results come from letting it chill overnight so the flavors can really blend and soak into the flour before baking. Recipes that take gratuitous amounts of time and love are wonderful journeys. They test your patience, attention to detail and skill, and come with immense pride payoffs when you finally pull the finished product out of the oven. Especially when that product is a warm eggnog-infused and glazed cinnamon roll fresh from the oven on a cold Saturday morning. Just don’t say I didn’t warn you when you suddenly find yourself on team eggnog.
For the dough:
1 stick unsalted butter
1 package active dry yeast
3/4 cup eggnog (with alcohol included if you drink) 2 large eggs
1 large egg yolk
3 1/2 cups all purpose flour
1 teaspoon salt
For the filling:
1 stick unsalted butter, room temperature
1/2 cup brown sugar
2 tablespoons ground cinnamon
For the icing:
1/3 cup eggnog
2 3/4 cups powdered sugar
*some of the pictures are from a different batch cause I missed photos of some steps on shoot day. Bear with me as I readjust to single food photography life!
1. Butter a 9×13 baking dish, line the bottom with parchment paper, and set aside. Lightly butter a large bowl and set aside as well.
2. Brown the butter! In a small, heavy bottomed sauce pan melt one stick of butter over medium heat, whisking constantly. The butter will start to bubble and foam, then a minute or two after the foam goes down small brown specks will start to appear at the bottom of the pan. Keep whisking for about 10 seconds then quickly remove from heat. The butter should be a nice deep amber color and smell like roasted nuts. Set aside to cool.
3. Grab the eggnog and heat just until warm. If it gets too hot it will kill the yeast so you really just want it to be slightly warm to the touch. If you have a thermometer you’re aiming for 100-105°. Once the eggnog is at the right temperature, stir in the packet of yeast and set aside for about 5 minutes. When you come back to check on it there should be a thin layer of foam on top of the eggnog. If there’s no foam your yeast is likely dead and you’ll need to try again with a new batch. Forgot to get a photo of this but it’ll be really clear whether it’s foamed or not! 
4. Once the brown butter has cooled–it should be no warmer than the eggnog was when you added the yeast– and the yeast has foamed in the eggnog, grab a large bowl or the bowl of a stand mixer if you have one. Add the flour and salt to the bowl followed by the butter, eggnog, eggs and egg yolk. If you’re using a stand mixer: you should be mixing the dough on the “stir” setting with the dough hook attachment just until it starts to clump together in one big ball. Once that happens, turn the mixer up to medium and knead until the dough is shiny and smooth, 3-4 minutes. If you’re making it by hand, likewise stir until the dough comes together in a ball, then turn out onto a floured surface and knead by hand for about 10 minutes or until the dough is shiny, smooth, and starts to spring back into place when you push or pinch it.
5. 
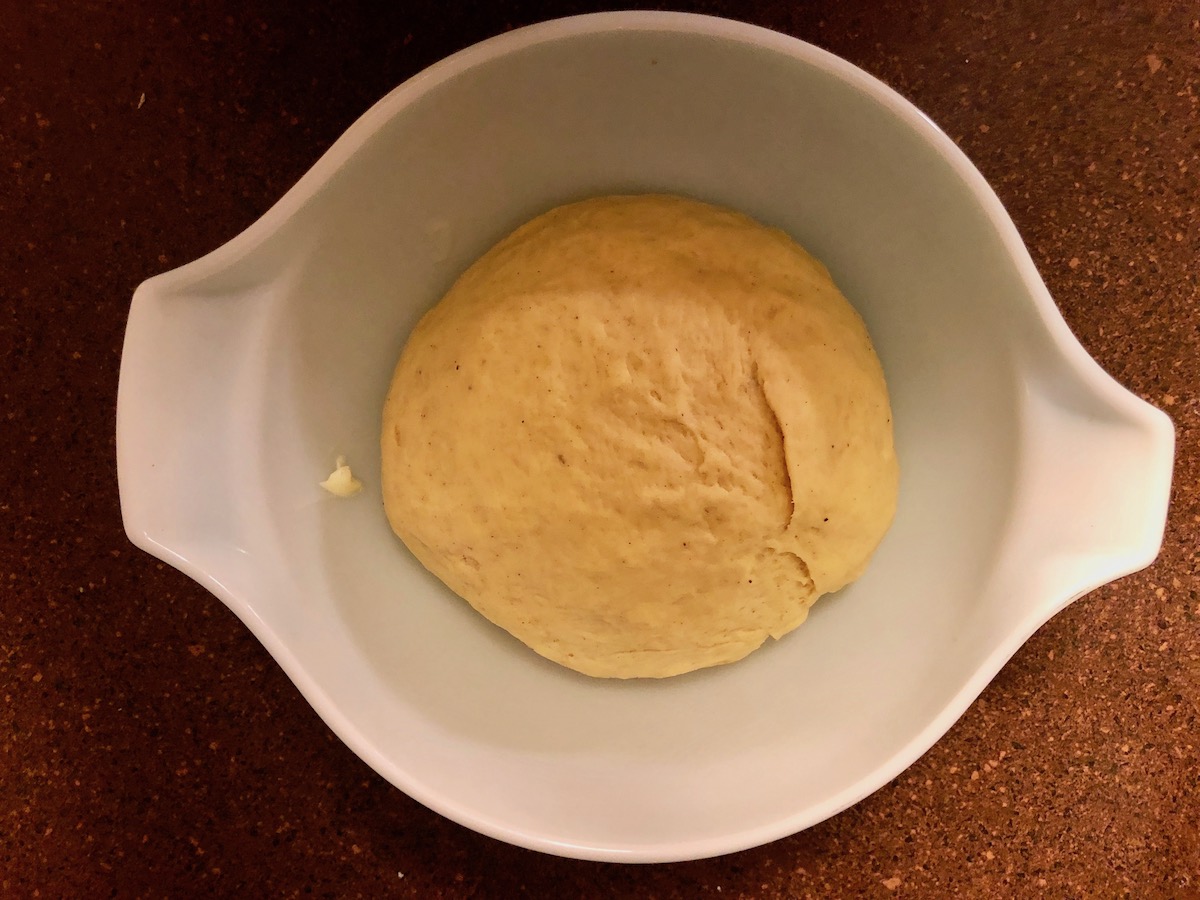 Place the dough in your lightly buttered bowl, cover with plastic wrap, and allow to rise for about an hour until doubled in size.
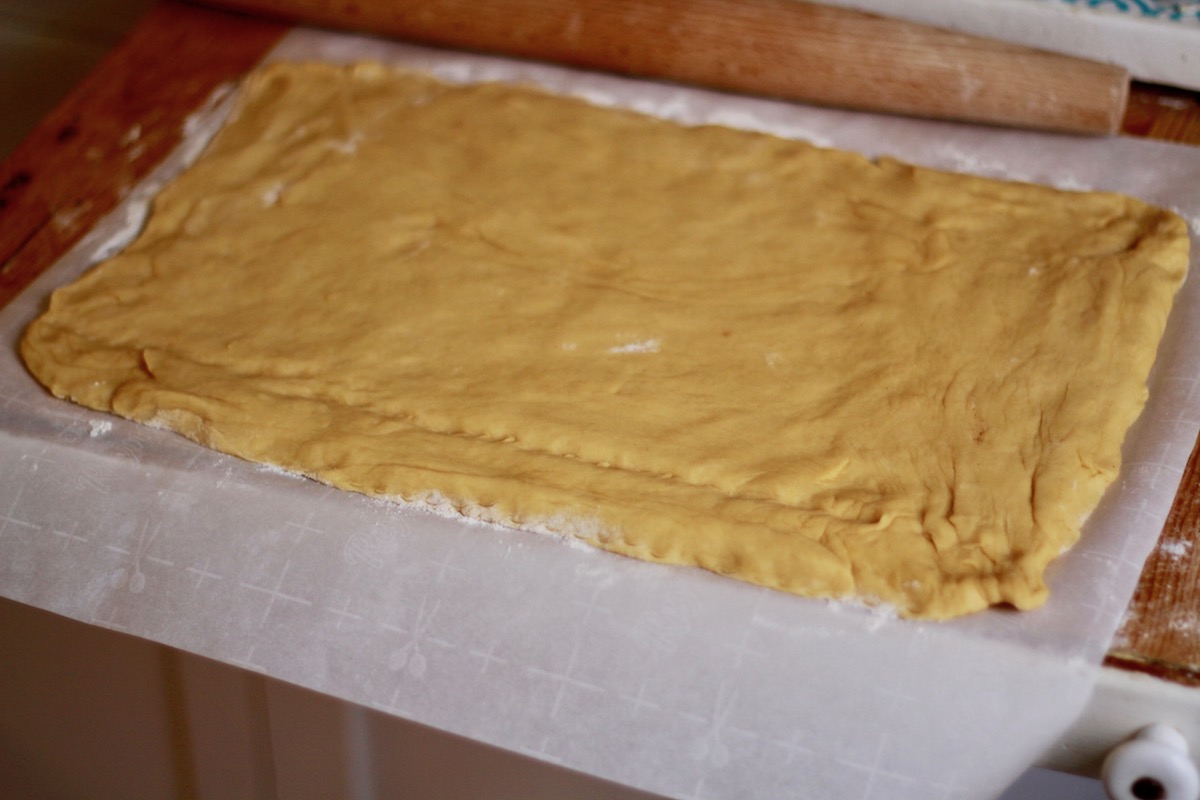
6. Once the dough has puffed up, place it onto a lightly floured surface and press it down to deflate it. Next flour a rolling pin and roll the dough out into a rectangle that’s about 10×16 inches (roughly 25x41cm). I usually cut a piece of parchment paper and make marks on it as guides to make sure my dough is rolled out to the right dimensions. 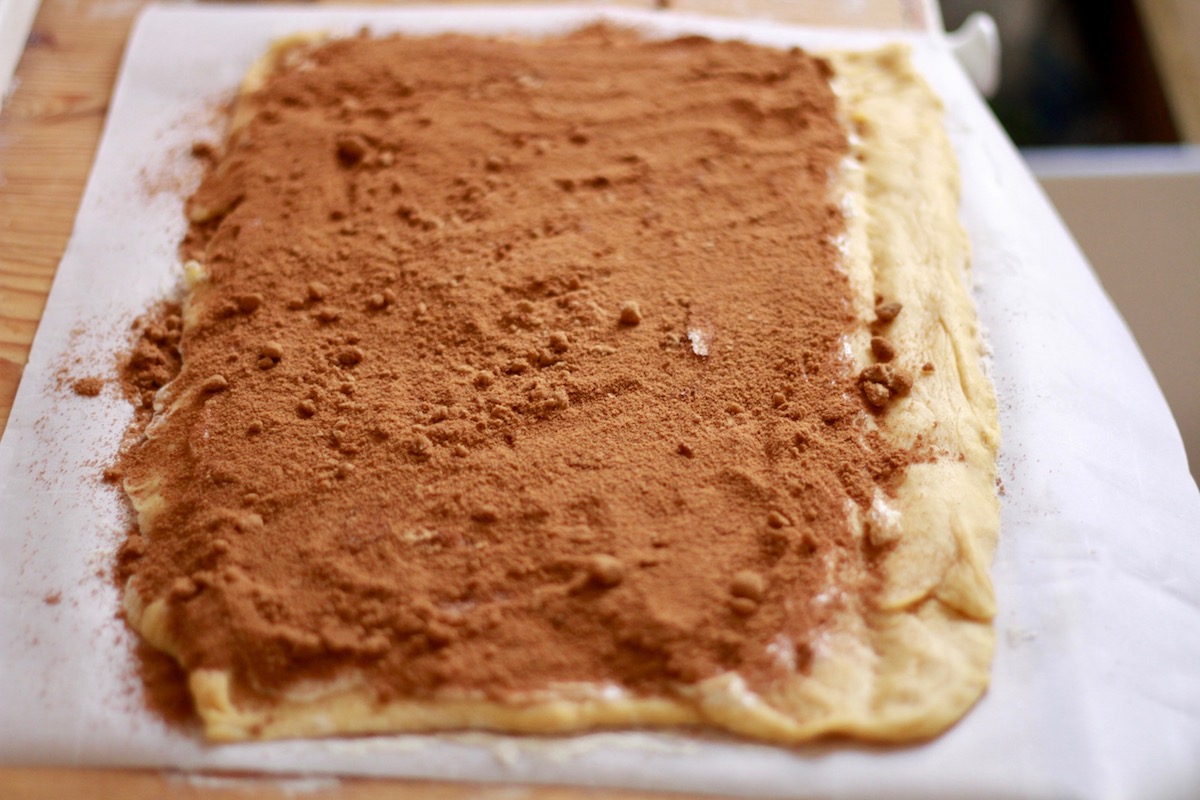
7. Now that the dough is rolled, spread the room temperature butter onto the dough but leave about an inch unbuttered on one of the long sides of the rectangle. Whisk together the brown sugar and cinnamon in a medium bowl then sprinkle the mixture over the buttered portion of the dough. 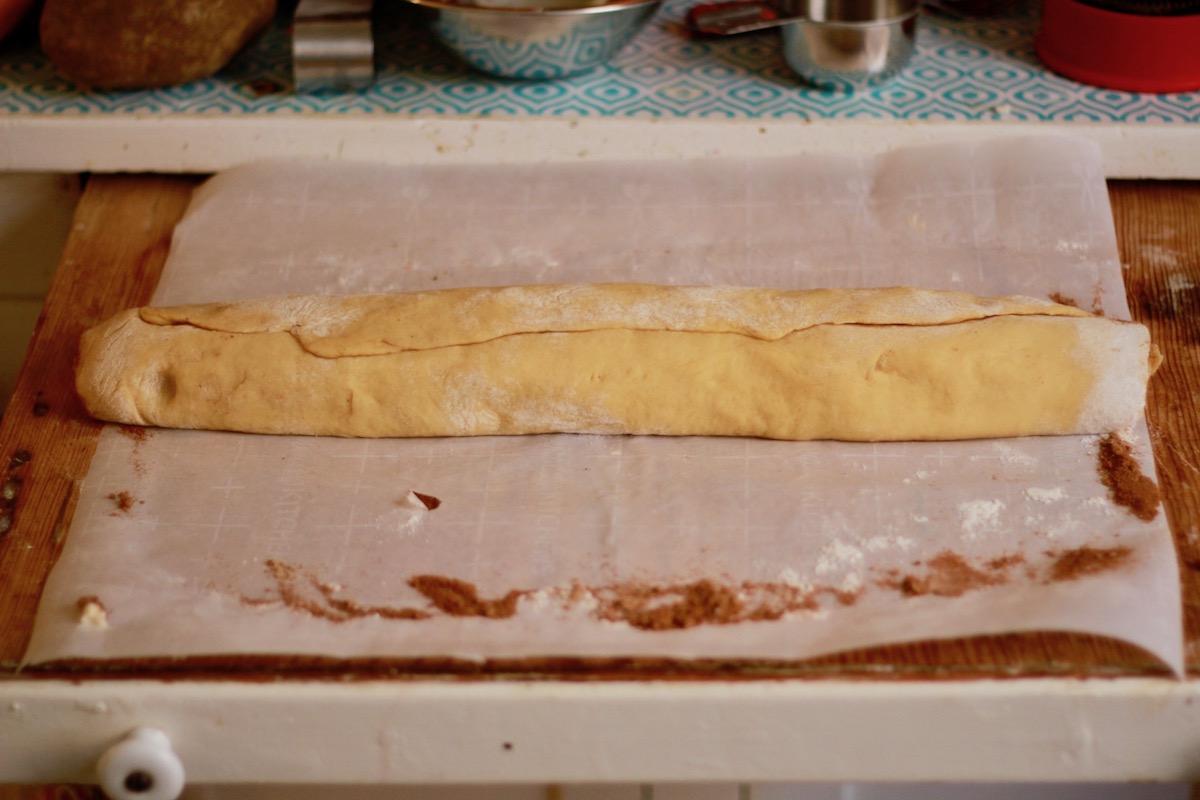
8. Use your fingers to very lightly wet the strip of dough that was left bare with water to help it stick when you roll up the dough. Now its time to roll! Start from the long edge of the dough that DOES have butter and cinnamon sugar on it, and roll the dough tightly into a log. When you get to the end, press the wet dough edge into the bottom of the roll to seal.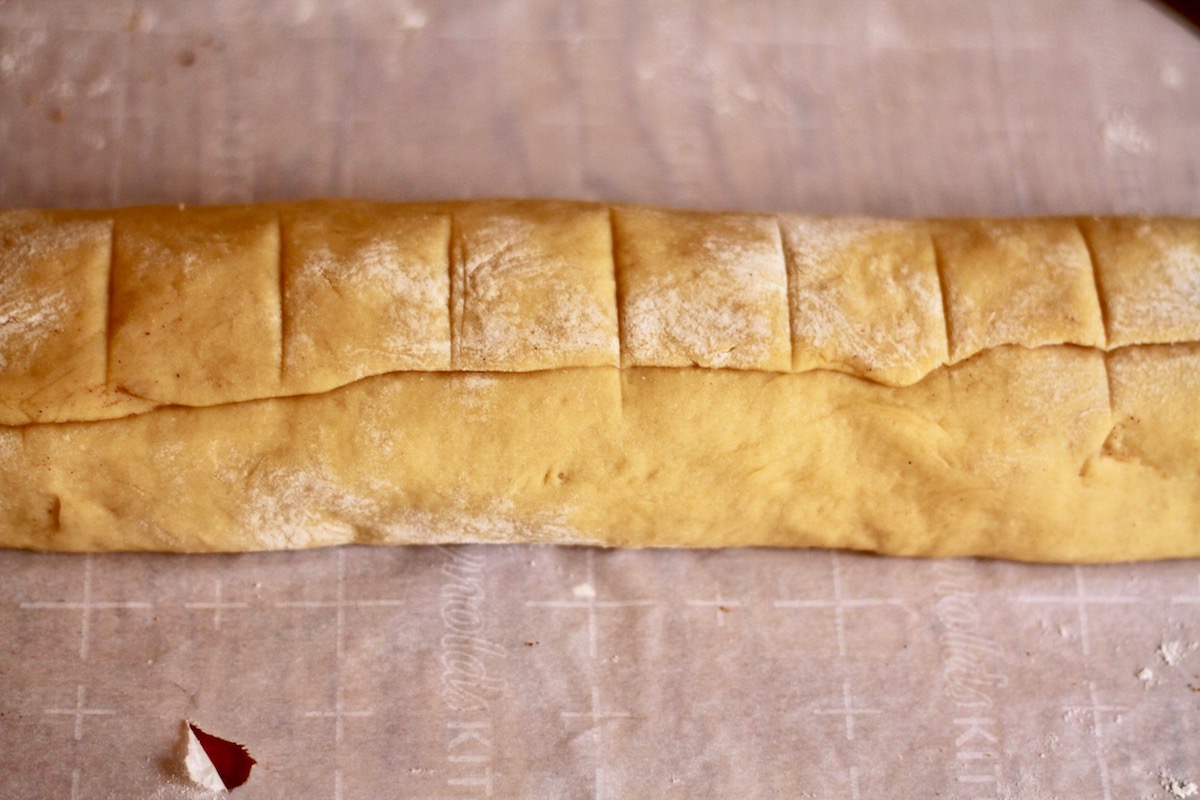
9. Cut out the rolls! It’s a very smart idea to make small indentations in the dough with your knife before cutting to ensure that you’re going to have 12 even rolls. There may be a small bit of dough left over on either end after measuring your 12. 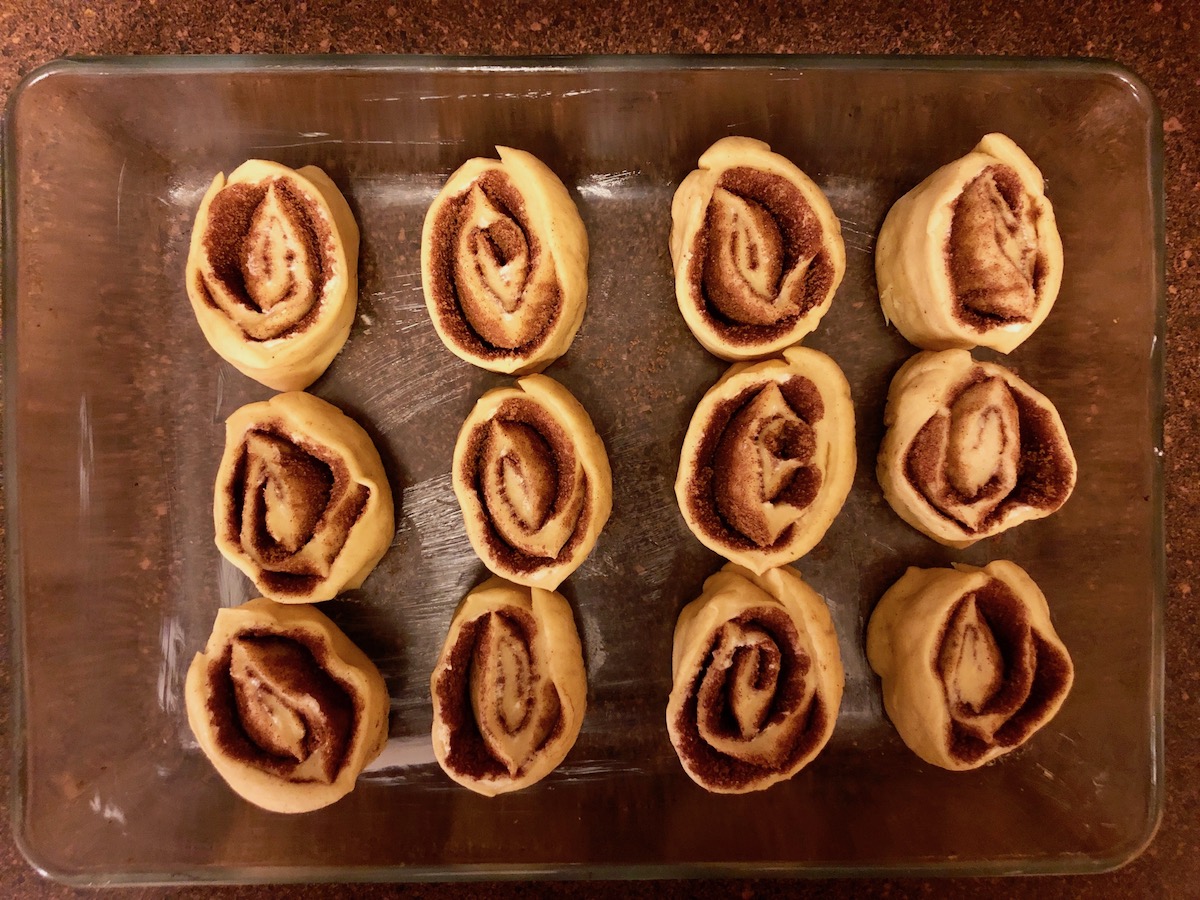
10. Now that you’ve most definitely done the smart thing and measured BEFORE cutting, go ahead and cut out your rolls! Use the sharpest non-serrated knife you have and be sure to press straight down through the dough (not sawing the knife back and forth like you would with bread) to cut out your rolls, flouring the knife as you go to prevent sticking. If you’re completely covered in flour by this point you’re doing it right. Delicious messes are the best messes!
11. Place the rolls in your buttered baking dish, cover with plastic wrap and allow to rise for 30minutes before placing in the fridge overnight or for up to two days before baking. These are so, so, so much better if you have time to let them rest so I really truly hope you’ll take the slow road, but If you’re really in a rush you can just let them rise at room temp for 30 more minutes before baking. If you do refrigerate them overnight, take them out of the fridge at least 30 minutes before you’re ready to bake them in the morning. 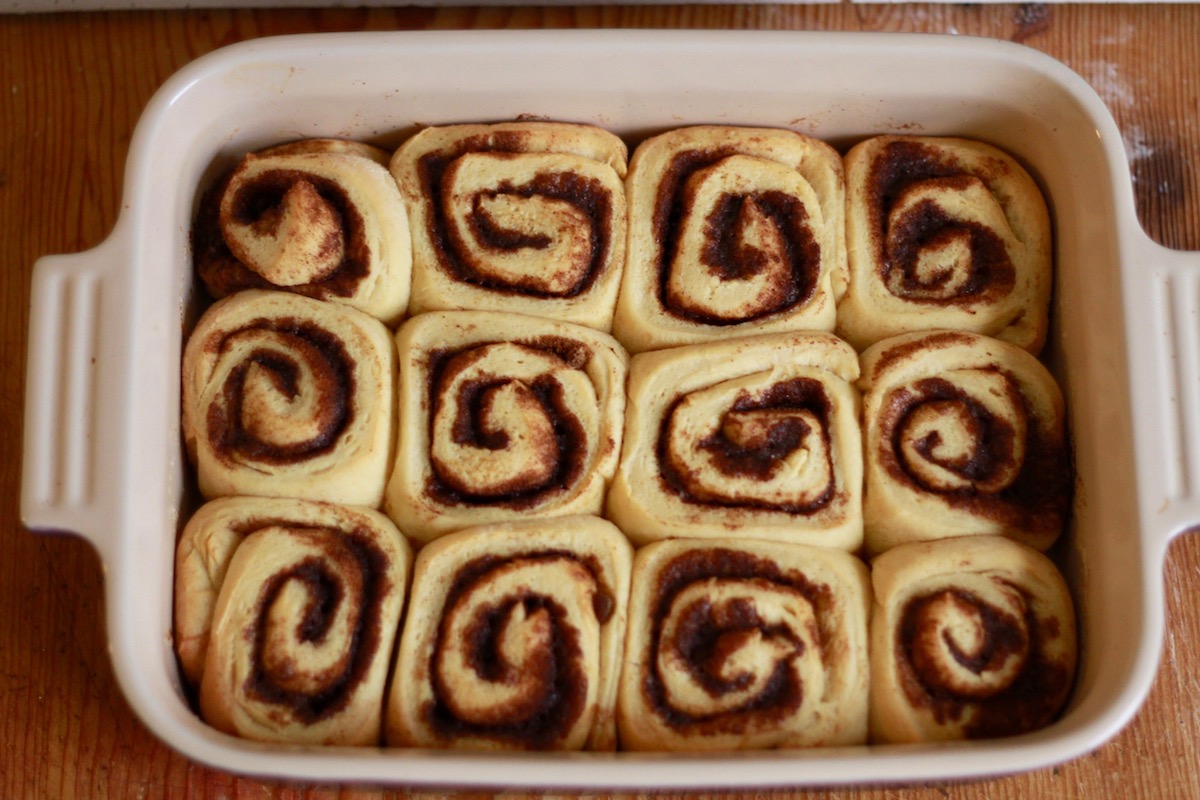
12. When you’re ready to bake, preheat the oven to 350° F and bake for 25-35 minutes. I like my rolls a little soft so I take them out at 25 but if you like them more firm and browned go for 30-35 minutes.
13. Meanwhile, make the glaze! Grab a bowl, add the eggnog and powdered sugar to it and whisk together until smooth and all the sugar is fully incorporated. 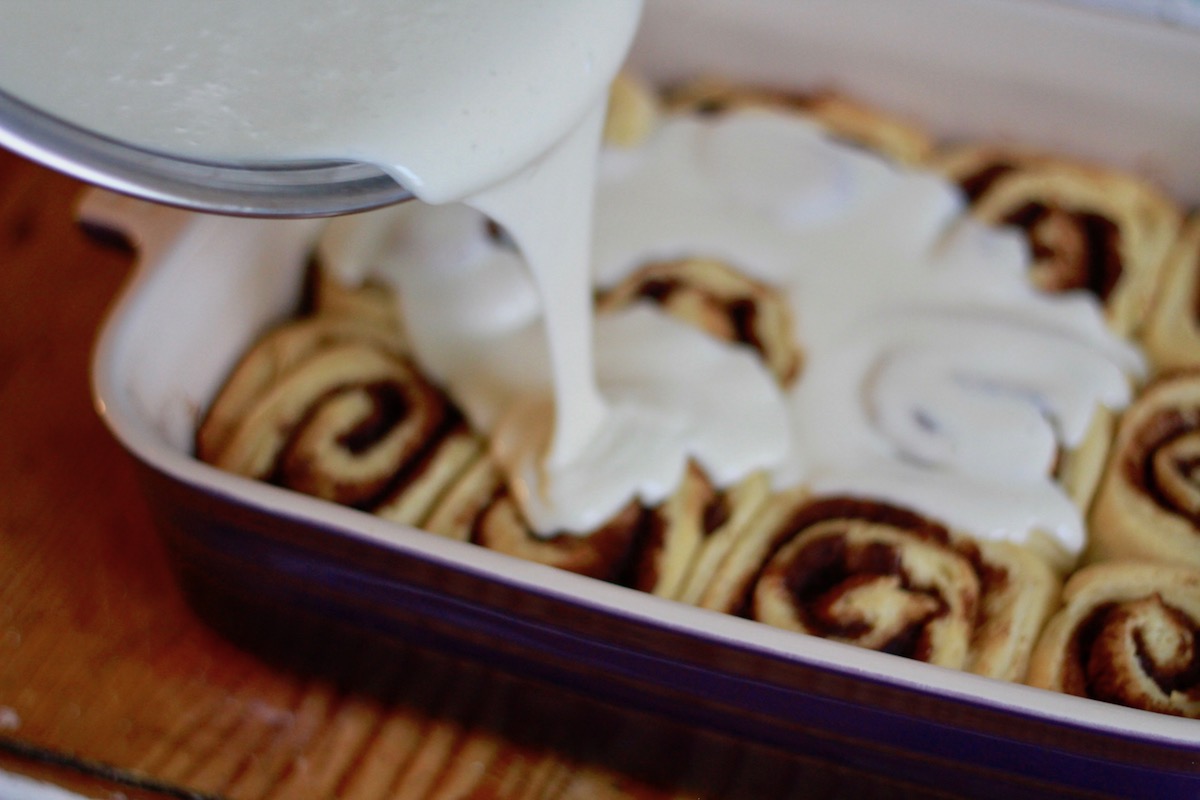
14. When the rolls are ready, take them out of the oven and place the baking dish on a cooling rack. Allow to cool for 10 minutes then pour the glaze on top while they’re still warm so it soaks in and drips deliciously into all the cracks. Hopefully you’ll be drooling by this point which is perfect cause it’s finally time to eat. 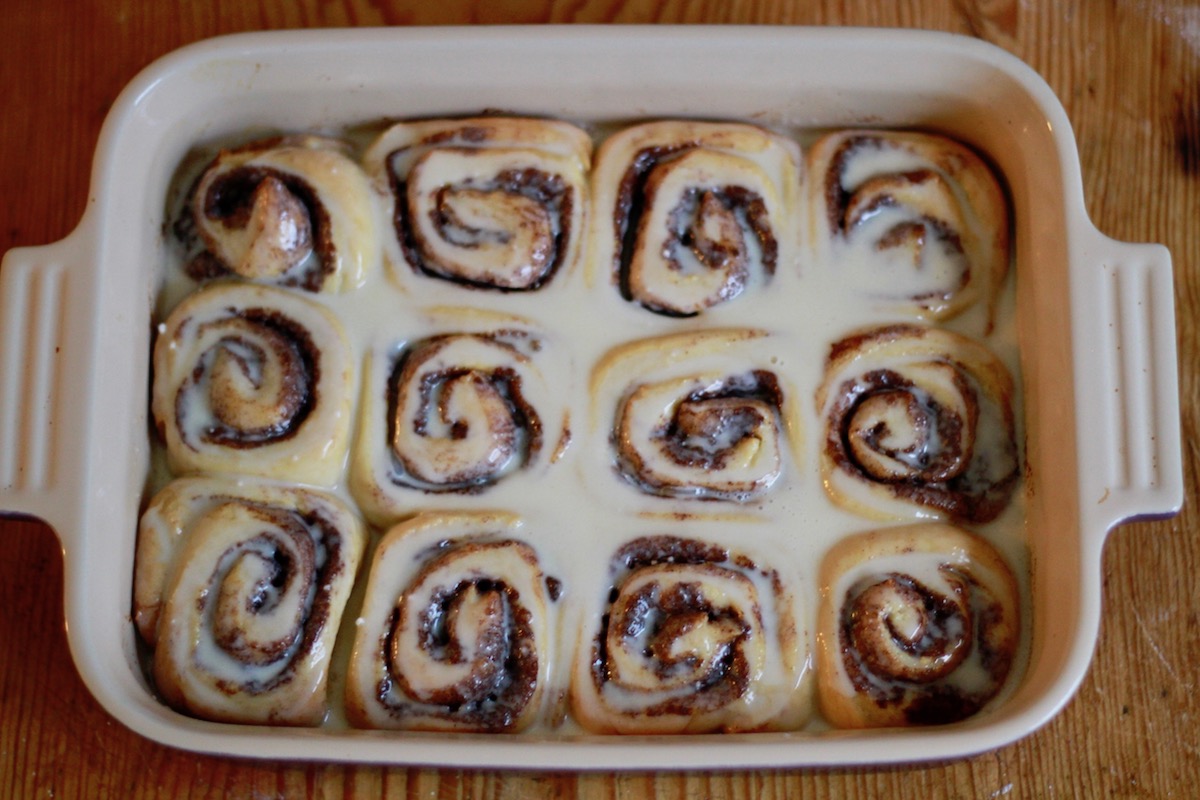
15. Serve up those rolls while they’re still warm and shimmering with glaze, and think of how worth the wait wait they were with every bite.
Happy Hanukkah, Let’s Make Vegan Sufganiyot
all photos by Ari Gofman
Happy Hanukkah!
Honestly, I tend to make a fairly minimal effort for Hanukkah. My frustration with the overwhelming presence of Christmas in the United States means that I would rather intentionally save the bulk of my annual celebrating for holidays that matter more to me (like Passover and Yom Kippur). Still, I’m looking forward to lighting my beautiful Narrow Bridge Candles and frying up some delicious foods.
The traditional explanation about why we eat deep fried foods on Hanukkah is to honor the miracle of a single jar of oil lasting for eight days and eight nights. It also solidly falls into the general trend of Jewish holidays that can be summarized as: “They tried to kill us, we survived, let’s eat.”
Many people are familiar with frying up latkes to celebrate Hanukkah, but that’s not the only option for fried food on this holiday.
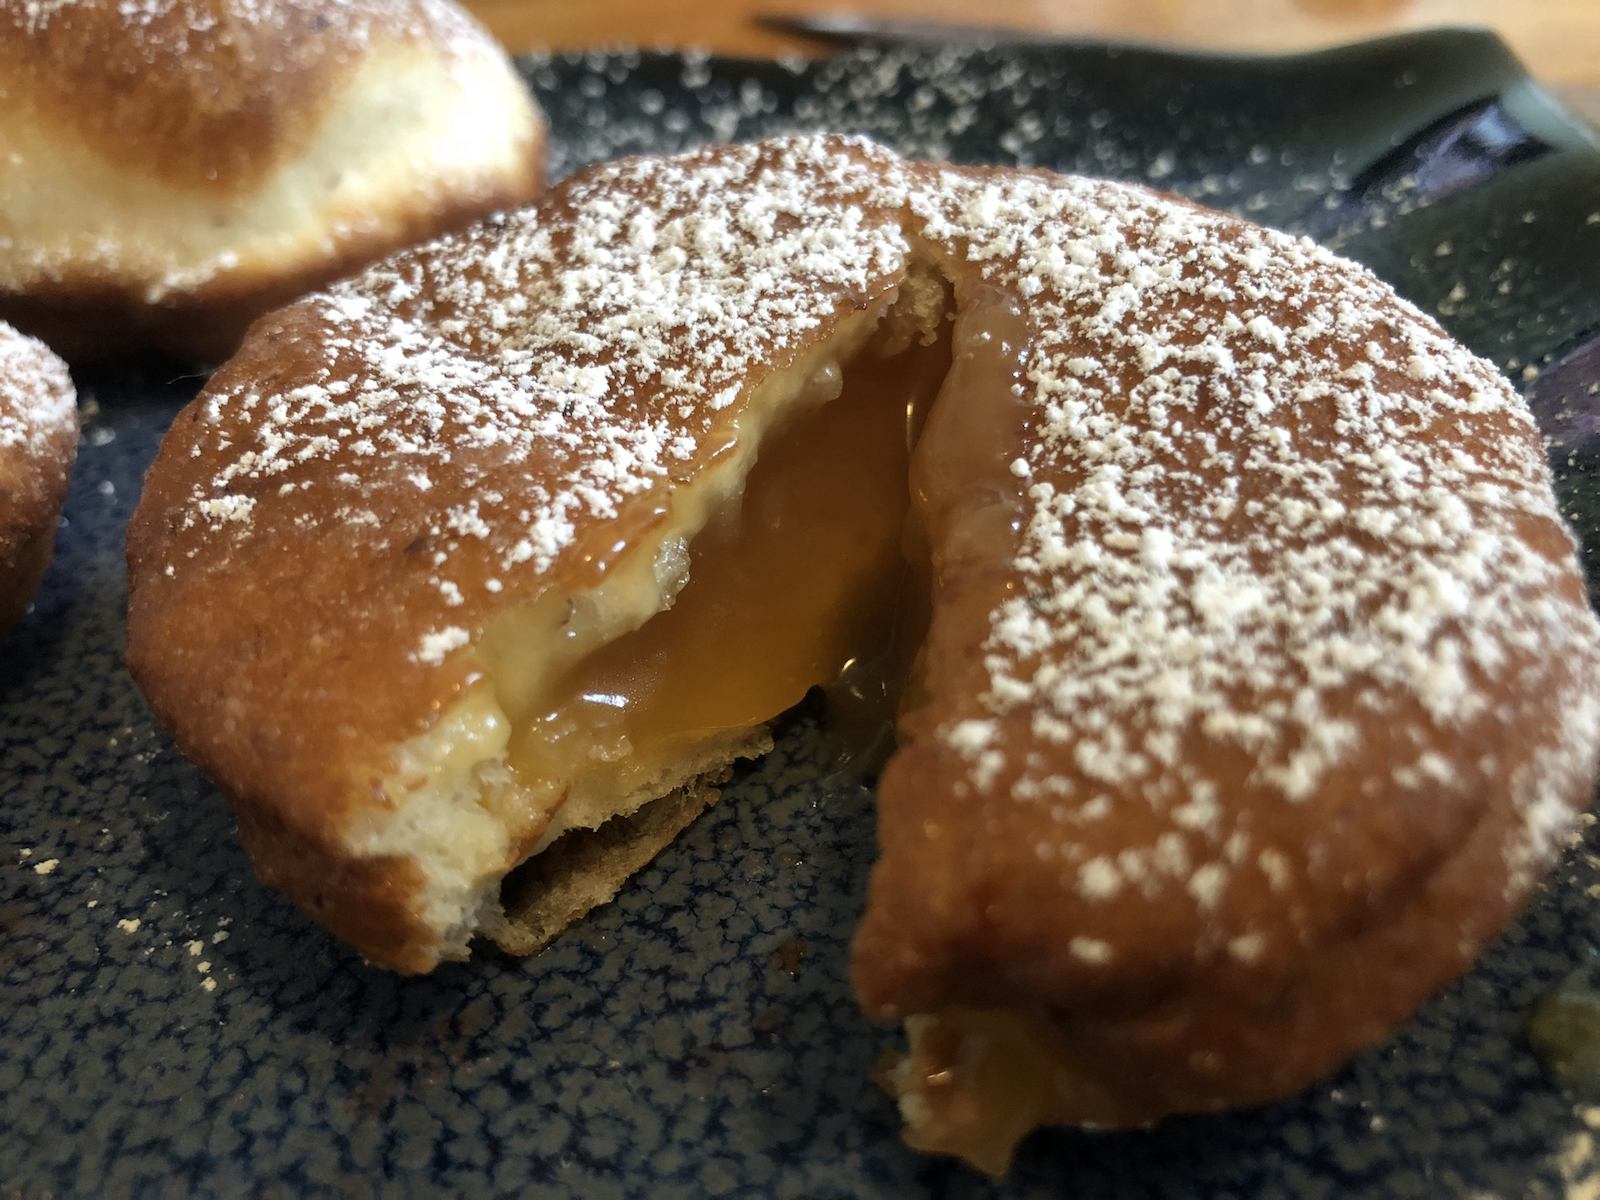
When I went to college, I was introduced to more Israeli-influenced Jewish practices, which included sufganiyot, or jelly donuts. Turns out, these have an interesting history: as summarized from the Encyclopedia of Jewish Food, sufganiyot and jelly donuts have been popular for Hanukkah for hundreds of years. They exploded into their current popularity in the 1920s when the Israeli Labor Union decided that latkes were too easy to make at home and weren’t contributing enough to employment opportunities. It’s true, sufganiyot are more complicated than latkes and often left to professionals to make, but I believe in you, queers! We can do this.
Last year, I decided it was the year I would learn how to make donuts, and proceeded to try four different recipes. I’m going to share two of them with you, and we’re going to make the vegan option together right here in this post.
If you’re looking for a traditional recipe, Smitten Kitchen’s Jelly Donuts is the one. Over the course of seven batches last year, I did find that (a) you can absolutely stick the dough in the fridge all day if you don’t have time to make it immediately before frying, and (b) sometimes the dough won’t rise nearly as much as it should and will be weirdly dense, but the final product will still turn out okay. This tended to only happen when I doubled the batch. They are best immediately out of the fryer, filled with jelly, and powdered with sugar.
For this post, I decided to mess with a vegan recipe, adapted from the Jewish Vegetarian Society. As you’re making it, you might as well know that Light One Candle was stuck in my head for about two days. Sorry!
Ingredients:
2 1/4 tsp or 1 packet fast action dry yeast
1/2 cup warm water
2 tablespoons vegan butter (I use Earth Balance)
1/4 cup granulated sugar
1/2 cup (approx.) powdered sugar for dusting
3 tablespoons warm soy milk (almond milk works if that’s what you have)
2 2/3 cup bread flour, plus extra to adjust (all purpose flour will work ok in a pinch)
1 tablespoon flaxseed mixed with 3 tablespoons water, or one egg’s worth of egg replacer of your choice
1/4 teaspoon salt
A large amount of a neutral vegetable oil; I used a 38 oz bottle of canola. See recipe for more discussion of oil types.
Instructions:
1. Proof the yeast. Mix the yeast into 1/4 cup warm (but not hot) water and allow to stand for about 10 minutes, until it “blooms” and puffs. It’s worth noting that I included measurements for a packet of yeast or measured. I have had the same bottle of yeast in my fridge for almost two years, and it shockingly continues to work. I also bought some packets because I know they are popular. They work fine if you very rarely bake, but if you plan on making more than a few recipes or batches then you might as well get a larger container and have a bit more control.


2. Melt the butter in a saucepan along with the remaining 1/4 cup warm water. Add the sugar and whisk until it is dissolved. Remove from heat and let cool.
3. Mix the flaxseed and water and let stand for a minute.

4. Warm soy milk. I put it into the microwave for 20 seconds. Combine soy milk with the yeast mixture.
5. In a large bowl (if using a KitchenAid, in that bowl), add the initial 2 2/3 cup flour, salt and flaxseed mixture or other egg replacer. Pour the sugar/butter mixture and yeast in and mix.

6. Time to knead! If using a KitchenAid, use a bread hook on medium for 3-5 minutes until the dough is fully smooth. It should be soft and not too heavy. If the dough is shaggy or wet even after kneading, you may need to add more flour – I have occasionally needed to add up to 1/3 cup flour. If you don’t have a KitchenAid, don’t worry you can knead by hand for about 5 minutes on a flat surface.
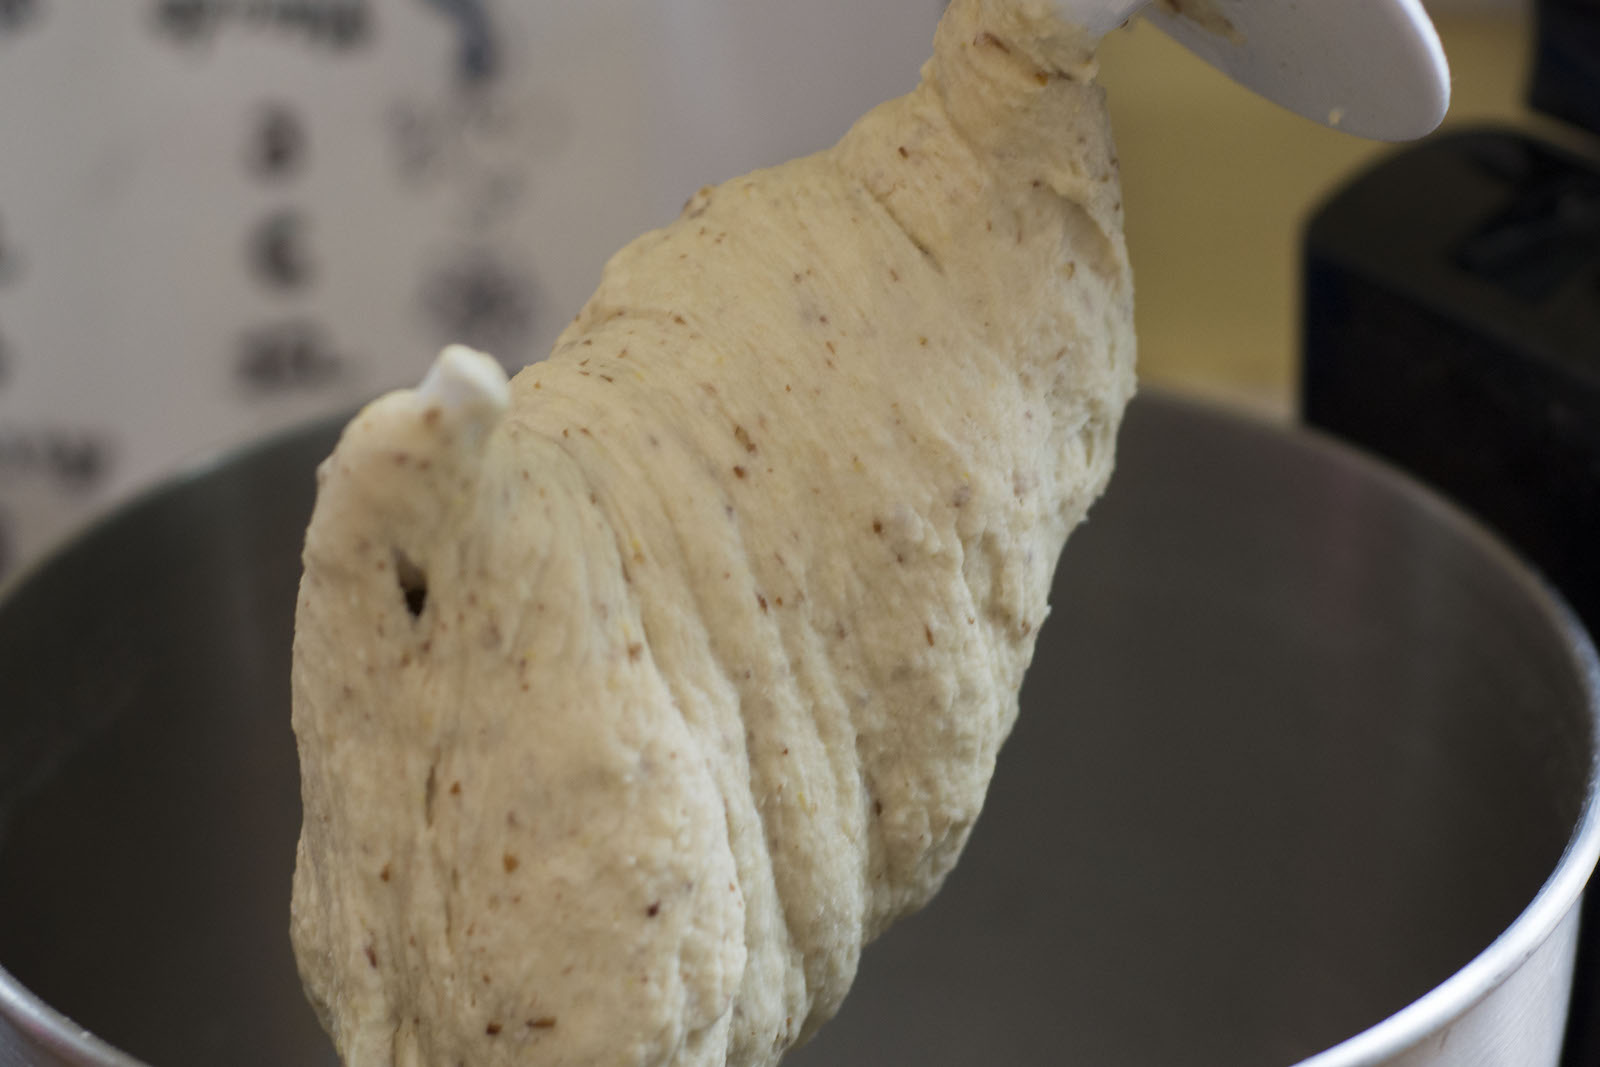
7. Coat the bowl with oil, return the dough to the bowl, and cover the bowl with cling film or a tea towel. Allow the dough to rise for about an hour until doubled.
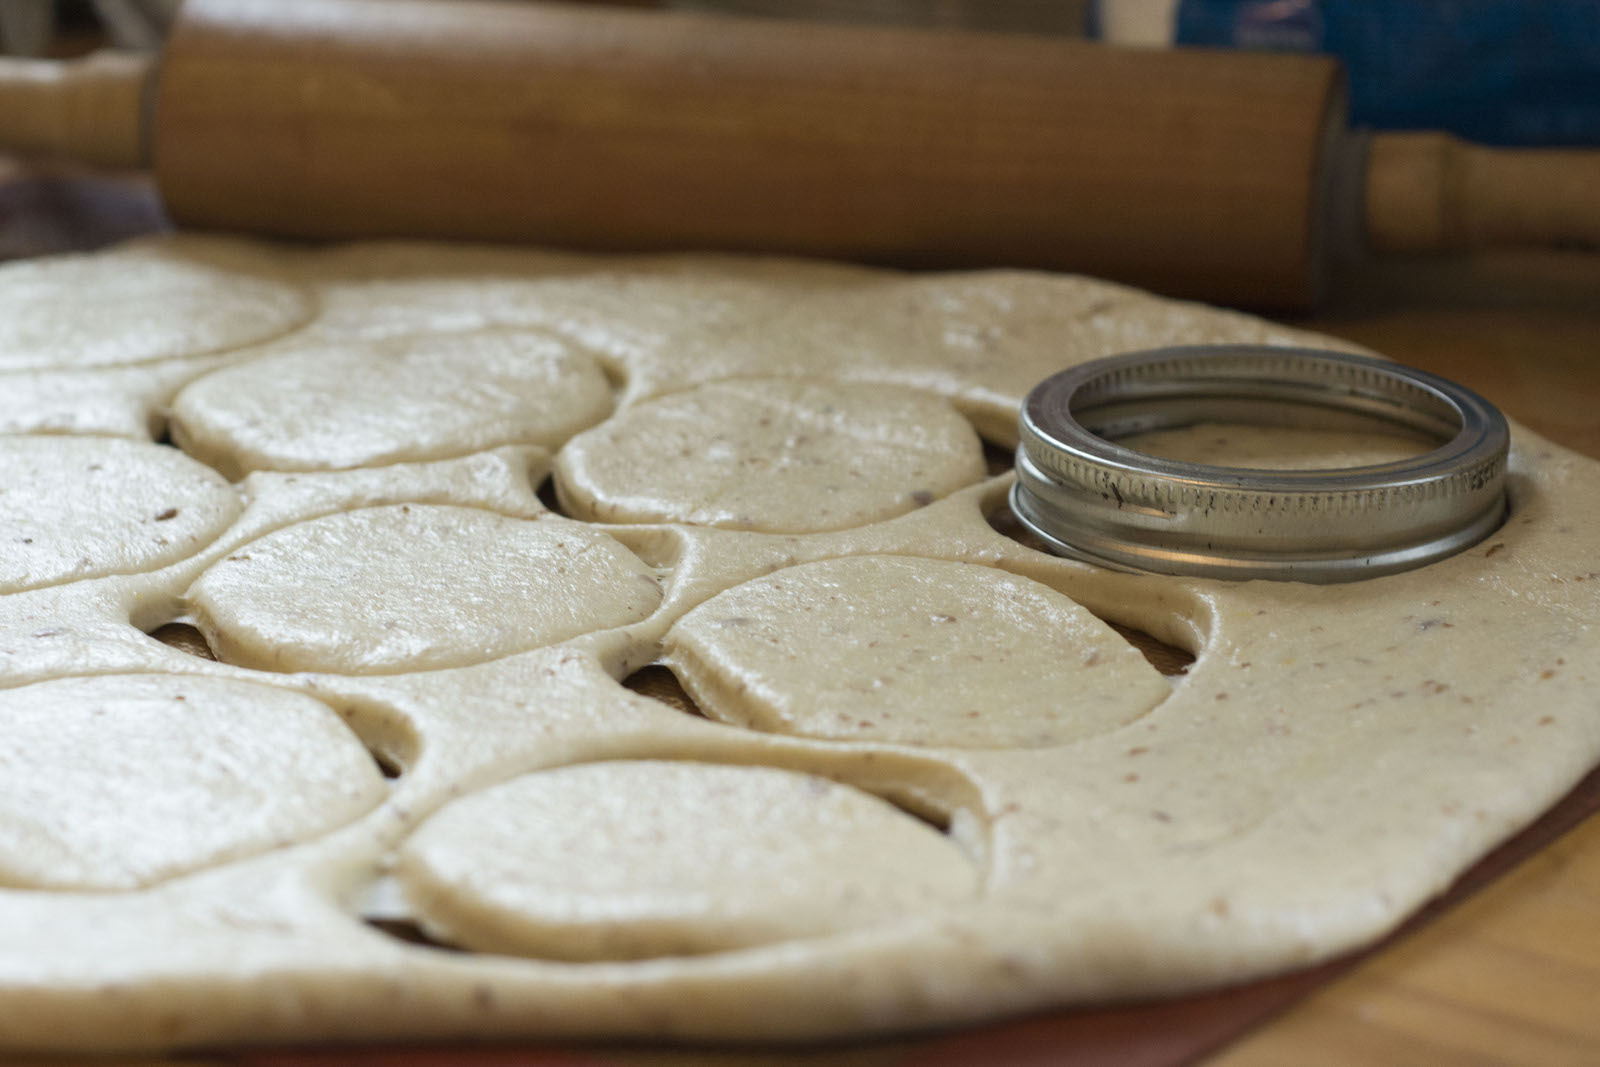
8. Remove the risen dough from the bowl and roll it out to form a sheet that is about a 1/2 inch thick. In a similar way to pizza dough, the dough will stretch out more when firm against a surface, and then spring back a bit if you flip it or pick it up. Roll it out to 1/2 inch even after flipping it over so that when you cut out shapes, they hold their shape better. Cut out donuts out using a mason jar lid ring (or an actual cookie cutter, but a wide mouth mason jar lid really works fantastically well for the small/medium size donuts I like. If you want larger ones like at a bakery, use a 4 inch cookie cutter). When you’ve cut out all the doughnuts you can, combine and roll out the remaining dough and cut more donuts. The very last one will be ugly, and will be a great first test for the oil’s temperature. Put the doughnuts on a baking sheet. You can use parchment paper underneath; I absolutely love my reusable silicone baking mats. Give them a centimeter in between so they have room to proof and grow. Cover them with a tea towel or cling wrap and let them rise for an hour in a warm space.
9. Near the end of the rising time, heat up the oil in a deep saucepan or large pot.
A note on oils: I know lots of folks love olive oil, and it’s wonderful, but it’s not good for deep frying because it burns at a comparatively low temperature. For this, peanut, canola or vegetable oil are your best choices (and conveniently, they’re also cheap!).
I used my enamel cast iron pot – if you’re going to use a pot, just be sure it has a thick bottom (I know.) so it doesn’t burn through if you overheat. Donuts do well being fried at 350-375℉. Three methods for checking the heat: (1) a food thermometer, (2) sprinkle a bit of water, and if it splashes back, the oil is at least hot enough (but could still be too hot; also, be careful because oil and water really don’t like each other and this oil is HOT). This year, I tried a new method of putting in a wooden spoon and checking the boil around it: small bubbles around the wooden spoon indicate a good temperature; if there are too many turn down the heat a bit for a minute and try again after the oil cools a bit. Don’t be afraid to adjust the temperature of the stove as you fry!
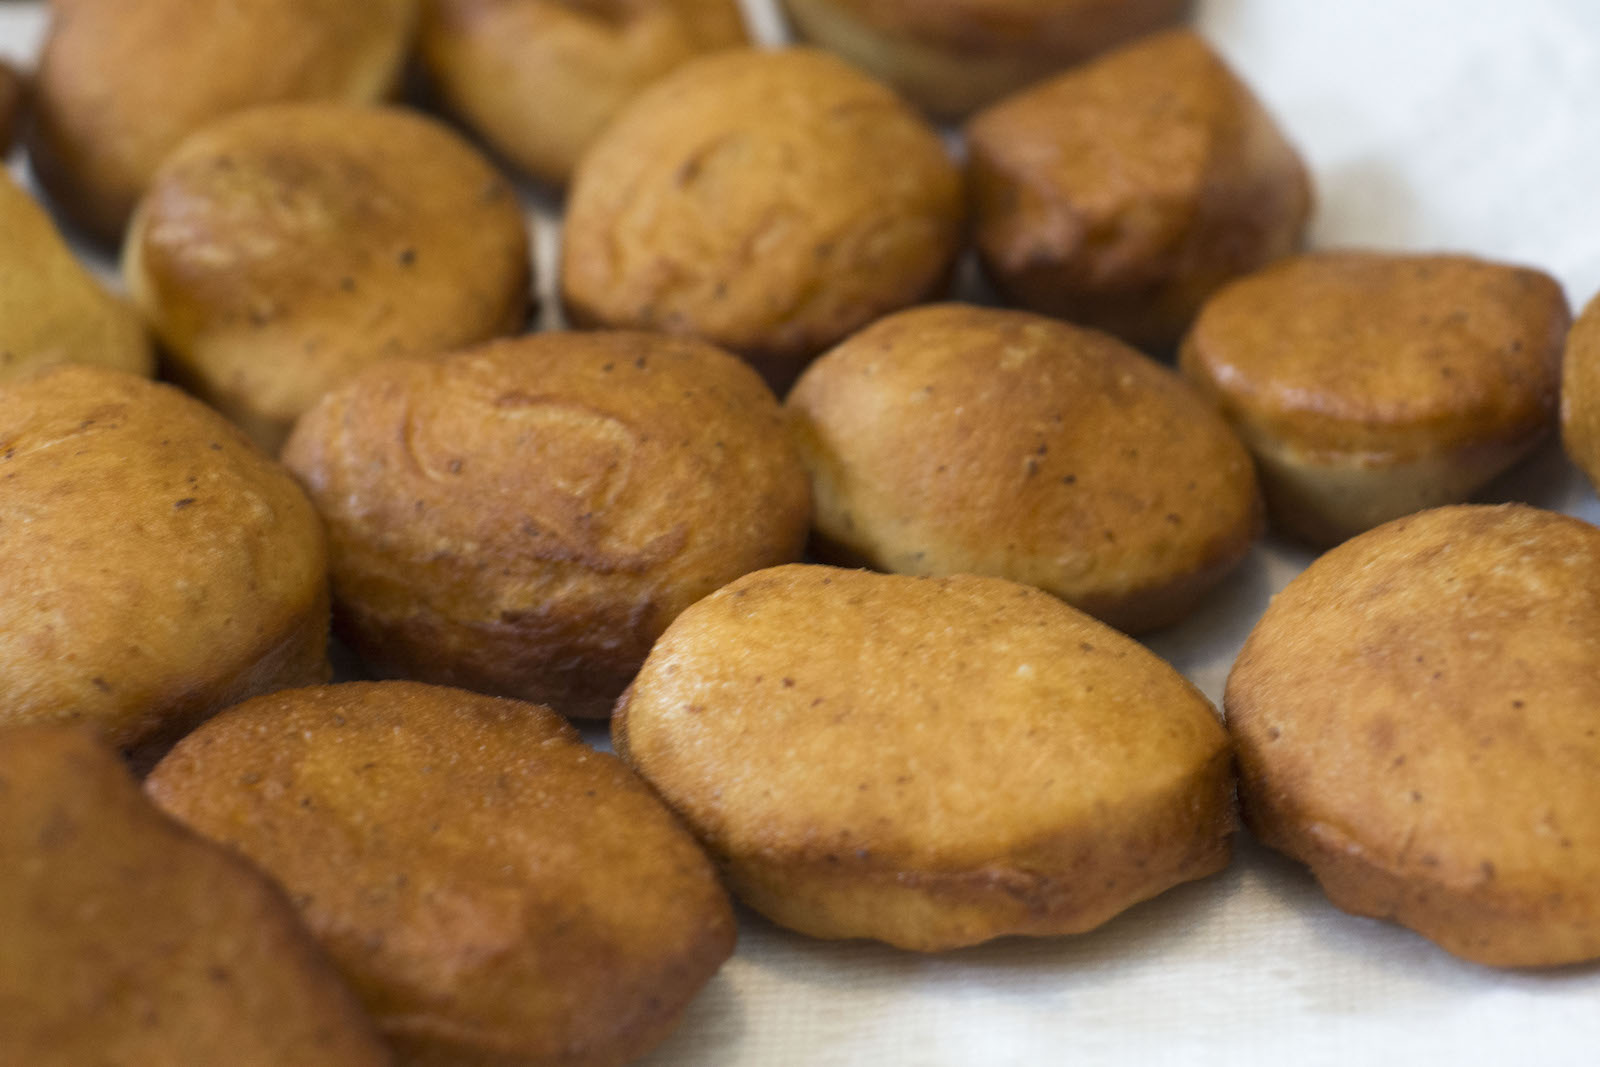
10. Drop the doughnuts into the hot oil and cook them until they rise to the surface and turn light brown. Roll them over. Cooking takes about a minute or less per side – it’s fast! Take them out fast using a wooden spoon or metal strainer.

11. If you have a wire rack, cover it with paper towels to drain the donuts. Otherwise, place a thick layer of paper towels on a baking sheet.
12. Fill a pastry bag with jam and fit the bag with a pastry tip. Insert the tip into each donut on the side or at the top and squeeze in the jam. If the jam is very stiff, heat it in a microwave first for 20-30 seconds. Alternate filling strategies if your kitchen isn’t completely stocked: use a squeeze bottle like a restaurant ketchup bottle ($2 at Michael’s). If using this, use a sharp knife to cut off the top of the tip so it’s large enough to get seeds through. Worst case scenario, use a ziploc bag with the corner cut off as a pastry bag. Take a break to let the cat play with the jam jar.

13. Dust with powdered sugar: pour some powdered sugar into a sieve and gently shake it. If not serving immediately, you may need to re-sugar them immediately before serving because it might be absorbed.
An exciting update shared by a friend who I carpooled with recently: you can fill sufganiyot with OTHER FILLINGS. Some non-vegan suggestions: nutella or lemon curd! YUM.
This year, Hanukkah starts at sundown on Sunday, December 2 and ends at sundown on Monday, December 10.
Get Baked: Pink Ombre Mini Cakes
Ombre cakes are one of those things that look fussy and involved, but are actually super chill to make! These are the perfect dessert for:
- Office tea parties
- Picnics with your cat
- Watching PYNK on an endless loop
- Quietly weeping into while the world burns
- Serving heterosexual men with rigid ideas about masculinity and acceptable gender performance
- Ostentatious self-care selfies
Also, they’re pretty as fuck.
Ingredients
Cake
Note: you can apply a gradient to pretty much any cake; just keep in mind that bright colors will show up more easily on light colored cakes. If you prefer to make your cake from scratch, here are some inspirational cupcake situations that do not include box mix.
I personally went with an off-the-shelf solution:
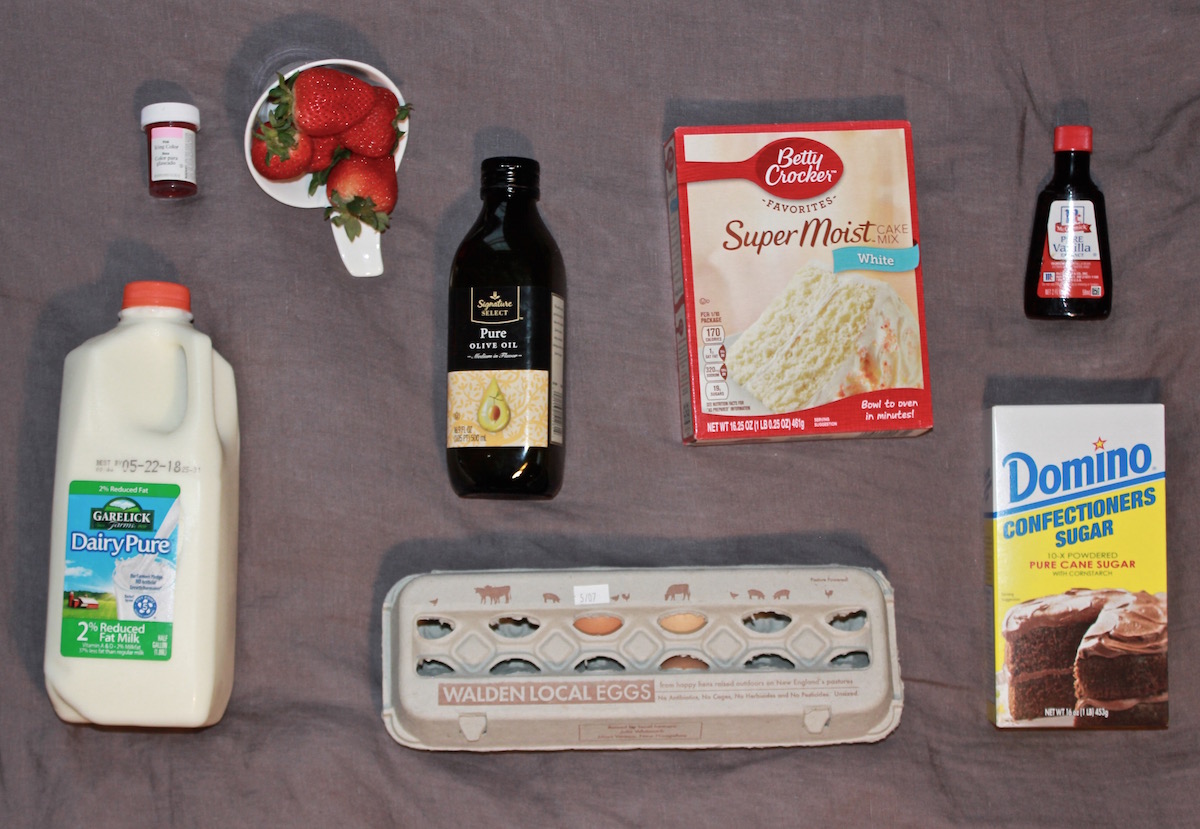
- Betty Crocker Super Moist White Cake Mix
- 1 1/4 cup water
- 1/2 cup vegetable oil
- 3 eggs
And some high quality icing dye:
Don’t skimp on this part. If your grocery store only has squeeze bottle food coloring, go to Michael’s or any other craft store to find gel icing coloring. You’ll get a much more vibrant and appetizing end result.
Frosting
Similar to the base cake situation, I would also encourage you to try different frosting combinations! To get you started, check out this recipe for Maple Bourbon Buttercream, with detailed notes on how to make your own original creations.
Here, I went with Betty Crocker’s vanilla buttercream recipe:
- 3 cups powdered sugar
- 1/3 cup butter or margarine, softened
- 1 1/2 teaspoons vanilla
- 1 to 2 tablespoons milk
And topped with:
- strawberries, sliced
- pink peppercorn (optional)
Directions
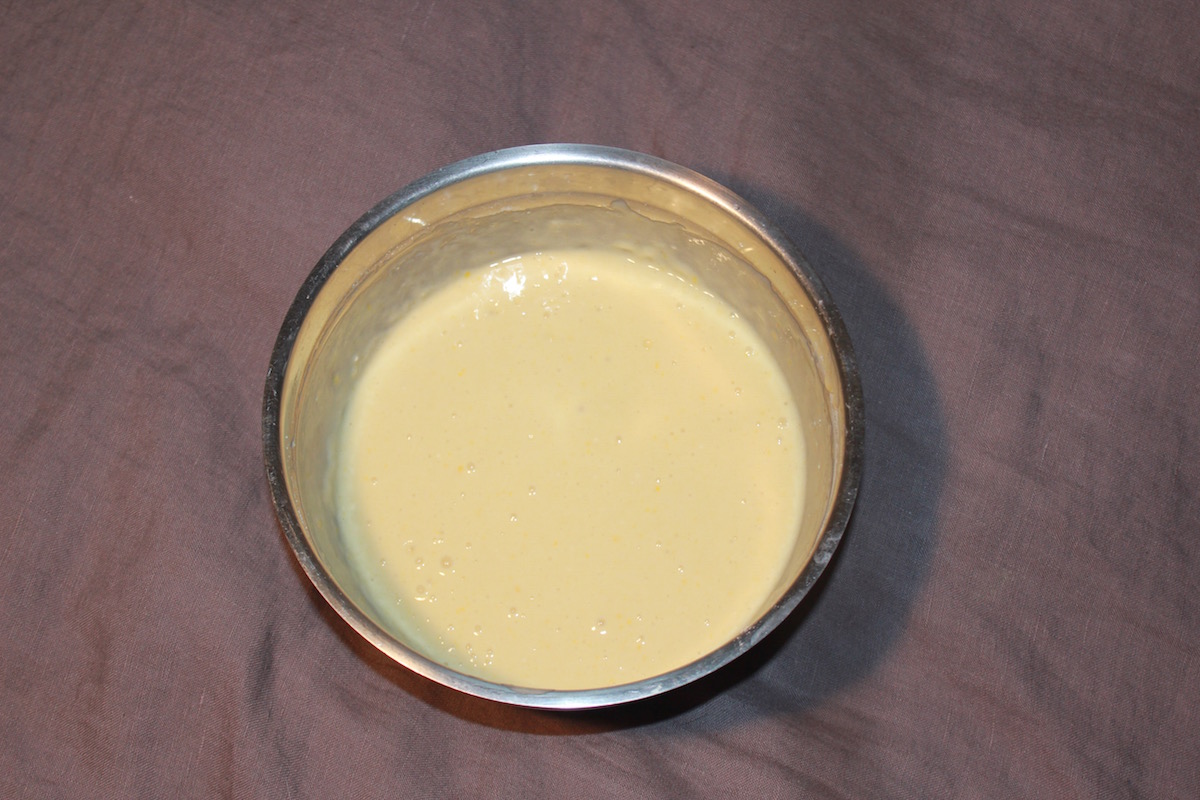
1.) Preheat the oven and make the cake batter. For Betty Crocker’s recipe, I preheated to 350, then mixed the cake mix, water, oil and eggs in a bowl.
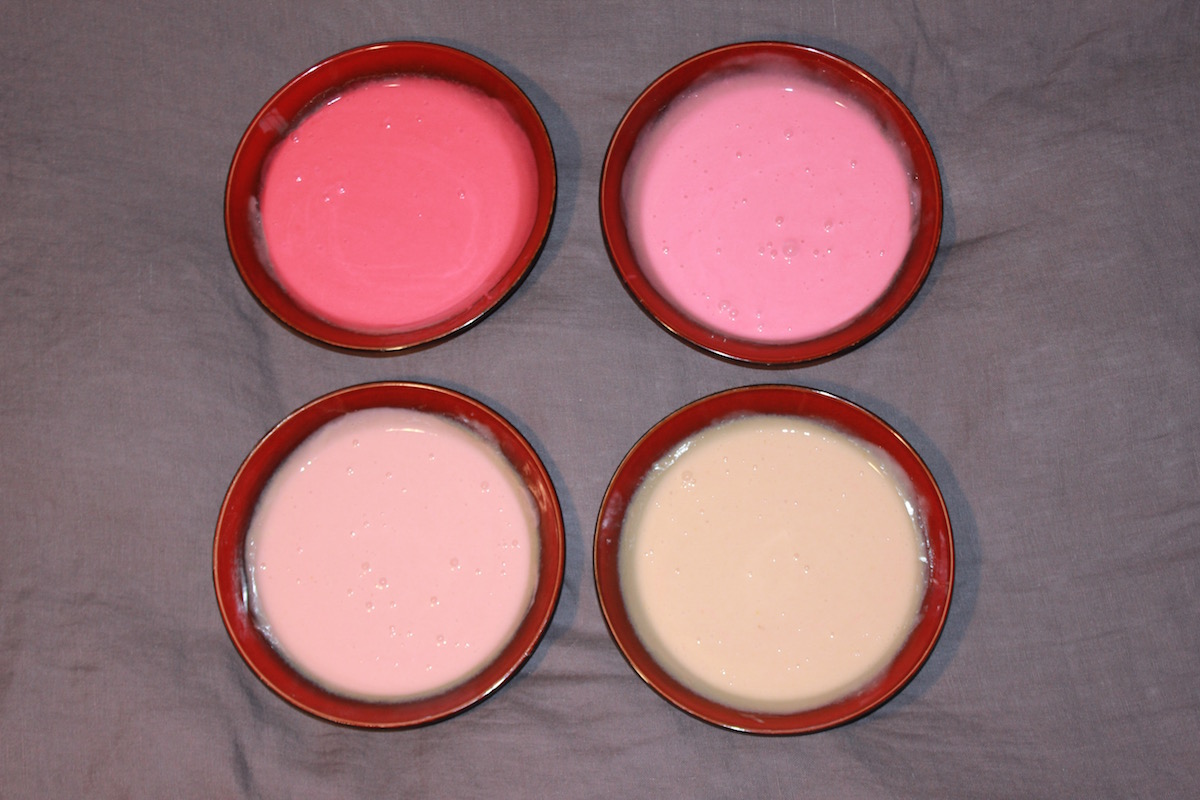
2.) Divide the cake batter evenly across four bowls. I used a kitchen scale to help (each portion was about ~6oz each), but it’s not important to be super precise. The only bad thing that happens if you’re off is that your layers will be slightly different heights.
3.) Add food coloring to the batter, varying the amount of dye according to how you want the gradient to appear. I found it easiest to make the darkest color first, then back off from there, as I wanted a fairly dramatic spectrum shift.
4.) Transfer your batter into four 8″ round pans, and bake according to the recipe. (For Betty’s mix: 29-34 minutes.) When complete, take it out of the oven and let it cool completely.
If you don’t have four cake pans, you may also bake the colors one at a time; it just takes a little longer.
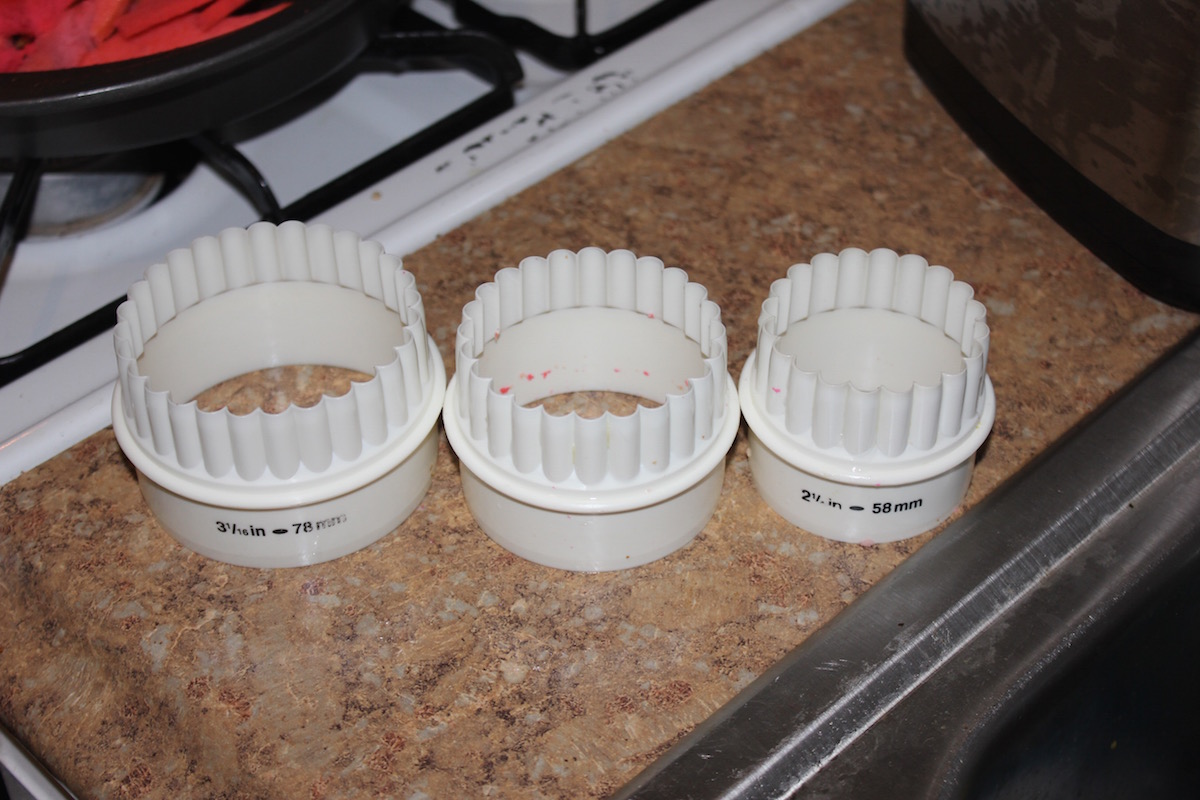
5.) Use a circular cookie cutter to stamp out circles from your cakes. I’ve found the sweet spot to be 58-78mm circles. Smaller than that, the tower is really unstable; larger than that, and the cake looks stumpy. I used 68mm for most of the cakes pictured here.
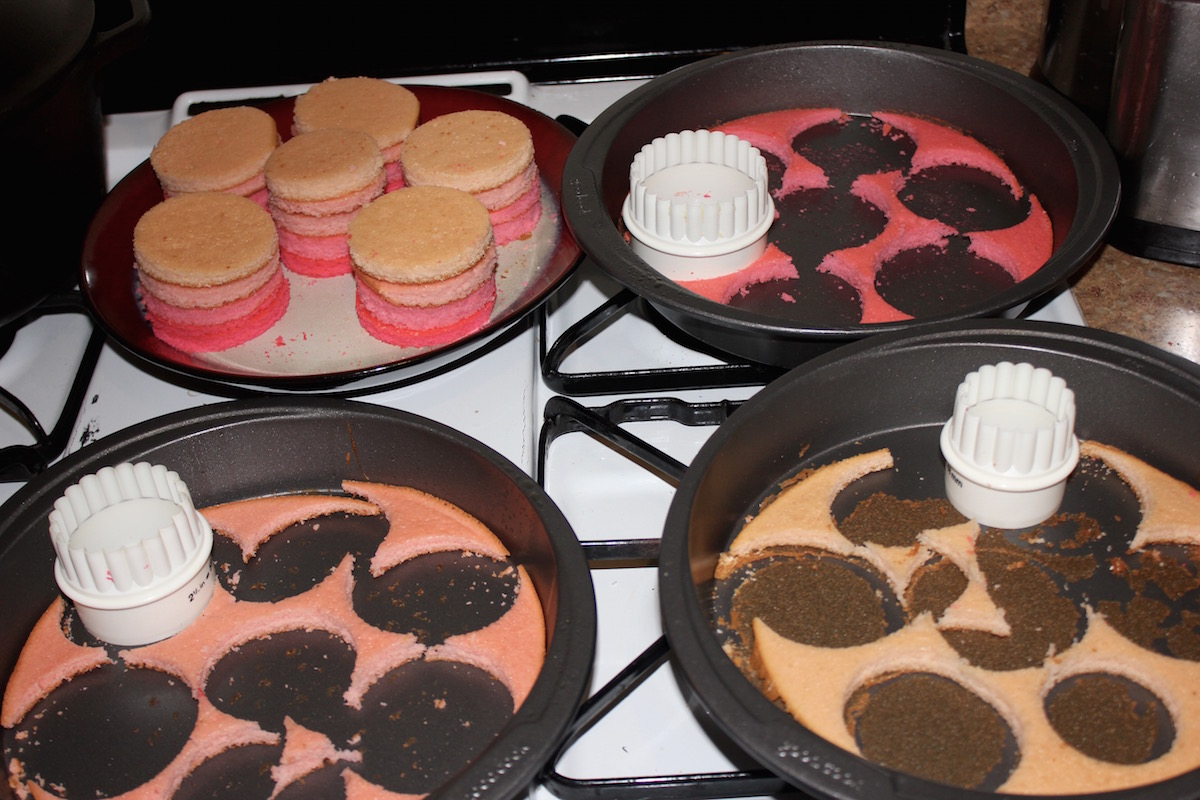
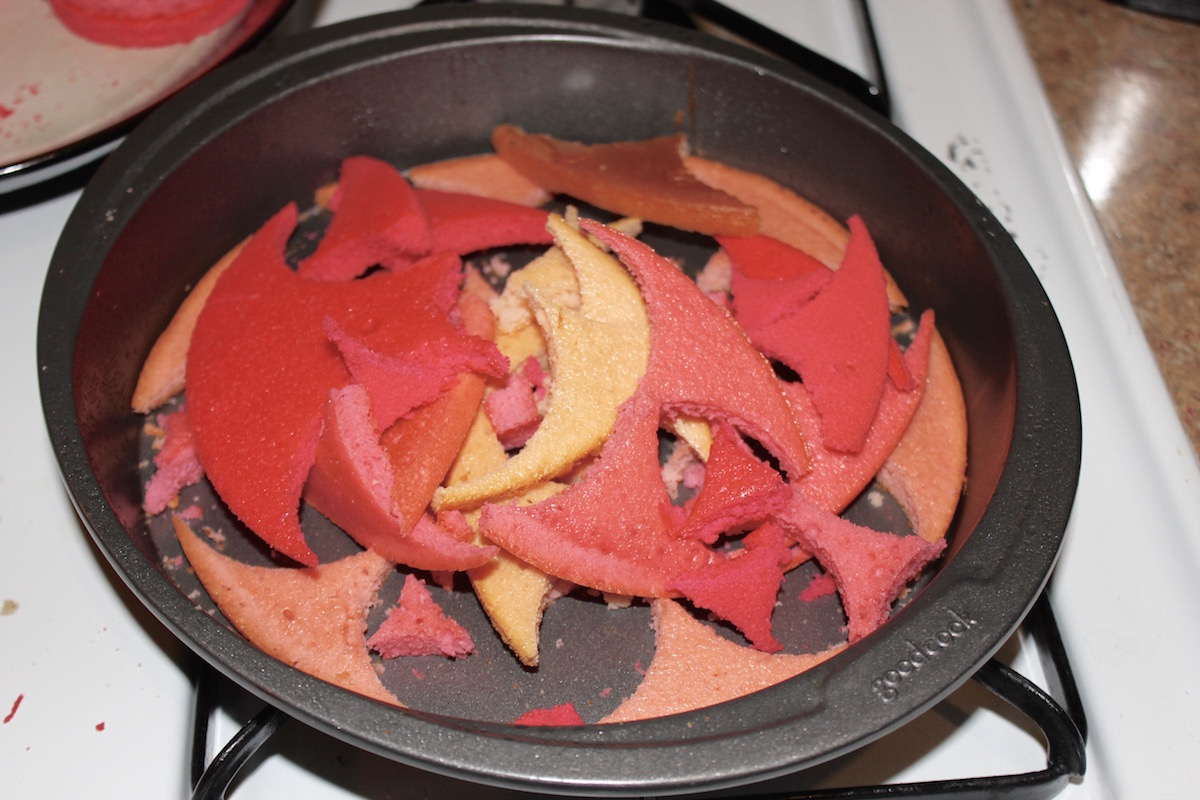
You will have scraps left over. If you don’t want to throw them out, put them in a freezer gallon bag and save them to make cake pops. Or snack on them while you’re making the frosting. (This is what I usually do.)
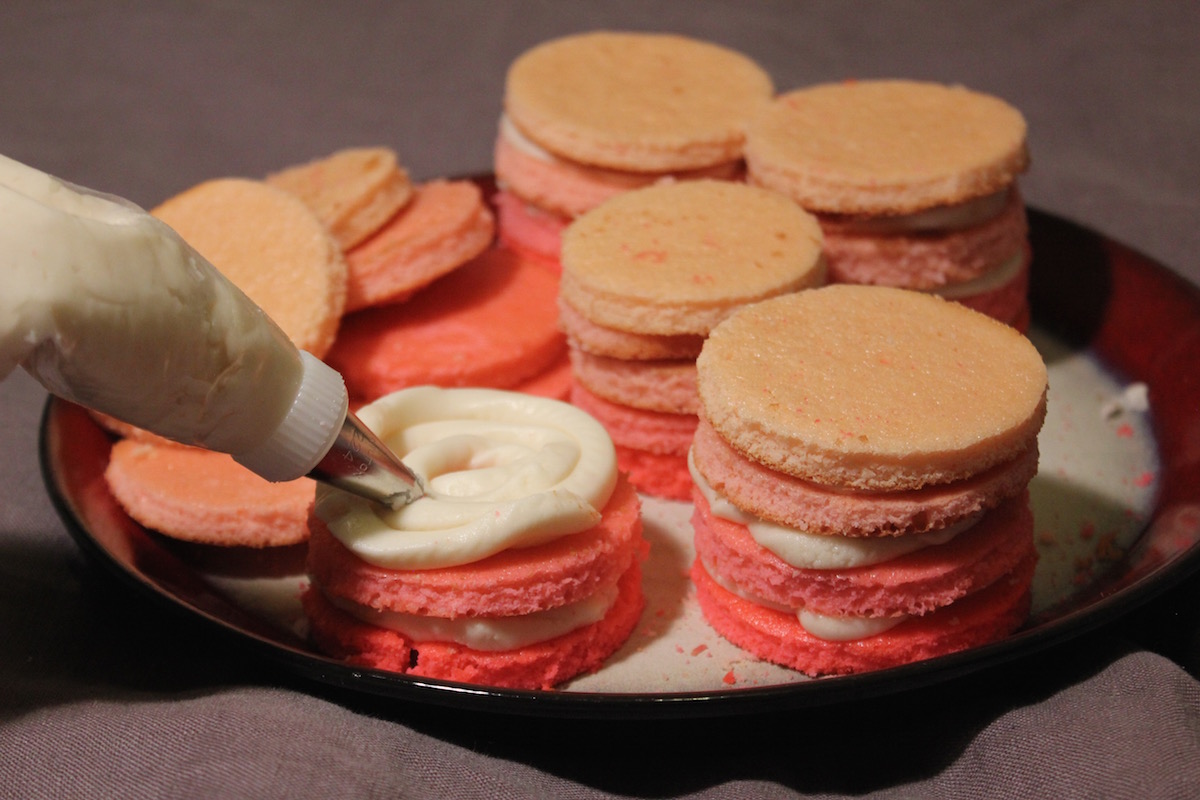
6.) Make frosting. For Betty’s recipe, I beat together the powdered sugar, butter, and vanilla, then slowly added the milk, stopping as soon as it looked like frosting.
Stack your layers, putting frosting in between each layer to help them stick.
7.) Top with fresh strawberries, or whatever else your heart desires.

These ones wound up being very sweet, so I deconstructed the layers partway through eating and added pink peppercorn. That was a solid call, would do again.
Get Baked: Sourdough Persian Love Cake
Recipe adapted from Brooklyn Botanic Garden and Deliciously Yours.
Greetings, starbeams! I hope you’ve gotten a good night’s rest and that every stranger you encounter on the street thinks kindly of you today. The world continues to be a dumpster fire, but I’m making the absolute most of it and would love to share some joy with you.
Check this out:
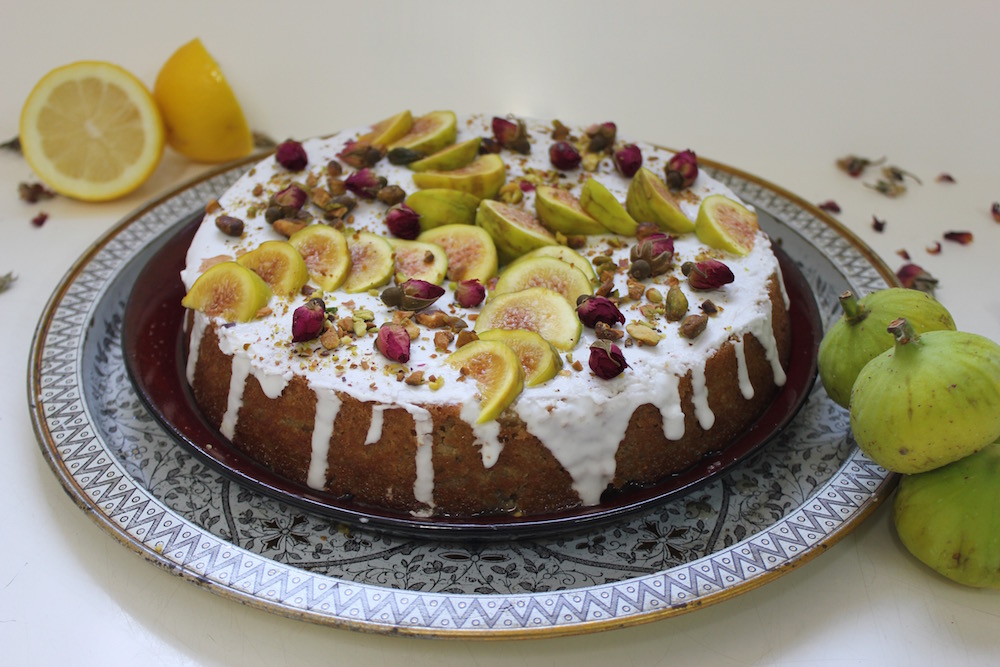
It’s called a “Persian Love Cake” and is a great way of using up any sourdough starter discard you may have. The flavor is sweet (due to the massive amounts of honey syrup), but also interesting and complex (due to the sourdough, cardamom and lemon). It’s delicious, and the cake itself is pretty gosh darn beautiful, too, if I do say so myself.
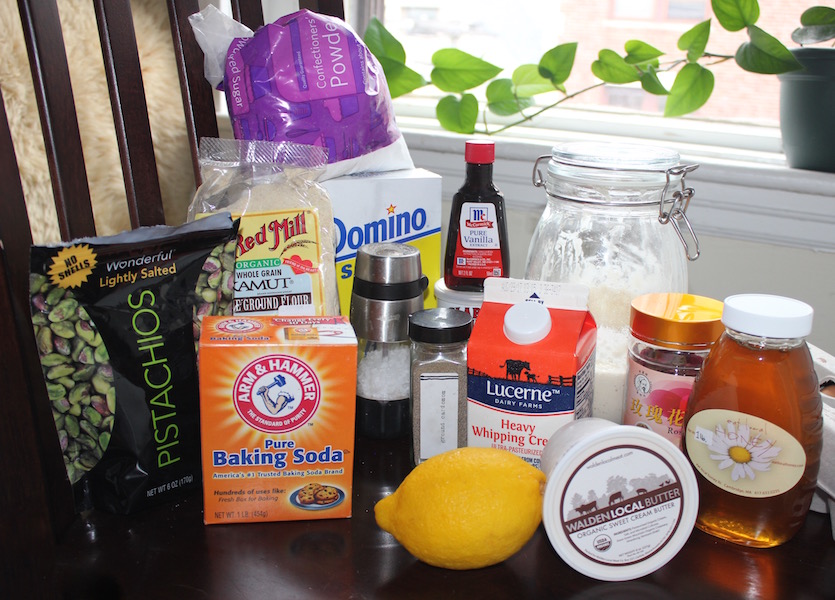
Ingredients
Syrup
- 135g strongly brewed rose tea
- 340g mild honey
- 40g fresh lemon juice (from about 1 lemon)
Cake
- 170g whole wheat flour
- 1 tsp baking powder
- 1/2 tsp baking soda
- 2 tsp ground cardamom
- 1/2 tsp sea salt
- 115 g unsalted butter, softened
- 100g granulated sugar
- 3 large eggs
- 200g Greek yogurt
- 20g heavy whipping cream
- 20g mild honey
- 1 tsp vanilla extract
- 150g sourdough starter, 100% hydration (meaning you’ve been feeding it half water/half flour)
If you don’t already have sourdough starter, here are some instructions on how to grow your own. Alternatively, Laura Wooley’s sourdough series on Mamoot DIY gives a very detailed account of each step.
Drizzle Icing
- 170g icing sugar
- 1 egg white at room temperature
- 1 tsp fresh lemon juice
Garnish
- 50 g pistachios, toasted and chopped
- Dried rose buds (sold as rose tea)
- Fresh figs or other fruit
Instructions
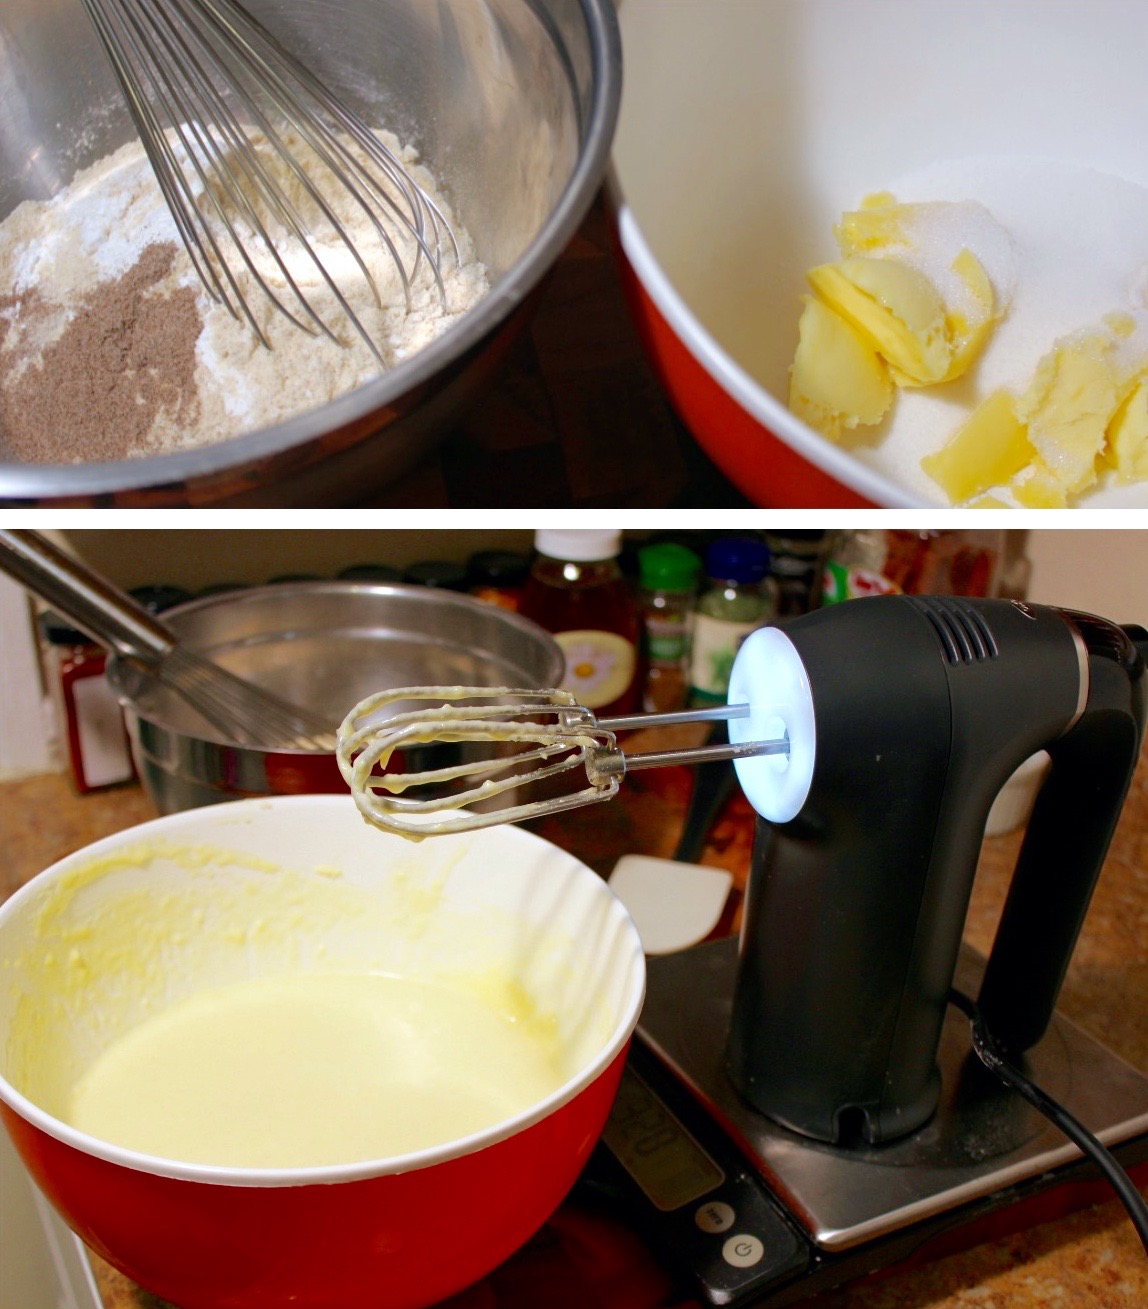
In a small bowl, whisk together the flour, baking powder and soda, cardamom, and salt.
In a separate large bowl, beat the butter and sugar together with a handheld mixer until pale and fluffy, about 4 to 5 minutes. Add the eggs, yogurt, honey, and vanilla and mix until combined. Add the sourdough starter and beat until the batter is smooth.
Fold the dry ingredients into the wet ones about a third at a time, being careful not to over mix. (Small lumps are okay.)
Spread the batter into a greased 9-inch cake pan and bake for 20 to 22 minutes, until it begins to pull away from the pan. Remove from oven and let cool.

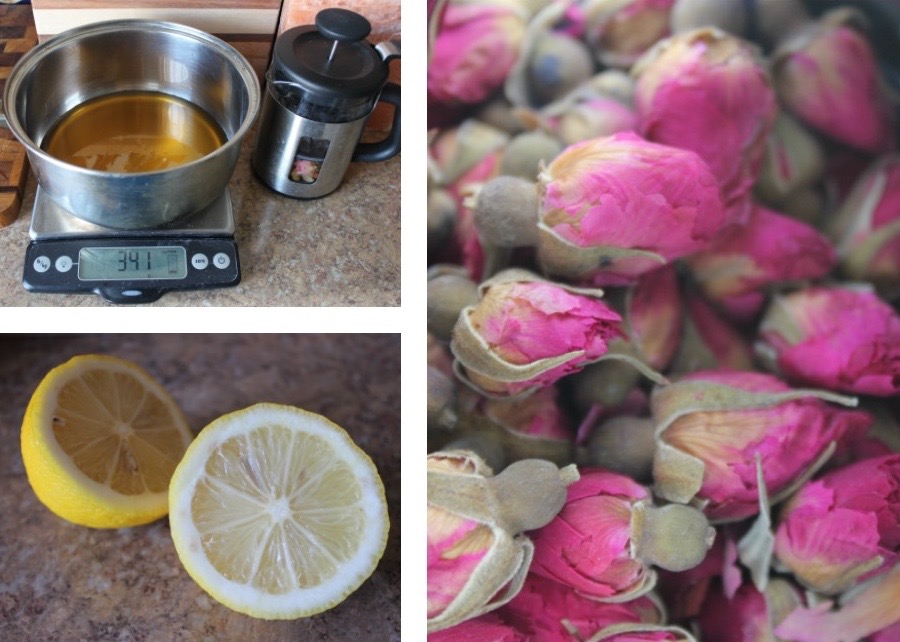
As your cake is cooling, brew your rose tea. I use dried, loose rose buds in a french press so that the flowers have room to expand. Honestly, though, it’s not going to matter much for this application because you’re mixing it with other stuff. So feel free to make tea however you usually do it.
When your tea is ready, measure out your honey into a saucepan over low heat and pour the tea in. Whisk until fully dissolved, then remove from heat and whisk in the lemon juice. Set aside to cool.
Go back to your cake and use a fork or toothpick to poke lots of tiny holes in the top of the cake. Pour the cooled syrup over the cake in 3 or 4 applications, allowing each to soak in before the next.
When you’re done applying the syrup, make the drizzle icing. Use hand mixer to beat together the icing sugar, egg white and lemon juice until you see soft peaks, about 5 to 7 minutes on medium/high.
Using a spatula, slather icing in a thick layer across the top of your cake. You want to be quick enough that the icing doesn’t set mid-way through, and quite generous in your application. Get the icing right up to the edge of your cake so that it starts dripping.
Once the top is covered, assess your cake. If enough icing has drizzled down the sides of the cake on its own, great! If not, use a teaspoon and drizzle manually. Obviously, more frosting = more drizzle, so adjust as needed.
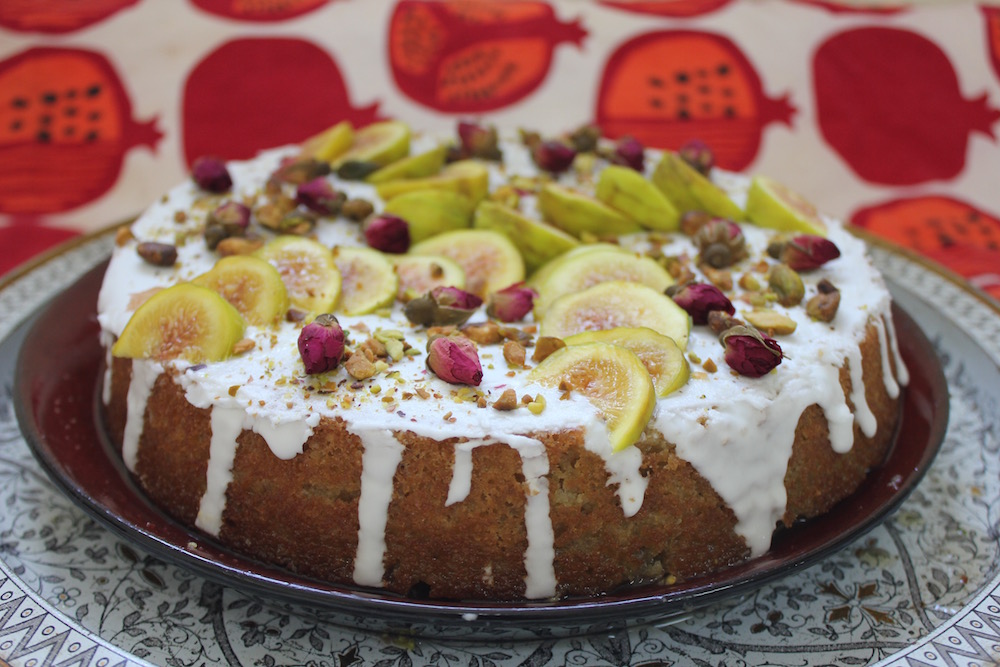
Just before serving, decorate with pistachios, roses and (optional) fresh figs.
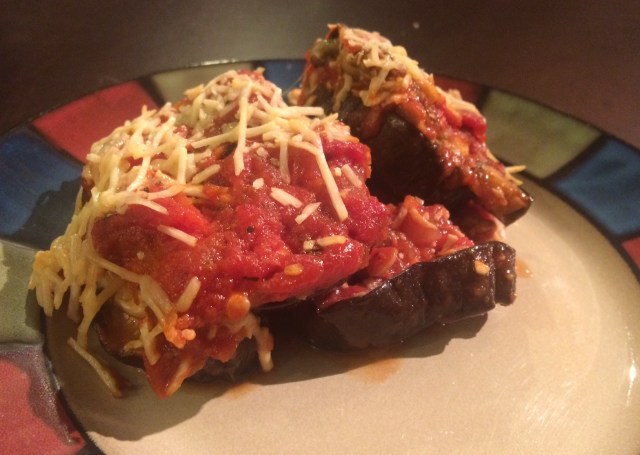
Get Baked: Eggplant Parmigiana with Homemade Tomato Sauce
At its best, eggplant is a creamy, earthy and addicting nightshade. At its worst, it’s a bitter rubbery grey sponge that you’ll never eat again, which is sadly many people’s experience. I’m here to defend eggplant’s honor and prove it can be damn delicious when done right.
What I love about eggplant parmigiana, aside from its rich tomatoey gooey cheesy goodness, is that it pairs perfectly with so many things. Chicken breast, crusty bread, a leafy salad, pasta, white fish, anchovies, quinoa, broccoli, roast cauliflower… it’s the Thelma to whatever’s in your fridge or pantry right now. It’s also the perfect meal on its own.
This particular parmigiana recipe requires you make your own tomato sauce. I’ve chosen Mario Batali’s recipe. If you’ve never done this before, get ready because you’re about to up your whole cooking game.
For tomato sauce to realize its full flavor potential, you should cook it one day in advance. If you choose not to do this then absolutely nothing bad will happen to it or to you. Your saucepan won’t explode. You will not go to cooking jail. Your sauce will still be heads and shoulders above store-bought. But it will not be The Best and that’s what we’re striving for here. I somewhat regret that it took entering my thirties to finally start listening to my mother on this ‘day before’ rule.
Tomato sauce ingredients
- 4 Tbsp olive oil
- 1 red onion, finely diced
- 4 garlic cloves, very finely sliced
- ½ cup carrot (loosely packed), finely grated
- 1 Tbsp dried thyme or 4 Tbsp of fresh thyme
- 2x 28 oz cans of whole peeled tomatoes, ideally imported from Italy*. Remove the top stem part of each tomato and crush by hand. Keep the juices.
* Italian-grown tomatoes are typically more flavorful than American-grown, and mind-blowing in recipes like this where tomato is the MVP. I used kinda pricey brands in this post however my go-to are Divella tomatoes, which are amazing and only $1 per can at my local store.
Eggplant parmigiana ingredients
- 3 large eggplants, cut in round slices half-inch thick
- Grated mozzarella, 1-2 cups
- Grated parmesan, 1-2 cups
- Pre-cooked tomato sauce
- Salt

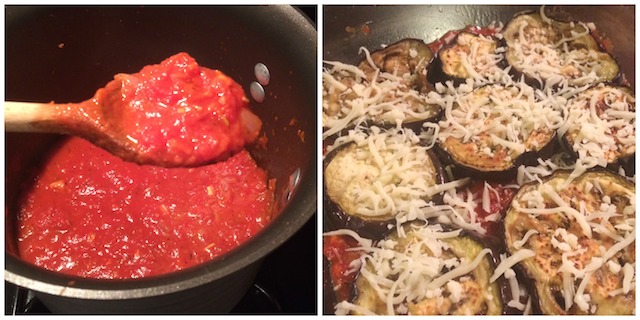
Day One: Cook the Tomato Sauce
(Watch a video demonstration here)
Put a large saucepan on a medium heat.
Add the olive oil to the pan and once it’s almost smoking, toss in the onion and garlic. Let it cook for 8-10 minutes, stirring frequently. That’s a long time to stare at a saucepan but resist the urge to rush this step. Only move on once the garlic and onion has gained a light brown caramelised color and glossy sheen.
Throw in the grated carrot and thyme. Let it cook for another 5 minutes, stirring occasionally.
Add in the tomatoes and juices. Brace yourself for splatter. Turn up the heat to high and bring the sauce to the boil. Reduce it to a low simmer and let it cook for about 20 minutes, or until the sauce thickens to an oatmeal-esq consistency.
Let the sauce cool and store it in the fridge overnight or for at least 8 hours.
Day Two: Make the Parmigiana
I’ve always believed that the (non-)secret to soft creamy eggplant is sprinkling salt over the flesh and letting it sit for 30 minutes. However, there are people in this world who swear that salting eggplant is a waste of time. Take a moment to decide what kind of person you’re going to be. If you’ve chosen to be right, here’s a video on how to salt eggplant.
Pre-heat the oven to 220 Celsius / 430 Fahrenheit. Line two baking dishes with foil and spray/brush olive oil on the surface.
Lay down eggplant slices and bake for 15 minutes. Watch the undersides like a HAWK because eggplant burns FAST.
Once 15 minutes is up, flip the slices and return to the oven for another 10 minutes. If some of the slices turn a darker color than desired, don’t stress! They’re gonna get coated in cheese and sauce anyway.
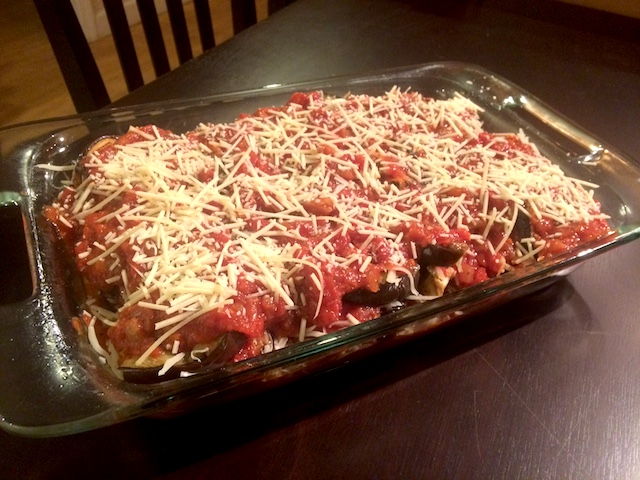
Once the eggplant is ready, start assembling the parmigiana in an oven-friendly dish (9×13 inch or so).
We’re striving for two layers here, with ingredients laid down in this specific order:
Sauce, parmesan, eggplant, mozzarella, sauce, parmesan, eggplant, mozzarella, sauce, parmesan.
First up, scoop some tomato sauce into the dish and spread it to cover the surface. Only use a thin layer; you don’t want to drown the eggplant. Sprinkle some parmesan on top.
Next, lay down some eggplant. You don’t need to create a solid layer; leave about an inch or so of space in between the slices. Follow with a sprinkle of mozzarella, then repeat the process.
Pop it in the oven and 25 minutes later you are DONE.
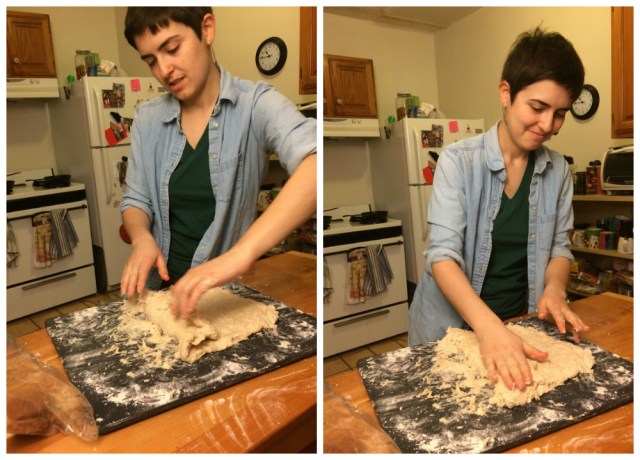
Soggy Bottoms: Rough Puff Pastry Is Like Classic Puff Pastry, But Easier
Welcome to Soggy Bottoms, where, lacking a tent in the British countryside, Autostraddle writers attempt to bake things inspired by The Great British Bake Off in their own homes, to varying degrees of success. This month, Maddie and Audrey made rough puff pastry.
About 90 percent of the foods they make on the Bake Off are random but extremely specific European desserts that I’ve never heard of. It’s exciting to peer into a world of carbs beyond cake, pie and things from a Pillsbury can. So when I went to visit Maddie in Philadelphia, we decided to take on one of the most consistently challenging recipes on the show: Pastry. Y’all, I’m not even sure I entirely knew what constituted a pastry until now. But I can tell you: It’s mostly butter and sweat.
Y’all, this is Maddie writing now, and I would just like to add that usually, when I’m cooking or baking, I work alone. I am not… the best… at sharing that space. Throughout this process, Audrey was very patient with me and my propensity to be a “kitchen top.”
So, minus a few moments of panic (the salt, the salt!) we came through this challenge with our selves and our friendship unscathed. But did the recipe work? Read on to find out and learn to make your own.
Ingredients
- 3 (THREE) sticks of cold butter (24 Tbsp)
- 2 ½ cups flour
- ¾ cup cold water
- ½ tsp salt
Tools
- pastry blender
- sharp knife
- rolling pin (if you don’t have a rolling pin, a wine bottle without its label works JUST FINE
- cutting board
- saran wrap (“cling film” if you want to keep it British)
Method
Make sure your three sticks of butter are cold, then use a sharp knife to cut the butter into small (roughly ⅓ inch) cubes.
Sift the flour and butter.
Put the cubes in a pile on the cutting board, and dump all the flour on top of the butter.
Use the pastry blender to cut the butter into the flour, until you have a relatively uniform crumbly mixture of flour and butter.
Arrange the flour/butter mixture into a mound of sorts with a little divot, like a volcano with a crater at the very top. Add about a third of the cold water and mix it into the dough. Repeat the water-adding process twice more. The dough should be moist and roughly held together; however, it should not look anything like your mental image of puff pastry dough yet.
Audrey used the pastry blender (also called a pastry cutter) to chop the pile of flour, butter and water into a mass. This process feels endless and useless at first, but with patience you will achieve greatness.
It’s time for your rolling pin! Or your wine bottle. Roll out the dough into a flat sheet. It won’t look smooth yet! That’s ok.
Once you have a flat sheet (it’ll still be piecey, but you’ve just gotta trust the dough that it’s gonna work out), fold it in thirds like you would if you were folding a letter.
We were not sure about the first rounds of folding. It didn’t seem like this sticky pile would ever look like food. But Maddie kept up her spirits about it.
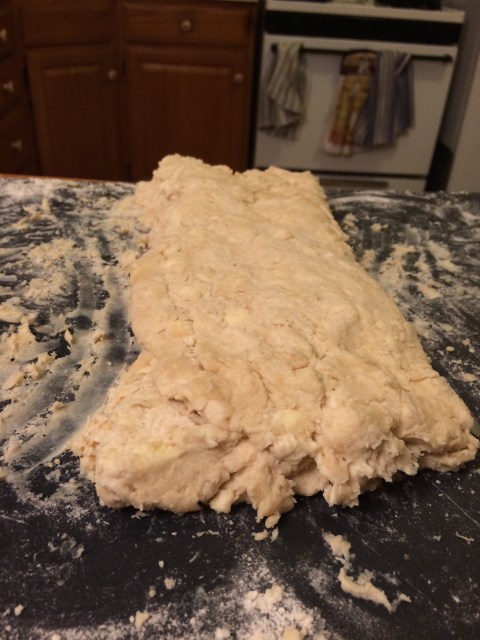
This is what we got after the first turn.
Then use your rolling pin to flatten it out again, and then fold it like a letter again.
Repeat those steps two or three times (each rotation is called, in baking terminology, a “turn”).

After the second turn! The flour and butter are looking more blended, and it’s getting easier to fold. Sprinkling the cutting board with flour definitely helped.
This is the process called “lamination” – it’s how the layers develop. If you were making real puff pastry, you’d be laminating a literal sheet of butter between sheets of dough, but this is ROUGH PUFF (ruff puff? rough pough?) and it’s a lot less precise and therefore it’s easier for the first-timer. Like you. Like us.
By the second or third turn, your dough should finally look like the pastry dough you’ve been imagining: a smooth and flexible sheet that doesn’t stick to anything or itself.
Maddie’s friend made us very strong cocktails at dinner so Audrey was extra pumped about this dough.
Fold it again and wrap it in saran wrap; then chill it in the fridge for half an hour. Then give it two or three more turns. After this, chill it for at least another half hour. You can use it right after the half hour, or leave it for up to three days (we left it overnight).
If you leave it for more than the half hour, you might want to let it soften up out of the fridge for a few minutes – I tried to unfold it immediately, but it broke into pieces, so I decided to leave it folded and roll it out again. That worked fine, too.
NOW YOU HAVE A ROUGH PUFF PASTRY DOUGH! AMAZING!

A M A Z I N G
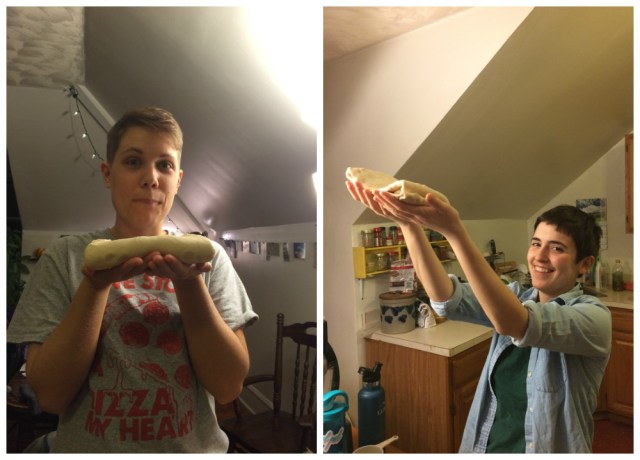
Please do not forget the very important step of posing with your dough.
But what are you going to do with it?
We went the savory pastry route, using this recipe as inspiration. We caramelized some thinly sliced onions and peppers and let some goat cheese get nice and soft.

Caramelizing onions always takes longer than you think it should, but I promise it’s worth it.
Then we cut our pastry into eight pieces (this whole “equal pieces” thing is a combination of baking technique and geometry I have yet to master and that continues to present baking challenges to me).
We scored edges into them using a butter knife.
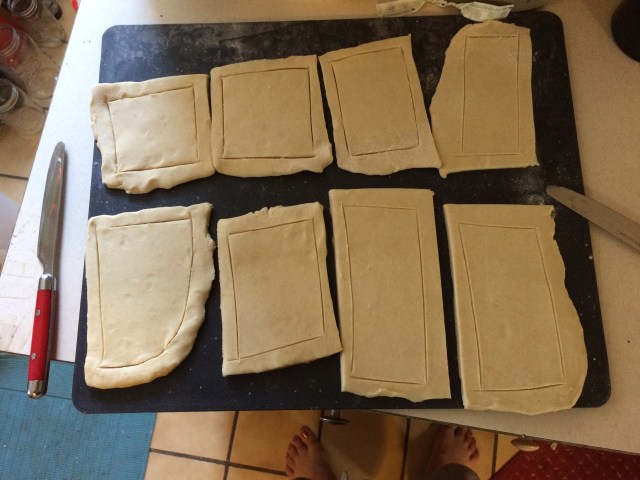
This is after we cut off the wonkiest edges.
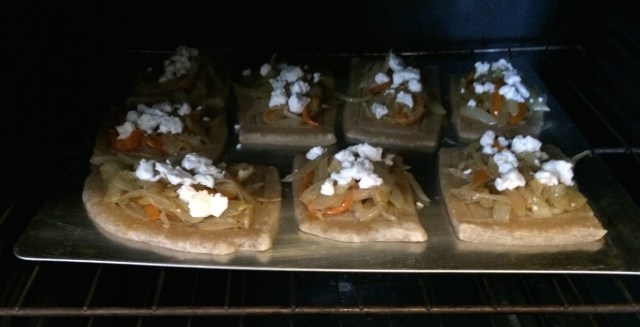
Then we pre-baked the pastry at 350 degrees for about 10 minutes, and then the idea was that the middle parts would “push in” and the outer edges would puff up more to make a crust…
That concept kind of worked. At any rate, we then loaded the pastries up with the onions and peppers and dolloped goat cheese on top, and then we baked them for another 20-30 minutes.
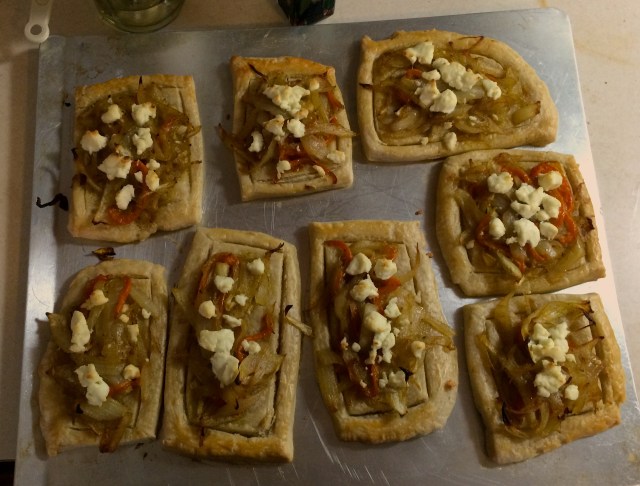
The little pastries that could~
When they came out, it was the moment of truth: WOULD THE BOTTOM BE SOGGY? That is, after all, the only question that matters. It’s the “real challenge” of this whole process.

via HuffPo
The verdict was…… NOT REALLY!
Overall, the bottoms were mostly crisp! They were a littttle greasy (remember how there are 3 sticks of butter in this recipe?), but the bottoms themselves were not overly soggy. The top was golden, and the dough had developed layers and puffed up!

Look at that crispy bottom! That’s the crispiest bottom that ever bottomed.
The inside was another story. Imagine Paul Hollywood saying, “it’s not cooked,” and you have a pretty accurate representation of what we were dealing with. Overall, I think they could have pre-baked longer, because the wet ingredients on top stopped it from being able to cook through entirely.
For a first attempt at rough puff pastry, though, I’d say we did ok. Follow this recipe at home and see what you come up with! Audrey ate one at my house and then another one on the plane and they said it held up as well as you’d expect a pastry in a ziploc bag in a backpack. My roommates inhaled them. I ate two despite severely overestimating how much butter my lactose intolerant stomach can stomach. So if those aren’t endorsements for a solid first swing at rough puff pastry… I dare you to do better.
…no but really try to make them and come report back on how it went.
Soggy Bottoms: How I Mastered The Fine Art of Making English Muffins
Welcome to Soggy Bottoms, where, lacking a tent in the British countryside, Autostraddle writers attempt to bake things inspired by The Great British Bake Off in their own homes, to varying degrees of success.
Have you seen The Great British Bake Off? If you haven’t, you’re missing a reality show that manages to be entirely dignified, while simultaneously packing in a lot of dry British gender-nonspecific sexual innuendo. But my favorite thing about The Great British Bake Off is that it has inspired me to start baking!
However, in this baking endeavor, I have discovered that, while anyone can bake a thing, mastering all the components that add up to produce a good-quality baked good is a refined craft that is much easier said than done. Maybe it looks good, sure, but is it cooked all the way through? It might taste good, but if the bottom is soggy, a kind-but-honest elderly British woman might shake her head at you with the kind of disappointment that makes you feel ashamed of yourself.
Bake Off judge Mary Berry sets high expectations. via HuffPo
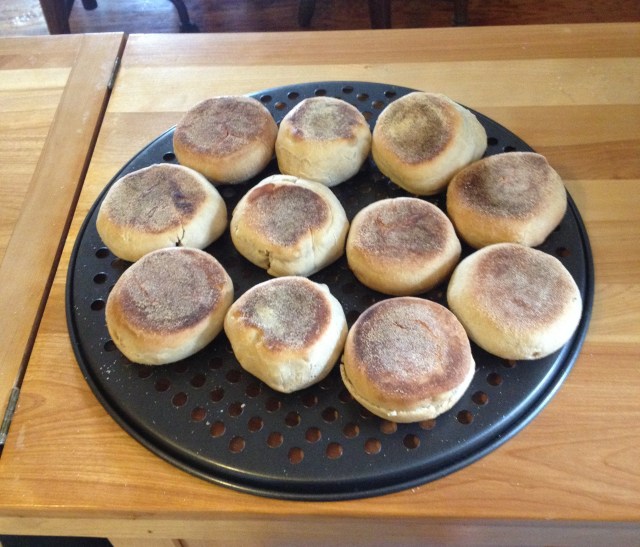
So today, I’m going to tell you all about my attempts to bake English muffins, inspired by a Bake Off technical challenge set by judge Paul Hollywood. While English muffins are pretty much guaranteed to not have a soggy bottom, there are still plenty of opportunities to go wrong.

Bake Off host Sue Perkins takes everything VERY SERIOUSLY. via Cosmo
Who bakes English muffins? Don’t they just come out of the pack with all their nooks and crannies, ready to lay the foundations for tasty meals like egg sandwiches and English muffin pizzas?
Turns out, there’s a reason no one bakes them: they’re hard to bake! Six weeks and about ten batches after my initial muffin-making attempt, I have developed a reasonably passable English muffin recipe that would probably land somewhere around the middle of the pack in an early-season GBBO technical challenge. Read on for that recipe and some of the lessons I learned about how not to make an English muffin in the process.
I feel you, Tamal. via Giphy
First Attempts
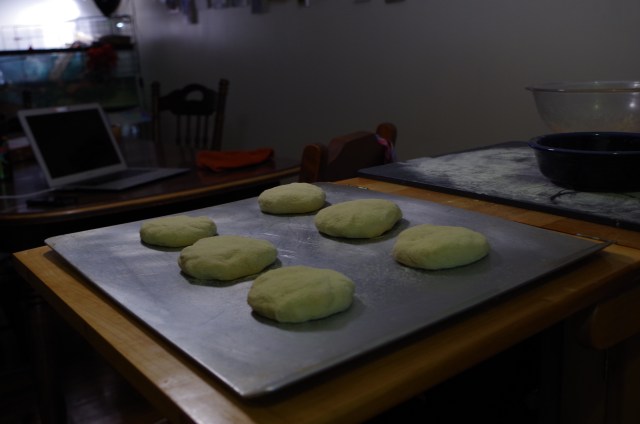
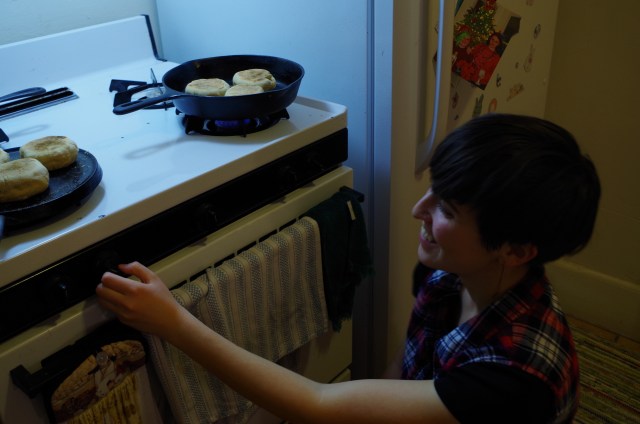
My first batch was ok. The dough was really wet and sticky and hard to work with. My roommate came in while I was up to my elbows in dough and laughed at me. But after the dough rose for a few days, I cooked them and they came out looking like English muffins! But in my haste to get away from the super sticky dough, I didn’t knead it enough, and so they were lacking the nooks and crannies I’d hoped for.
I was not deterred. I was going to get these guys right.

Just like Nadiya. via Giphy
I’ll just do it again and knead it some more, I figured. The second dough came out looking great. I left it to rise. The dough puffed up. I formed them into circles and left them to proof another time. They puffed up more. I put them on the stove, because that’s where you cook English muffins. The outsides cooked. The insides were doughy and raw. Turns out they’d puffed up WAY too much. We cut them open and toasted them to dry them out. They were still doughy. We ate them anyway.
The third batch was much the same, but I was determined they would cook through. I resorted to some creative measures:

Bet you’ve never had an English muffin cube
For batch four, I popped them in the oven at the end to finish cooking through. That worked, but wasn’t very satisfying. English muffins are supposed to cook on the stove and only on the stove. I prodded at my muffins in despair, wondering what I needed to do to make them cook all the way through. At this point, I’ve watched so much GBBO that I always hear Paul Hollywood’s critical voice in my ear while I’m baking.
“i just keep poking at the middles and hearing his voice say, “raw”
”
– @madderka, determined to succeed
— laneia (@grrreen) February 11, 2016
@grrreen @madderka “Don’t eat that, Mary.”
— Heather Hogan (@hhoagie) February 11, 2016
The Paul Hollywood Approach
I decided it was time for a different recipe. So I went to the source: Paul Hollywood’s technical challenge recipe.
I stayed away from this initially, because most other muffin recipes had a much longer rise time, and I figured that since I didn’t have the time constraint of a technical challenge on GBBO, why impose it on myself to the detriment of the muffins? But a longer rise wasn’t having good results, so I decided to give it a shot.
The dough recipe on this one is a lot different than the first: there’s an egg involved, and slightly less flour. The dough ended up being a lot sturdier and less sticky.
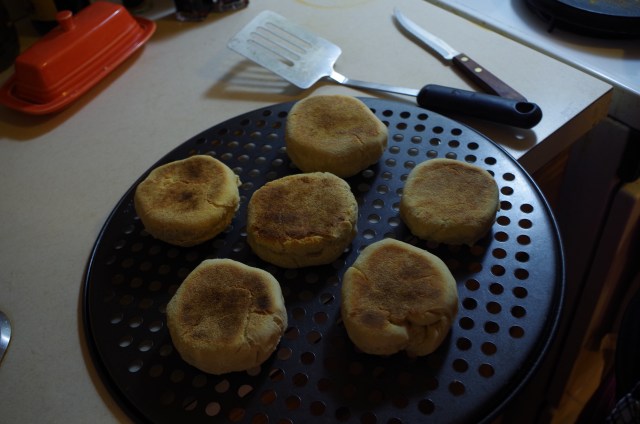
I made these twice, because the first time I accidentally dumped way too much salt in. The two batches came out roughly the same: they were pretty small, and while they did cook through, they didn’t have the nooks or the crannies, and the taste wasn’t that interesting.
Uniform in size and color, but otherwise kind of unremarkable.
So I turned back to the depths of the internet, where I found Sheryl’s recipe, developed in direct response to the lack of nooks and crannies she’d had with other internet English muffin recipes. They were the best bake of the three internet recipes I tried. The trick with this recipe, Sheryl explains, is to actually leave it proofing long enough to overproof so that a lot of air pockets develop – this is something that you should try to avoid with bread, but with English muffins it’s exactly what you want in order to form the nooks and crannies. But Sheryl’s recipe had way too much yeast and they ended up tasting sour without the flavor depth of sourdough.
Maddie’s English Muffin Recipe
So I went rogue. I took all the components of each recipe that I liked, and I made my own, introducing a new component: bread flour. My first attempts all used all-purpose flour, but bread flour is more glutinous, which means it’s more elastic when you knead it, and ultimately makes a sturdier type of structure when it’s baked.

via DK
Ingredients
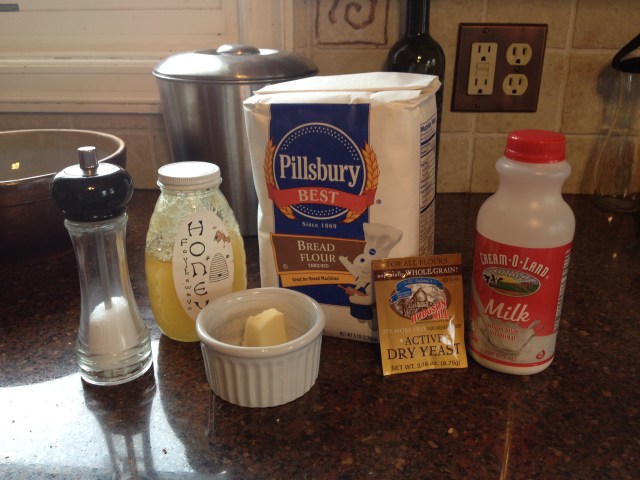
Not pictured: semolina.
1 1/4 cup milk
1 tbsp butter
1 tbsp sugar or honey (I used honey this time, but I’d probably use sugar if I did it again)
1.5 tsp active dry yeast
2 cups strong bread flour
½ tsp salt
semolina (about 2 tbsp)
The Process
Heat the milk on the stove and once it’s simmering, mix in the butter and the sugar with a small whisk. Transfer it into a glass bowl or measuring cup and leave it to cool. Once it’s lukewarm, put the yeast in and stir it again. Let it sit for 10 minutes or until the yeast bubbles up.
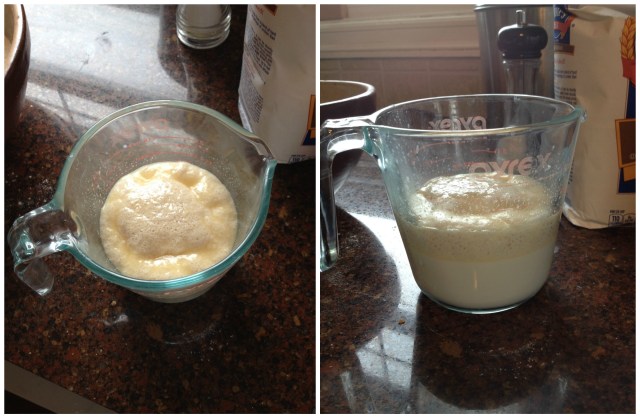
Bubbled yeast from two angles.
Mix the flour and salt in a glass bowl, and then mix in the yeast and milk mixture using a wooden spoon. When it gets too hard to mix with the spoon, use your clean hands to bring the flour and liquid together into one doughy mass with all the flour incorporated, and then knead it either in the glass bowl or on the counter.
First it’s all floury and piece-y, then it’s a glob, then it’s a smooth ball!
You’ll know it’s done kneading when it can pass the “windowpane test,” which is when you pinch a golf-ball-sized chunk of dough off and pull it apart. If you can see light through the dough without it just breaking, then you know the gluten has developed it enough.
This is what a windowpane looks like… right?
Put the dough in the glass bowl and cover it with a cloth or plastic wrap. Leave it for about eight hours outside the fridge. (If you do this right before you go to bed, it’s good timing for making fresh English muffins the next morning.)
Before rising
The dough will rise…
It doubled in size!!
…and then fall again.

Not so big anymore
That’s the goal: to get it to puff up and then sink back down. If you were making bread, this would be considered “over-proofed,” and it would leave your bread with big giant air bubbles. But with English muffins, that’s exactly what we want: big giant air bubbles, aka “nooks and crannies.”
Rad nooks and crannies developing!
Then, tip it out — you should be able to hold it in one hand — and GENTLY stretch it into a large flat blob.
Feel free to ignore the change in setting here and trust that i’m showing you the pictures that illustrate this process the best.
Then split it into six pieces. I usually do this with a sharp knife.

Put the two tablespoons of semolina flour in a small bowl you’ll be able to dip the raw muffins into.
Shape each of the six pieces into the roundest shape you can. Techniques really vary for this part. Some recipes recommend you cut out circles, but then what are you supposed to do with the extra dough? Others will tell you to roll the dough into round spheres, but then, all the air gets squished out of them. I did my best to shape the six pieces into rounds without squashing them too much.
Then plop each one in the bowl of semolina to get a thin coating on the tops and bottoms. The semolina keeps the muffins from sticking to the pan.
Once they’re all shaped and semolina-ed, leave them on a tray for 30-40 minutes to proof again. They’ll puff up a little.
And now, the trickiest part: cooking the muffins.
I highly recommend a cast iron skillet for this. I’ve never used anything else. I imagine a typical frying pan would work, too, but the following instructions are based on my experience using cast iron on a gas stove. You might need to adjust based on your specifications.
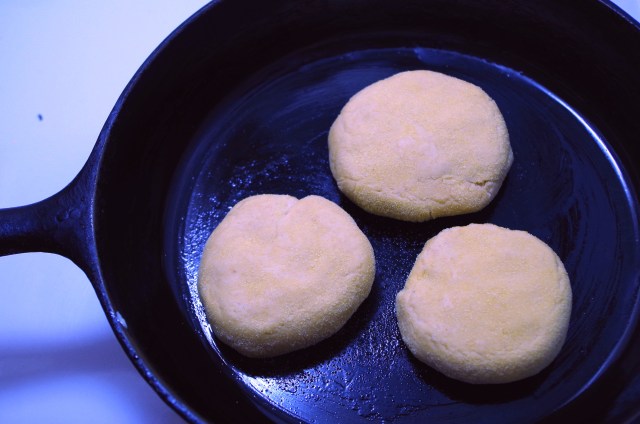
Turn your stove on VERY LOW. Melt a bit of butter into the pan and wipe out any excess beyond a light coating. Once the pan has gotten hot but not extremely hot, place your muffins in (I typically get three at a time in one pan).
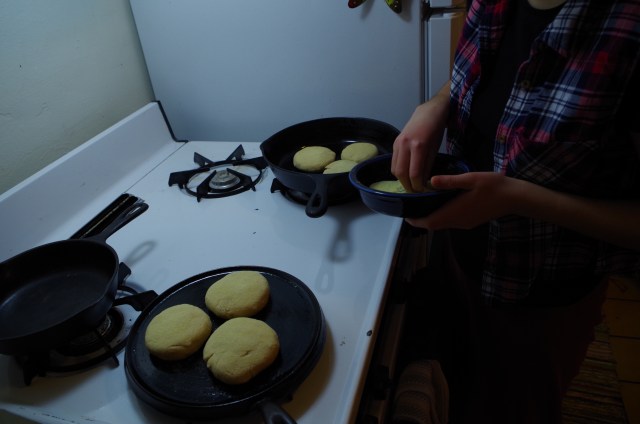
They will cook on the first side anywhere from 10 to 15 minutes. Check them periodically to see if they’re cooking unevenly and move them around if necessary for them to get an even bake. DO NOT RUSH THIS PROCESS. If they brown too fast, they’ll be raw on the inside and Paul Hollywood will tell you so.
But you also don’t want them to burn. So a long slow bake is key. If you actually watch the technical challenge where they make English muffins (episode two of PBS’s season two, but the British season five), they’ll tell you that if they cook for too long, they’ll dry out, but I have yet to encounter dryness as an issue in my desperate attempt to cook them to beyond raw.
Once the muffins are brown on one side, flip them and repeat.
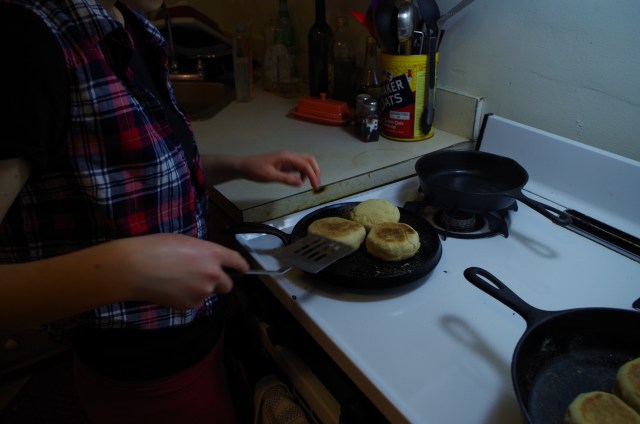
Adjusting the temperature to as low as i can possibly get it while making sure that the gas doesn’t go out entirely
Then take them off and put them on a rack to cool. Let them cool so the middle will be less doughy.
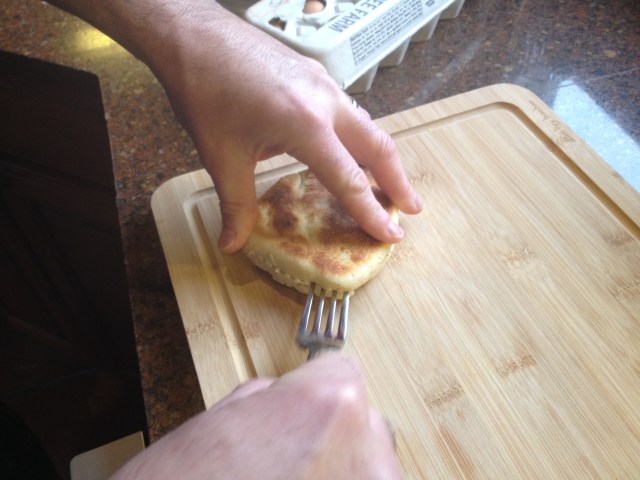
Split them in half and toast them. Then top with whatever you want! The true test is if they will split open with a fork. If they can, and if the edges are “squidgey” as Mary Berry likes, then hooray! You’ve done it!
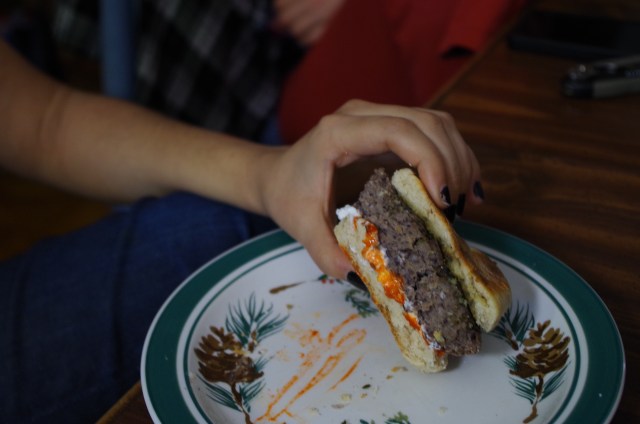
Toast and enjoy with…
…an egg shaped like a creepy bunny…

…a veggie burger…
…and maybe your friend’s turquoise lipstick will rub off on it.

I hope you enjoyed this first installment of Soggy Bottoms!

via The Buzz
Special thanks to Hannah Mogul-Adlin for helping with photography!
Get Baked: Quick ‘n Easy Veggie Sausage ‘n Peppers Sandwich
Hey, do you have five minutes? Good! ‘Cause that’s all you’ll need to whip up this vegetarian sausage and peppers sandwich.
Ingredients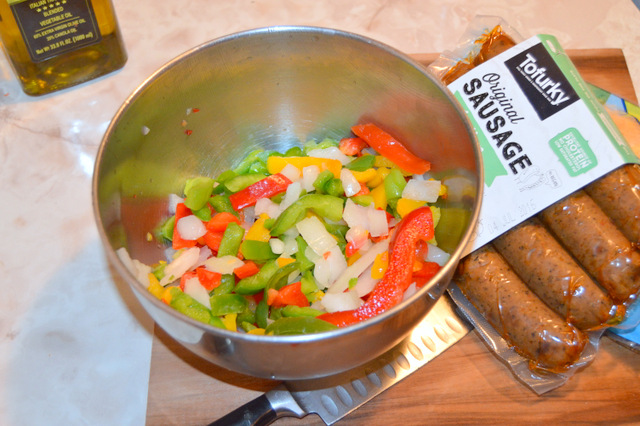
- 3 Bell Peppers, chopped
- 1 Clove Garlic, Crushed
- 1/2 White Onion, chopped
- 2 Italian-Style Veggie Sausages
- About 1/2 Cup Shredded Cheese*
- 1 Hoagie-Style Roll
Directions
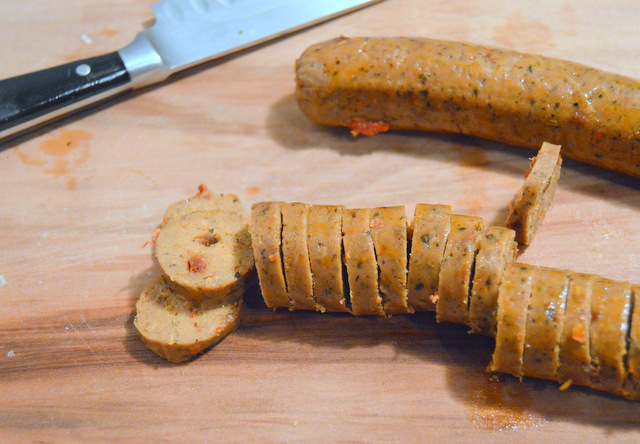
Start by heating some olive oil in a frying pan. Add the onions, garlic, and peppers to the pan and add some water. Cook over medium heat until the peppers and onions are soft. While that stuff is heating up, slice your sausages into nickels.
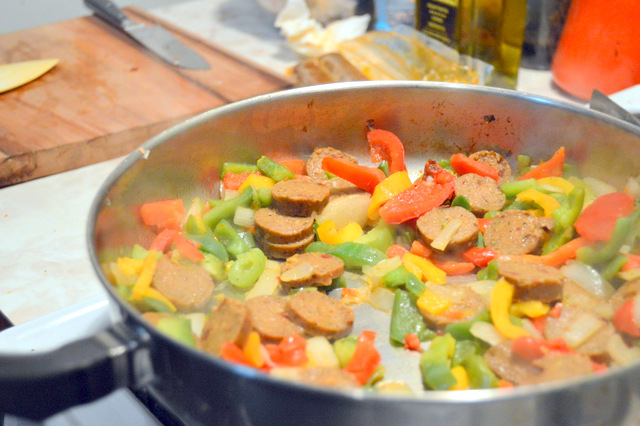
When they’re all done, toss ’em in to the pan and add oil as needed to prevent the ingredients from sticking. The goal is to let everything get a little browned, so don’t fret if they already are!
Cut your roll in half, vertically, without slicing all the way through the roll. Toast it, open, in a toaster oven. (Or an oven. Or a toaster!) Remove the sausage and peppers from the pan and use a soft baking spatula to push them into the roll. Add cheese, then another layer of sausage and peppers. Squish the sandwich down to melt the cheese and then, voila! It’s all ready for you, bae.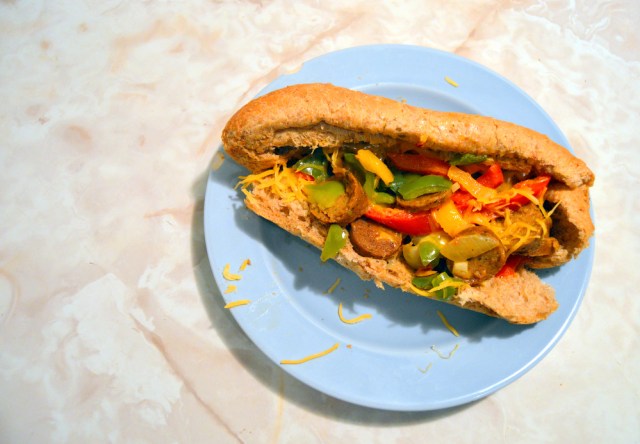
*Everything in this recipe is vegan, minus the cheese. Just don’t add cheese or trade it out for some vegan cheese if that’s your life and dig in!
This Is How We Do It: Living That Fresh Bread Lifestyle
Sometimes I wish I actually could live an Instagram- or Pinterest-worthy life, but we all know that’s not realistic. There is one thing, however, that makes me feel a little bit like my home life is in order; it’s also got the added bonus of making my apartment, however cluttered and terrible, smell like a bakery. That, friends, is baking fresh bread whenever I want to. In fact, there are stretches of time where I bake fresh bread every other day. And I’m busy! So I figured I’d share some of my tips and tricks with you, in case you wanted to live that fresh bread life too.
The Easiest Recipe in the World
My bread baking adventures began when I tried to make bread in a slow cooker, which I found out was a big fat lie after many sad, barely edible attempts. But my desire to enjoy effortless fresh bread didn’t go away with that epic disappointment, so I searched for REALLY easy bread recipes. I found this, the easiest bread recipe in the world.
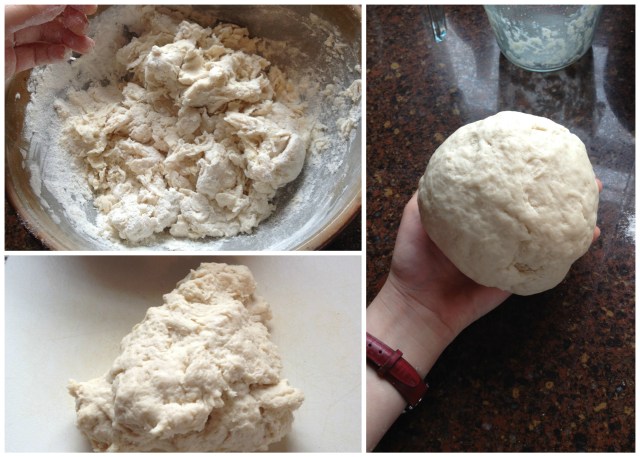
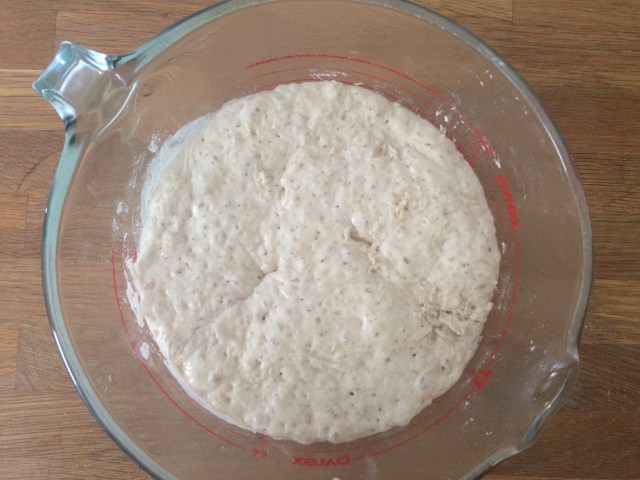
The reasons it’s so easy are a) it’s three ingredients and water and b) it requires no kneading. It’s also really resilient — you can mess it up and correct it and it mostly doesn’t change how it tastes. Once I effed it up and didn’t add enough flour and I still managed to fix it. But it does take quite a long time to rise; at least 12 hours to be exact. You should read through the recipe and follow it for real the first time you make it, but I will let you know the changes I’ve made to it—I whisk together the 3 cups flour, 1/4 teaspoon active dry yeast and 1 teaspoon of table salt even though it calls for 1 1/4 teaspoons. Like I said. I’m busy. I don’t have time for that extra 1/4 teaspoon, and also it doesn’t change the way the bread tastes that I can discern. (This came about by accident because I make this recipe from memory and I remembered it incorrectly.) Then I go ahead and add the 1 1/2 cups of lukewarm water and, instead of using my hand like in the New York Times video, I use a wooden spatula. Otherwise I get all sticky, and I don’t have time for that. Cover it with cling film and let it sit for the rise time — but we’ll talk about the rise time later, when we talk about fitting it into your schedule. First I want to tell you about the tools that have made this go quickly and easily for me (and have cut down on the clean up, too).
My Tool Recommendations
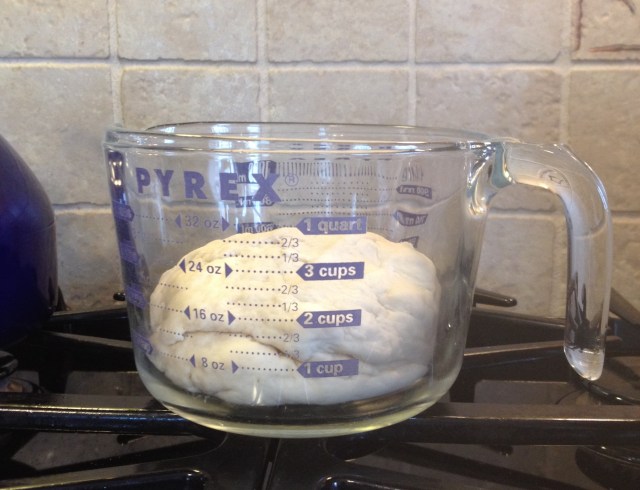
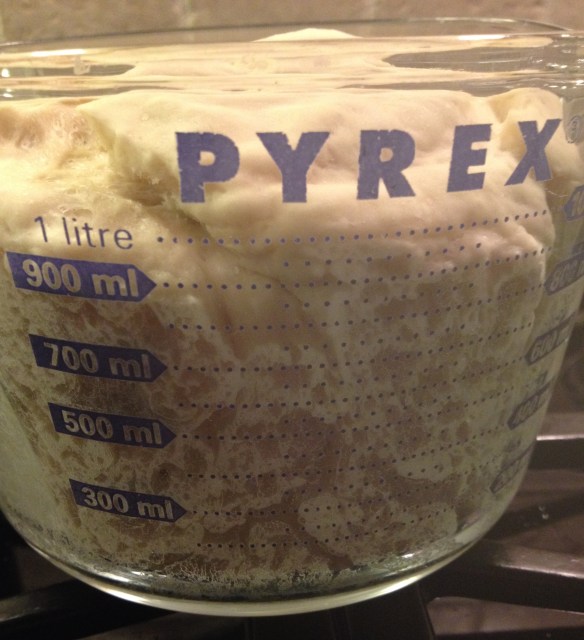
For mixing the bread, I recommend a big ole 8-cup pyrex with a handle on it, so you can turn it out easier. Also nothing sticks to pyrex and, if you have a dishwasher, it’s totally dishwasher-friendly!
I do use cling film, but I reuse the same piece of cling film for the entire process of one loaf because I try not to use too much plastic when I can help it.
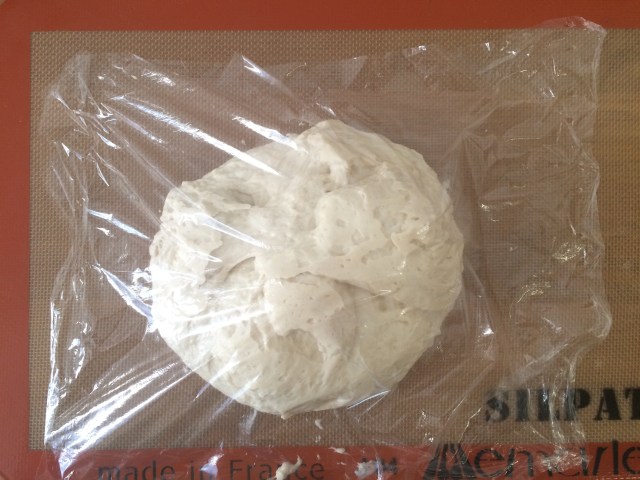
There is nothing better for bread baking than a Silpat mat — it’s a French silicone mat that is supposed to be used in place of parchment paper in the oven, but I use it to turn bread out on because I don’t have to flour it. That cuts down on clean up immensely, because I don’t have flour all over the butcher block and because a lot of the time it just rinses clean and I add the tiniest bit of soap and that’s it. This is one of my favorite kitchen tools literally ever.
So the temperature for bread baking is really high — in this case (and in most cases) it’s 450 degrees F. My oven mitts actually couldn’t handle it, so I did my research and came up with Grill Armor Gloves (they’re good up to 932 degrees F!). I like them because they give me dexterity and also no hot hands.
And last, you do need a 3 to 5 quart, oven-safe-at-450 degrees container with a lid to bake this in. I use a cast-iron dutch oven, and that’s my only concession to something that’s not the easiest. But honestly, aside from having to dry and oil the thing every time I clean it, it’s not the hardest to clean because bread releases really well from it. However, if you want something a little easier to use, get an enameled dutch oven.
Great, now we’re set to actually bake it. But how to find the time?
How To Fit It Into Your Life
Okay, so the thing about this is a rise on this bread can take 12-18 hours, with success even if you let it rise as long as 24 hours. That’s what makes this so good — even if your day changes unexpectedly, probably this bread will still be okay. Now I set my own schedule and prefer to get down to the serious work in the afternoons and evenings (morning for journaling and tea and all that good stuff). So I’m going to give you the times I actually do this, and then I’m going to suggest other times for different sorts of schedules.
7pm the night before: Measure out all the dry ingredients into your favorite pyrex, and whisk them together. Add the water, stir it up and cover it with a piece of cling film. Set aside overnight.
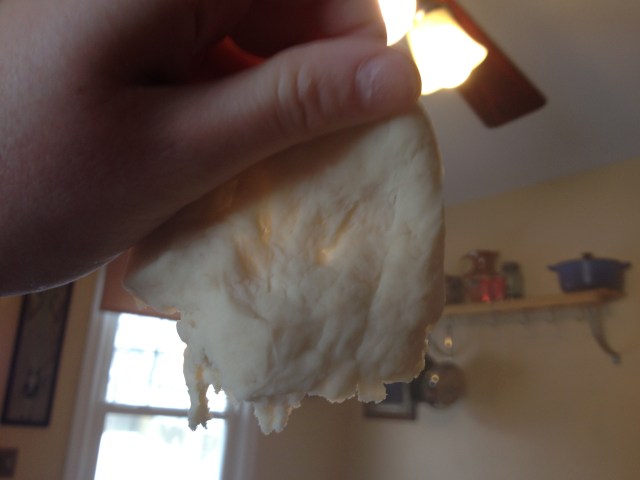
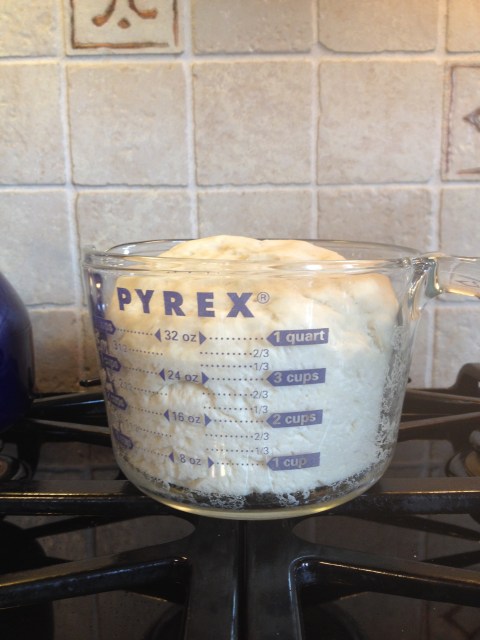
8am or 9am (13 hr or 14 hr rise): You’ll know the dough is ready when the upside is peppered with little air bubbles.
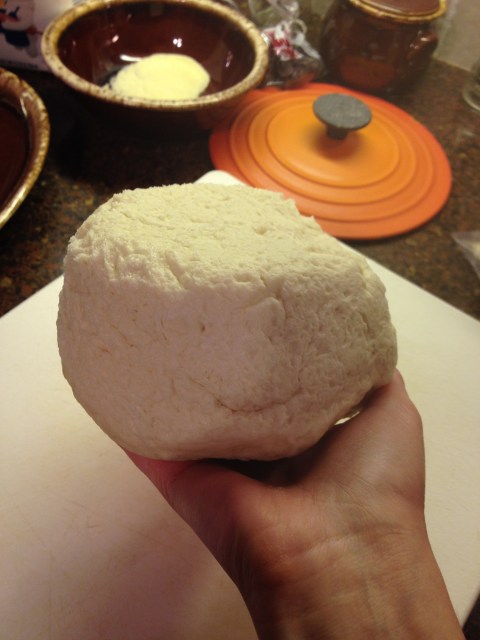
If it looks like that, remove the cling film and set it aside. Turn the bread out onto the Silpat mat. Fold it over itself a few times and cover the resulting dough ball with the same exact piece of cling film. Do it pretty loosely—the dough is gonna get bigger again.
8:30am or 9:30am: Grab the dutch oven or whatever be-lidded, oven safe at 450 degrees container you’re using and put it in the oven. Preheat the oven to 450 degrees. This means that, when you eventually put the bread in it, the cookware will be SEARING hot. That’s key, as it helps form the crust. Doing it during the preheat saves time because you’re busy. Let it sit in the oven, though, for at least half an hour, even though your preheat will likely be done before that.
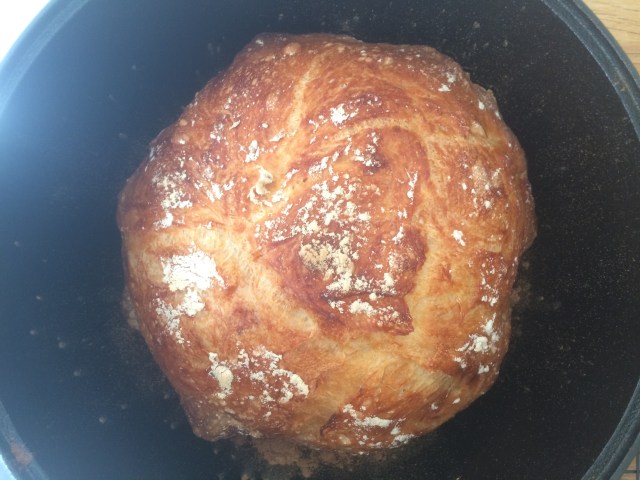
9am or 10am: Remove your dutch oven from your oven oven very carefully using Grill Armor gloves, because as previously mentioned it is SEARING. Using a trivet or your stove, set it down and remove the lid. Sprinkle a little flour in the bottom of it. Fold the dough over on itself a few more times and then legit just toss it right in there. FUCK SHAPING THE BREAD INTO SOMETHING FANCY YOU’RE BUSY AND IT’LL BE GORGEOUS ANYHOW. Just trust me here. Put the lid back on the dutch oven, put it back in the oven oven, and let it bake for half an hour. Inhale deeply over this next half hour because your apartment will smell awesome.
9:30am or 10:30am: Using your Grill Armor gloves or equivalent favorite heatproof hand-thing, remove the lid and set it on a trivet or your stove. Let the bread go for another 15 minutes. This’ll make the crust nice and brown.
9:45am or 10:45am: Remove the bread and put it on a wire rack to cool. This is the actual hardest part: let it cool for real. That’s what forms the lovely internal structure of the bread. If you simply cannot wait until it’s entirely cool, let it stop being searing at least. Listen to the bread crackle as the crumb structure is birthed into this world.
Need bread for the breakfast hours? Start the whole process at 6pm the night before and turn the bread out at 6am, preheat 6:30 am, bake at 7am, bread by 8am. Prefer some fresh dinner bread? Teach at school? Then start the process at 10pm the night before and leave it for a 17hr or 18hr rise and turn it out at 2 or 3 pm. That means bread by 5 pm! Need to run an unexpected errand? NO FUCKING PROBLEM. Once I timed poorly and went to go eat lunch with my visiting mother when I should’ve been baking the bread and guess what? Turned out and under plastic, I was sure it would be over-proved, but NO DIFFERENCE. This recipe is ideal for people who give just the bare minimum amount of shits about bread baking in relation to the rest of your life.
Now I find one loaf lasts me and my fiancée two days. The crust is always better on the first day, and I highly recommend not storing it in anything for that first day. It’ll hold up without going stale. But when you go to bed that night, wrap it in either wax paper or tin foil; I can say with certainty that plastic does it no favors, and neither does a covered cake plate (I was trying everything at the time).
Now I also want to stress to y’all — if you don’t care about eating fresh bread, that’s perfectly fine. No rule exists that I’m aware of that says you have or have not your shit together if you can spend time baking bread. And nothing says that your fresh bread lifestyle isn’t a Saturday-Sunday thang, or other days off adventure; that is also a perfectly valid fresh bread lifestyle. I will also tell you that it is one million times less expensive than buying bread of the same quality (okay, not actually one million times, that’s hyperbole) and if you show up to a party with one of these loaves, everyone will love you especially if you’ve coordinated with someone who has good taste in in cheese.
So what about you? What are your secrets to shoehorning some quality homemade bread into your schedule? Do you have a favorite easiest bread recipe in the world?
Get Baked: Homemade Sparkle Truffles
Note: Disco dust is non-toxic, but (like many other cake decorating products) is not classified as edible. Here is some information for you to consider before making this at home!
Hello, star-crossed sparkle ponies! This Valentine’s day I thought I’d improve your life by sharing a couple secrets of the universe with you. (Or maybe some obvious, indisputable facts? Perspective is everything, friends.) Ready? Here goes:
- Chocolate is an all occasion food. You can eat it whether you’re happy or sad, single or partnered, in love or anti-love. I was recently gifted a bedside table, and the first thing I did was fill the tiny drawer all the way to the top with chocolate. If you haven’t considered this possibility in your life yet, I highly recommend it.
- Homemade truffles are the best and they’re also super easy to make! They’re just balls of chocolate ganache with more chocolate outside. You can add fancy flavors, fillings or elaborately decorate the outsides… but truthfully, you don’t even need to. It’s chocolate! It’s going to taste good. Everyone wins under all circumstances.
Because my main objective in life is to make things as gay as possible, I recently made a batch of truffles coated in a form of non-toxic glitter known as “disco dust.” Behold the glory:

Just in case you wanted to make a batch (you do! you do!), I’ve written up the recipe for you below.
Homemade Sparkle Truffles
base recipe is “Robert Linxe’s Chocolate Truffles” via Smitten Kitchen
Ingredients
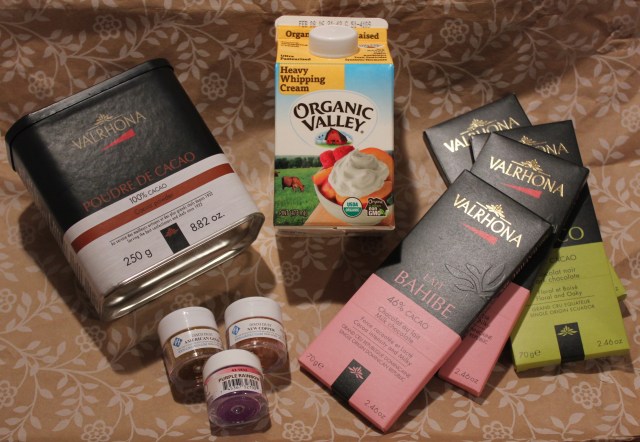
- 11 ounces of semisweet chocolate (the original recipe calls for 56% cacao, Valrhona brand)
- 2/3 cup heavy cream
- Cocoa powder for dusting (optional)
- Disco dust for dusting (optional, but, you know, this is where the sparkle comes from)
Instructions
- Finely chop eight ounces of your chocolate. This is the most tedious step. I tried using a grater, but it wasn’t much faster. Just stick with it. Note: the original recipe calls for Valrhona, 56% cacao. They didn’t have that in my grocery, so I did an equal mix of 46% and 70% cacao. On previous occasions, I’ve used Scharffen Berger 62% cacao, and Icelandic Chocolate 56% cacao. All versions were delicious. Follow your heart.
- Put your finely chopped chocolate in a mixing bowl and set aside. Measure out 2/3 cup heavy cream and bring it to a boil on your stovetop. Let it cool and repeat two more times.
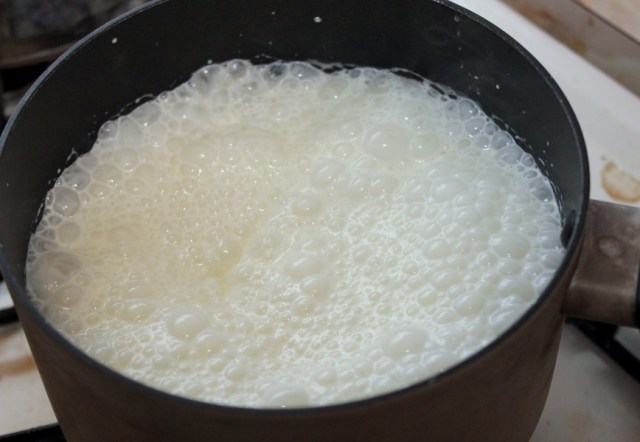
- Pour the cream over your chocolate and whisk into a smooth looking ganache. (It’s okay if there are still little chunks; nobody’s going to see the inside of your truffles anyway. But a smoother texture is generally more enjoyable for eating.) If you wanted to flavor your ganache by, say, pouring in a bit of liqueur, now would be the time. I generally don’t bother.
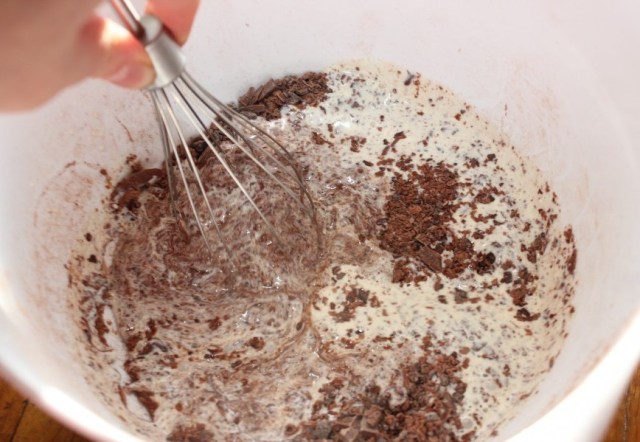
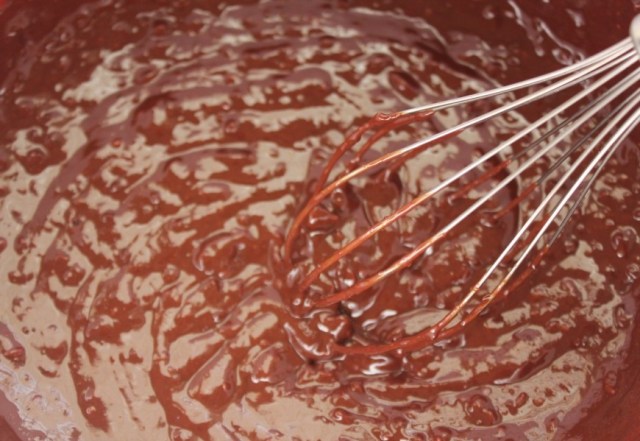
- Let the ganache cool to the point where it can hold shapes. (Mine took the length of one episode of Jane the Virgin, about 45 minutes.) Then put latex gloves on and mold little balls out of the ganache. Place on parchment paper to solidify. I left mine alone in my somewhat chilly living room for three more episodes because I got sucked in. You could also just pop the tray in the freezer for 15 minutes. If you wanted to add nuts or brownie chunks or whatever else you like inside truffles, this would be the step for that. I’m a fan of just straight up chocolate, so I didn’t add anything.
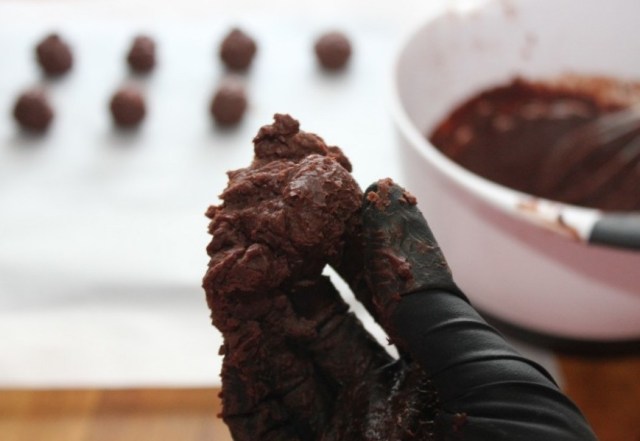
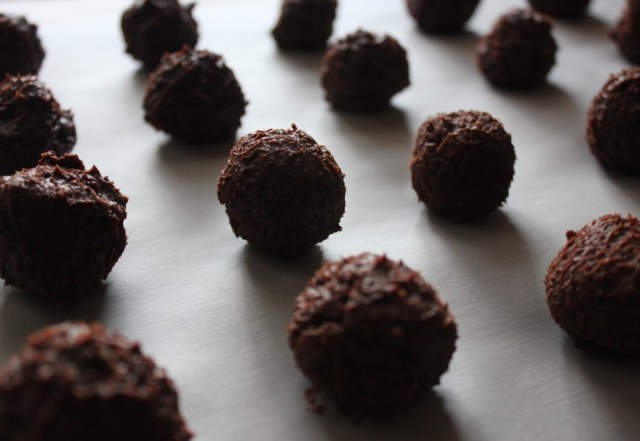
- Once your truffles are firm, get a little bowl and melt the remaining three ounces of semisweet chocolate. Set up your dusting assembly line:
A.) Tray of frozen truffles
B.) Bowl of just-melted chocolate, with a spoon or small spatula in it
C.) A fork and little bowls of disco dust, cocoa powder, or whatever you’re coating the truffles in
D.) An empty, parchment-lined tray
Put on latex gloves and going down the line, lightly coat a truffle in melted chocolate, swirl it in the dusting bowl of your choice for coating, then place it on the empty parchment-lined tray. Repeat until you’ve coated all the truffles. Put in the fridge for a few minutes to let the outer chocolate coating cool all the way before eating. (Or don’t; you’re the boss. But I think the textural difference is very nice when you bite into it.)
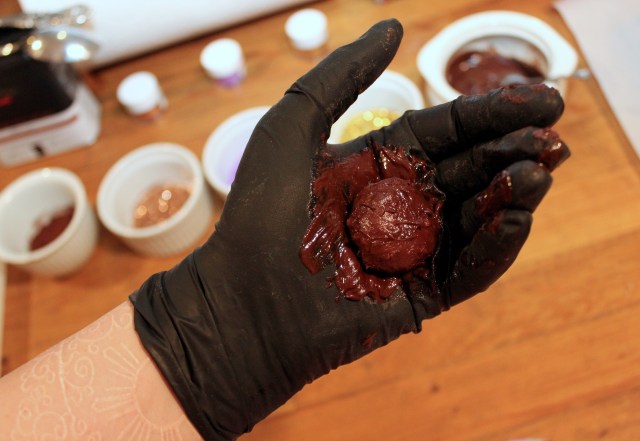
I’ve found that the easiest way to get a delicate coating of chocolate is to plop a ganache ball in your hand, spoon some melted chocolate over it, then roll the ball between your fingers to smear chocolate all over it. If this seems sexual to you, that’s because it is. Truffles are very sexy. Also I got those multipurpose latex gloves at Babeland. - Store your truffles in the fridge, or plate them up all cute and give them to someone special. That person can be yourself.

Eat with gusto.
Holidays and Spice and Everything Nice: A Soul Food Recipe Roundup
Ahh, the holidays! Your auntie whom you haven’t seen since before you got your alternative lifestyle haircut decides that now is the perfect time to ask you about when you’re getting a boyfriend. Your cousin Ray Ray, who is 34, but is still called by his childhood nickname, brings both of his baby-mamas to dinner and they actually got along! Watch out for your uncles though — they’ve been drinking brown liquor since the first game started and now they’re in a heated argument over a game of spades. And yes, Reverend Grandpa, bless his heart, is still blessing the food after 20 minutes.
But it’s all worth it because Granny, Aunt Mae, and everybody’s mama threw down. The spread on the table is something you only get to see once a year, and regardless of the complicated feelings you have about your family, after the the blessing is over there are at least ten minutes of bliss as you fill yourself with some of the best seasoned food you’ve ever had.
Soul food: it’s not just a cuisine, it’s a lifestyle. Soul food is historically rooted in Black American culture and its recipes are decedents of West African cuisine that made their way across the ocean during the Trans-Atlantic slave trade. Just as Black culture is always evolving, I think soul food is evolving too. My granny would never make greens without fat back, but honestly, I don’t know what fat back is and putting that in something I make doesn’t sound appetizing (although my grandmother’s greens are delicious). I’m also including a recipe for Jollof rice, which is a traditional West African dish.
So I guess that soul food is food that’s made from the soul. It’s rooted in the African diaspora, and it’s made with love for people you love. My recipes might be different than your recipes, but what matters is that you make them with good feelings in your heart, good seasonings, and you eat them with good people.
Vegan Collard Greens
Recipe adapted from this one right here. Greens are a classic. Everyone makes them, and everyone thinks their recipe is better than yours. I like my greens a little vinegary and spicy, but maybe you like yours a little sweet. Use this as a base and adjust it to your needs!
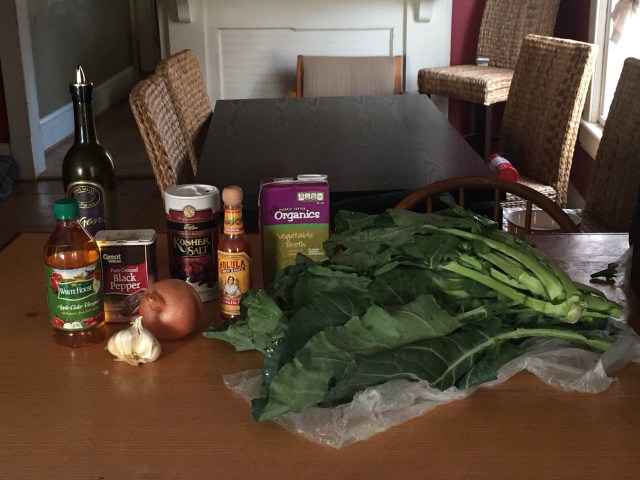
Ingredients:
- 2 tbsp olive oil
- 1/2 large onion, chopped
- 1 tsp red pepper flakes
- 1 clove garlic, finely chopped
- 1/4 cup AC vinegar
- 2 lbs. collard greens, chopped
- 3 cups vegetable stock
- your favorite hot sauce to taste
- salt and pepper to taste
Start by washing your greens. Once you’ve gotten off any dirt/debris that may have been there from the grocery store, then you want to chop them. Greens have a long hard stem that you absolutely don’t want to eat. If you bring greens with hard stems in them to someone’s holiday meal, you will get the roasting you rightfully deserve. Or, if your family is nicer than mine, they’ll probably just not eat them and smile at you. To chop greens, you want to fold the big leaf in half, and cut it directly off of the middle stem. Once you cut off the stem, and your leaf is still folded in half, you roll the leaf, cut it into strips, and then cut those strips in half, if they seem a little long. Give them another rinse, and set them aside.
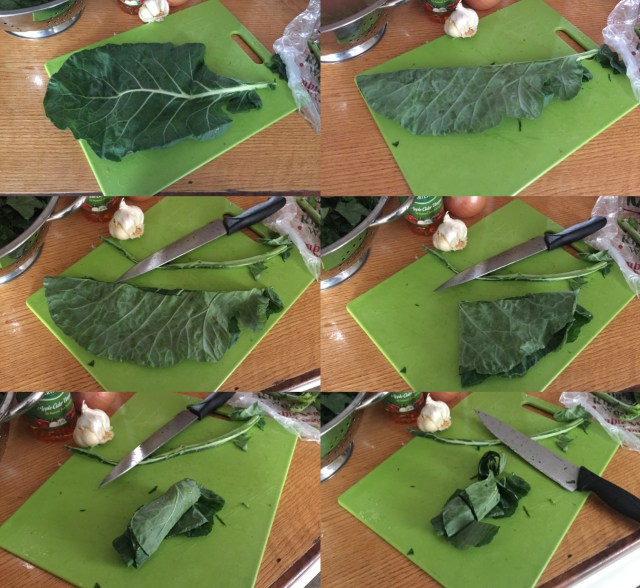
In a big pot, sauté your onions in the olive oil on medium low-ish heat. Another thing you should start doing here is seasoning. Give those onions a little salt and pepper! Don’t be shy! Once they’re nice and translucent (should take about two minutes), add in your garlic and red pepper flakes and cook for about another minute.
Then you want to add your greens to the pot. They will be far too big to fit, but you gotta just stuff them in there. It’s gonna be fine, I promise. Leaving the top off, cook down the greens for just a minute or so, stirring so that you get the onion/garlic/red pepper mixture all throughout your greens. After about a minute, add your vegetable stock and vinegar. Season your greens with a little bit more salt and pepper. Leave the pot uncovered until the liquid starts to simmer (about five minutes), and then cover and cook until the greens are tender, or for about 40 minutes. About twenty minutes in, taste the greens — do they need anything? Maybe some more seasoning. Now’s the time for adding that, and if you’re me, some of your favorite hot sauce. Cover them back up again for another twenty minutes and you’re ready to eat!

Macaroni and Cheese
This is an adaptation of my mother’s recipe, which I believe is like her mother’s recipe, which is NOT like my paternal grandmother’s recipe. Mac and cheese is one of those things people fight about, so while I definitely believe mine is good, don’t tell anyone it’s the best.
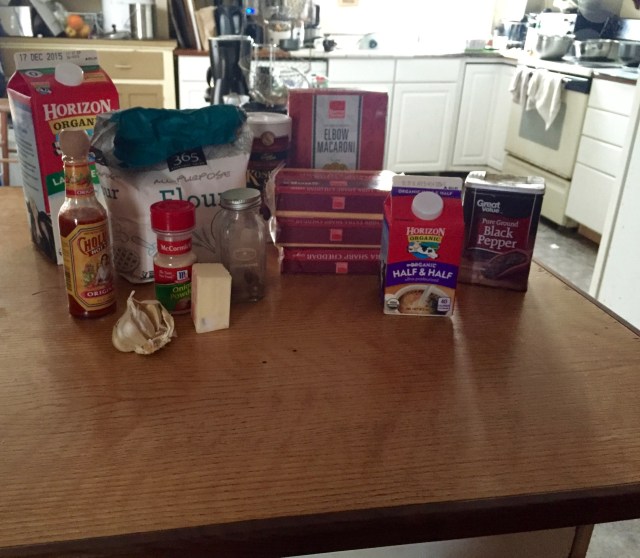
Ingredients:
- 4 cups cheddar cheese, shredded — I used about 3 cups of sharp cheddar and 1 cup extra sharp cheddar
- 1/2 stick of butter
- 3 cups of milk
- 1 cup of cream
- 2 Tbsp AP flour
- 3 cloves garlic
- 1 tsp salt
- 1/2 tsp pepper
- 1/4 tsp onion powder
- 1/4 tsp seasoned salt
- dash of nutmeg
- dash of hot sauce
- 1 lb. box elbow macaroni noodles
Bring a large pot of salted water to a boil to cook your macaroni. Cook it until just under al dente, about 7 minutes. Drain it and set it aside.
While your pasta is cooking, work on your cheese sauce! First start with the butter. Melt it down. I’m not specific about unsalted/salted butter because it doesn’t really matter for this recipe. Just use what you’ve got. Once your butter is melted, add your garlic and get it nice and fragrant. As soon as the garlic is smelling amazing, whisk in your flour until it forms one big ball of butter/flour/garlic. It should look kinda gross (but it’ll taste great!)
Once you’ve got that ball of thickening agent going, add in your milk and cream. Bring those up to a simmer, continuously stirring it. You want to melt that ball down into the sauce so that it can get thicker. Season your milk with salt, pepper, onion powder, seasoned salt, nutmeg, and hot sauce. As soon as it starts to boil, turn the heat to low and add in about 3/4 of all of your shredded cheese.
Stir this until you don’t have weird globs of cheese in the milk, but instead have a luxurious cheese sauce. Take your drained pasta and mix it into your cheese sauce. Pour the cheesy macaroni goodness into a 9-by-9 inch casserole dish. If you’re doing this right, you should have a little bit (okay, last time I made it I had enough for another 9-by-9 baking dish) of macaroni and cheese left over in the pot that you get to eat (or freeze and make later) while the rest is baking. Lucky you!
Cover the macaroni and cheese with the leftover 1/4 of cheese and cover your whole dish in non-stick foil. Put the dish into an oven preheated at 350 degrees Fahrenheit and bake for about 35 minutes on the center rack. After 35 minutes, take the foil off of the dish, and place it back into the oven. Cook for another 10-15 minutes, or until the cheese on top is golden brown and beautiful.
Serve to all of your friends, who, if you pull it off (and I believe in you!), will think you’ve really got your life together.
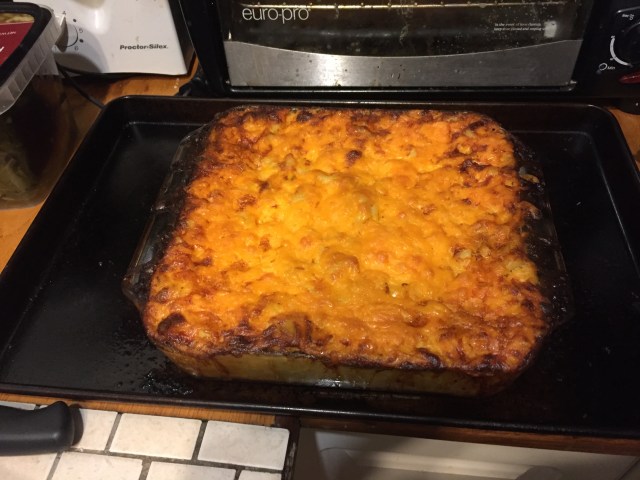
Jollof Rice
Recipe by Tolu T.*
Because both of my parents are Nigerian, our holiday menu ALWAYS includes jollof, which is kind of a jambalaya-paella West African mix. And when I say always, I mean always. This is a non-negotiable. Jollof rice is a staple for Thanksgiving and Christmas (and birthdays. And Wednesdays. Fun fact: I’m actually 29% jollof rice). Typically, I just let my mom do her thing and only help with the prep work, because I have made jollof rice before, and it was not a great experience for anybody. This year, however, Thanksgiving was at my place, so I decided to stretch myself as a hostess by cooking the rice. The end result was a not-too terrible shot at one of my favorite meals.
This recipe is one-fourth jollof rice recipe from an easy-to-follow blog, and three-fourths looking at my mom and constantly asking “IS THIS RIGHT?!?!”
Ingredients:
- 2 cups rice (It helps to soak the rice for 5-10 minutes and then rinse afterward.)
- 1 Tbsp vegetable oil
- 1 cup of hot water
- 4 large tomatoes or 1 can of tomatoes
- Red pepper, seedless and cut
- 1 onion
- 2 Tbsp tomato paste
- Any spices of your choosing (my favorites include 1 teaspoon of paprika, 1 teaspoon nutmeg, and a dash or two of garlic powder).
- 1 tsp of curry powder
- 2 cups chicken or vegetarian stock
- 3 Tbs of butter
- 1 package of small frozen shrimp (this meat choice is optional. I love shrimp, but when my mom cooks jollof rice, she adds in shredded chicken near the end)
- Maggi/bouillon cube (again, shrimp, chicken, or nothing, depending on your personal preference)
- Salt and pepper for taste
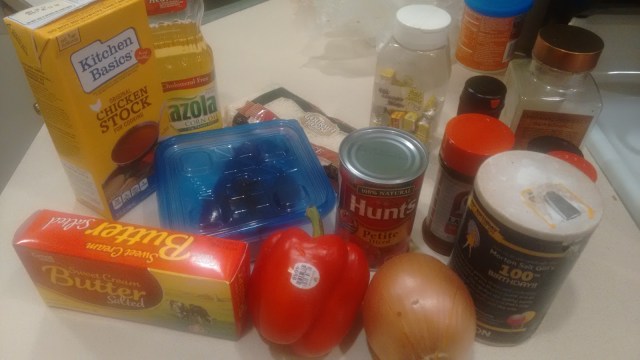
Missing here from the Great Jollof Rice Portrait of 2015: frozen shrimp
Blend the tomatoes, pepper, and onion. At the same time, heat up the oil in a large pot. After about a minute, add in the spices of your choosing (for me, it was the paprika, nutmeg, garlic powder) and the curry powder. Allow the spices to sit for a couple of minutes, and then add the tomato-pepper-onion blend. Add the stock, water, and tomato paste, turn up the heat to high, bring what’s in the pot to a boil for 5 minutes.
Turn the heat down to medium, and slowly add in the rice and the shrimp. Let the mixture steam up for 10 minutes.
Afterward, check to see if the rice is cooked. If not, add more hot water until it is. The key is to add a little water at a time so the rice isn’t overcooked.

Soggy rice check.
When the rice is done, keep stirring it so it doesn’t scrape the pot. At the same time, crush the cube in. JUST A NOTE: my mom and I had a low-key debate about this step for a good five minutes. She was all “What are you doing I add the cube in when I add in the spices,” and I was all “I’m sure it’ll be fine it’s totally okay, don’t worry be happy,” and she was all “I believe in you” with her mouth but her eyes were all “don’t mess this up for us.” Conclusion: our rices taste the same either way.
Add salt and pepper if needed, then add in the butter. Stir again for good measure, and then simmer for another 5 minutes for all the flavors to seep in.
Typically with jollof rice you can serve with whatever your heart desires (fried chicken, moin-moin, salads, turkey, wine, all of the above, etc.).
Congratulations! You’ve made jollof rice!
The best sight in the world
Sweet Potato Pie
Patti Labelle knows it, I know it, and you should know it too: sweet potato pie is better than pumpkin pie. Hard stop. This is a recipe that combines a lot of recipes and is pretty amazing in my opinion. Make it for your girlfriend’s mom and I bet she’ll show you her embarrassing baby pictures.
Ingredients:
- 3.5 lbs. sweet potatoes
- 1/2 stick butter, softened
- 1/4 cup sugar
- 2/3 cup brown sugar
- 2 eggs, beaten
- 1 tsp vanilla extract
- 1/2 tsp ground cinnamon
- 1/8 tsp ground nutmeg
- 1/8 tsp orange zest
- 1/2 tsp salt
- 3/4 cup sweetened condensed milk
- 1 unbaked pie crust (I used this recipe to make mine, but store bought is just fine)
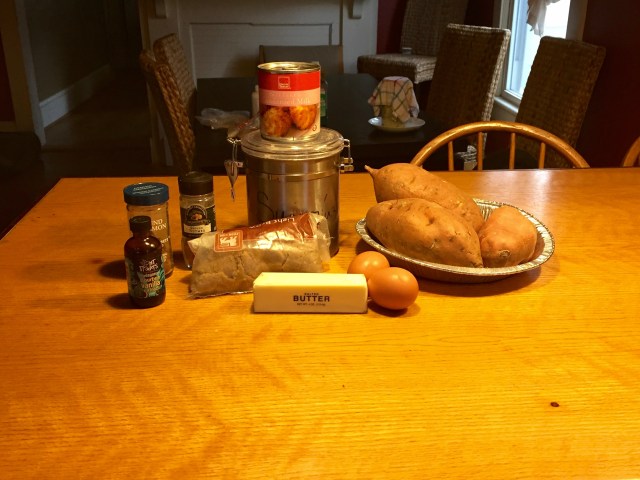
Preheat your oven to 350 degrees Fahrenheit.
Cook your sweet potatoes however you like. I baked mine for an hour in a 350 degree Fahrenheit oven, but you can also boil them or even just nuke them. Once they are tender enough that a fork can easily pierce them, let them cool and then peel them. Mash them up, and set them aside.
In another bowl mix your butter and sugars until they’re creamy and pale colored. Add in the eggs, vanilla, cinnamon, nutmeg and salt. Add in your sweetened condensed milk and beat it all together. I’d suggest using an electric mixer if you have one, but if you’re like me, a whisk will do just fine. And you’ll have arms like Michelle Obama!!
Beat your mashed sweet potatoes into your butter and egg mixture. Make sure it’s not lumpy, but if it is, I bet people will still eat it, because sweet potato pie is delicious. Pour your mixture into an unbaked pie crust that you’ve rolled out and bake on the bottom rack of your oven for about one hour. A fork should come out clean when inserted into the pie.
Makes two pies.
Serve warm. Get your life.

*Tolu Taiwo is a Nigerian girl currently residing in Tacoma, WA, and this is her first time making jollof rice that hasn’t brought any family members to tears of sadness. All tips are welcome.
Get Fried (for Hanukkah!) with Latkes
feature image via shutterstock
As a high-holiday Jew whose strongest religious connection is with Jewish cooking, latkes are one of my most visceral foods. They smell like my birthday and my mom making my favorite food and eating with my hands standing next to the stove while I wait for the next batch to fry. Holidays are a weird time for me living thousands of miles away from my friends and family, and making my tiny one-room apartment smell like fried potatoes for days and days helps me feel a little less far away.
Latkes are also really easy, can be made with everything found in a severely understocked kitchen (hi, I’m single and I live alone, why do you ask?), and everyone likes them because they are literally just fried potatoes and everyone loves fried potatoes. Not that you need any more reasons to cook latkes, but it’s Hanukkah this week and latkes are a traditional food so you get to eat fried potatoes under the guise of tradition! This recipe makes about 15-20 latkes.
Ingredients
- 4 large Idaho potatoes (otherwise known as the normal potatoes found in every grocery store across America, but found in exactly zero stores in all of Switzerland so I used smaller potatoes and they came out fine)
- 1 onion (white or yellow)
- 2 eggs
- 1/4 cup of flour
- 1/4 cup of oil (I used sunflower, pretty much anything is fine)
- salt and pepper
- optional: lemon juice, if you’re not cooking them right away
- a cheese grater, or a food processor if you’re fancy
- a frying pan
- paper towels
Preparation
First step: peel your potatoes. As I peel them I put them in a bowl of cold water after they’re peeled which keeps them from browning I think? We always put them in cold water and at this point I’m too superstitious not to.
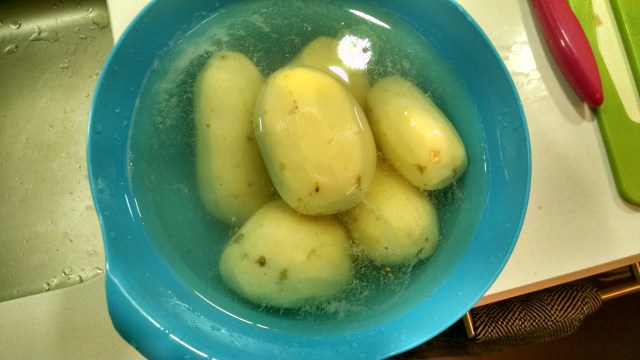
They get more delicious I promise
Grate the potatoes into a bowl using a regular cheese grater, or if you have a food processor you can use that. I’m not even going to get into the pulverized versus shredded debate, but I am #teamshredded. Peel the onion and grate the onion into the bowl as well (warning: this will get onion juice everywhere. I was determined to continue grating despite impaired vision and accidentally grated my thumb. I instead recommend these stylish onion goggles).
Once you’ve grated the onion and potatoes, you have to press out the extra water, which makes the latkes fry better. I do this by covering the top of the bowl in a couple paper towels and pressing down hard a couple times. You could use a dish towel if you’re the kind of person who regularly washes their dish towels, or you could use a fine sieve or colander (see above re: understocked kitchen).
Next, add the eggs, flour, and salt and pepper to taste (I don’t know, follow your heart, I just shake it in for a while) and mix everything up. Important: if you are not going to cook the latkes right away, cover the potatoes in lemon juice otherwise they will turn black! Also put them in the fridge, very important!

Oh did I not mention you are going to get shredded potatoes everywhere?
Frying
Once it’s all mixed, you’re ready to start frying! Put some oil in your frying pan (enough to thinly cover the bottom), put the heat on medium-high, and give the pan a few minutes to heat up. Take a medium-sized spoonful of potatoes and put in the oil, then flatten it out with the spatula until it’s about 1/4-/1/2″ thick. Fry for 1-2 minutes on the first side (or until light-brown), then flip, and fry the other side also until golden brown. When I take my latkes off, I like to put them on a plate with a paper towel, which absorbs the extra oil. I usually change the oil every two rounds of frying, but it’s up to you!

This is approximately what they should look like at this point
If I’m making a lot of latkes, to prevent the earlier batches from getting cold I turn the oven on to 200F and put them on a cookie sheet, or just serve them right out of the frying pan as they’re ready, as my mom always does.
Last but so very much NOT least, I feel really, really strongly about what latkes should be served with. There are only two appropriate condiments for latkes: sour cream and applesauce. You do you, but if you put ketchup on your latkes my Jewish grandmother will turn over in her grave. I got really ambitious during this round and cooked applesauce while I was prepping the latkes using this recipe and I didn’t even burn anything.
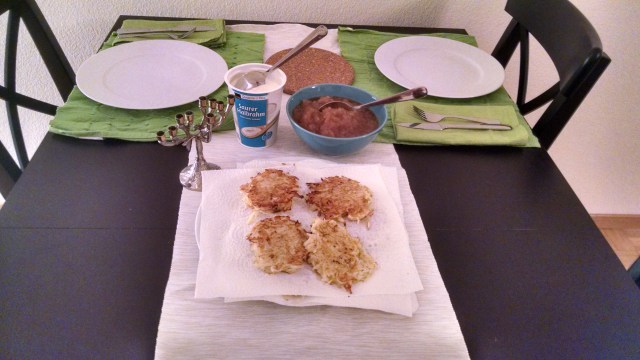
Just don’t tell my mother I couldn’t find any candles that would fit in the Menorah.
Menu For My Date With Lamia: Five Hearty Homemade Soups
She wore headphones constantly, and I completely understand why. If I were Lamia, I wouldn’t want to hear what people were saying about me either.
“Did you know that home wrecking witch actually devours children?”
“I hear her weirdo name means ‘lone-shark.'”
“She’s a bloodsucking man-eater!”
People are so rude! I mean, yeah, the rumors are mostly true. But that doesn’t mean you have to whisper it on the subway, you know?
Anyway. Headphones.
Lamia rode across from me every morning on the E train for an entire week before I mustered up the courage to wave at her. She waved back and pulled her ear buds out with a friendly smile.
“What are you listening to?” I asked.
“The A+ Podcast,” she replied.
I grinned and told her she had excellent taste. She looked me up and down and told me I had magnificent hair. So I told her she had a beautiful tail. She told me she liked my scar. I told her I liked her, and would she like to have dinner with me sometime? “Yesss,” she replied.
The following evening she came to my apartment and I fed her five different homemade soups.

Graphic courtesy of Nikki Smaga.
I’d heard of her quirky penchant for eating human children, but when I checked the meat section at Trader Joe’s in Forest Hills, they didn’t have any in stock. Following a hot tip from Fox News, I called up my favorite lady clinic, but it turns out they don’t actually sell dead babies either. (Who’d’ve guessed?) So I worked out a new plan: wean Lamia off the taste of human flesh with a flight of delicious, increasingly veggie-based soups.
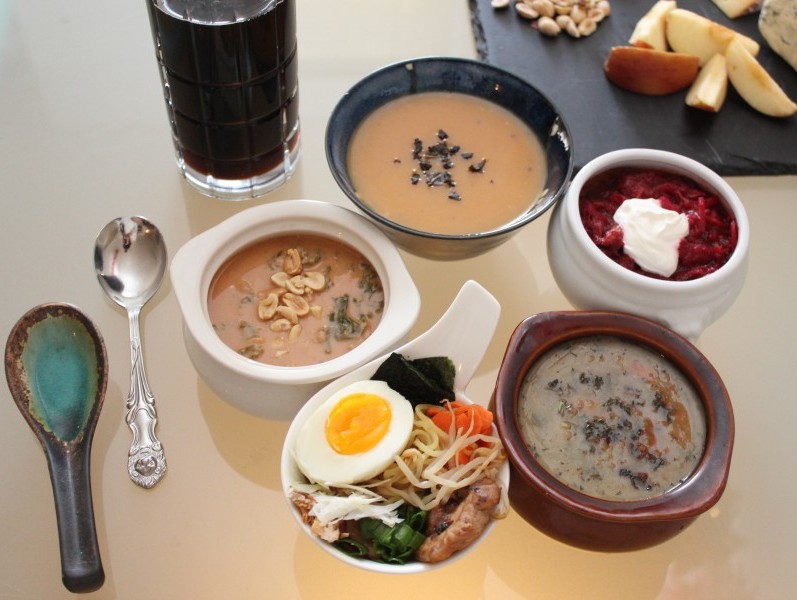
Irresistible, right?
Here’s the menu I settled on:
- Borscht With Beef – A winter staple that says “I care about you so much that I spent two straight hours cooking, including 40 minutes just grating beets. Get in my pants.”
- Persian Cabbage Soup – Really excellent for freezing and reheating to eat when you’re sick. Savory. Vegetarian.
- Miso Ramen Soup – A highly customizable soup that looks a lot fancier than it actually is.
- West African Peanut Butter Stew – Slightly spicy, super peanut butter-y, surprisingly complex flavor. Vegan.
- Butternut Squash Soup – Delicious, and very little effort to prepare. Sub margarine for butter to make it vegetarian.
Borscht With Beef
recipe adapted from Natasha’s Kitchen
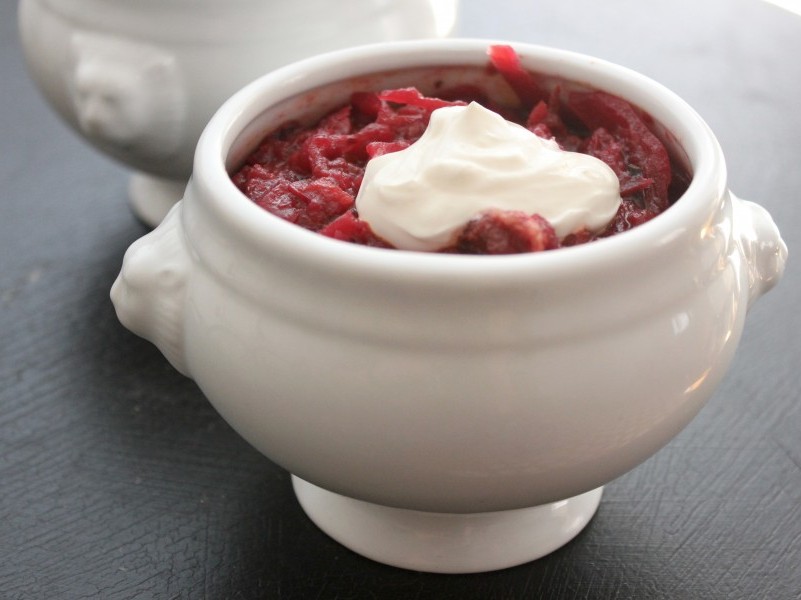
I’ll be honest: I picked this soup because it looks like bloody human entrails. I wanted to start with something familiar to help set my date at ease and make her feel at home in my home. Yet when I set the bowl in front of my date, she looked entirely unimpressed.
“You’ve never seen entrails, have you?” my date asked pointedly, after a long minute of silence. I scrambled to fill it.
“Nooo. But uh, I’ve watched Bones. Don’t you just love Angela?” I babbled nervously. “She’s so great. And I like to think of Booth as the identity Angel assumed after bringing down the LA branch of Wolfram & Hart. Do you like Buffy?”
“No.”
“Oh. Um, why… not?” I asked foolishly. Lamia then launched into a passionate 20 minute diatribe about how passionate love is an illusion and destructive enchantment and she hates the Scooby Gang. Now it was my turn to sit stunned and silent. We were not off to a good start. Not even slightly.
Fortunately, the borscht was as good as our conversation was bad.
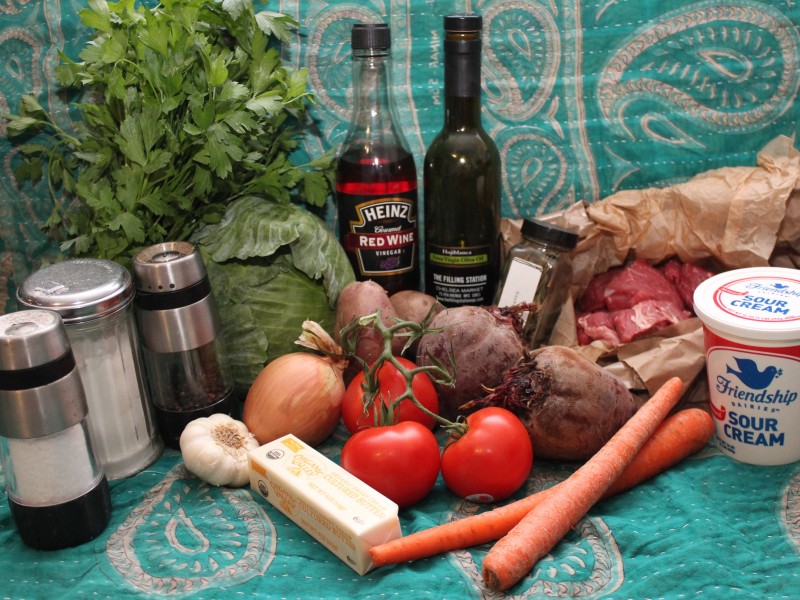
Ingredients
- 1 lb beef stew meat
- 1 Tbsp salt + more to taste
- 2 large beets
- 4 Tbsp olive oil
- 1 Tbsp red wine vinegar
- 1 Tbsp sugar
- 2 Tbsp tomato sauce
- 1 Tbsp butter
- 1 medium onion
- 2 carrots, grated
- 2 large potatoes
- 1/2 head of small cabbage
- 2 tomatoes
- 2 bay leaves
- 1/4 tsp freshly ground pepper
- 1/4 cup fresh parsley, chopped
- 2 cloves garlic
- Optional garnish: sour cream and fresh sprigs of parsley or dill
Instructions
Rinse off your beef and cut it into 1″ pieces (if it’s not already cut up). Place it in a large soup pot with 14 cups of cold water and 1 Tbsp salt. Bring it to a boil and skim off the foam.
Reduce the heat, partially cover it, and let it simmer, skimming off additional foam as needed. Set a timer for 45 minutes and start prepping your veggies.
Wash, peel, and grate your beets. You can use a food processor if you have one (which I don’t), or a grater with large holes (which I do). If you go the grater route, I recommend using a food holder guard or wearing gloves so the beet juice doesn’t stain your fingers.
Place your grated beets in a large heavy-bottom skillet with 4 Tbsp olive oil and 1 Tbsp vinegar. Saute for 5 minutes, then reduce heat to med/low and add 1 Tbsp sugar and 2 Tbsp tomato sauce. Mix thoroughly. Saute for about 10 minutes, stirring occasionally, until the mixture starts to soften and break apart.
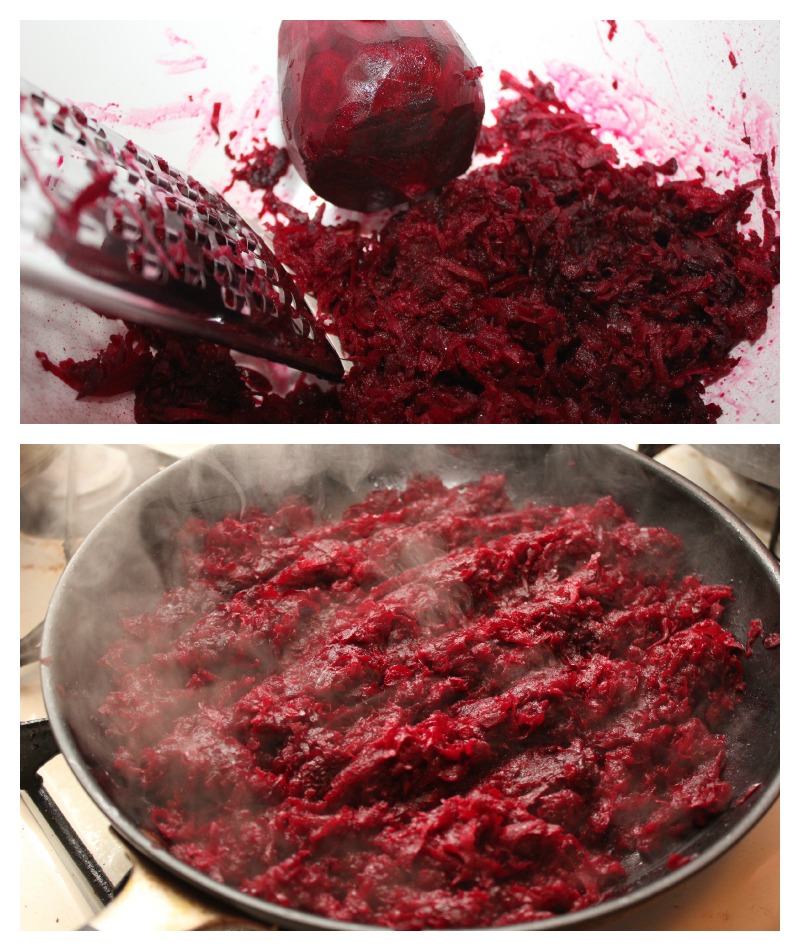
Remove from pan and set aside. In the same skillet, saute onion in 1 Tbsp butter for 2 min. Add grated carrot and saute for another 5 min.
Wash and peel your potatoes. Slice them into bite size pieces and put them in a large bowl with the sauteed beets, onion and carrot. Chop 2 tomatoes and add. Shred your lettuce (I used a mandoline slicer) and add it to the same bowl.
Now go back to your beef. Has it been 45 minutes yet? If not, you’re incredibly fast and/or must have a sous chef. You should probably massage their shoulders and tell them how pretty they are until the timer goes off. Once the beef has been cooking for at least 45 minutes, add the potatoes, beets, onion, carrot, tomatoes, and cabbage. Cook for another 10 minutes, or until the potatoes can be easily pierced with a fork.
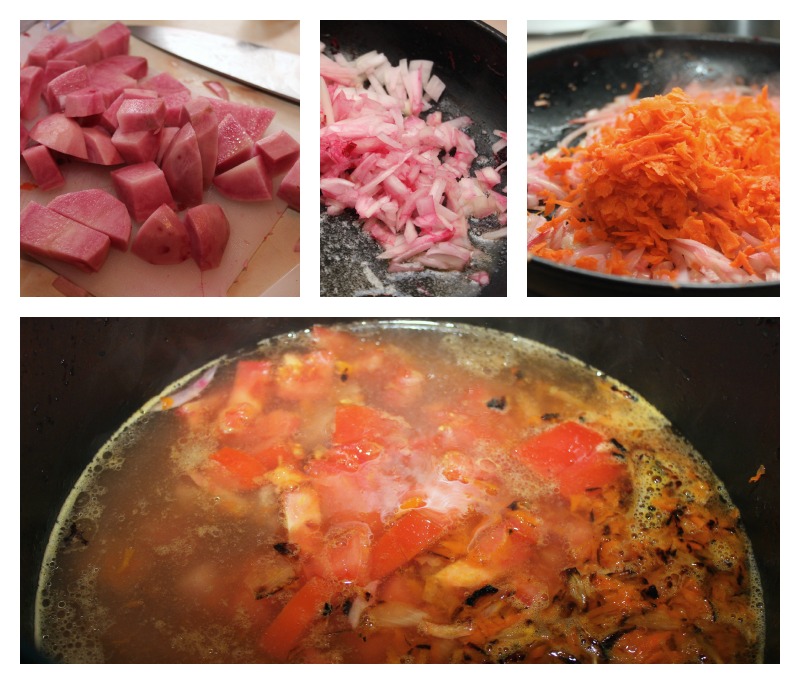
Add 2 bay leaves, ¼ tsp pepper, and more salt to taste. Chop the parsley, dice ore press the garlic, then stir them into the soup pot. Immediately cover the pot and remove it from heat.
Important: let the pot rest covered for 20 minutes for the flavors to meld. It smells delicious already, but I promise it tastes so much better if you wait.
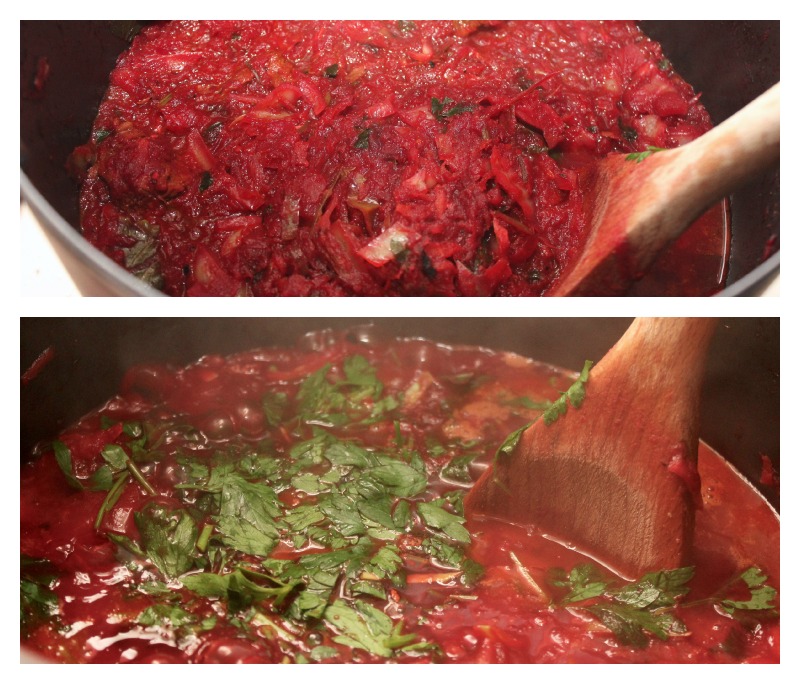
Serve garnished with sour cream and optional sprigs of parsley or dill.
Persian Cabbage Soup
adapted from Cooking Mignette
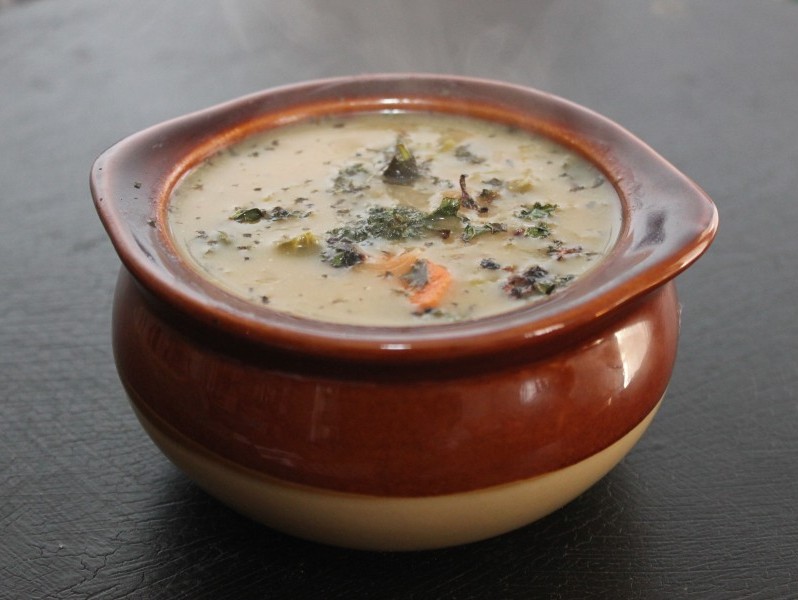
When I interrupted Lamia’s rant to tell her that our next soup was vegetarian, the beautiful creature sitting across from me rolled her eyes so hard that I was afraid they might come right out of her head. But at least she stopped insulting Willow.
I abruptly changed the subject. “Do you have any pets?”
“I was thinking of getting some snails,” she said.
I nodded politely. “Not a fan of cats or dogs?”
She lowered her chin and fixed her eyes on me, unblinking. I mean, she never blinks (something about a curse, blah blah, never being able to rest from the sight of her dead children), but this stare was loaded. What had I done wrong?
Oh right. Cats and dogs eat snakes.
“Agh, I’m sorry!” I said. “That was really insensitive of me.”
She rolled her eyes again. “This soup better be amazing,” she grumbled. (It was.)
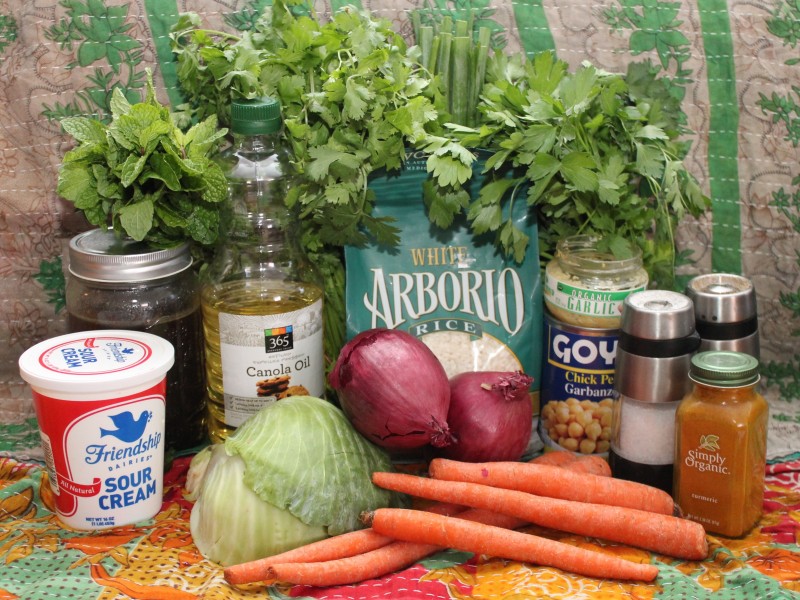
Ingredients
- 1 cup white arborio rice
- 2 medium onions, thinly sliced
- 2-3 tsp turmeric
- 2-3 cloves of garlic, finely minced
- 2-3 cups spinach, roughly chopped
- 2 cups cilantro, chopped
- 1 cup parsley, chopped
- 1 cup scallions, thinly sliced
- 2 cups cabbage, cut up in chunks
- 4-5 carrots, peeled, cut in half, then in 1 inch pieces
- 1/4 cup vegetable oil
- 2 Tbsp dry tarragon
- 2 tsp mint, chopped
- 5-6 cups broth (vegetable, chicken or beef)
- 1/2-1 cup cooked garbanzo beans
- sea salt and pepper to taste
- 1/2 cup sour cream
Instructions
Slice two medium onions. In a large stock pot, brown your onions in half of the vegetable oil (about 1/8 cup) with 1 tsp turmeric. Remove 1/4 of the onions with a slotted spoon and set them on a paper towel to drain. Set them aside for garnishing with later.
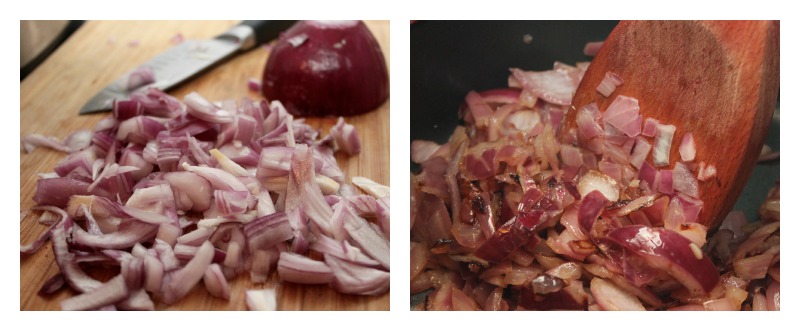
Add 5 cups of broth to the remaining onions, with 1 tsp turmeric, and several (another 5-6) cups of water. Add sea salt and pepper to taste. Bring the mixture to a boil, then reduce heat and simmer for 45-50 minutes, stirring occasionally. Add carrots, parsley, cilantro, scallions, and spinach, and cook for another 30 minutes.
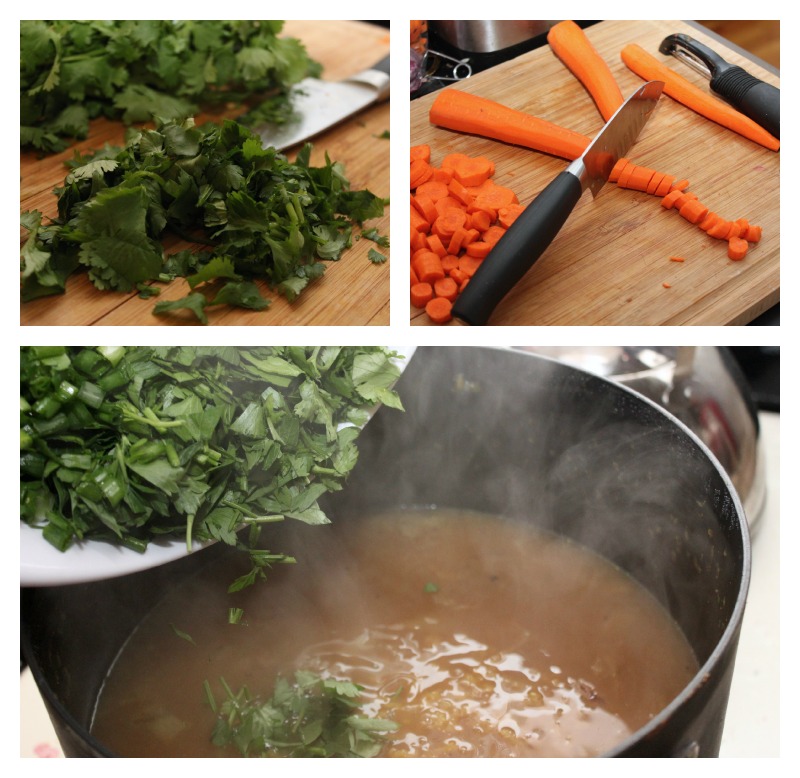
Add garbanzo beans, cabbage, and 2 Tbsp tarragon. Taste it and adjust the seasoning to taste. If necessary, add more water to keep it the consistency of a thick soup. Cook for another 30 minutes, stirring occasionally. Stir in sour cream and simmer for another 15-20 minutes.
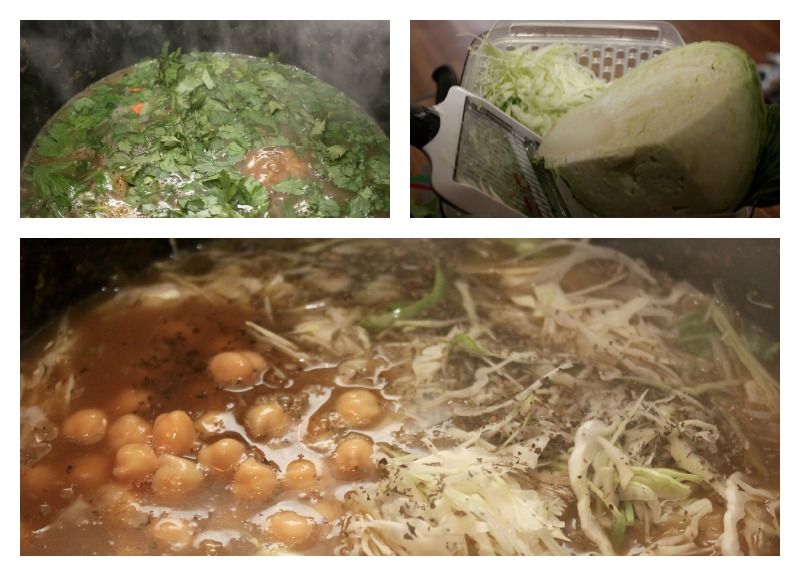
Heat remaining oil in a small saucepan. Add minced garlic and fry until golden. Remove from heat, then add mint. Combine well and allow the mixture to sit for at least a few minutes before using.

Stir 1/2 of mixture into the soup. Serve topped with garlic/mint oil and some fried onions as garnish.
Miso Ramen Soup
based on Namiko Chen’s tutorial

This one is the only one that Lamia liked, and I have no idea why. Although she liked the last soup, she had mostly given up speaking to me at this point. But when Lamia ate this one, her smile was so wide I could see all six rows of teeth.
I’m going to go out on a limb and say that it’s because of all the different textures. That’s what I liked about this soup. And also the broth! Very tasty.
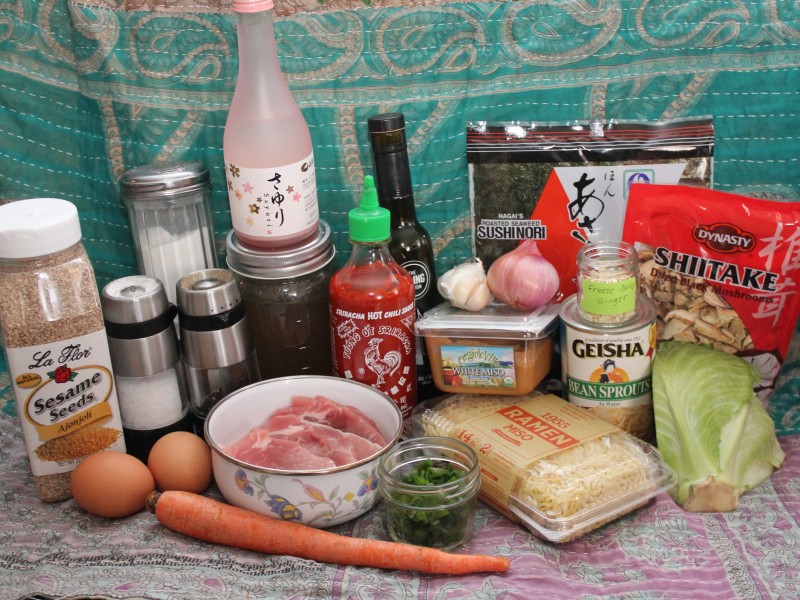
Ingredients
Miso Ramen
- 2 garlic cloves, minced
- 1 inch ginger, minced
- 1 shallot, chopped
- 1 Tbsp sesame seeds, ground
- 1 Tbsp sesame oil
- 1/4 lb pork (ground or cut into bite size pieces)
- 1 tsp sriacha
- 3 Tbsp miso
- 1 Tbsp sugar
- 1 Tbsp sake
- 4 cups broth (vegetable or chicken)
- 1 tsp salt
- 1/4 tsp pepper
- 2 servings of ramen noodles
Toppings
- bean sprouts
- carrots, sliced
- cabbage, shredded
- shitake mushrooms (dried)
- sushinori roasted seaweed
- green onion, sliced
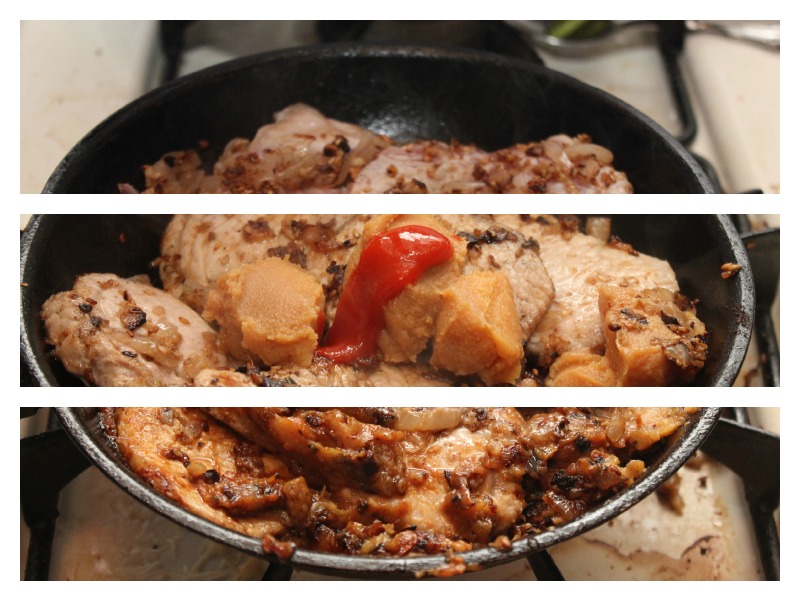
Instructions
Brown your shallots, ginger and garlic in the sesame oil over medium-low heat. Add the pork and cook through. Mix in sriacha, miso, sesame seeds, sugar, and sake. Add broth, salt, and pepper. Let it simmer while you do the noodles in a separate pot.
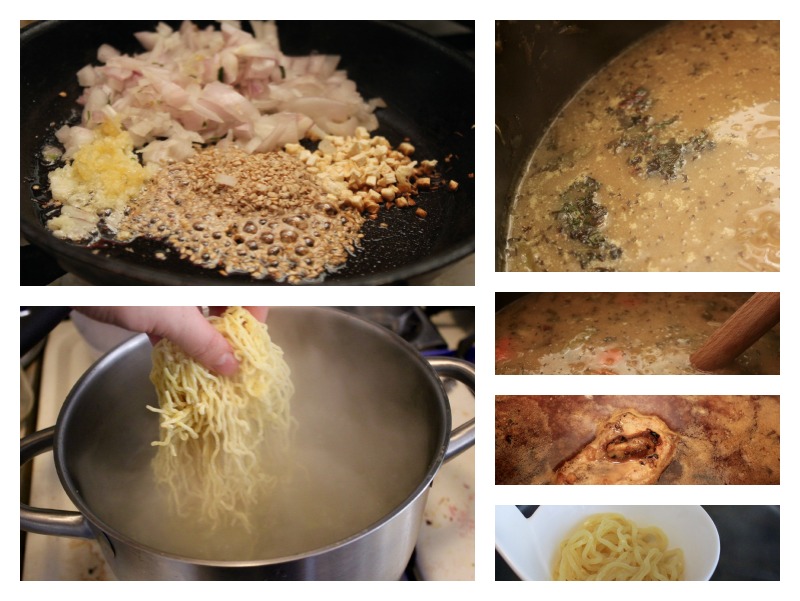
Cook your ramen noodles according to package instructions. Drain water, then put your noodles in a bowl.
Place your toppings, then pour broth over it and eat immediately. You can use the same toppings that I did, or go your own way. Ideally you want a little more broth (and a bigger bowl) than is shown in the photo below, but I wanted to let you see the toppings better.

West African Peanut Butter Stew
adapted from Cookie and Kate
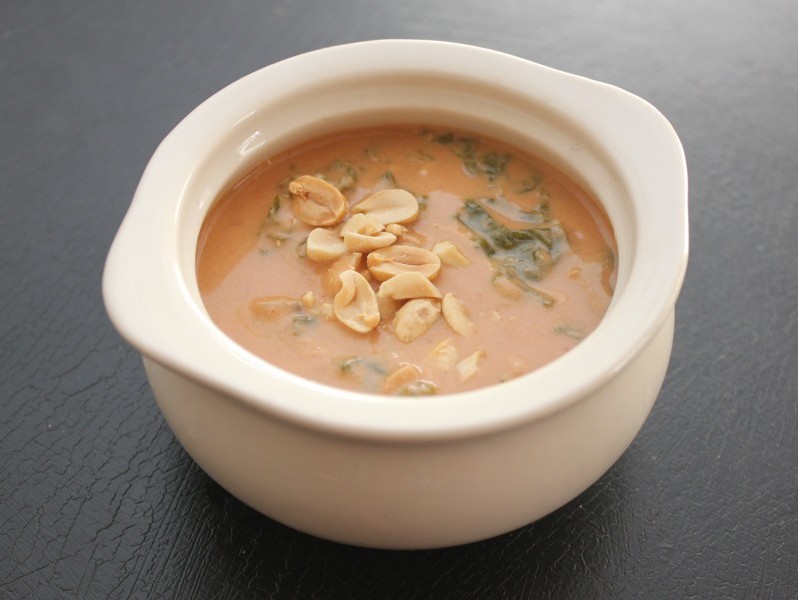
“This one’s nice and hearty,” said Lamia. “Real thick.”
I wondered briefly whether she was making a cardiovascular pun, but it didn’t seem like a polite dinner conversation topic to pursue. I was over it at this point anyway. I concentrated on enjoying the (mildly spicy but entirely comforting) soup.
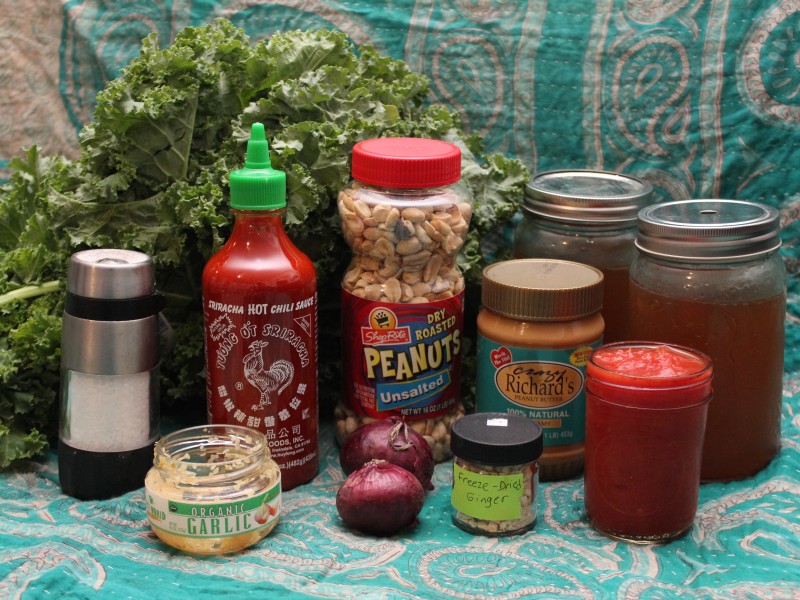
Ingredients
- 6 cups vegetable broth
- 1 medium red onion, chopped
- 2 Tbsp ginger, minced
- 4 cloves garlic, minced
- 1 tsp salt
- 1 bunch kale, ribs removed and leaves chopped into 1-inch strips
- 3/4 cup unsalted peanut butter (chunky or smooth)
- 1/2 cup tomato paste*
- Sriacha
- 1/4 cup peanuts, roughly chopped
Instructions
Bring the broth to a boil. Add the onion, ginger, garlic and salt. Cook on medium-low heat for 20 minutes. In a medium-sized, heat-safe mixing bowl, combine the peanut butter and tomato paste, then transfer 1 to 2 cups of the hot stock to the bowl.
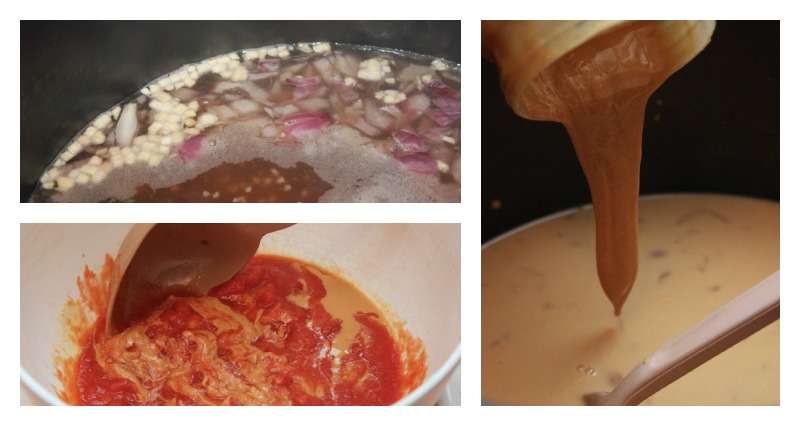
Whisk the mixture together until smooth, then pour the peanut mixture back into the soup. Mix well. Stir in the collard greens and season with sriacha to taste. (Add just a little bit at a time! Too much heat can overpower your soup.)
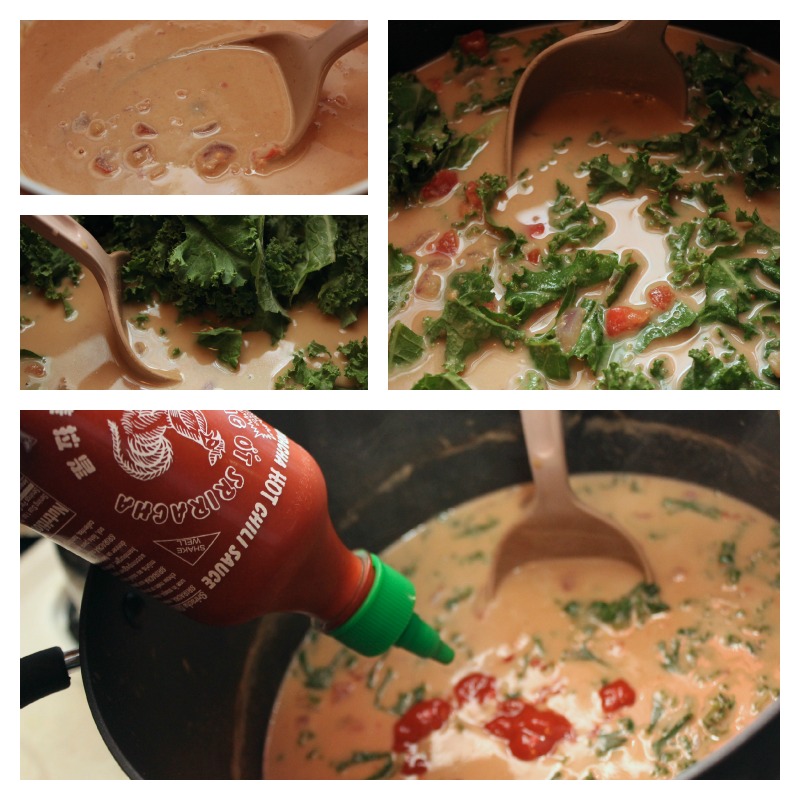
Simmer for about 15 more minutes on medium-low heat, stirring often. Serve topped with a sprinkle of chopped peanuts.
Butternut Squash Soup
recipe from Food.com
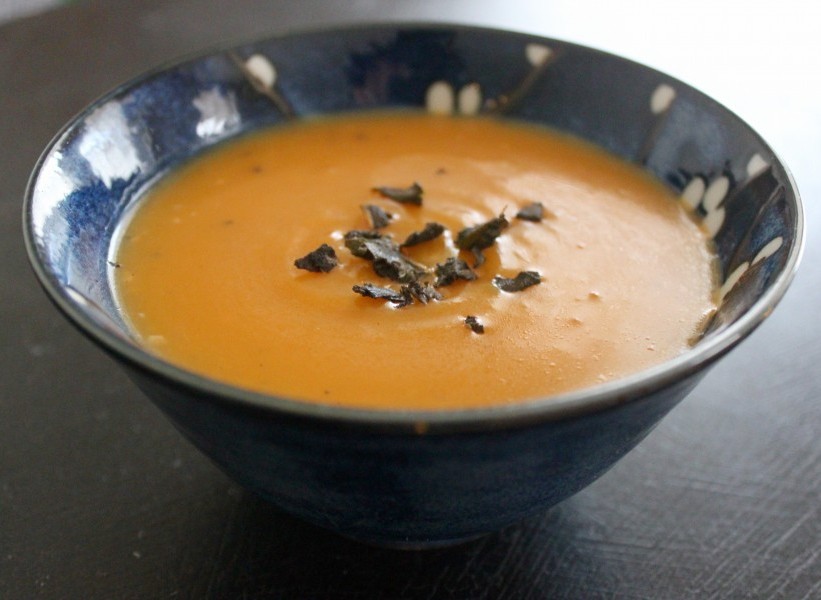
Lamia took one look at this soup and walked out. (Or slithered, rather.)
Honestly? I was fine with it. She wasn’t very good company. And her leaving meant more of this glorious, creamy soup for me!
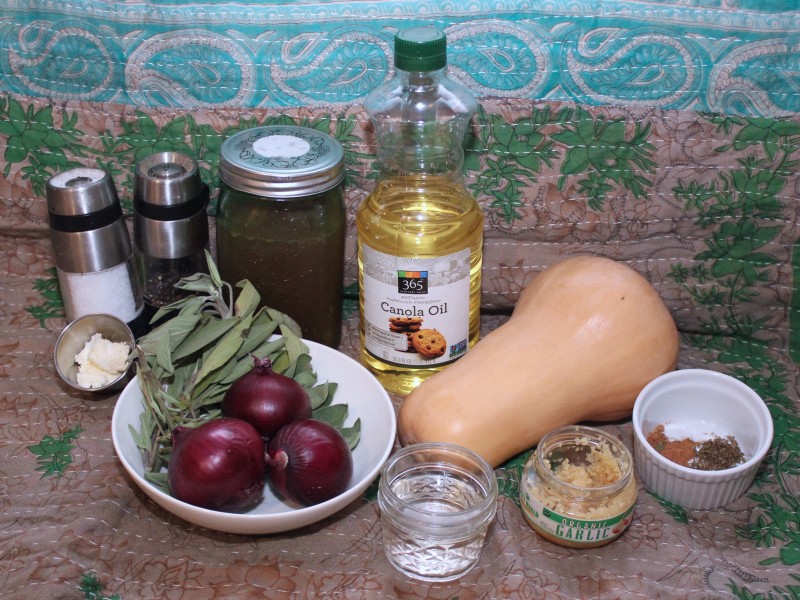
Ingredients
- 1⁄4 cup olive oil
- 3 lbs butternut squash
- 6 garlic cloves, minced
- 2 large onions, peeled and quartered
- 1⁄4 cup water
- 3 cups vegetable stock
- 1⁄2 tsp dried thyme
- 1⁄4 tsp ground nutmeg
- 1 tsp salt
- pepper
- 2 tsp butter
- 20 fresh sage leaves, sliced
Instructions
Preheat the oven to 400°F. Brush the bottom of a baking pan with olive oil and set aside. Cut the squash through the stem ends into halves, prick the skin in several places, and scoop out the seeds. Brush the cut surfaces with about a tablespoon of the olive oil. Put the garlic inside the squash cavities and place halves in the pan cut side down.
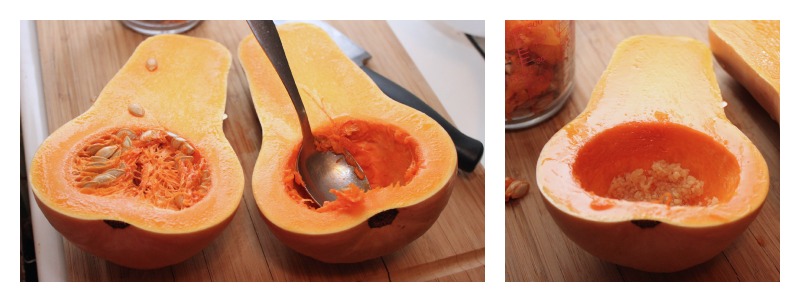
Add the onions to the pan and brush with remaining olive oil. Pour the water into the bottom of the pan, cover and bake for 50 minutes. Uncover and bake for 5-10 minutes more or until the squash is tender and the onions are soft.

When the squash is cooled enough to handle, scoop out the flesh. Squeeze the garlic cloves out of their skins and discard the skins. Using an immersion blender, puree the baked vegetables, vegetable stock, thyme, nutmeg, salt and pepper.
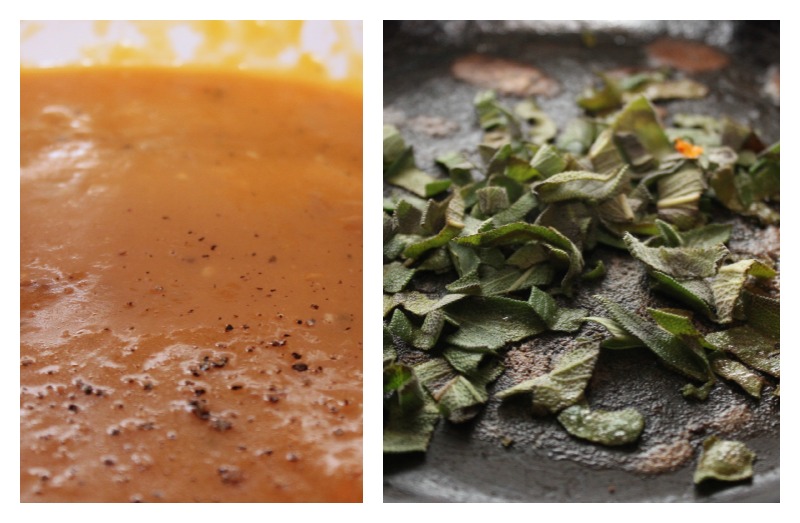
Pour the soup into a pot and heat gently. In a small skillet, melt the butter and saute the sage leaves until dark and curled. Garnish each bowl of soup with the sage leaves.
I’m sure you’ve guessed by now, but there was no second date with Lamia. I do have a freezer full of amazing soup, though, if anyone else is interested.

My Picnic Date With Galadriel: Strawberry Soup, Mango Shrimp Salad, Focaccia and Galettes
feature image courtesy of Nikki Smaga
We met at the library. She was in line at the checkout desk, her luminous porcelain skin and ethereal golden locks practically glowing under the harsh fluorescent light. Although she had no sign of age upon her, I could tell by her stately presence that she was an older woman. Much older. Our eyes locked across the room, and we formed an immediate, almost telepathic connection. I approached.
Striking up conversation, I learned that her name was Galadriel. Age: several thousand years old. Work: some sort of government job, co-ruling Lothlórien. Interests: ancient rings, political debates regarding the fate of humanity, me.
After a brief, flirtatious exchange, I gave her my number and we made plans to meet the following day for a picnic lunch at Prospect Park. (Galadriel is very into nature.) But that evening, the Lady of Light texted me: Sry, won’t be able to make it. I diminish and go into the West tomorrow. Family stuff. :/
I replied: Hope everything’s okay! Let me know when you’re back in town and we’ll reschedule!
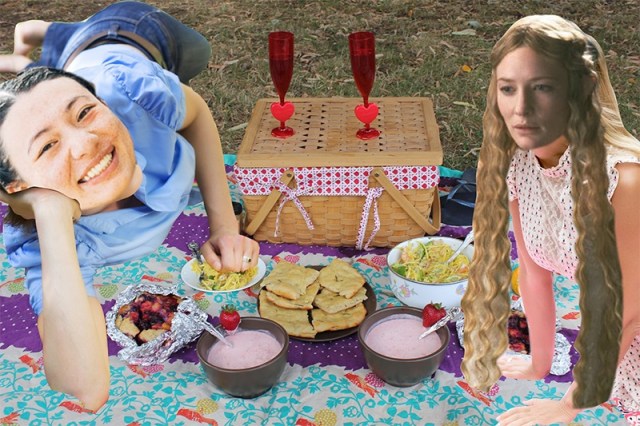
My date with Galadriel: a vision that has not yet come to pass.
She never got back to me.
Although I reached out a couple times after that, my calls went straight to voicemail — apparently they don’t have great T-Mobile coverage in the Undying Lands. Yet I will not let my heart be troubled. As a wise friend once said: where there’s life, there’s hope, and need of vittles.
In that spirit, I present to you the menu I’ve planned for my eventual date with Galadriel. It includes:
- Strawberry Soup – A dish that sounds kind of fancy but is actually super easy to make. Very cool for the summer.
- Shrimp Mango Salad – A crisp and fresh citrus salad that’s as tasty as Galadriel is formidable. (Meaning: very.) Easily adaptable for a vegan option.
- Rosemary Focaccia Bread – This is what I’ve always imagined Elvish bread to taste like. Unlike lembas, however, one small bite is not enough to fill the stomach of a grown [wo]man. It’s light enough to serve as a snacky side dish.
- Blackberry Blueberry Peach Galette – Rustic! Portable! Perfect for the human-elf couple on the go.
Pair with a cheap peach champagne, or diet peach Snapple ice tea.
If you feel so moved, I’ve included the recipes so that you can make a version of this picnic for a human date, romantic or otherwise. Or! You can make said delicious picnic and eat it all by your damn self. I won’t judge you in the slightest, because you’re wonderful and deserve all of the good things in life. May the stars shine upon the end of your road.
Strawberry Soup
adapted from The New Book of Soups
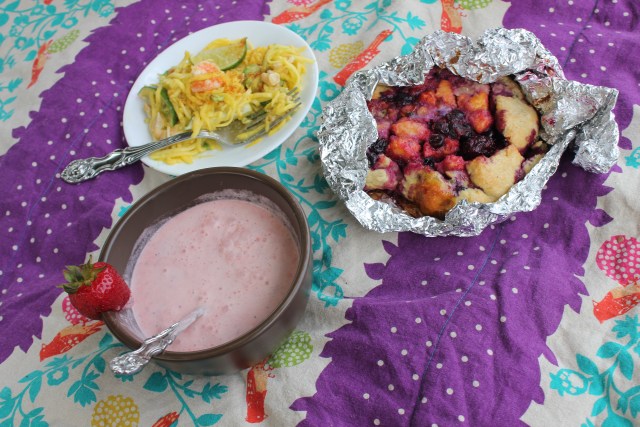
I love this soup! It’s refreshing, light and sweet; perfectly suited for leisurely late summer/early fall picnicking. Note, however, that unless your date has a powerful mastery of elven magic, you need to bring this soup to the park in a cooler with a couple of ice packs. This is both for food safety reasons (dairy + warm temperatures = ick) and taste reasons (it’s best enjoyed chilled).
The recipe below yields about a dozen servings. I’m really into this soup, so I think that’s fine — but if you’re wary of heavy cream or a commitment to eat strawberry soup for multiple days in a row, you may want to cut the recipe in half.

Ingredients
- 1 quart strawberries
- 1/3 cup sugar
- 1/4 cup amaretto
- 3 cups of heavy cream
- 3 cups of apple juice
- 1/2 cup honey
- 1 tsp lemon juice
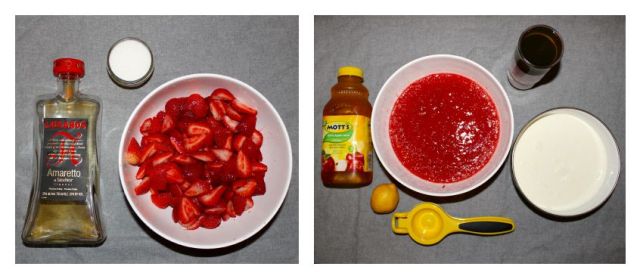
Instructions
- Hull the strawberries by cutting off the green parts. Cut into quarters.
- Combine the quartered strawberries, sugar and liquor and refrigerate for at least 2 and up to 24 hours.
- Puree the berries with their juices until smooth. Add the heavy cream, apple juice, honey, and lemon juice to the puree. Chill the soup for at least 4 and up to 24 hours.
- Serve chilled and garnished with a slice of strawberry.
Mango Shrimp Salad
adapted from Honest Cooking
This is another recipe for your picnic’s cooler, thanks to the shrimp. I use a julienne slicer to make quick work of the mangos, but if you don’t have one, a box grater would also get the job done efficiently.
Substitute agave for honey and use a different protein to make this dish vegan. I don’t know whether Galadriel has any dietary restrictions, but I do know that she’s originally from Valinor, a tropical land encircled by the sea of Ekkaia. So shrimp seem like a reasonably safe bet to me. You may want to check in with your date before making a similar assumption.
Note that I listed lime wedges and cayenne pepper as optional garnishes, but I highly recommend them. They really tie the flavors of the dish together, and I always think it’s fun when there’s an interactive element (like squeezing limes, sprinkling pepper, or setting things on fire) during serving.
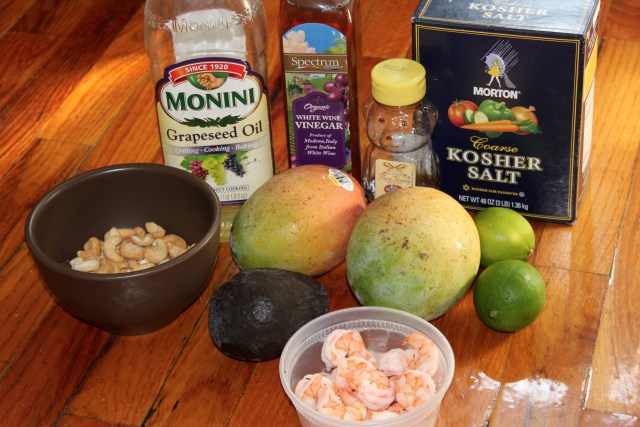
Ingredients
- 2 green (unripe) mangos
- 3 Tbsp oil
- 1 Tbsp white vinegar or rice vinegar
- 1 Tbsp fresh lime juice
- 1/2 tsp honey
- 1/4 tsp salt
- 1 cup shrimp
- 1 cup roasted cashews
- 1 ripe avocado
- optional: cayenne pepper, for serving
- optional: lime wedges, for serving
Instructions
- Peel and devein the shrimp. Bring salted water to a boil on the stovetop and drop the shrimp in, cooking 2-3 minutes until the shrimp are done and a pretty pink color. I like to put the shells in the water while boiling for extra flavor.
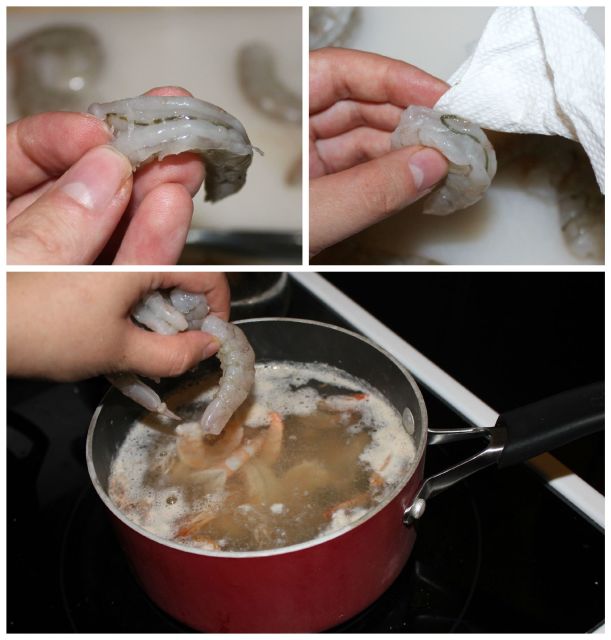
- Peel and julienne mangos into long, skinny matchstick pieces.
- In a small bowl, whisk together oil, vinegar, lime juice, honey and salt to make a dressing.
- Toss mangos in dressing just until lightly coated.
- Add shrimp and crumble in cashews, stirring gently to combine.
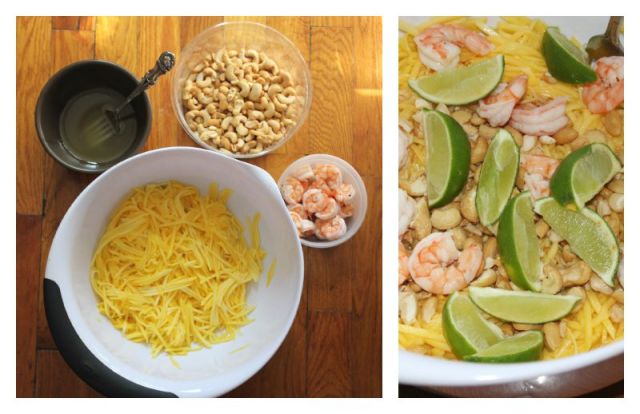
- Just before serving, top with avocado slices. Serve at room temperature or slightly chilled. Optional: garnish with lime slices and sprinkle with cayenne pepper.
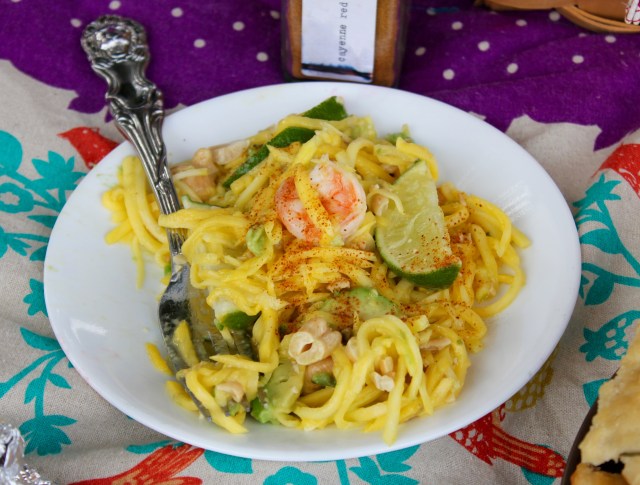
Rosemary Focaccia Bread
adapted from The New Book of Soups
This recipe makes two sheet pans worth of focaccia, about 16 generous slices. I like to make the full amount of dough, but only put rosemary in half. The other half remains unbaked and goes in the fridge for use as pizza dough later on.
Feel free to play with flavored olive oils for the coating. I used a blood orange infusion on this batch and it was awesome. (Don’t play with anything else, though! The ratios are important, and your sprightly sense of cooking whimsy will wreak havoc if applied here. Perilous to us all are the devices of an art deeper than we possess ourselves, you know?)
Ingredients
- 1 cup milk
- 1 tsp sugar
- 1 envelope active dry yeast
- 3.5 cups all-purpose flour
- 3/4 cup warm tap water plus 1 Tbsp for topping
- 1/2 cup olive oil
- 3 tsp kosher salt
- chopped rosemary, about 1/2 cup

Instructions
- Warm the milk to around 100F over very low heat. (Note: do not let it boil!) Remove from heat and add the sugar and yeast. Stir until dissolved. Let the mixture rest for 15 minutes. When you come back, you should see a thick foam on the surface.
- Combine the flour, yeast mixture, water, 2 Tbsp olive oil, and 2 tsp salt in a large bowl. Mix until a smooth elastic dough is formed, about 10-15 minutes. Dust the surface of the dough with a sprinkling of flour and cover the bowl tightly with plastic. Leave the dough to rise at room temperature until it doubles in bulk, about 1 hour.
- Transfer the dough to a floured work surface. Roughly chop about the rosemary and knead it into the dough. Make a ball and let the dough rest until it has relaxed, about 30 minutes.

- Put foil down over your baking pan and brush liberally with olive oil (about 2 Tbsp). Uncover the dough and spread and pull it into a rectangle on top of the oiled pan. Brush the surface of the dough with 2 Tbsp of olive oil. Drape the plastic wrap over the surface and let the dough rise again until it has nearly doubled in volume, about 30 minutes.
- Preheat the oven to 475F. Position a rack in the bottom third of the oven. Before the dough goes into the oven, whisk together the remaining 2 tbsp of olive oil, 1 tbsp water, and 1 tsp salt; it should thicken.
- Remove the plastic wrap and, using your fingertips, poke dimples into the dough in a random pattern. Pour the oil mixture over the dough.
- Bake until the focaccia edges are slightly golden in color, about 10-12 minutes. Remove from the oven and cool on a rack for about 10 minutes. Cut into squares and serve.

Blackberry Blueberry Peach Galette
recipe triangulated using references from The New York Times and Wicked Goodies
Galadriel is a complicated woman, but that doesn’t mean our dessert needs to be. Have you ever had a galette before? It’s basically pie for modern, independent women who like to freeball in the kitchen/chaos muppets who are in the process of moving and can’t remember which box they they put their pie pan in. In a word: everything.

Ingredients
For the dough:
- 1 1/3 cups all purpose flour
- 1 Tbsp sugar
- 1/2 tsp fine sea salt
- 1 large egg
- heavy cream as needed (<1/3 cup)
- 1 stick unsalted butter
- 2 tsp lemon juice
- optional: 1/2 tsp grated lemon zest
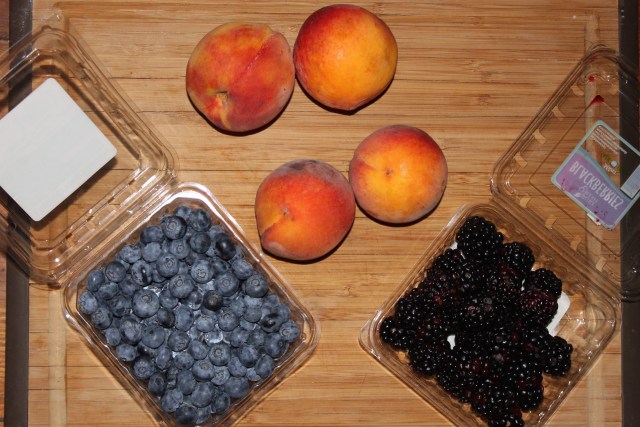
For the filling:
- peaches (3 large or 4 small)
- blackberries (1 container)
- blueberries (about half a pint)
- lemon juice as needed
- sugar as needed
- cornstarch as needed
Instructions
Make the crust:
- Mix together the flour, sugar and salt.
- In a measuring cup, lightly beat an egg, then add just enough cream to get to 1/3 cup. Lightly whisk the egg and cream together.
- Add butter to flour mixture and use your fingers to break up the butter. It’s okay if you don’t break it all up; just try to get chickpea-size chunks of butter by the end.
- Start drizzling the egg and cream mixture over the dough, stirring until it just starts to come together but is still mostly large crumbs. You can use up to 1/4 cup of the egg and cream mixture for this part, then put the rest in the fridge so you can use it later. Mix in lemon juice and zest if using.
- Put dough on lightly floured counter and pat it together to make one uniform piece. Flatten into a disk, wrap in plastic and chill for 2 hours, or up to 3 days.
- Heat the oven to 400 degrees. Roll the dough out to a 12-inch round (it can be ragged). Transfer to a rimmed baking sheet lined with parchment paper and chill while preparing the filling.
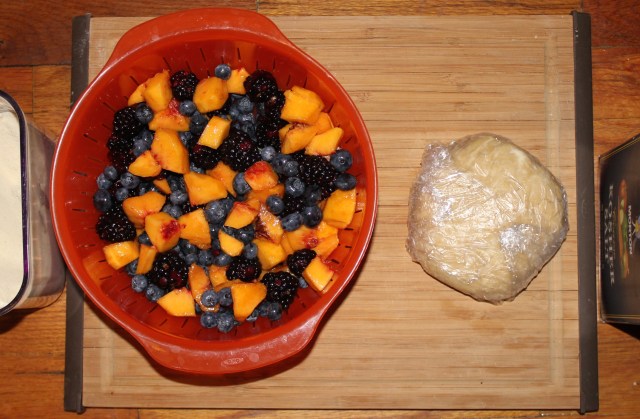
Make the filling:
- Wash all of the fruit. Skin the peaches and cut into bite size chunks.
- Mix the fruit together and taste it. Do you like the way it tastes? If yes, do nothing. If no, mix with sugar and/or lemon juice until you get a balance of sweetness/acidity that you like.
- Sprinkle with cornstarch as needed, until the filling isn’t dripping with juices when you lift a spoonful up. The purpose is to prevent your crust from getting soggy.
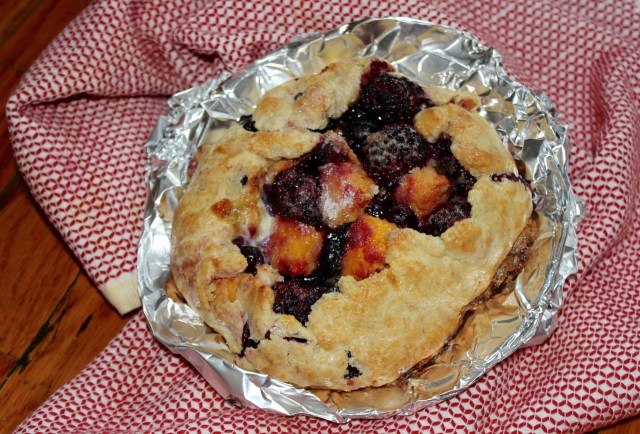
Combine:
- Heat the oven to 400F. Lightly grease a baking pan.
- Divide the dough into two halves (or more, if you want smaller galettes) and flatten it on the baking pan using your fingers or a rolling pin.
- Pile the fruit into the center of the dough. Using your fingers, fold up the edges of the dough to make a little open-faced pocket to contain the fruit. Try to have at least 1/2 inch of folded dough around sides.
- Brush the remaining egg and cream mixture all over the galettes. (Did you forget to save it earlier? Do not cast all hope away; tomorrow is unknown. Also you can just whip up some more real quick right now.) Concentrate on the folded over edges, because this glaze is what will give it that golden brown sheen with baking.
- Sprinkle a little bit of sugar over the glazed galettes and stick them in the oven. Bake until golden brown, about 35 minutes. (Note, however, that it could take up to an hour depending on how much fruit you used and how big you made each galette. So just keep an eye on it and pull it out when it looks like something you think an elven queen would repin to her Pinterest cooking board.)
- Cool for 20 minutes and serve warm.

P.S. Galadriel – I do not deny that my heart has greatly desired this. You have your own choice to make, girl, but if any of this looks good to you, you have my cell. I like to cook, and I would be thrilled to discuss the corrupting influence of technology and power at any time. CALL ME.
love,
Laura
Get Baked: Summer Berry Cobbler With Buttermilk Biscuit Crust
A couple of weeks ago I went to bed a normal, moderately well-adjusted woman with many hopes and ambitions. I awoke to a different world, a different me. My hopes and ambitions had been reduced to one single thing and it was all I could think about: my grandmother’s peach cobbler. Not a peach buckle or a peach crumble or a peach girl bait. A peach cobbler. And not your peach cobbler or the peach cobbler you can get at the hipster barbecue place or even all the peach cobblers a person could make using all the recipes from the first fifty pages of results when they searched “peach cobbler” on google. It had to be my grandmother’s peach cobbler: roughly 33% dough, 33% peaches, and 33% butter. The kind of peach cobbler that vanilla ice cream weeps for. The reason spoons were invented. Mema’s peach cobbler.
I texted my mom for the recipe and asked Megan to bring home a box of peaches ASAP. I made sure we were flush with butter. I told the kids, KIDS I’M MAKING A PEACH COBBLER. Everything was in place.
Then I froze. Trying to emulate my grandmother’s peach cobbler? Had I lost my mind?? IT’S NOT POSSIBLE TO REMAKE HER PEACH COBBLER because I’m not good enough! No one’s good enough. Oh man. I put it off for days while the pile of peaches sat on the countertop. My children lost hope. Megan doesn’t even like peach cobbler so she was fine, but I was miserable. So much longing yet so much fear! Like having sex for the first time or something. I had to come to terms with the fact that the peach cobbler I would make wouldn’t be my grandmother’s peach cobbler. It might not even be close at all, but it would be a) a peach cobbler and b) in my mouth, and in the end, that’s what felt most important. Also my grandmother would’ve hexed me if I’d let those peaches go bad.
The cobbler I ended up making was on the scale of OK/Good, but as predicted, even an OK cobbler is better than no cobbler, and I learned a thing or two. For example, cobblers are like the stew of desserts, in that you kind of can’t fuck them up, really. Once you know your preferred ratio of sugar to fruit to crust, you have all cobblers at your command. You are the cobbler king, my friend. What will you do with this power? Maybe you will find that your local grocer has put strawberries and blueberries on sale this week, and you’ll make this delicious cobbler so we can be cobbler twins!
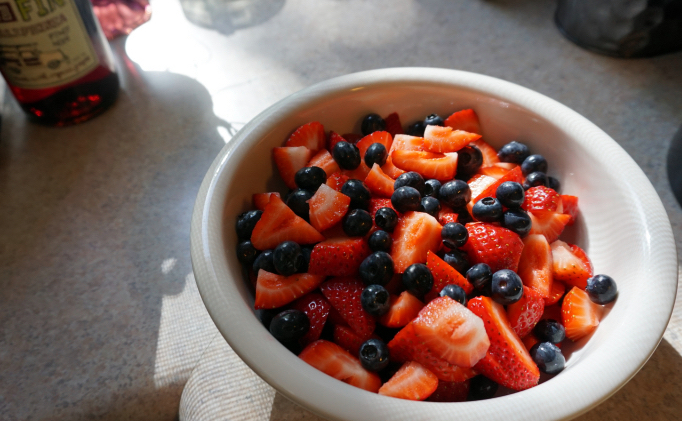
Let’s make things with these!
Summer Berry Cobbler That You Deserve
Filling:
4+ Tablespoons salted butter, cubed or pinched
3-4 cups of blueberries and sliced strawberries (I used one small 6oz package of blueberries and one 16oz package of strawberries)
1/3 cup white sugar, plus more for sprinkling
pinch of salt
kettle of boiling water
Buttermilk Biscuit Crust:
2 cups all-purpose flour
1/4 teaspoon baking soda
1 Tablespoon baking powder
1 teaspoon salt
6 Tablespoons super cold salted butter, cubed
1 cup buttermilk (or scant 1 cup milk + 1 Tablespoon vinegar, whisked together and rested for 10 minutes)
Also:
9″ cast iron skillet
2 Tablespoons butter (or more)
1. Line the bottom rack of your oven with foil to catch the filling when it boils over, then preheat it to 350 degrees.
2. Do you have buttermilk? I salute you if you do. I never have buttermilk because a person can only make and eat so many buttermilk biscuits in the week it takes a carton of buttermilk to go bad, and so I always end up throwing it out, which is a damn travesty. I make my own buttermilk by whisking one tablespoon of vinegar in with enough milk to equal a cup and then letting it sit for 10 minutes while it curdles. If you need to make your own buttermilk, now’s the time!

Making my own buttermilk stuff!
3. Cut up all your fruit and instagram a picture of it in a bowl so all your friends know that you’re living your best life. Mix in the sugar and salt and set it aside, preferably near a sun drenched window because you deserve only the most beautiful views right now.
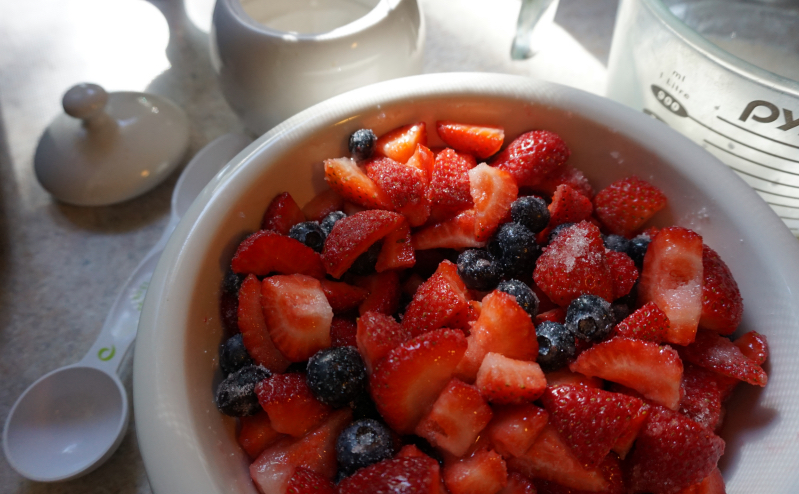
4. Put the kettle on. You’ll need at least a cup of boiling water, more if you decide to do this in a larger baking dish. What music are you listening to? I hope it’s something lovely.
5. Crust time! Mix together the flour, baking soda, baking powder and salt in a large bowl. Using a pastry blender, food processor [or two knives in a crisscrossing motion if you hate yourself and want this to take forever], cut the very cold butter into the flour mixture until it resembles cornmeal and/or you get bored. If you were making actual biscuits with this recipe (because that’s what it is, a tried and true recipe for perfect biscuits), you’d want to really mix it in and make it as uniform as possible, but kid, you’re making a cobbler. This is so chill.

As the original biscuit recipe states, the key to perfect biscuits — or in our case, crust — is that you don’t overwork your dough. Combine the flour mixture with the buttermilk just until it’s mixed and not a moment longer. It should be sticky, wet and fluffy.
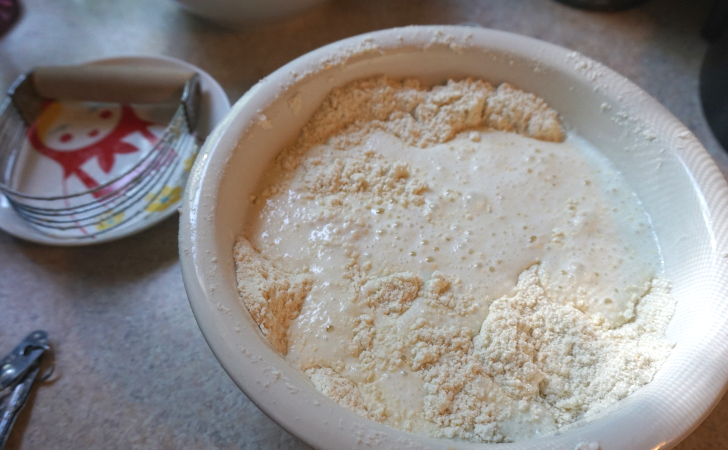
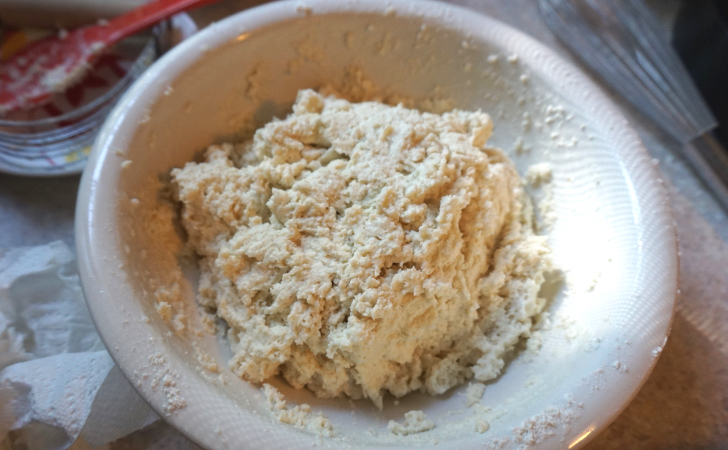
6. Put the two tablespoons of butter into the skillet and pop it into the hot oven. I like to obsessively monitor my skillet while it preheats, but this is also a good time to get everything set up in one place so it’s easy to assemble the cobbler once the skillet is hot and your butter has browned slightly. You should have a bowl of sugared fruit, some cut up butter (or you can pinch it off a little chunk at a time like Mema did), a bowl of fluffy wet dough, a couple of spoons for scooping the dough, sugar for sprinkling, and a kettle of boiling water.
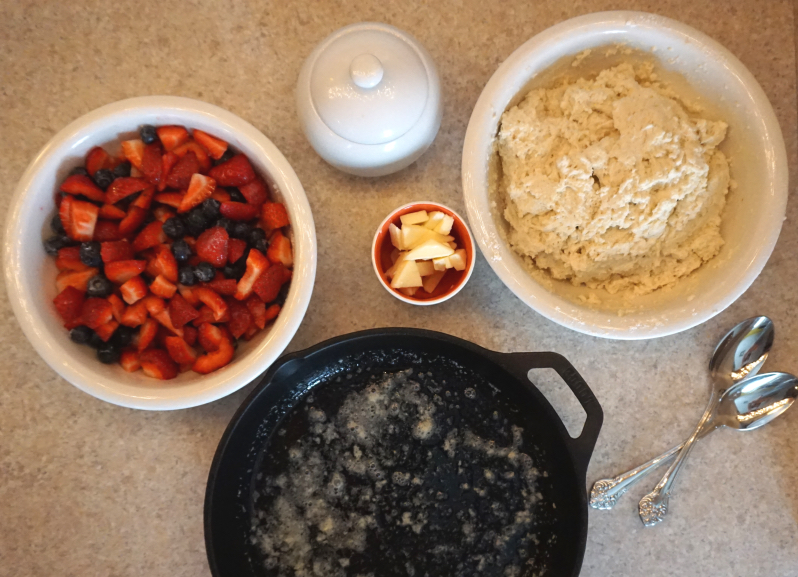
That’s browned butter in the skillet. I realize it might look weird in this picture, but it’s just browned butter, AKA the Lord’s work.
7. Once the butter has browned, you’ve removed the pan from the oven and you are ready for this jelly, spoon about half of the dough into the skillet so that it mostly covers the bottom. Don’t do this all in one go like you’re pouring cake batter — you’re going to create a bumpy bottom crust one spoonful at a time. Then dump all the fruit on top of the dough, followed by enough boiling water to almost cover the fruit. Distribute the butter about as evenly as a person can, then create the top crust the same way you did the bottom, one spoon at a time until it’s pretty much covered, then top that with a heavy sprinkle of sugar. Your skillet will be very full at this point, so be really really careful when you move it to the oven.
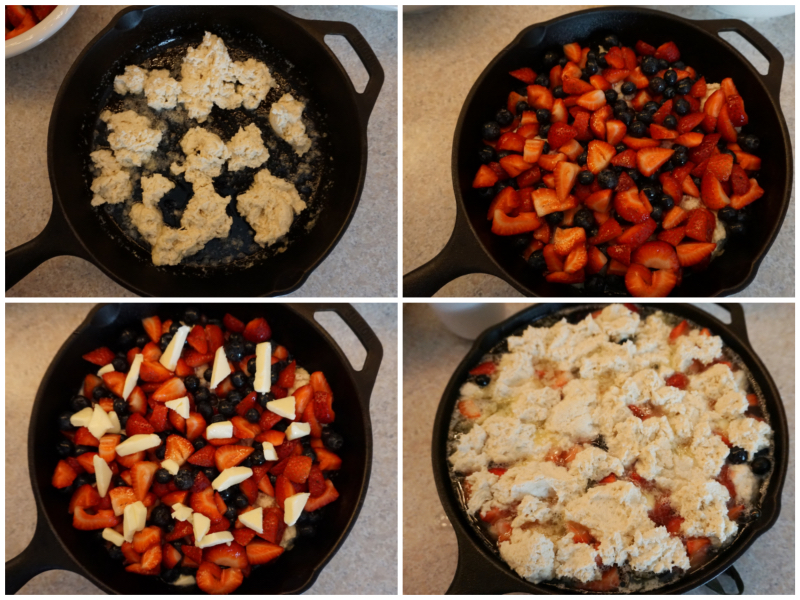
Clockwise from top left: dough on the bottom; berries; butter; boiling water, more dough and sugar.
8. Bake for around 45 minutes, until the crust has browned and the filling has thickened. Then give so much praise and thanks to seasonal fruits and the spirits of our grandmothers AMEN.
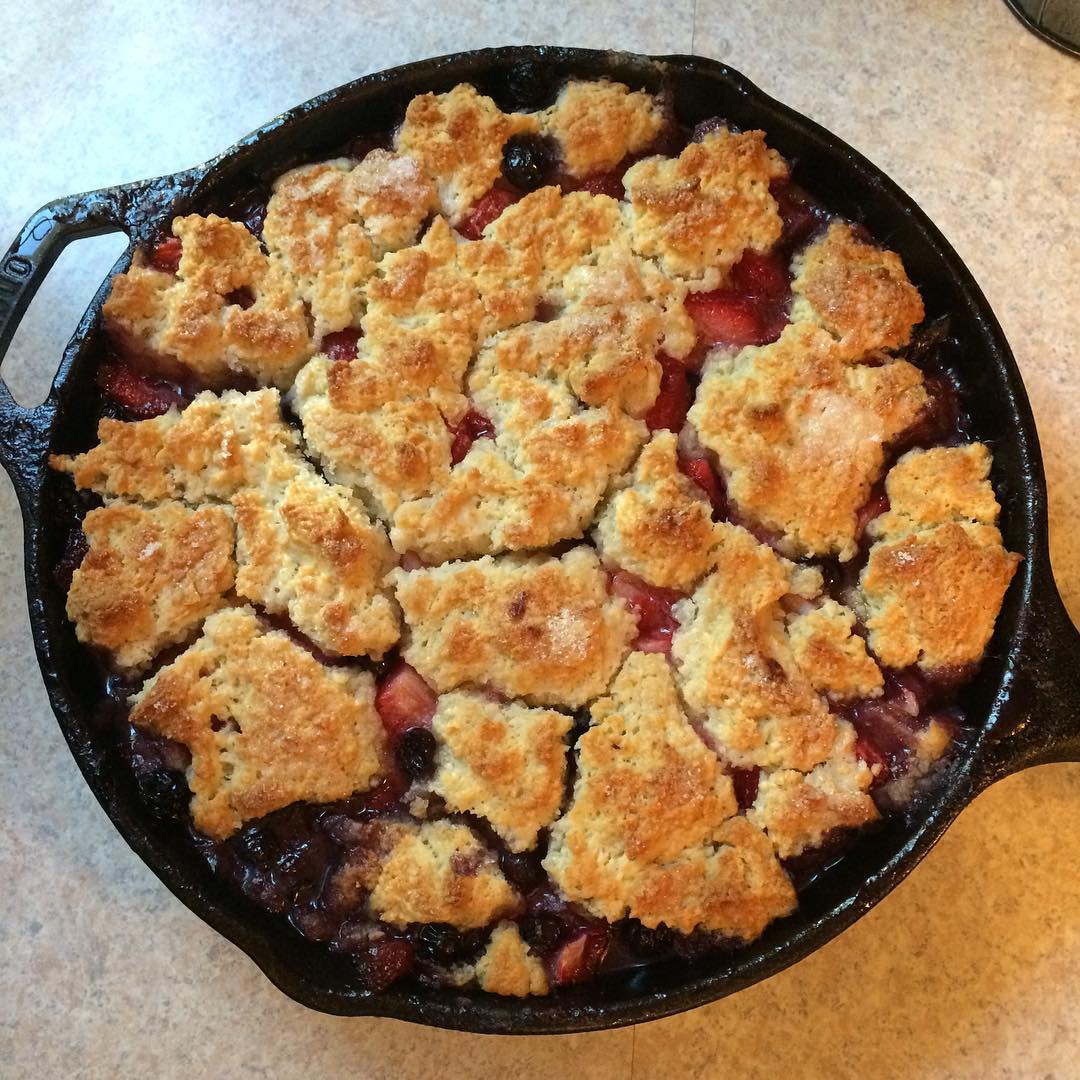
You have earned this.
Get Baked: The Great Autostraddle Babe-B-Q Cookbook
It’s almost Autostraddle’s own Babe-B-Q weekend! We’ll be hanging out with each other August 15 and 16 to grill up a storm, and everyone’s invited! We’ll also be guiding you through the process of grilling up said storm and getting prepared for the big event all week. You can view all Babe-B-Q posts here.

As you gear up for your Babe-B-Q’s this week, you’re probably wondering what to throw onto that sheet of slatted metal over a burning hot flame when the time rolls around. In the interest of helping you out, Rachel, Aja, Kaitlyn, and Carmen (and her gal pal Geneva) whipped up some totally kick-ass sauces, drinks, appetizers, and entrees for you that are best enjoyed on picnic benches and on paper plates next to a crackling set of coals. If you’re looking for even more menu ideas, check out these 39 out-of-the-box BBQ recipes.
Grandma Jones’ Bourbon Slush
by Aja

via Stephie Cooks
My mama passed this boozy recipe down to me from her mama and told me it was a big old family secret, so I dutifully guarded it with my life for years, sharing it only with one close friend who was sternly warned to keep her mouth shut: “You swear on your mama and your mama’s mama not to tell a single living soul about this recipe,” to which she replied, “I will swear to keep this a secret on the souls of both my mama and my mama’s mama, as that grandma happens to be my favorite one anyway.”
You can imagine my surprise (or naiveté, perhaps) when just a few weeks ago, Garden & Gun promoted a new Southern cookbook touting my Grandma Jones’ exact secret bourbon slush recipe. So. Rude.
Of course, the reality is that when my grandma was a young woman, this slush and others like it were all the rage. When I started making it I couldn’t leave well enough alone and spent summers tinkering with the recipe, bringing huge batches to the San Francisco Dyke March to everyone’s delight, and it became a tradition. It won a cocktail competition at a party during the first year we moved to Boston. We’d whip up big batches when friends came over, or show up with it on our friends’ front porches.

Because I didn’t make it until I was a newlywed, and so many fantastic memories are associated with it, it almost feels like our marriage’s signature libation. Here it is in its original form, probably from the early 1950s as OJ concentrate wasn’t successful until the late 1940s. Then, I’ll show you my own interpretation of a rightful classic.
These recipes each serve 16–18.
Original Ingredients:
- 6 cups water
- 2 cups strong tea
- 2 cups bourbon
- 1 cup sugar
- One 6-ounce container frozen orange juice concentrate, thawed
- One 6-ounce container frozen lemon juice concentrate, thawed
- Garnish: Mint sprigs or lemon slices (optional)
Combine the water, tea, bourbon, sugar, orange and lemon juice concentrate in a large container or bowl, and mix until sugar dissolves. Pour into two gallon-size freezer bags. Freeze until an hour before serving. Place the frozen punch in a large bowl and let thaw, breaking up every 15 minutes. When punch is melted, add more ice or water as desired. Serve in punch cups. Garnish, if desired.
My Ingredients:

- Six to Eight Cups Smith Teamaker Lord Bergamot Blend No. 55 black tea
- One 750-ml Bottle Bulleit bourbon
- One 750-ml Bottle Blood Orange Italian Soda (any brand)
- One Quart Santa Cruz Organic Lemonade
Make it a day before you actually need it, first off. Make the tea (if you want to get extra fancy you can add basil or mint leaves here), but wait for it to cool before mixing all of the above together. Unless you have a giant, sanitized bucket or the mother of all pitchers, you will likely need to batch this, which involves a bit of math, but not terribly meticulous math. Mix to taste with the first batch and adjust from there, adding a little sugar at a time if you must (but I wouldn’t). It may bite at first but that’ll smooth right out in slush form, trust me. Any remnants make up a wild card batch, which is f-u-n.
For freezing, freezer bags are perfect if you’re transferring to another container for serving (punch bowl, pitchers, etc.), and some folks just put a giant container in the freezer (though I can’t imagine what sort) and scoop it out of there as they serve (with this much bourbon things probably won’t freeze to rock hard ice).
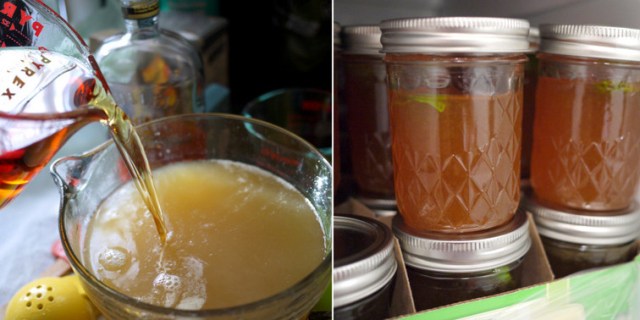
You can easily slush-and-go, 8 oz. canning gem jars are perfect. Remember not to fill ‘em all the way up — the water will of course expand as the mixture freezes. For serving, mint or basil garnish is lovely, but not required. Cut straws down to fit for a pretty, thoughtful touch. Feel free to tinker and tweak the recipe to your liking — fresh citrus is always a great idea — and please do responsibly enjoy this rich Jones woman tradition.
Grilled Caesar Salad
by Carmen and Geneva
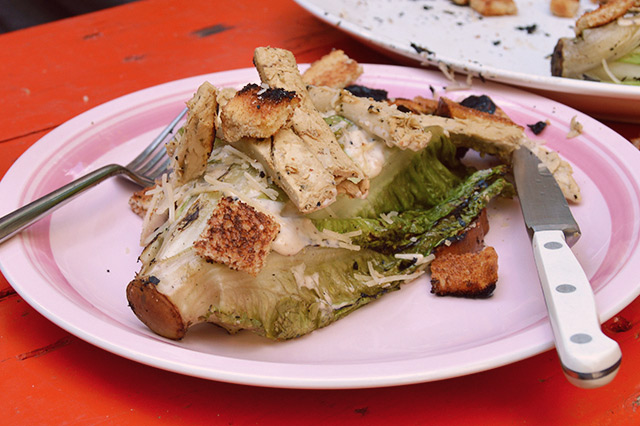
I’ve eaten so many salads in my time, y’all, but never like this. Now that I’ve grilled a head of lettuce and covered it in vegetarian chicken strips, though, I’ll probably never go back. 5/5 would recommend to a friend.
I’d say serve these cut in half, so this recipe would make side salad for six people.
Ingredients:

- Three Heads of Romaine Lettuce
- Three Slices of Bread
- Chicken Strips (Mine Are Veggie Grilled Chicken Strips)
- Parmesan Cheese
- Caesar Dressing
This is an easy one, y’all. You start by tossing the entire heart of romaine, washed and not dripping wet, onto the grill. Go ahead and put a sheet of aluminum foil, open-faced, with the chicken on it over the fire, too.
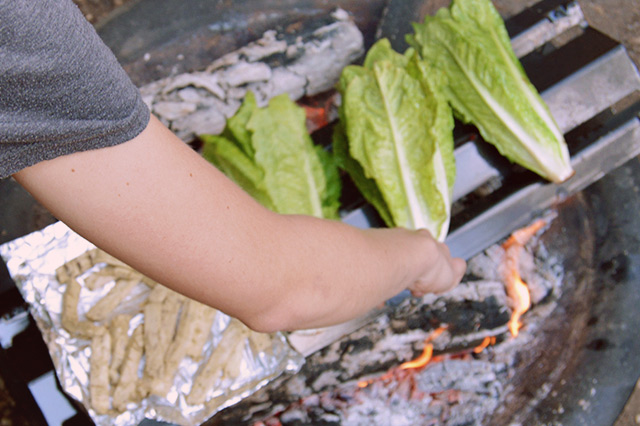
Someone should toast the bread while this is happening, like in a toaster. When it’s good and crispy, cut it into four strips and then cut those into chunks to your liking. (I like a big crouton, so.) Cover them in a thin layer of olive oil, add salt and pepper, and then put them on a sheet of foil over the flame, too.
Remove the ingredients as they begin to look a bit browned, which probably means lettuce first, croutons second, and chicken third. But hey, you do you. I love burnt things, to be honest. Lay out the hearts in a plate, cover them in the chicken strips, and then sprinkle the croutons over top. Slather on some dressing, throw cheese wildly, and get ready to chown down.

Totally Improvised Potato Salad
by Carmen and Geneva

Geneva has turned me into a potato advocate, like the most passionate potato advocate. And so, we had this massive amount of potatoes and nothing to do with them and I suggested we make a potato salad because, well, potato salad is dank as f*ck and why not. And thus, this entire recipe was borne of our own potato-based intuition. As in, we winged it. We came, we cooked, and trust me, we conquered.
This recipe makes five to six servings.
Ingredients:
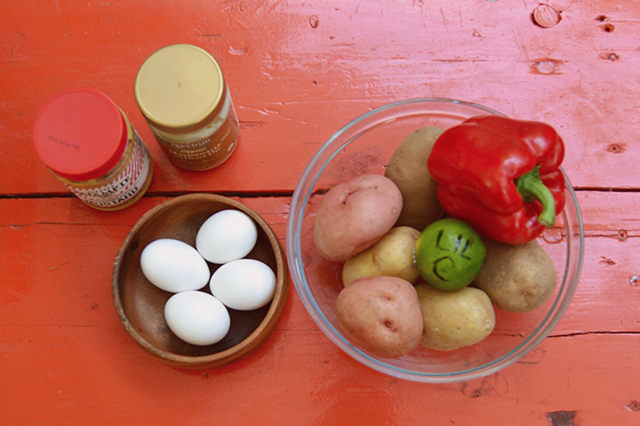
- Six Potatoes, Cleaned and Quartered (But Not Peeled)
- One Pickle
- Four Eggs
- Half Red Bell Pepper
- One-Fifth Sweet Onion
- Quarter-Cup Spicy Mustard
- Half-Cup Mayonnaise
First, you start by boiling the potatoes. Place them, quartered, into a big ol’ pot and cover them. Let ‘em boil for half an hour on medium heat like that, stirring occasionally and removing them from heat when they get soft. Drain them in a colander.
You’ll also wanna boil your eggs at the same time. My method is to put eggs in still water, toss a dash of salt in that b*tch, and then place them over an open flame uncovered. The water in your chosen pot should cover them by about an inch. When the water begins to boil, cover the pot, lower the heat, and set a timer for ten minutes. When it goes out, remove them from heat, drain them in a colander, and run cold water over them until they’re cool to the touch. Toss them in the fridge until later.
While things are boiling, clean and cut your veggies. Slice and dice the pickle, onion, and bell pepper. When everything else is cut, peel the eggs and quarter them. When the potatoes are done draining, cut them into smaller chunks using a fork and knife (they’ll be hot!) and then, mix all that stuff up in a considerably large bowl.
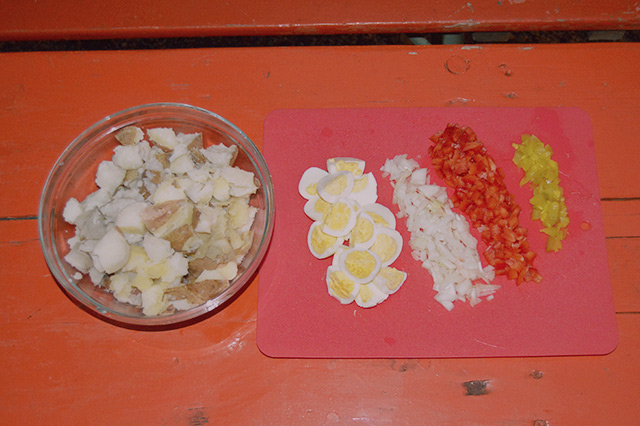
Using a hard spatula, mix all the ingredients, including the mayonnaise and mustard, in that big bowl. Don’t completely rid the potato salad of the lumps and chunks, but mix well enough that there’s nothing that hasn’t turned yellow.

And then, voila! You’re ready to chow down.
Hot ‘n Tangy and Spiced Blueberry Barbecue Sauces
by Kaitlyn
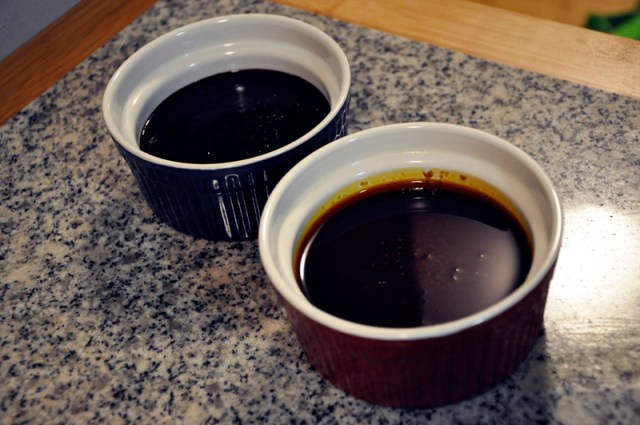
Everyone knows sweet barbecue. It’s that thick, syrupy, tangy stuff that you can buy at any grocery store, that helped Sweet Baby Ray make his barbecue sauce fortune. It’s been my favorite kind of grilled food topping since I lived smack-dab between Kansas City (where this style was born) and St. Louis (home of its tangier, thinner cousin). You could make the KC sweet style at home and put it on just about anything — it’s ubiquitous for a reason — but if you’re going to the trouble to make your own version of a sauce that you can buy at the store for two dollars, I say you may as well do it big.
So for my first foray into the DIY sauce game, I picked two types that weren’t what I’d normally reach for at a barbecue joint. The first is a blueberry sauce, and despite an off-putting (to me) inky blue color, it was really tasty. Sweet and fruity, but with enough vinegar that it doesn’t go down like a bucket of syrup. My girlfriend, who loves blueberries and frequently puts blueberry barbecue sauce on her burgers, said it was different from other ones she’d tried (“It’s got a kick to it!”) but happily scarfed down her portion. The second, a family recipe I snagged from The Kitchn, was runnier and super tangy, but with enough brown sugar to mellow out the vinegar that usually turns me off to this type of sauce. It was also spicier than I’m used to, but my taste buds came out unscathed!
Blueberry Barbecue Sauce Ingredients:
- Two Cups Fresh Blueberries
- Half-Cup Balsamic Vinegar
- Half-Teaspoon Salt
- Two Tablespoons Red Onion, Roughly Chopped
- Half-Teaspoon Cayenne Pepper
- Three Tablespoons Ketchup
- Three Tablespoons White Sugar
- Two Cloves Garlic, Roughly Chopped
- Half-Teaspoon Worcestershire Sauce
- One Teaspoon Chili Powder
Put literally all your ingredients in a small sauce pan. It’s so easy. Stir them together, then set to medium-high heat. Once it comes to a boil, reduce to a medium-low simmer for about 15 minutes. Stir occasionally if you, like me, cannot let a pot sit unattended for that long.

Check the consistency of your sauce. The blueberries should have pretty much broken down by now, and the red onion and garlic will be soft. I ended up adding a little extra water because I wanted the onions softer but worried about running out of liquid; feel free to do the same.
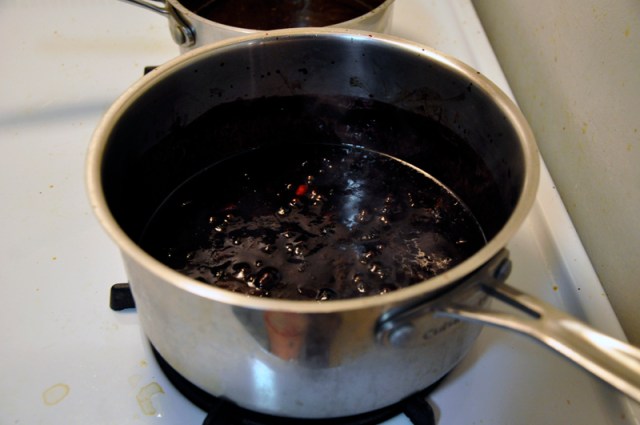
Once everything has mushed to your liking, remove the pan from heat and let cool. Pour into a blender or use an immersion blender to liquefy the ingredients. Pour or brush onto your grilled proteins, or use as a dip!
Hot ‘n Tangy Barbecue Sauce Ingredients:
- Three Teaspoons Salt
- Three Teaspoons Dry Mustard
- Three Teaspoons Chili Powder
- Three Teaspoons Paprika
- Half-Cup and One Tablespoon Light Brown Sugar
- Six Tablespoons Ketchup
- Six Tablespoons Cider Vinegar
- Three Tablespoons Lemon Juice
- Six Tablespoons Worcestershire Sauce
- Six Tablespoons Vegetable Oil (See Note Below)
- Half-Cup and One Teasoon Water
Put all your dry ingredients in a saucepan. Mix ‘em up with a whisk and blend in the ketchup until it’s all smooth. This supposedly keeps the mustard powder from separating, but I wouldn’t know if that’s true because I forgot to do it. Oops.
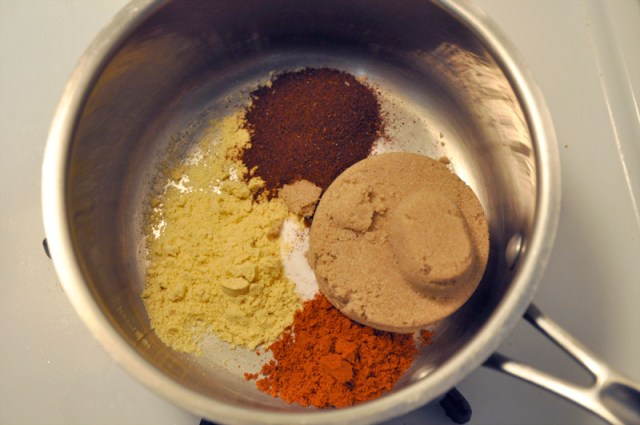
When I made this, I added all the wet ingredients in at the measurements listed. However, my end product was pretty oily — I had to cook the sauce for much longer than the recommended time to get a good consistency, and there was a decent layer of oil that just would. not. combine. So I’d recommend starting out with just 3 tablespoons of vegetable oil, reserving the other three for if things look too dry during the cooking process.
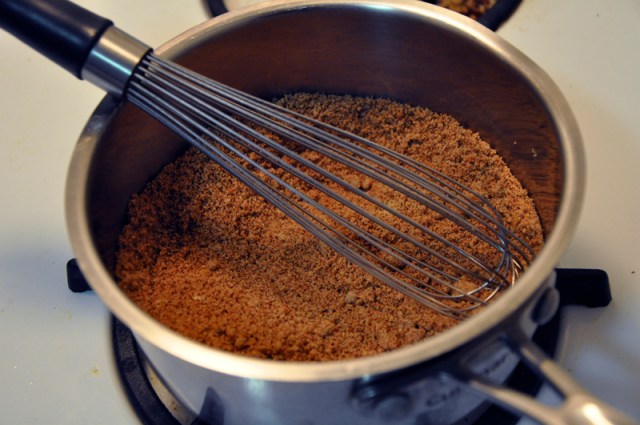
Add the rest of your wet ingredients, whisk until smooth, and bring to a boil. Lower the heat and simmer.
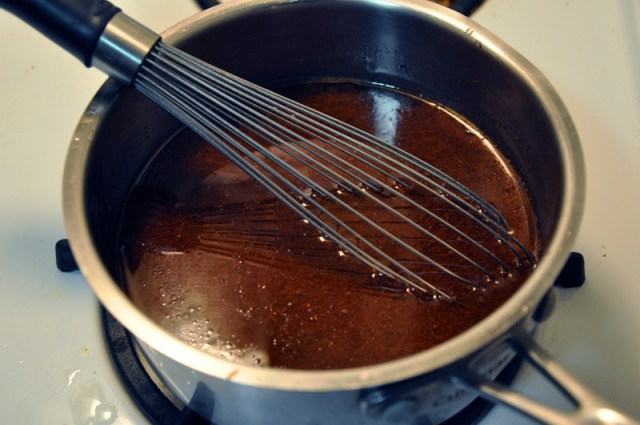
The original recipe says to simmer for about 10 minutes, but as I said, I had a lot longer wait before things started to reduce. Keep an eye on things, stirring occasionally, until the sauce is thick enough to cling to the back of a spoon. You’ll know it when you see it.

Vegetarian Stuffed (and Grilled) Peppers with an Elote Remix
by Carmen and Geneva

Stuffed peppers have long been my jam, but I’d never grilled them before Geneva and I threw together this recipe. AND WHAT A RECIPE IT IS, Y’ALL. I could probably eat these for breakfast, lunch, and dinner for the rest of time until I died and be the happiest little nugget on Earth. On the side, we added a spiced up time-honored BBQ classic by preparing corn as they do in Mexico: slathered in mayo and sour cream and covered in chili powder. It’s a wild ride, y’all.
Stuffed Pepper Ingredients:
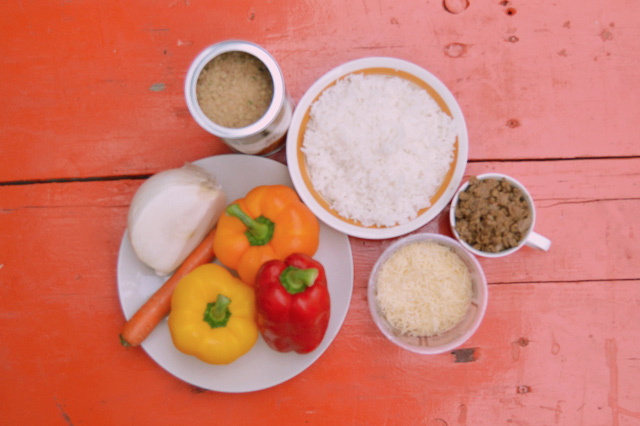
- Three Bell Peppers
- One and One-Half Cup Rice (Uncooked)
- One Cup Morningstar Crumbles
- One-Quarter Cup Chopped Onion
- One Carrot, Finely Chopped
- Parmesan Cheese
- Bread Crumbs
Before you can stuff and grill these babies, you’re gonna need to prep the rice. Cook it separately, then combine it in a well-greased frying pan with the onion, carrot, and veggie crumbles. Stir it up real good, spice it to taste, and then turn off the heat when it’s mixed and the veggies look done. Meanwhile, cut the tops off of the peppers, but don’t discard them. Then, gut them and stuff them with the rice and veggie crumbles mixture. Top them off with some parmesan and some bread crumbs, and then put the tops of them back on.
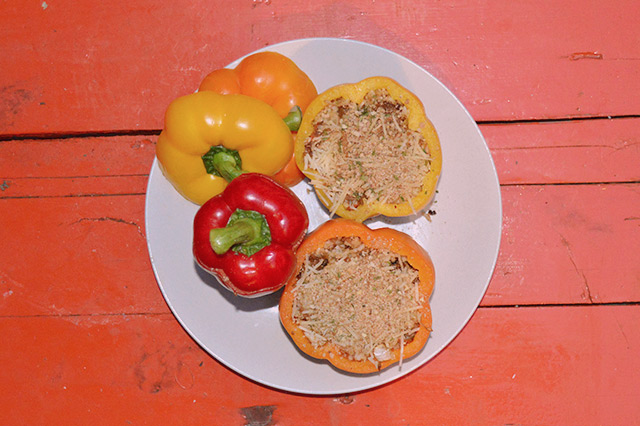
Wrap them up in aluminum foil, fully covering them and preventing them from opening or spilling out. Toss ‘em on the grill for fifteen minutes, turning them as needed, and then unwrap them carefully.
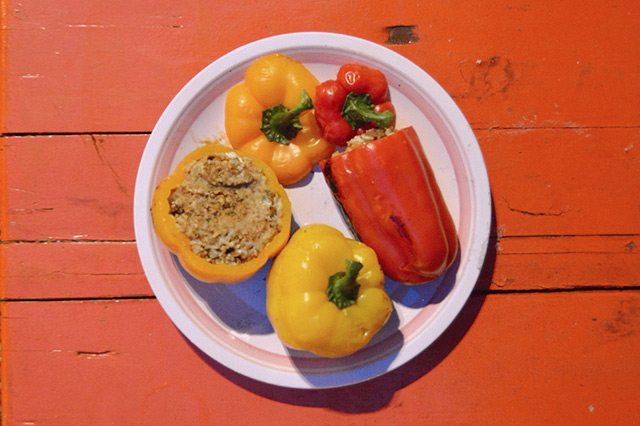
Proceed with caution, as these will be dangerously delicious. (And really hot!)
Elote Ingredients:
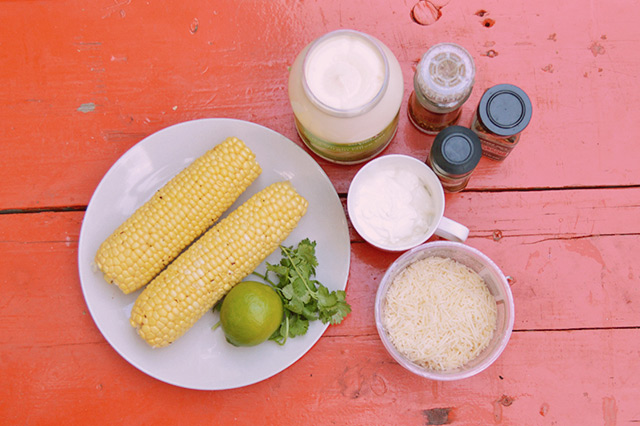
- Two Ears of Corn, Husked and Washed
- Quarter-Cup Sour Cream
- Eighth-Cup Mayonnaise
- One Lime
- Cilantro
- Chili Powder
After you’ve washed the corn, pat it dry and then rub on some olive oil. Add salt and pepper as desired, and then wrap it up in aluminum foil. Cook it on the grill, turning it regularly, for twenty to thirty minutes.
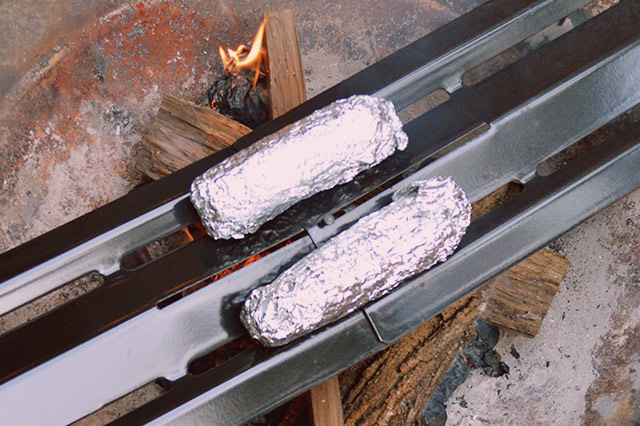
While the corn is over an open flame, chop up some cilantro. Mix together the mayo and sour cream in a bowl and then toss in the cilantro, too. Once your corn is good to go, unwrap it and spread the mix on it while it’s still hot. Season it with chili powder to your own liking and then squeeze some lemon on top before you serve it.
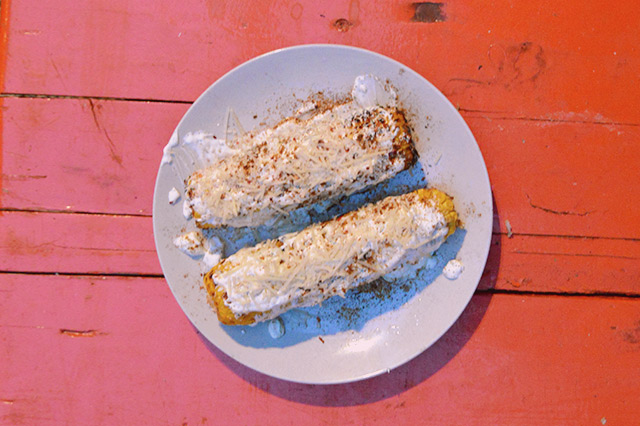
Put out napkins in advance.
The People’s Veggie Burger
by Rachel
I have been blessed, as a vegan, to be invited to many cookouts where friends have graciously provided veggie burger options. Unfortunately, many of those veggie burger options have been kind of lame, ranging from hockey-puck-like frozen storebought patties to loose piles of shredded beets that become essentially a warm salad because the burger chef wasn’t sure how to bind patties without egg. Into this void I would like to respectfully suggest this veggie burger, which is vegan, quick and easy to make, requires no ingredients that would necessitate a trip to a Whole Foods, and conveniently does not contain any tofu or breadcrumbs, which means it is acceptable to persons of a soy-free or gluten-free persuasion. Also it does not contain any black beans or beets, which are ingredients I love but have already eaten so much of in burger variations I can no longer summon enthusiasm for them.
It’s originally from Lukas Volger’s Veggie Burgers Every Which Way, which is an authoritative text on the subject and very worth buying. In the book, they’re called Quinoa, Red Bean and Walnut Burgers. The book recommends glazing it with a Pomegranate-Sesame sauce, which I’m sure would be delicious, but which I have never quite gotten around to trying.
Ingredients:
- ½ cup quinoa, rinsed thoroughly
- 1 small potato (4 to 5 ounces), peeled and chopped into 1-inch pieces
- 3 tablespoons olive oil
- 1 bunch scallions, including an inch of the green parts, thinly sliced
- ½ cup roughly chopped fresh parsley
- 2 tablespoons minced fresh ginger
- 1 ½ cups cooked red beans
- ½ cup roughly chopped toasted walnuts
- ½ teaspoon salt
- Juice of ½ lemon
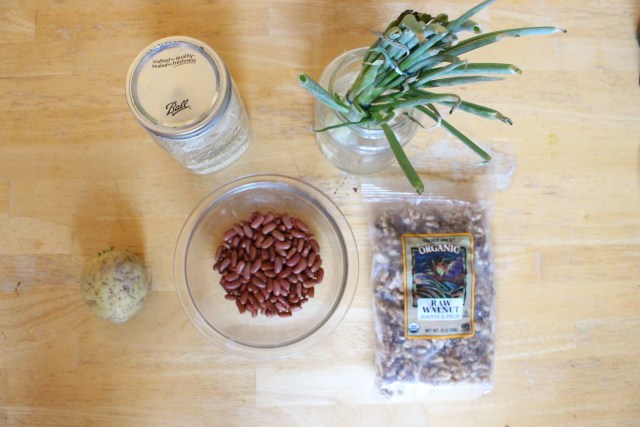
I forgot the parsley and ginger for this picture but I feel like you know what they look like
1. Cook your quinoa and potato until they’re both cooked through and soft. If you’re using dried red beans like I was, you’ll need to cook those too (remember that you need to soak them overnight the night before! No cheating on this part!). This is a recipe where canned beans are at least as good to use as dried beans, because that viscous canned bean liquid helps bind things, but dried beans were what I had and they worked great.
2. While your pots are bubbling away, toast your walnuts — you can do this either by putting them in a dry pan on medium-low heat and moving them around so they don’t burn, or you can arrange them in a single layer on a baking sheet and bake them at 325-350 for 7-10 minutes. Once they’re toasty, chop them up a bit.

3. Chop up your scallions, parsley and ginger into a relatively fine mince. I always use more scallion and parsley than the recipe calls for because I like fresh herbal things.
4. Once all of your items are cooked, toasted and/or chopped, you can combine them all into a mixing bowl and add the salt and lemon. Use a potato masher to smash everything together thoroughly. The mixture should begin to stick together pretty well right away.
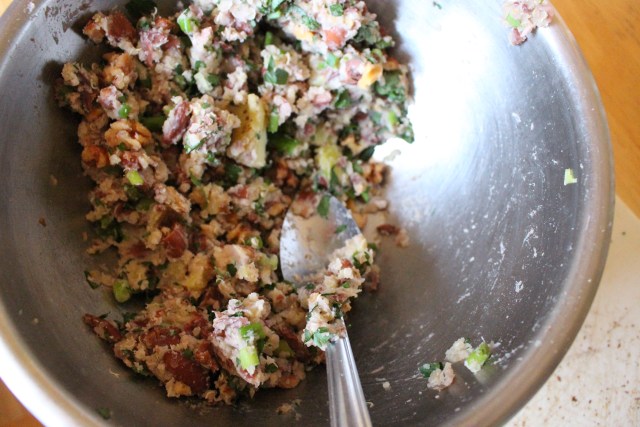
Proto-burger
5. Patty time! To make a burger patty, grab enough of the mixture with your clean hands to make a ball about the size of a baseball. (For burger aficionados who are not sports inclined, it should be about the size of a fist.) Next, flatten it gently between your palms and cup it in your hands, using your thumbs to press in the sides of the burger slightly so that they don’t taper out weirdly. You want it to be shaped more like a car tire and less like a flying saucer.
6. You’re ready to apply heat! These burgers are firm enough that I suspect they can be thrown on the grill, although you want to make sure that any grill you use is well oiled so that your burger doesn’t stick and fall apart. I personally prefer to cook these in a pan, at about 5-6 minutes per side over medium heat. Everything in these is already cooked, so you’re not trying to cook them through, just get a nice crispy crust on the outside. If you want to pan-fry them, you don’t have to worry about being left out of the barbecue atmosphere; if you have a stainless steel or cast-iron pan, you can stick that right on top of the grill itself and use that as a heat source.

7. Once your patties are off the grill, it’s all about the condiments.
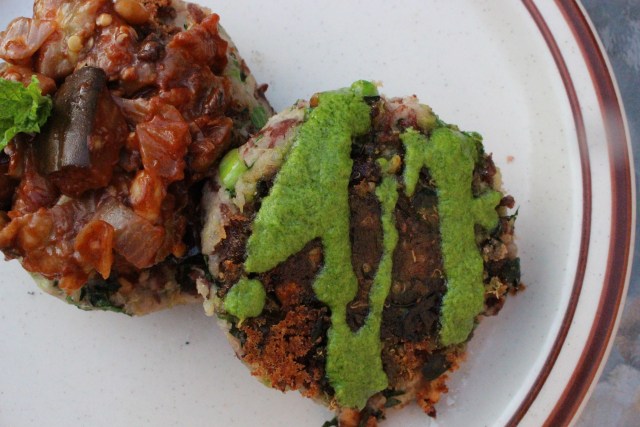
This burger is definitely hearty enough to handle some classic ketchup/mustard/pickle/relish situations, but I’d encourage you to think outside the box too. Here’s a place to start. I personally like these with a green pureed sauce of some sort, whether it be pesto or chimichurri or something similar. I went bunless, because I knew the burgers themselves would be enough to fill me up, and topped them with eggplant caponata and a vegan riff on the Silver Palate Cookbook’s green sauce.
However you choose to dress your burgers up or down, the most important thing is that you eat them outside, in the sun, with some good friends and a drink of your choice.
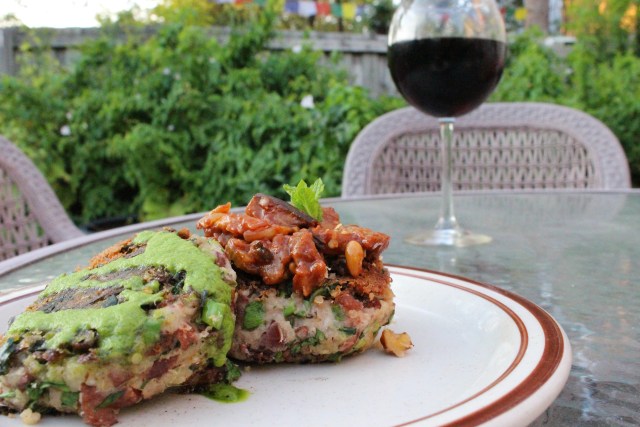
Veggie Skewers (w/ Pineapple!)
by Carmen and Geneva
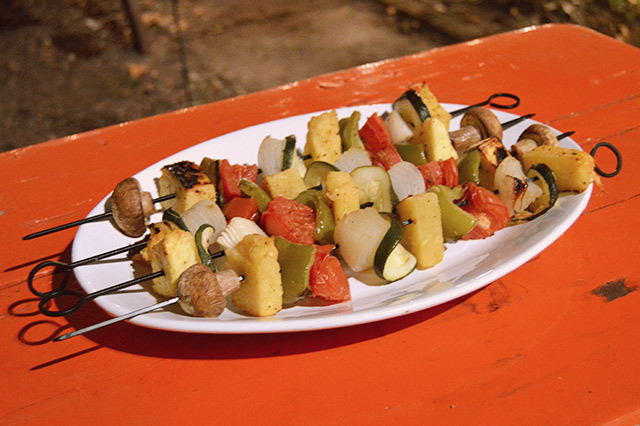
In the midst of burgers and hot dogs, what’s a vegetarian to do at a Babe-B-Q? Well, my friend, I have right here the ultimate answer to that question. I have right here the most heavenly grilled veggie and fruit kabobs you’ve ever put in your goddamn mouth. We made four.
Ingredients:
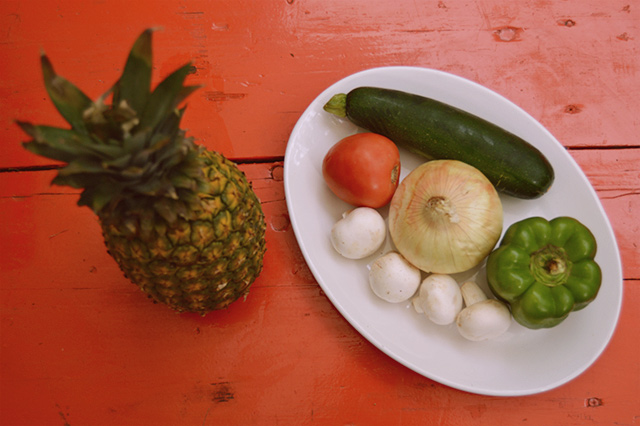
- 4 Button Mushrooms
- One Green Zucchini
- One Tomato
- Half Onion
- Half Fresh Pineapple
- Half Green Bell Pepper
This one’s easy peasy lemon squeezy. You start with your fresh veggies, get ‘em washed and ready, and then start cutting them into slices. You’ll wanna be able to put all these things on a big stick in a hot second, so cut the zucchini width-wise, into circular slices. Cut the tomato into eighths. Cut the pepper into strips and then cut those strips in half. Leave the mushrooms whole. Cut the onion into chunks, slicing large bits away from the center. Dice the pineapple, but into big chunks.
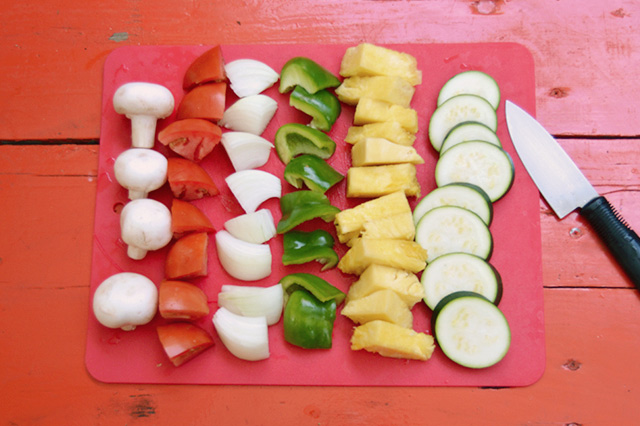
Line up your ingredients on the skewer however you damn well please. Then, spray them with an olive oil spray and season them to your liking. We put chili powder, cumin, pepper, and salt on ours. Be sure to rotate the skewers and season and oil every side. Wrap the skewers in foil, leaving them open on the ends so you can track their progress. Cook them over an open flame or in an oven for 30-40 minutes until brown, rotating them about halfway through.
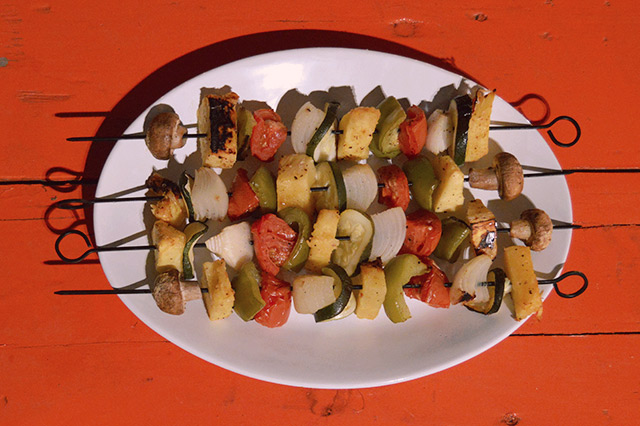
Then, put each heavenly piece in your mouth one by one.
Get Baked: Three Brilliant Blueberry Recipes To Try This Summer
Alert! Alert! Blueberries are in season! I recently came home to visit my dad and his wife, only to find 18 pounds of freshly-picked highbush organic New Jersey blueberries. They were gorgeous; as far from your typical grocery store blueberries as you can imagine. These berries were lucious and juicy, sweet but still tangy, practically as big as very small grapes.

Look at all these!! This is SERIOUS BUSINESS!
I did everyone a public service and baked things til my tongue turned purple! Here are some of the things I made:
Blueberry Crumb Cake
based on Blueberry Crumb Cake from Smitten Kitchen
STEP ONE: Prep
Heat the oven to 375°F. Butter a 9-inch round baking pan. Dust it with flour. Cut out a circle of parchment paper to fit in the bottom. (I did this step because I miraculously had parchment paper available to me. Probably it would be ok if you didn’t have the paper; it will just make it harder to get out at the end.)
Next, gather your ingredients.
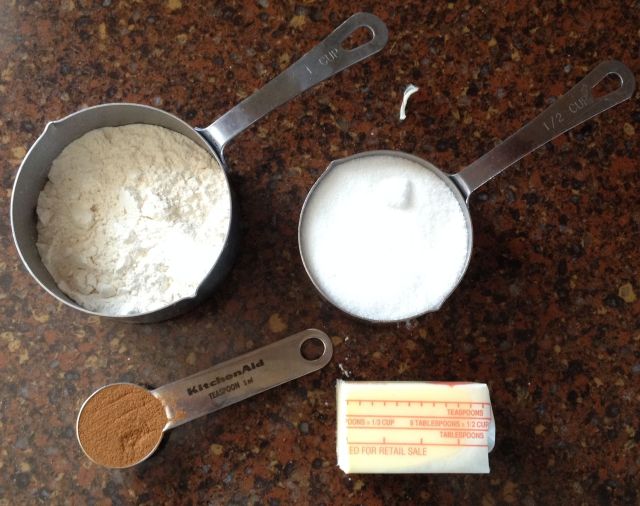
Topping
- 5 Tbsp all-purpose flour
- 1/2 cup sugar
- 1 tsp cinnamon
- 4 Tbsp unsalted butter (that’s half a stick)
- pinch of salt
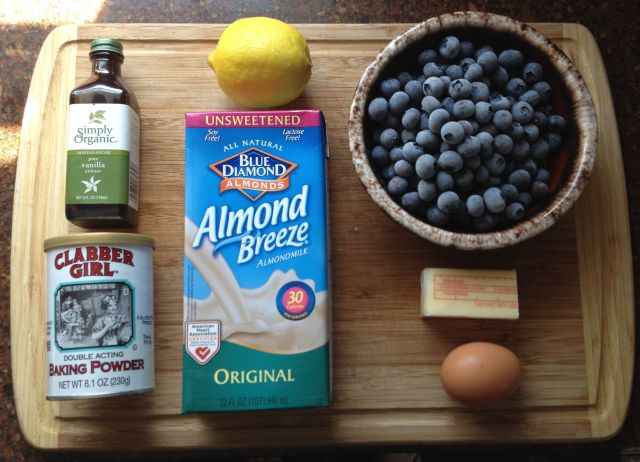
Cake
- 2 cups all-purpose flour
- 2 tsp baking powder
- 1/2 tsp salt
- 4 Tbsp softened unsalted butter (that’s the other half of the stick)
- 3/4 cup sugar
- 1 lemon’s zest
- 1 large egg
- 1 tsp vanilla extract
- 2 1/2 cup fresh blueberries
- 1/2 cup unsweetened plain almond milk
STEP TWO: Topping
Combine the flour, sugar, cinnamon and salt together, and then cut the butter into it. I learned to cut butter in a time when I did not have a pastry blender available to me. I think I was like twelve. I tried to use the “two knives” method, but I didn’t have the fine motor skills for it and honestly I don’t think I do now, either. My preferred butter-cutting method is just with my fingers.
I start by cutting the butter into smallish cubes like so:
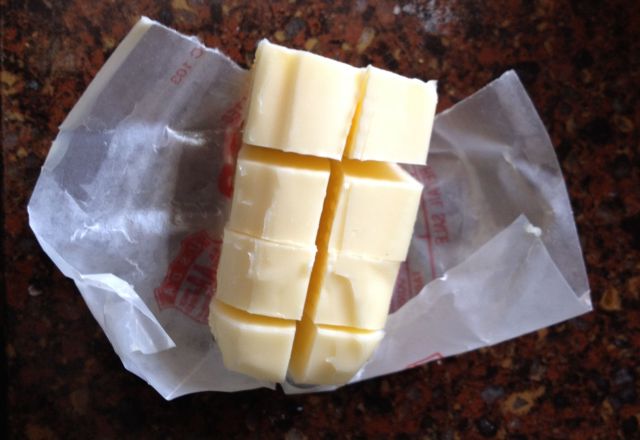
It should be a little soft, but not mushy.
And then I put them in the flour/sugar mixture:
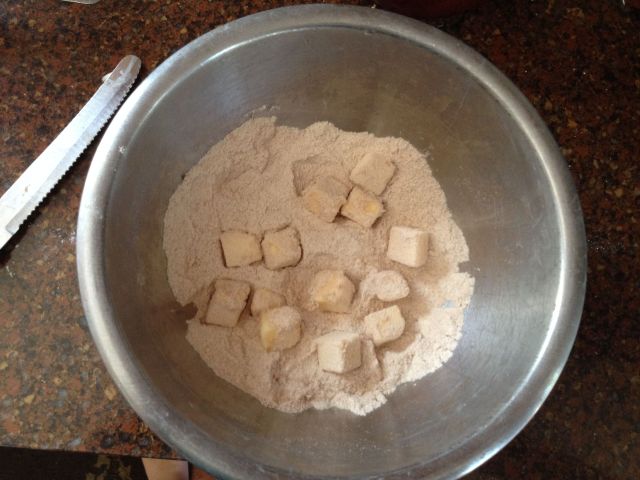
Get the butter nice and coated with the sugar and flour mixture…
And then I pull them apart over and over again.
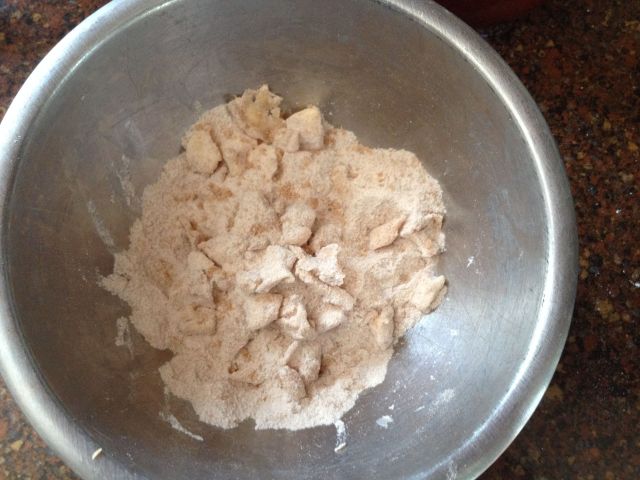
…make sure the butter keeps getting coated with the flour and sugar
At the end of the process, you can involve a fork to kind of smash things around.
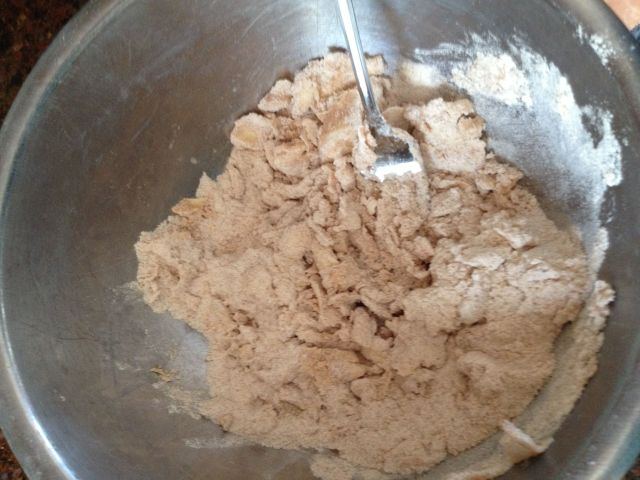
I’m sure there is a better technique for this, but I promise it works this way, too.
The idea is to get it all crumbly, but not have the butter completely evenly distributed.
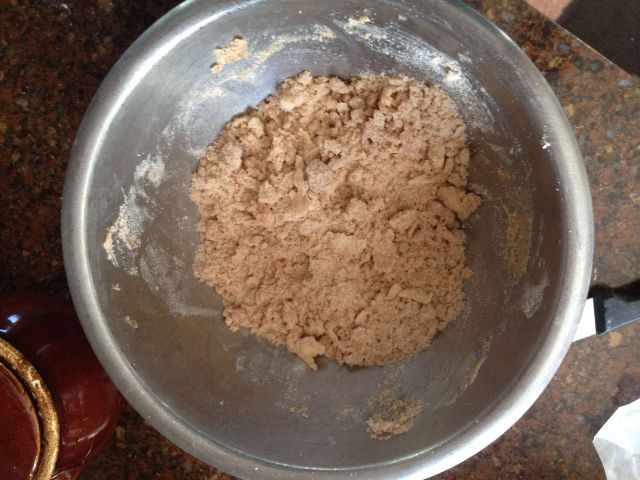
It’s all going to melt into itself when it bakes.
GOOD WORK. Now put it aside for later. I put it on the stove, which I didn’t realize was going to make it get hot because of the heat from the oven. This was not the worst thing later when it was time to put it on the cake, but if it had been on the oven much longer, it would have probably melted into a goo that would have been less than ideal.
STEP THREE: Cake
Whisk the flour, baking powder and salt together. In a different bowl, beat the butter, sugar and zest together. I used a hand mixer for this, but if you have a stand mixer it’d be worth it to pull it out, because while this is totally manageable, it’s gonna get less manageable.
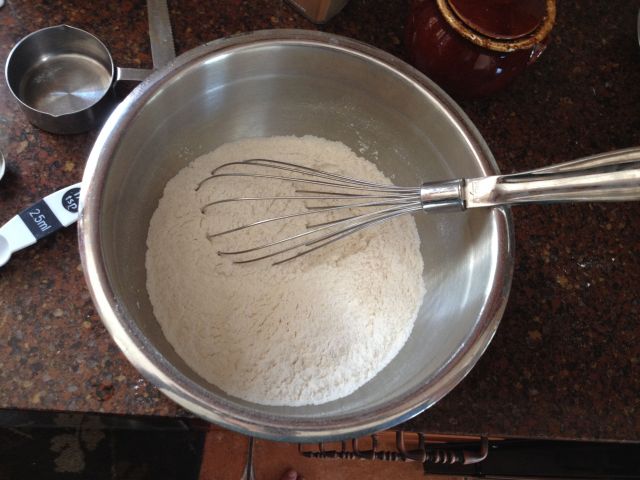
Once the butter, sugar and zest are fluffy, add the egg and vanilla and beat it all together.
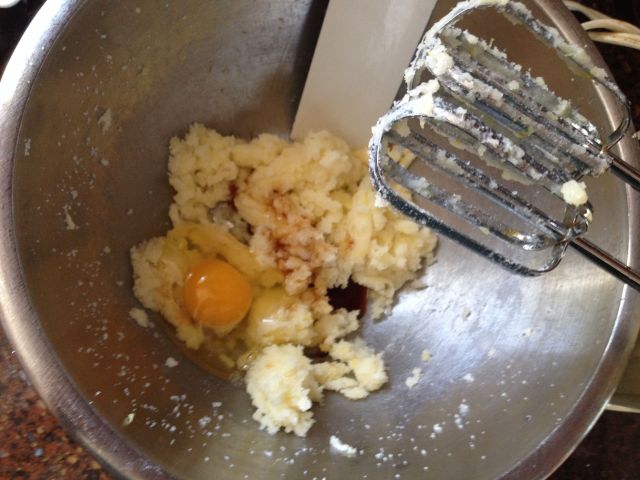
Ok, so now you have your wet ingredients, your dry ingredients, and your almond milk on the side. (Sidenote: I always prefer almond milk when baking because it’s easier on my stomach and it adds a subtle almond flavor that is rarely a bad thing.) First, beat 1/3 of the dry into the wet. THEN add half of the milk. THEN add another third of the dry, then the rest of the milk, then the rest of the dry. OK? Got it? Dry, milk, dry, milk, dry. You’re going to have really, really thick batter, but Deb says “don’t fret,” and if Deb says not to fret, there’s no need to, is there?
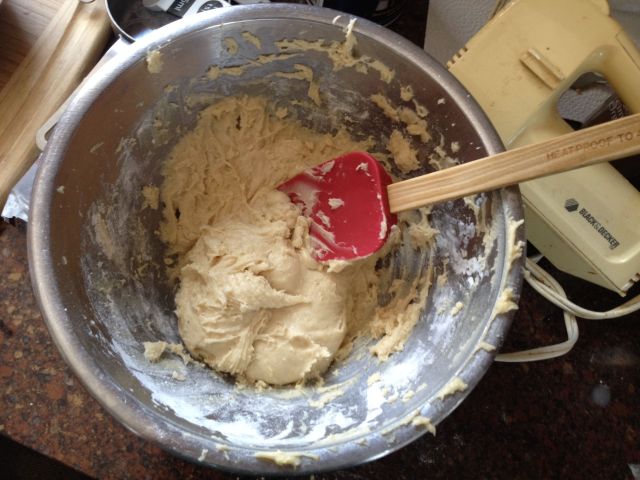
Then fold in those blueberries. Yes, all of them.
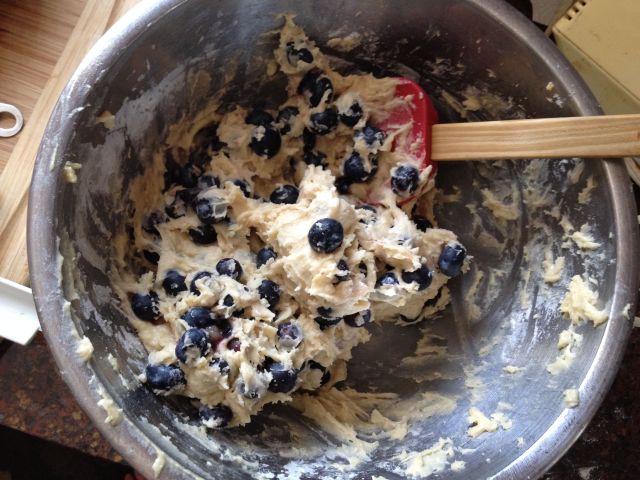
Now take your cake pan and dump the batter in. Spread it all around. Then sprinkle the topping on.
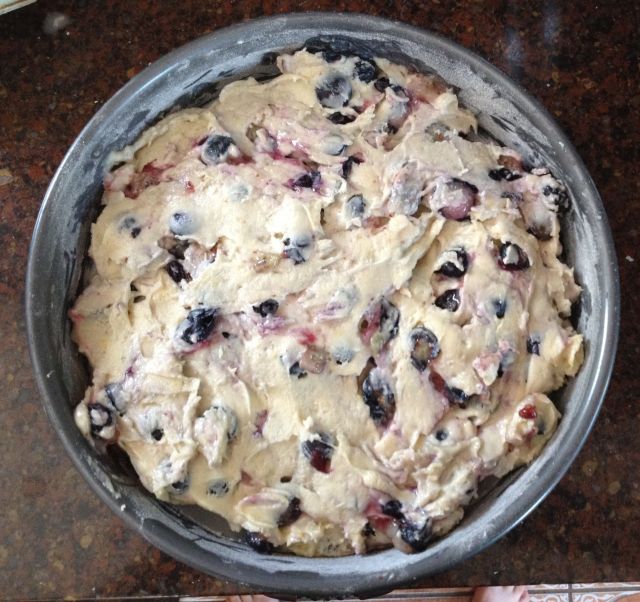
Bake for 40 minutes or until the top is kind of crunchy and a toothpick comes out clean.
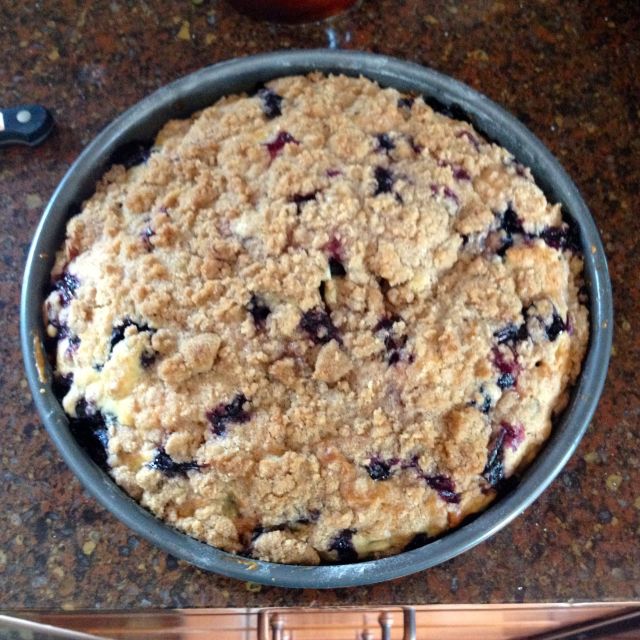
STEP FOUR: Eat
We ate this to celebrate my aunt’s birthday! Happy Birthday Auntie Ali!

It’s like 50% blueberries and so very delicious.

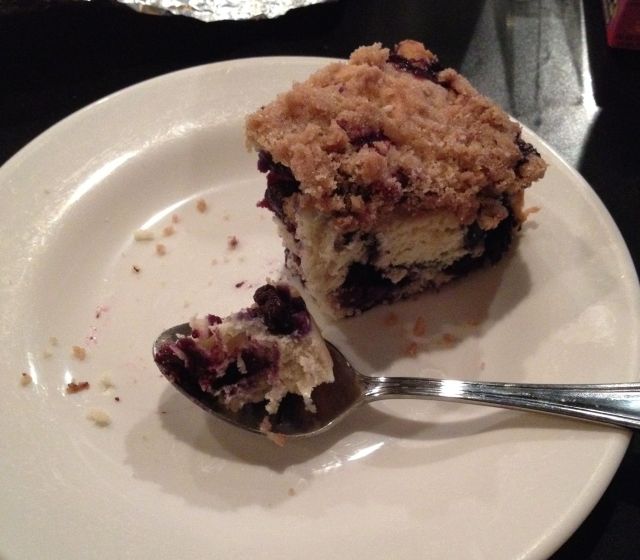
Blueberry Basil Popsicles
I combined the abundant blueberries with abundant home-grown basil to make abundant popsicles. While you can certainly follow my recipe, I’d recommend you create your own modifications depending on what you have a ton of and/or really need to use.
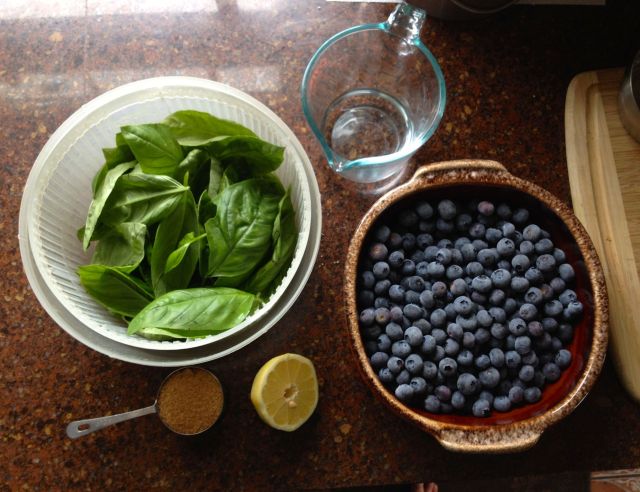
(That’s the lemon I zested earlier!)
My ingredients:
- juice from half a lemon
- 3.5 cups blueberries
- a whole bunch of basil (I don’t have anything more specific to tell you other than I loosely filled a salad spinner. I know that’s not super helpful, but it’s better than nothing)
- 1/4ish cup sugar
- 1/2 cup water
Take your blueberries, mix them with the water and sugar and a little more than half the basil, and put them in a saucepan over medium heat until the sugar dissolves, the basil wilts, and everything is super dark purple.
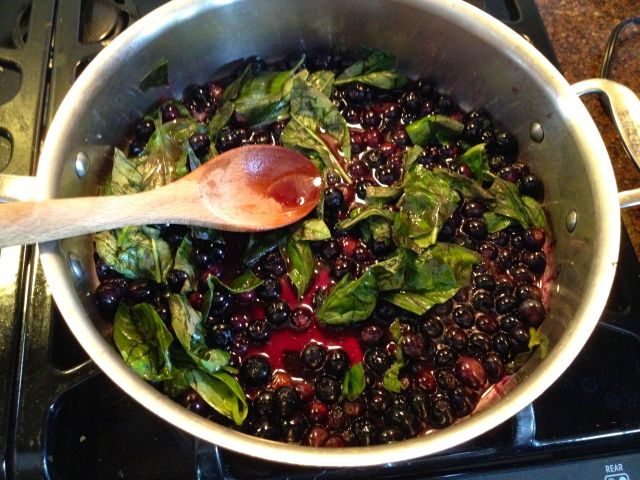
Then fish out the basil. I am not sure why, but the internet suggested it, and I feel like it makes sense. because you don’t want a bunch of cooked basil in your ice pops.
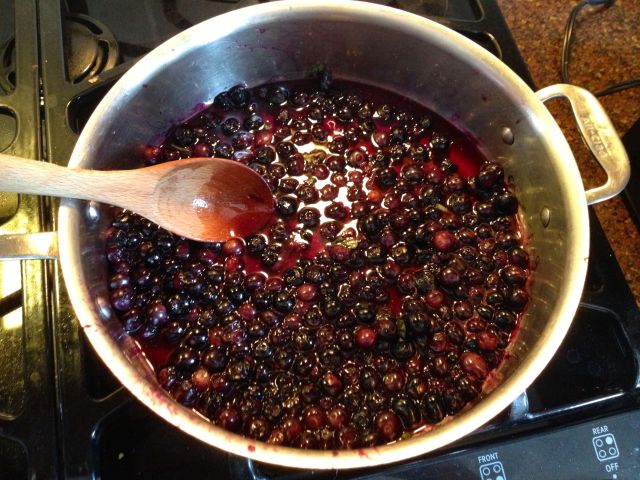
Now let the blueberries cool. While you wait, juice your lemon half, maybe rip up the rest of the basil a little bit, get out the blender, and clean the kitchen.
Once the blueberries are cool, put everything in the blender and liquefy it for a good long time.
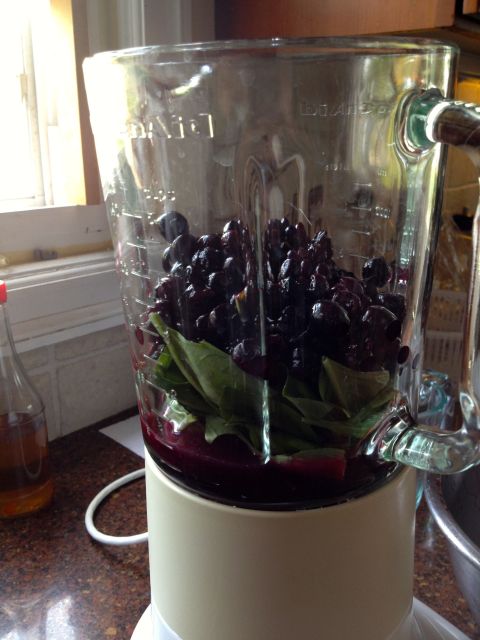
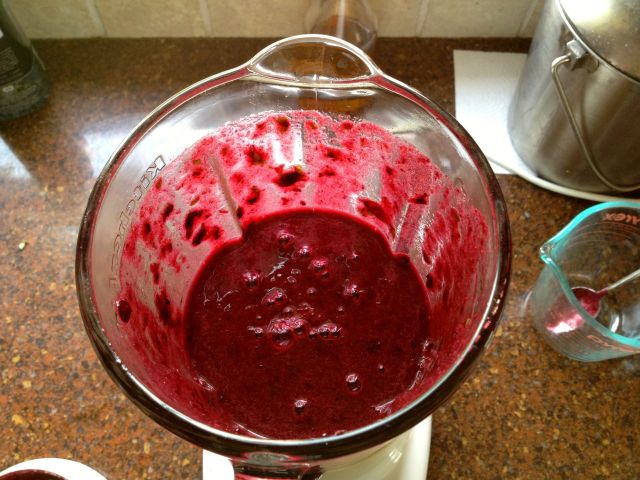
v pretty, but needs to be more liquid.
Then pour it into your popsicle molds.
I had exactly the right amount to make eight popsicles, which made me feel like a wizard.
Okay. So. Here’s how they turned out. On flavor, I’d give them a nine out of ten, but on texture they were only at like a five. They were too chunky! The blueberries weren’t totally liquefied before they went into the popsicle molds, but that wasn’t as much of an issue as the basil, which also wasn’t totally liquefied — some of the pieces were still kind of big, which is pretty weird in a popsicle. This is why when I say liquefy that stuff in the blender, I really mean liquefy. There might be something to be said for using an actual juicer if that’s something you have access to.
I still thoroughly enjoyed these with the family.
BlueberryTinis
Then I left the other four popsicles unattended while I went to Dyke March, and said remaining popsicles were appropriated for “BlueberryTinis.” I am told this involved, “blending the popsicles and adding a lot of gin.”

This is the lone photographic evidence of said BlueberryTinis, but I am assured that three of them led to a fun night and a rough next morning.
So that’s what I did when I had a zillion blueberries at my disposal. And let’s be honest – there were still a ton leftover in the freezer. How are you celebrating blueberry season?