Nine Vegetables Procrastinating Queers Can Still Grow from Seed in May!
Hey there, my procrastinating yet effervescent gay friend. I’m so glad you’re here and that you’re contemplating the possibility of growing at least one vegetable. And are you here because you’re wondering what vegetables to grow from seed in May? That’s great!! We’re doing great. I’m here to tell you it is not too late to plant some vegetables right now, this very month in fact! I am also in this situation, in your shoes, that I am by some quantum miracle standing in your shoes at the same time as you with this problem — I have been overwhelmed with work and all things life and have not planted my garden and now I need to need to seriously get on my game and get some seeds into the ground. And you! You can still sow many of these vegetables from seed in May and then reap the rewards, in some cases, as soon as June!
In my particular part of US Zone 6b, the climate’s pretty rainy and also has serious heat waves that last for weeks, but with a growing season that drops off by mid October. It’s too cold, too short a growing season for a lot of vegetables that might be easier to grow in more southern zones (eggplants die in my garden, sweet potatoes are spindly shadows of their southern cousins). You also can’t as easily grow plants that prefer cooler climates in the middle of summer, but if you’re more north, you might get away with this.
So, what’s in this list? We are listing vegetable seeds you can plant, now! Why seeds? Seeds are cheaper than seedlings or starts — you can get an entire pack of seeds for about the price you might need to shell out for a single seedling, depending on the plant, and you’ll get a bigger harvest from an entire seed packet than a few plants. You won’t see things like tomatoes or peppers on this list because those needed to be started a minute ago and if you really must grow tomatoes or peppers, you’re going to have to go to a greenhouse and get some seedlings. I’m sorry. It’s May and that’s just the way it needs to be if you want any kind of a reasonable tomato situation. The option to pour your love and attention into a tomato plant you start from seed does exist, but you have to know that if you do this now you might get, like, a single tomato for your efforts. This seems like a pretty unfulfilling relationship is all I’m saying.
So, none of the following seeds need to be started indoors at this point. In fact, most do better if you direct sow them. “Direct sow” means just putting those seeds into the ground instead of starting them indoors. More gardening terms: when I say “succession planting” that means, instead of planting something all at once, you’ve planted some, then wait for a period of time, then planted more in order to stagger the harvest. “Full sun” means 6-8 hours of sun, “partial sun/shade” is 4-6 hours of sun a day aaaaand none of these will be shade plants. Make sure you read the directions on the seed packet before planting anything (look for spacing directions and follow them, etc.), and if you’re feeling zippy, you could also give the variety a Google to see what people recommend! There is oodles of gardening advice out there, including some gardening advice previously published right here on this very site!
Before you start sowing your vegetable seeds, however, a warning, especially, as a helpful commenter pointed out, for those in East Coast US / Rust Belt cities, which is to screen your garden soil for lead. You should take samples from several points in your garden and get each of them screened. Alternatively, if that isn’t do-able, then the raised bed route might be your best bet. My girlfriend’s constructed me simple raised beds from some reclaimed untreated lumber. (Which means it is not the pressure-washed and treated, POISONOUS arsenic-laced kind of reclaimed lumber okay? Please be careful!) You can make raised beds out of all sorts of things just check to make sure the materials you’re using aren’t hazardous as hazardous materials can leech into the ground and into your food and into you! You’ll also need to go purchase some soil if you aren’t sure of the contents of yours, which, again, is an added expense. However, at the end of the day, it might be the best route for you, and also, container gardening is a great avenue for anyone growing vegetables on an outdoor concrete pad, balcony, rooftop or other urban gardening situation.
Let’s grow some beautiful plant babies!
This post was originally written in 2021 and updated/republished in 2022.
Carrots and Beets

Be sure to keep your carrot seeds damp after you sow them and well through sprouting. They do not like to dry out!
You’re bold. It’s almost too late for these. They grow best in cool spring weather, so it is time to get MOVING on sowing your beets and carrots.
The reason these are ranked as “most difficult” is that you need a certain soil consistency for these to do well. Beets and carrots can actually thrive in raised beds and containers because of the level of control you have over the soil, but you need to make sure the containers are deep enough. Root vegetables prefer loose soil that also retains water and somehow also has good drainage. So, if your soil has a significant clay content, like mine, you’re going to have trouble — moreso with beets than carrots. Carrots are kind of tough and will battle their way through the soil as best they can and then you’ll just have kind of funny looking carrots. Beets will tucker out and refuse to grow if the soil’s not loose enough. So, if your soil is full of clay (You can tell just by handling it. Does it feel like clay and stick together a lot and is really heavy…like clay?), I recommend just giving up and growing these in a container or raised bed. Carrots can be used to better the soil, but we’re growing vegetables for validation here! We want results!
Notes for growing carrots and beets from seed: Make sure the seeds remain damp for the couple of weeks or so it takes to get them to sprout. You can also plant these two things together and they’ll help each other out. Once they sprout, you’ll need to “thin” them. Just make sure only one plant is growing per spot. I recommend using scissors to snip away extras so you don’t disturb the root. Congrats, these extra seedlings are 100% edible so now you can sprinkle some carrot seedlings on top of your toast in the morning (wash them first please) and feel super fancy. Bonus note: beet greens are edible, great sauteed. Carrot greens are edible, make an awesome pesto.
What you need to know about carrots and beets as vegetables you can grow from seed in May!
Sun / Shade: Full sun
Time to Sprout: 10-14 days for beets, 14-21 days for carrots
Time to Harvest: 50-60 days for beets, 60-80 days for carrots
Container-friendly: Yes!
Self-pollinating / Needs pollinating: Irrelevant
Peas

I love to pick fresh sugar snap peas in the morning and have them with breakfast!
The absolute first thing I would get in the ground right now are some peas. Peas are one of my favorite vegetables seeds to plant in April and May. You are almost too late for these, but we’re not here to follow the rules, we’re here to get some things in the ground! These are soooooo easy, except for the trellis. New to gardening? Get some sugar snap pea seeds. You can eat them off the vine and it will make you feel like you’ve done everything right. Peas are relatively easy once you figure out the trellis situation, most varieties are ready to start harvesting in 60 to 70 days (a short period of time for vegetables), and the difference between fresh peas off the vine and store bought is really night and day, which is why they have VIP, completely reserved space in my spring garden this year.
Need a trellis? You don’t have to buy one! You can use your knot-tying skills to make one with some twine, or you can make one with chicken wire, which is what I’ve done because it’s really pretty fast once you get a little used to working with the chicken wire. Unroll it at least 5 feet, preferably more, attach it to things so that it slants from the bottom of the ground, upward, either by using the ends of the chicken wire itself, zip ties, twine, or other wire. You can attach it to an existing fence, or width-wise between two boards that you then lean against something, like the side of a building. A twine trellis can be hung from above like a rope ladder, which it is, but for pea vines. This is chicken wire. You will also need pliers or wire-cutters in order to cut it. Bonus: you can also use the chicken wire to keep critters out of your garden.
Container Gardening Tips for Peas: If you need to conserve space, I recommend trying a dwarf variety of pea. Some don’t even need to be trellised. These will grow in containers AND all peas are self-pollinating so you can grow them in places where you won’t have a lot of pollinators like bees coming around. Also, peas only need partial sun so if you have a shadier situation, they’re a good option.
What you need to know about peas:
Sun / Shade: Partial Sun
Time to Sprout: 7-14 days
Time to Harvest: 60-70 days
Container-friendly: Yes
Self-pollinating / Needs pollinating: Self-pollinating
Bush Beans

Bush beans are the easy baby sibling of pole beans. Be careful, though, when sowing your green beans. I’ve found that birds LOVE to pick these out of the ground. You might want to cover them with a cage, chicken wire, or a net until they sprout.
Beans are best to direct sow because they have delicate little roots and they hate it when you mess with them! Sow them where you want them and leave them there. As with any of the vegetables listed in this post, they’ve had human intervention that has helped cultivate them into the varieties we have today, and it’s important to recognize the thousands of years of labor and knowledge that have gone into the varieties that you consume, including some of our most common strains of beans, many of which are indigenous to the Americas. The genus Phaseolus are the way they are today because of indigenous farmers in North and South America who intentionally cultivated these varieties over millenia. That’s thousands of years! The Phaseoli are your pintos, your limas, but also, runner beans which are incredibly exciting because of their flowers! I’m planting this variety and am as thrilled by the prospect of flowers as I am of beans.
Beans can be roughly divided into two types, based on their trellising needs: pole and bush. Pole beans require trellising, bush beans don’t.
We’re covering bush beans because this list is supposed to be for gardening procrastinators who want to grow vegetables from seed this May, maybe after a quick trip to the store, and you maybe didn’t have time to get a trellis together! With bush beans, there’s no need to worry about that — they just grow on their own, in a little bush, thus their name. So if you don’t want to or aren’t able to make a trellis situation happen, this is a great route. Green beans of the bush variety will give you a continuous harvest for a while once you have them planted and fresh green beans are the best. You can buy seeds for blue lake green beans and do all the things you normally do with them once they’re done growing.
They also don’t need to be fertilized much since they make their own nitrogen, making them a great companion plant (a plant planted near another plant that helps it grow) for nitrogen hungry vegetables.
Now, for the reason these beans aren’t ranked as having more ease — I recommend you soak the beans overnight. This will require you to do some foreplanning, about 12-24 hours of planning ahead, but I believe in you! Put the beans in a dish of water the night before you want to plant them. You are now 1% less of a chaotic queer.
Container Gardening Tips for Beans: You can plant beans in a container, especially bush beans! Make sure your soil’s deep enough and just do your best with the spacing instructions. They’re self-pollinating so you don’t have to worry about hand-pollinating or getting some pollinator insects to visit. Great for a little outdoor patio or balcony situation that gets a lot of sun!
What you need to know about bush beans (which are an excellent choice to grow from seed in May):
Sun / Shade: Full sun! Heat!
Time to Sprout: 6-10 days
Time to Harvest: 40-60 days, Note: I like to go out and pick these each morning when they’re fruiting. You want to do this to keep the plant producing more beans.
Container-friendly: Yes!
Self-pollinating / Needs pollinating: Self-pollinators!
Pole Beans

Pole beans a hardy choice of vegetable to grow from seed this May! They are also just a great choice, I think, if you want to grow a vegetable in your garden that will taste seriously different fresh than it does from the supermarket.
Pole beans are next up! These are still super easy to grow, but they do require something to climb. You can use anything from a fence (one that has enough gaps for them to hold onto), to a trellis, a pergola, to, yes, poles that you literally stake up next to the pole beans. You’ll want whatever they’re climbing to be at leat 6 feet high, but ideally up to 8 feet. These are supposed to be planted after your last frost date which might not have even happened yet, they love sun and also will do well all summer long so you know what? No need to worry that you feel behind on gardening. Grab some beans and get going!
A bit about varieties here! There are some of these that you eat fresh, much like bush green beans. For example, Blauhilde beans are best used fresh. I love to just fry them up with butter and, yes, they are amazing. I grew these last year and picked some off the vine at least every other day while they were producing. On the other hand, you might try something that is more of a baked bean or a soup bean, such as the Good Mother Stallard bean. For these, you don’t harvest every day — from the time you sow their seeds in the ground, you just take care of them (water, weed, keep pests away) and let the pods dry out on the stalks. Dry beans aren’t harvested until they are all the way dry and the pods have released them inside of the pod. (Check your seed packet for an estimate on when this might be but it will be some months.) Then, yank out the whole plant by the roots and take it somewhere to pluck all the pods off the plant and “thresh” them or remove the beans by hand. Maybe get a friend to help you or put on a nice podcast. Store in some of those (clean!) glass spaghetti jars you’ve been hanging onto if you’re anything like this queer over here, and admire your handiwork. You actually now have beans you can use now — or that you can enjoy in the fall and winter! Look at you!
What you need to know about pole beans if you want to sow them this month:
Sun / Shade: Full sun! Heat!
Time to Sprout: 5-10
Time to Harvest: Like 3 months (check the seed packet but also use your observational skills! They will rattle when dry!)
Container-friendly: you could do a raised bed for sure
Self-pollinating / Needs pollinating: Self-pollinators!
Squash / Pumpkins

Do you have room in your garden / place you are growing things? Do you love squash? Do you want to grow your own pumpkins for Halloween? My spooky friend, now is the time to get those in the ground. These will need lots of space. An advantage of pumpkins specifically is that they’re good for reclaiming space from invasive species because…pumpkins win? In Pittsburgh, we have a huge knotweed problem (an invasive plant maybe also holding the whole city up because everything is built on cliffs and hillsides — I try not to think too much about it). Anyway, planting pumpkins in an area knotweed is trying to take over actually results in just… pumpkins! Magic.
Squashes also include zucchinnis which are legendarily easy to grow and productive, if you’re looking for what is maybe the hands-down easiest variety of squash. Winter squashes, deceptively, get planted now and are just harvested much later. These include your pumpkins, also things like your acorns and your butternuts.
I BELIEVE you can successfully grow some squashes in containers, but have not attempted this myself. Squashes like to spread their viny selves all over the place, so you will still need s p a c e.
Pollination and Other Notes for Squashes: Squashes DO need to be pollinated by pollinating insects, but you can actually hand pollinate these. Have you ever wanted to be the bisexual unicorn for two squash blossoms looking for a third? Now, you can! Hand pollinating is what it sounds like. You can get a cotton swab, old toothbrush, whatever and go scoop up some of the pollen from the male blossoms and then gently deposit it in the female blossom and spread it around. Here is a good visual for what to look for in male vs female squash blossoms, both of which are on the same plant. You can also pull the petals off the male flower, pick it, and stick the stamen into the female flower, but then you don’t have a male squash blossom to eat, which is sad because you can eat the male squash blossoms when you’re done. Don’t eat the females if you actually want squash, though! Blossoms are great battered and fried or stuffed with cheese (or your chosen briney, vegan stuffing) and baked.
Squashes may be the #2 most pest-ridden plant I’ve ever planted. (#1 being close-to-the-ground-greens slugs get after.) These squash bugs are a menace. If you’re okay with it / not attempting 100% organic gardening, diatomaceous earth works well for keeping these under control. I use it sparingly, but find it helpful. You may want to avoid it if you’re avoiding pesticides entirely. I have also seen people deal with squash bugs by manually removing them with tape. Like, get a roll of sticky tape and use it to stick up all the pests. This seems like a good idea because squash bugs can bite so you don’t want to just be reaching in there and scooping them up!
Also, I am just kind of looping cucumbers under squashes here. In my garden, they’ve experienced the same pest issues but are also, I hear from folks in the comments, pretty easy!
What you need to know about squash and pumpkins before planting them from seed this May:
Sun / Shade: Full sun
Time to Sprout: 7-10 days
Time to Harvest: really depends on your variety, but REALLY easy to tell just by looking. Is there ripe squash? You sure? Is it about time for this squash to be ready? Yes? Pick it.
Container-friendly: Yes?
Self-pollinating / Needs pollinating: Needs pollinating
Dill

Fresh dill, or dill weed, is a delight AND really easy to grow from seed. It doesn’t seem to me to be very picky in terms of soil and you don’t have to do much besides churning the soil around a bit with a trowel and sprinkling the seeds on top. (Skip the digging if you’re planting in a pot, just sprinkle). You can succession plant dill so you have fresh dill all summer long. This is great for omelettes, pickles, salads and dressing, anything you want dill in. Super easy and more cost effective than if you were to buy this much fresh dill from the store. Bonus points if you save the seeds for next year or dry some dill for the winter.
What you need to know about dill to grow this veggie from seed this May:
Sun / Shade: Full sun, deals okay with shade
Time to Sprout: 10-14 days
Time to Harvest: Once the leaves are ready, fully mature after about 90 days
Container-friendly: Yes
Self-pollinating / Needs pollinating: Irrelevent for eating, but should take care of producing seeds itself!
Radishes

This Fairy Tale Theater episode, starring Shelley Duvall, and the witch’s radishes within will haunt me forever. Are you a witch or witch-adjacent person who wants to grow your own “special radishes”? Wherever you’re coming from with gardening, radishes are magic. They sprout within a week, grow super fast and mature within 22-70 days. You’ll know because their tops will peek out of the soil when they’re close to ready. You can also succession plant these seeds for more radishes! Another thing to do with radish seeds is to plant them near other plants that you want to lure pests away from. They’re basically a sacrificial vegetable, then, that you use to keep pests occupied while other, more delicate plants like your carrots and beets grow. Radishes are also fun for kids to try because of their quick turnaround time, but that doesn’t mean you need kids to bask in that productive feeling that comes from seeing radishes sprout after just a few days.
What you need to know about radishes to plant them this May:
Sun / Shade: Full sun but also not the fussiest
Time to Sprout: 2-5 days
Time to Harvest: 22-70 days, depends on variety
Container-friendly: Yes
Self-pollinating / Needs pollinating: Irrelevent
Arugula / Rocket

Are you craving something that is really, really easy? Easier than anything else you have going on right now? In need of something that can come together faster than answering a slightly in-depth email or even washing a load of dishes? ARUGULA, friend. It’s arugula. I just throw these seeds around into empty areas of the garden like Johnny Rocket-Seed and once they sprout, you have arugula in a little over a month. You can succession plant arugula for a good while though it doesn’t love heat. This is a great way to have fresh salad greens that have not turned to slush because you forgot them in your crisper drawer. It doesn’t grow well in mid / high summer though, so get planting. Arugula also grows really, really well in containers, especially if you have partial shade. Can probably also be grown indoors. Pick it before it bolts (flowers). What are you waiting for? Plant some of this leafy green veggie this May and then tell us about all the arugula dishes you get to create!
What you need to know about arugula and rocket to grow them this May:
Sun / Shade: Full sun but tolerates shade
Time to Sprout: About 7 days
Time to Harvest: 40 days after seeding or when the leaves are at least 2 inches long
Container-friendly: Yes
Self-pollinating / Needs pollinating: Irrelevent
Melons

Bold of you. Bold of me! Are melons a vegetable? They’re in the same family as squashes and cucumber so I feel fine about looping them in here. These are another one where, like your pole beans, you are actually not late to the party! These like the heat so you actually want to be planting these after your last frost date. My absolute latest possible frost date for my region is mid-May. You can look yours up here.
Now, I hate cantaloupes and most kinds of melon excepting watermelon, so I am just going to pretend we’re growing watermelon and only watermelon! Don’t show me your cantaloupes! Watermelon is a vegetable (or fruit if you like) that can be planted even in regions skirting the edge of too cold so long as you plant these vegetable seeds after mid-May. Of course, if your region is warmer, you can get right to it! Again, check your frost dates, or just wait until the daily weather is hitting more than seventy degrees or so each day and the soil’s had some time to warm up.
These are big plants, much like their squash friends above. You’re also going to need to keep those pests at bay, and be in there weeding and taking care of these babies. Another note: the watermelons you get might not be nearly as big as the ones you see at the supermarket. That’s okay!! They might ripen with a diameter as small as your hand. Read up on the seeds you’re purchasing for more info on the variety. However, if you choose to go the growing-food-from-supermarket-plant-seeds route this May, you could wind up with anything (including something that does not quite resemble the plant you got it from — because genetics). These need warm soil and plenty of time to grow, so, again, make sure you are looking at the time you’ll have to grow these (until your first frost date of the fall) before you get going! I’ll be really curious if you decide to throw some watermelons into the mix for the vegetables you’re planting this May! Let me know if you’re trying them in the comments!
What you need to know to grow watermelon:
Sun / Shade: Full sun
Time to Sprout: 5-10 days
Time to Harvest: 3 months or more
Container-friendly: not really
Self-pollinating / Needs pollinating: one plant can pollinate it but you’ll need bugs to help (or you can get in there and help yourself!)
OKAY! What vegetables are you growing from seed this May now that you’ve read this? What veggies HAVE you planted already? Which of these vegetables are you going to grow from seed this May? What do would you recommend folks plant? We’d love to hear more from you and see your sprouts in the comments!
How To Post A Photo In The Comments:
Find a photo on the web, right click (on a Mac, control+click), hit “Copy Image URL” and then… code it in to your comment like so:
If you need to upload the photo you love from your computer, try using imgur. To learn more about posting photos, check out A.E.’s step-by-step guide.
Put On Your Bra-ssicas: You Can Still Plant Vegetables Now for the Fall! Here’s 14 to Try!
Summer’s Almost Over! What Are We Doing Here, Talking About Gardening?
In May, I wrote about 7 vegetable seeds procrastinating queers could sow right then!. Maybe you did sow some seeds! I hope you’ve enjoyed some of the fruits of your garden adventures by now. Maybe you saw that post in May, sighed, didn’t have time, and moved on with your life. Listen, I feel you. Personally, I am very grateful that my garden chooses to gift me with tomatoes even though I’ve done an awful job of weeding because the work at this very website sure does pile up and we’re all just trying to survive here. Gardens are nice, they’re soothing, they’re pretty gay (claiming it); and it can be really healing and pleasant and cathartic to grow something from seed and then, um, eat it. I want that for you. So, if you gave up, thinking that your dreams of vegetable gardening would have to be deferred for a year because you were too busy or just chaotic until now, I have some news: You can still plant a fall vegetable garden this year! What follows are some fall vegetable gardening tips and how-to’s (including vegetables you can plant for fall and winter harvests) to get you started.
In fact, fall vegetable gardening is its own special thing. So this isn’t playing catch up. This isn’t a rush job. You still have time to do this right! YOU can plant a vegetable garden that will yield veggies this fall and winter.
In fact, it’s the best time for planting certain things. I have a bag of carrot seeds I’ve been hanging onto, gazing at with longing. I’ll pick up the packet, pass it from one hand to the other, wonder what they’ll taste like, and read the message printed very clearly on the package that warns they are NOT for spring sowing. It is almost time for these carrots. I have been waiting for months for this moment.
In fact, certain vegetables, like your brassicas (cabbages, mustards, broccoli, cauliflower), your lettuces, and, again, root vegetables like beets and carrots will actually taste better after a light frost. This quick video explains why carrots are sweeter after a frost, but, essentially, it’s because these plants have adapted to survive in the cold by generating their own form of antifreeze… made of sugar. Then, when we eat them, they taste sweeter because the sugar content is in fact higher.
Sounds delicious, right? Let’s dig into this gardening adventure together!
First of All: Check Your Frost Date

Fall Gardening Tip #1: Know your frost date!
I’ve found the Old Farmer’s Almanac dates to be pretty accurate! My family’s sworn by the print version’s predictions for years, and it’s what I always go back to. Now, in this here year of 2021, you can go and enter your location to see your frost dates online.
So, I’m seeing that, in all likelihood, I’m going to get the first frost around October 19 in Pittsburgh, Pennsylvania. That means I’m going to, personally, for practical purposes, try not to have any plants that will die with a light to moderate frost planted in such a way that I’m hoping to harvest from them any time past the first week of October. I’m not going to plant those plants! (It is, alas, not time for any peppers, tomatoes, eggplants, or really corn. We’re not going to talk about them just like we didn’t talk about them with seed-planting in June. These babies get started early and need to be grown during the hot weeks of midsummer.)
On the other side of the spectrum, plants that can stand some moderate dips in temperature might be with me through the end of October and even into November, which is awesome. I grew up in western New York State / Buffalo, right up on the Canadian border, so my internal clock is set to “it snows in October.” If you’re farther north, you’re probably counting on even less time, and similarly, if it’s hotter where you are, you’ll have a longer growing season. If you’re in Richmond, VA for example, your first frost date is October 30. If you go even farther south, you don’t really have a frost date, even if temperatures will cool somewhat.
Why do we need to know the frost date? So we don’t set ourselves up for disappointment. It sucks to plant something and then have it die in the cold before you can eat anything from it! It also is a little less than satisfactory for something to stop growing because it’s too cold, so you wind up with a teeny tiny (but tasty) plant. My tiny cabbages from last year were my lesson in this (don’t worry, they still made beautiful cabbage rolls) — because, yes, these plants can survive the cold, but you want them established and to have done most of their growing before the frost date.
And yes, there are ways to extend the growing season: greenhouses =, cold boxes, various configurations of translucent tarp — but we’re not trying to start a homestead here, we’re just growing a few vegetables that you maybe haven’t even put any thought into it until this very moment! We’re going to keep it simple.
So Now You Know Your Frost Date! What Does It Meeaaaan!?

Random Fact My Girlfriend Loves: Did you know Swiss chard and beets ARE THE SAME PLANT, just bred over the years to either emphasize the leaves or the root? Wild. Anyway, like beets, Swiss chard is an awesome addition to a fall or winter garden! Fall Gardening Tip: Keep the plant growing for longer by harvesting from the outside and letting it replenish itself.
We have to look at the time to grow to maturity for whatever you’re planting, the time to harvest, and then count backward from the frost date. If you want to be the safest, time it so your plants are ready to harvest at around your frost date. In my example, I’m going to stagger planting dates so that I have three harvests ready to go at different times. So, let’s use beets as an example:
Beets take 7-8 weeks to mature from sowing to harvest, and I want them to go through about one frost, so I’m going to count backward about 6 weeks from October 19 and not really go past that.
I’m going to stagger planting dates so that I have three harvests ready to go at different times (this is also called succession planting). So, here is my planting calendar for beets.
Week 4 of August: Plant ⅓ of my beets, these should be ready for harvest in about the second week of October or later (these probably won’t face much frost but should enjoy maturing during the cooler weather)
Week 1 of September: Plant ⅓ of my beets, these should be ready for harvest around the third week of October or later
Week 2 of September: Plant ⅓ of my beets; these should be ready for harvest around the fourth week of October (really playing with the frost date with these) or later
Remember, my frost date is October 19. Yours might be different.
When it comes to planning your garden, different plants have different times that they take to grow, so you need to do this for each plant! Besides checking your frost date, my top fall gardening tip is to plan your garden in advance so you don’t miss your planting times. Here is a quick shortcut guide of vegetables to plant for fall with days from planting until harvest based on info I have gathered from the internet, put here just for you:
Beets: 50-70 days
Swiss Chard: 70-84 days
Carrots: 60-80 days (seeds need to remain damp)
Cabbage: 70 days
Bok Choy: depends on variety (baby versions can be ready really quickly), 45-60 days
Kale: 55-75 days
Mustard Greens: 40-70 days (really depends on how big / mature you want the leaves to be)
Broccoli: 80-100 days (I personally wouldn’t plant broccoli where I am at this point, but maybe if you’re somewhere warmer you could pull it off!)
Kohlrabi: 45-80 days depending on variety
Radishes: like 28 days, as little as 18 depending on the variety — these are so fast just keep planting them until the last minute in my opinion.
Peas: sugar snap peas (my #1 recommendation for a beginner gardener) will usually start producing after 40-60 days
Lettuce: depends on variety, as little as 30 days, 45 more commonly, longer
Arugula: as little as 28 days for common arugula, wild rocket can take longer
Spinach: 45-50 days, also depends on variety
What I’m Planting

Once I get the seeds in my hands and I’ve got a patch of dirt in front of me, I start making serious last-minute choices that I DID NOT PLAN. Like “I just want more beets than that.” Having a plan helps me keep track of what is where and also helps keep me to task so that I am sure to plant some of everything in my fall vegetable garden that I want to have later on in winter.
As you can see, I have some summer harvest vegetables going; tomatoes, kale, swiss chard, beets, peppers, cabbage and runner beans.
I’m going with some things I KNOW will do well and trying some things for the first time. I’m looking forward to the slower pace of a fall vegetable garden, and hoping that a little cold slows the pests a little. (Not a gardening tip: just a wish, from me to the universe.)
In terms of things I know will do well, I’m planning more sugar snap peas where I currently have runner beans trellised. These are always a hit and I don’t feel like I can have too many. I’ll probably trim back my grape vines pretty hard (I have wild grape vines that came with the place, that I keep around for their tasty leaves, harvested in late spring).
Once the green beans, radishes and peppers have run their course, I’ll pull them and replace them with beets, succession planted as outlined above. Where I currently have my beets, I’m sowing carrots and a few cabbage plants. Some people get hardcore into crop rotation. I have limited space so I do what I can, but there is advice out there for what to plant before and after what else, mostly as an effort at pest management.
As for new things, I’m trying bok choy in my spring lettuce containers. The spring lettuce turned bitter, is now dead and ready to be pulled. I’m going to try some mustard greens and other lettuces in my tomato container later on.
What Do I Do With My Fall Vegetable Garden Now?

Fall Gardening Tip: Carrots can break up soil and help prepare it for vegetables that you want to plant come spring. Cool! Plant some carrots in a rough patch of your fall or winter garden to help loosen soil. You may get carrots that are kind of funny shaped but who cares? They taste the same and carrots that look like they have legs are the best.
Get planting! All of these will do well in cooler weather for a fall planting. I recommend that you do research specifically on whatever you decide to plant, just to make sure you have the right conditions. I talk a little bit more about growing plants, like peas, that require a trellis in my first gardening article.
So, the point here: If you combine your frost date + the knowledge that you now possess of plant grow times, you likely have time to grab some seeds and get a patch of ground ready (don’t forget to test your soil for lead and if you need to do this you can get a sample tested for $20 here). Carrots are great for soil that’s a little rough, if that is your situation. I’ve also seen cabbages persevere (though grow slowly) in heavy clay soil. Peas are intrepid. Most of these, and even root veggies, also do pretty darn well in raised bed situations. These are especially good if your soil isn’t safe to use or if you can’t get it tested (because with a raised bed, you are using soil you bought from a gardening store that is safe and I hope lead-free).
After you sow the seeds and take care of them according to instructions, you should be well on your way to a beautiful fall harvest. Soon, autumn won’t just be about pumpkins; it can also be about beets and carrots, lettuce and sugar snap peas and all the colorful fall vegetables you’ve planted. You did it! (Or you will!) Proud of you!
Another note: with most of these plants, beets, lettuce etc — if you follow the seed packet instructions, you’re going to have thinnings. You can eat these! I like them on top of poached eggs on toast. You could put them in a sandwich, IDK dream big!
Some Other Things to Do With Your Vegetable Garden in the Fall

Hot Fall Gardening Tip: Garlic is Awesome
This fall, once I pull some of my summer plants, I’ll transfer some potted blackberry plants into my caged area so they’re safe from deer and will cover them for the winter. I’m also going to try and cover and preserve my huckleberry and ground cherry bushes so they hopefully grow larger next year. Finally, depending on where you are, September and October are the time to plant garlic for the following summer harvest! You can get seed garlic, or if it’s sold out because it is always sold out these days, you can break apart and peel the skins from garlic you get from a farmer’s market and plant each individual little clove pointy side up (and mulch on top to keep it tucked in and warm all winter). I tried both farmer’s market and store bought garlic last year and…only the farmer’s market survived, thus the recommendation. Harvest these the next late June or July, when the tops (scapes) start to brown. Keep this timing in mind as you plan your garden in case you want to have a garlic patch!

I grew these beets! Look at that dirt! Don’t eat that part! That’s my number 1 fall gardening tip: don’t eat dirt.
Got tips, tricks, recommendations, fall gardening plans or questions…maybe even garden photos? I would love to see them in the comments! Good luck out there, my gay gardeners. I believe in you!
The Queer Gardener’s Almanac: What You Need to Do as Spring Turns Into Summer
Illustrations by Gillian Lake-Thompson
Spring: a season of many clichés. In a regular year, the changing of the clocks heralds a glut of daylight hours to remind us the outside world exists and tempt us into verdant meadows of decadent new growth, basking in a chirruping chorus of baby chicks.
But even when all is normal, things are never as straightforward as a time-lapse video of a perfect bloom unfurling. Each cubic inch of nature writhes with the mundane struggle of life; the reality is the perfect bloom fares worse than a Tudor monarch’s wife when it comes to beheading or survival.
In this liminal season, the tail of winter tussles with the promise of a summer that may never arrive. Basically, you don’t know whether it will chuck it down or blow a balmy breeze; whether there will be a heatwave or an ice storm. Or both, on the same day.
It’s in this uncertain climate that the plucky gardener must make one of their most vital decisions: when to start planting your lovingly hand-reared seedlings in the perilous ground outdoors. This choice is largely at the mercy of the last frost, a fickle date predicated on cosmic schadenfreude
Unpredictable by super-computers and generations of horticulturalists alike, frost has caught us out many times. A couple of years back, Gillian dragged me from the flat in the middle of the night (at least 8pm), gripped by anxiety that her freshly-planted tender shoots would be nipped by frost. We hurried to the allotment and by moonlight tucked them into fleecy covering. They died.
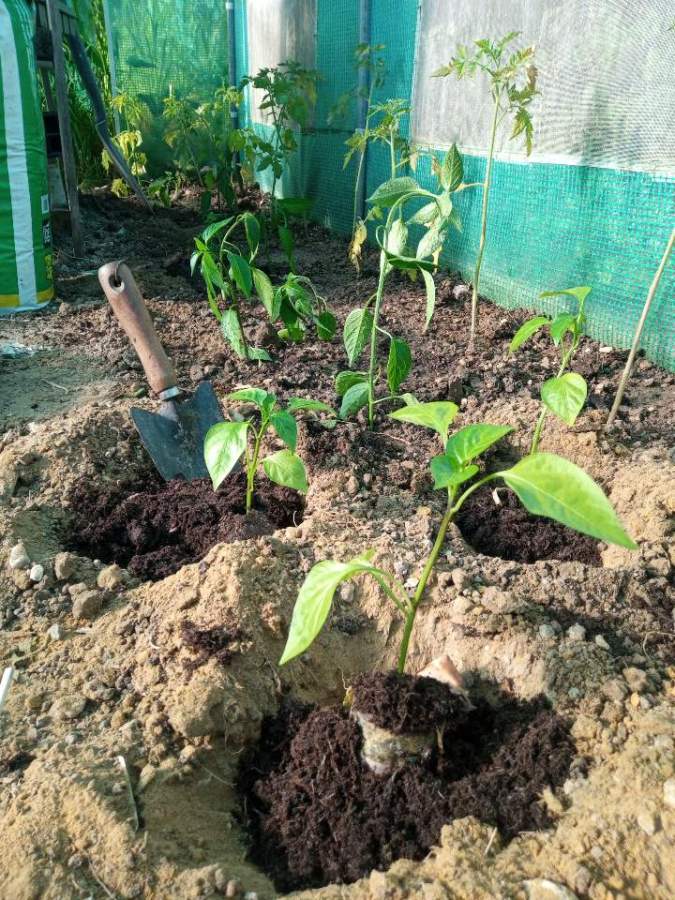
This year, we thought we had it sorted. After a heatwave for much of April, devilishly timed to inflict maximum dismay on a house-bound population, a week of rain was forecast. The assertive kind of rain that dampens the ground with purpose, but falls short of full-on laceration, and guarantees the temperature won’t dip into frosty territory. Ideal for fragile young plants starting their first term in the soil. So, into the ground went the many seedlings that had overtaken the flat with even less regard for boundaries than your worst ex-girlfriend: corn, peas, beets, dwarf beans, broad beans, and for the poly tunnel: aubergines, chillis and many, many tomatoes.
After two days of this pleasant soaking, Gillian and I stood in the flat as the sky blackened, then pelted the ground with hunks of ice. The sleet heaped in the planters on the balcony, like cheap crystals in a gift-shop. Fully exposed at the allotment, the plants took a beating, but remarkably everything survived but the beans, until a mid-May frost took another side-swipe at the lot.
The moral of the tale: just keep fucking planting until something survives.
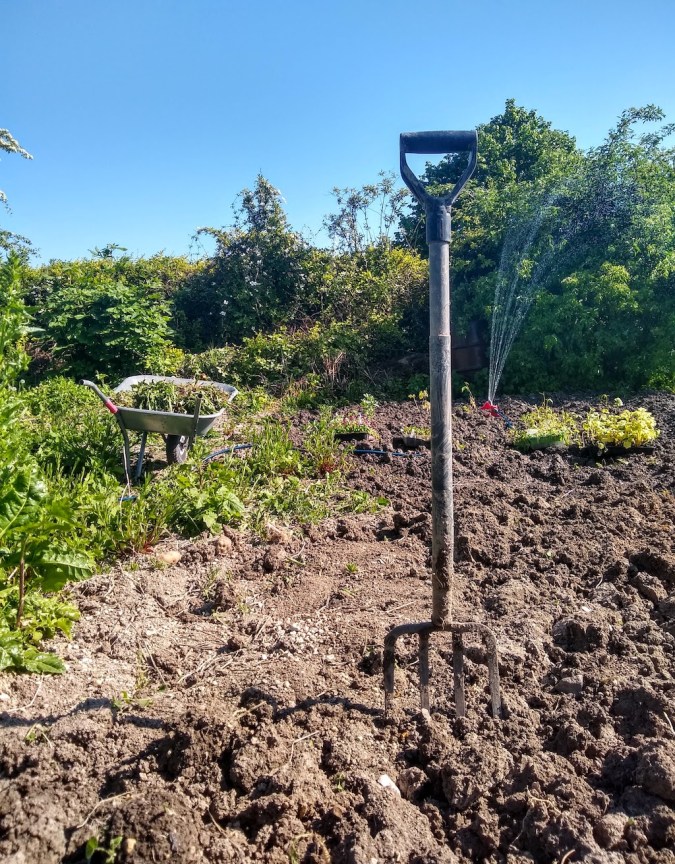
Spring Jobs
It’s a very busy time of year in the garden, and I have been tirelessly prompting Gillian to get on with a wide array of tasks so I can chronicle it all from the comfort of the sofa.
Planting
While it may be quicker to list the things that you can’t plant by the end of spring, there’s still a few things you may want to hold off on until you’re confident the warm weather is here for good. I particularly like that these plants are often called “tender crops” which are kind of like “tender butches” in that you may need to bundle them in rugged yet cozy fleece in colder spells, or they will surely wither and die.
For us, it’s safe to get into the ground: potatoes, rhubarb, asparagus, peas, chard and beetroot, spinach, parsnips, carrots, corn, brassicas and broad beans. We’ll leave it just a little later for cucurbits (cucumbers, courgettes, squashes, pumpkins), and less hardy herbs (basil) and salad leaves (callaloo & amaranth).
While I remain firmly veg-centric, one must also remember the importance of flowers for bees, decoration, and secret codes.
Let us know what you’re planting!
Compost
One of the true joys of the lockdown has been the thrice-daily “Compost Update” emails of our local allotment committee as they wrestled with the inability to get hold of their annual delivery of horse manure. I don’t believe horses have stopped defecating, so presumably it’s some kind of supply-chain issue between shit and shovel.
From the shops, anything that’s organic and peat-free is fine by us. However, if you want to give your plants the silver service treatment, consider feeding them comfrey tea!
Despite inheriting numerous compost bins on our plot, for years we have just kept adding detritus to the top, and magically more space appears, but no compost ever comes out the bottom. It all feels very allegorical but, like most allegories, lacks practical application.
Please do shout out in comments if you are a compost whisperer with any weird and wonderful ways with fertilisers!
Pests
If you aren’t in a perennial state of anxiety about slugs, start worrying about them now. If it seemed like they went dormant in the colder months, that was only so they could take advantage of your complacency and inflict maximum emotional damage when they return to their gluttonous ways. We’ve tried DIY repellants like copper wire and crushed up eggshells, as well as organic slug pellets and attritional guerilla warfare, with mixed results – more on this next time!
What’s Cooking
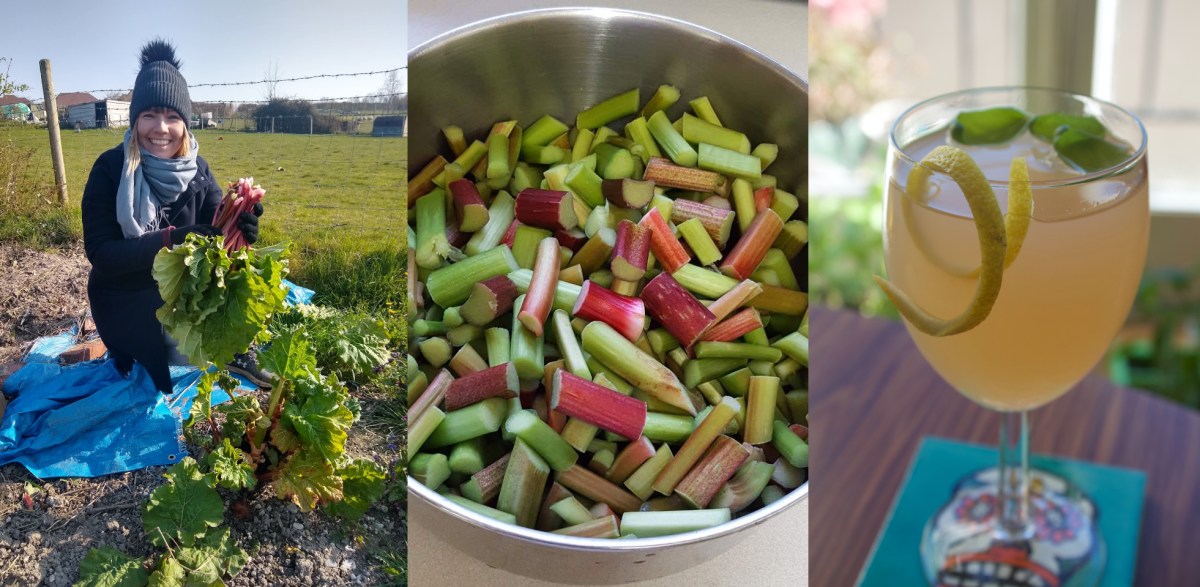
This season we have been gifted with abundant and repeated growth of a couple of robust crops: rhubarb and chard. The latter has been a welcome and reliable source of greenery while supermarket shopping remains a hazardous activity, liberally used in everything from warming saags to tourte pascale. Also, it really should not have been a surprise when Gillian came home with vast quantities of spring onions (scallions) the other day, which sounds like a perfect excuse to give scallion pancakes a go.
As for the rhubarb, owing to our lifestyle choices, we found ourselves with a greater need for mixers than desserts. Cue this very forgiving rhubarb juice recipe!
Rhubarb Juice
Ingredients
- rhubarb (at least 500g / 1lb to make it worth the faff)
- water
- sugar/honey/agave etc. to taste
Method
- Chop rhubarb into rough 1/2 inch pieces
- In a large pan, cover the rhubarb generously in water, and bring to a boil
- Turn the heat down, and let it simmer for at least half an hour, until the rhubarb becomes easy to break down with a fork
- Take the pan off the heat and let it cool completely
- Using a fork (or even an immersion blender), mash the rhubarb to get as much juice out as you can
- In batches, strain the rhubarb in a sieve over a bowl, again mashing the solids to release the juices
- Add sugar to taste – be careful to only add a spoon at a time, as the more you add, the less rhubarby it will taste! You can omit sweet stuff entirely for a super tart flavour
- Pour the rhubarb juice into bottles, pre-sterilised with boiling water, then refrigerate and consume with 2-3 weeks. It’s also possible to freeze it as long as you leave room for expansion in the bottles.
- Optional: if you want a super-clear colour, wait a couple of hours for the sediment to settle, then re-strain the juice
- Serve it as it is, or with your fave gin and whatever random citrus fruit and herbs you have lying around to make it look fancy! UPDATE: also surprisingly good with pear vodka! And probably literally anything else you find at the back of the alcohol cupboard.
Inspiration
While women’s labours outdoors have traditionally been overlooked, here are a few queer women whose dedication to cultivation took lady-gardening to a whole new level. Perhaps their exploits dabbling in petals and perfecting bush topiary will inspire you; please shout out in the comments with any horticultural heroes of your own!
(Warning: this list will skew towards rich, white women. It’s almost like you have to bribe people to get in the history books)

Vita Sackville-West
Famous for her affair with Virginia Woolf (among other women), Vita was an accomplished novelist in her own right, but it’s perhaps her work as a landscape gardener that left the biggest legacy. She created the world-renowned gardens at her home at Sissinghurst Castle, wrote weekly gardening columns for the Observer and co-founded the garden committee of the National Trust.
Mary Lobb
A farmer by career, Mary Lobb was fired for falling asleep at the wheel of a tractor, drawing the sympathy of the owner of nearby Kelmscott Manor, artist May Morris (William Morris’s daughter). Hired as a gardener, Mary quickly jumped into bed with the lady of the manor and stayed as her companion for the rest of her life.
Emily Dickinson
Floral inspiration runs through Dickinson’s poems, who throughout her life was dedicated to her conservatory and gardens at the Dickinson family’s Homestead in Amherst. Dickinson would frequently send flowers with her correspondence, so it’s safe to assume she bundled several in with her lesbian love letters to Susan Gilbert. (You can even see some here)
Alvilde Lees-Milne
A fringe member of the Bloomsbury Set, courtesy of her marriage blanc to James Lees-Milne, Alvilde had several notable relationships with women including sewing heiress Winaretta Singer and Vita Sackville-West. With the latter she shared a love of landscaping, and was inspired by Vita’s work at Sissinghurst to create her own version at her home at Alderley Grange in Gloucestershire, and later the Badminton estate. Encouraged by many visitors, she turned pro, designing gardens for the Queen of Jordan and Mick Jagger, and authoring numerous gardening books.
How have you been faring with your gardens and allotments in these curious times? Please share your successes and failures in the comments!
Next time: We’ll get deep into summer?
How To Post A Photo In The Comments:
Find a photo on the web, right click (on a Mac, control+click), hit “Copy Image URL” and then…
code it in to your comment like so:
If you need to upload the photo you love from your computer, try using imgur. To learn more about posting photos, check out A.E.’s step-by-step guide
The Queer Gardener’s Almanac: Winter
Illustrations by Gillian Lake-Thompson
We all know queer people love to be outside. Like, really, really love it. While the flight of LGBTQ people to urban centres and consequently minuscule dwellings is well-established, Autostraddle’s giant survey last year showed that queers will make the most of even the tiniest outdoor patches they can get their green-fingered mitts on. It’s time we celebrated the wide open spaces of our rural and suburban queers too, imagining the possibilities for the expanses we inhabit today or dream about tomorrow.
Seeing my parents gardening as a child, maintaining borders to appropriate levels of suburban respectability, I assumed that once I hit thirty the knowledge of all plants would be bestowed upon me. Gardening was just one of the trappings of adulthood that one didn’t so much do as embody, like wearing clicky heels, or re-mortgaging, or dusting.
Spoiler to readers aged 29 and under: plant knowledge does not magically happen. For many years I lamented to my country-reared wife, Gillian, that I suffered from plant blindness, only to discover it’s a real thing. Despite, or perhaps because of, the endangerment to our natural world, humans are increasingly unable to recognise and appreciate the flora around them. While I have always felt a strong appreciation for the variegated wonders of the British countryside, it’s definitely the case that I’m more likely to remember the flowers needed for a medicine recipe in an RPG I played 15 years ago than an actual plant I saw yesterday. Fortunately my wife has tailored a rubric for plant identification to my own learning style, so at least I can pick out some big-hitters like foxgloves (has spots on the petals like a little landing pad for bees), or iris (looks kind of slutty).
If you are feeling apprehensive about my credentials for discussing this topic, imagine this feeling amplified tenfold in me when Gillian first declared she was applying for an allotment plot. I was relaxed at first, thinking we’d be years on the wait-list, but a purge at our local allotments quickly netted us a double-sized plot formerly tended by a disgraced MP, dethroned after a rent boy scandal. After he scarpered, it fell to his now ex-wife to oversee, who neglected it into a wild patch of barbed bitterness, little more than a couple of ragged raised beds and waist-high weeds, surrounded by an encroaching ring of razor-sharp brambles. Gillian hacked up the brambles with alarming glee while I winced and idly burnt things. After vastly more effort on her part than mine, we had our blank canvas.
Winter, such as it is in my corner of the Northern Hemisphere, is the ideal time to begin plotting your plot, no matter how large or small. I write as a storm beats at the windows, the wind’s whistles and catcalls repelling me into bed, never to brave the outdoors again. What better time to sink into visions of a lush and fertile future, with ideas at their most fanciful and robust, the peril of pests, disease and quirks of weather an oblique consideration.
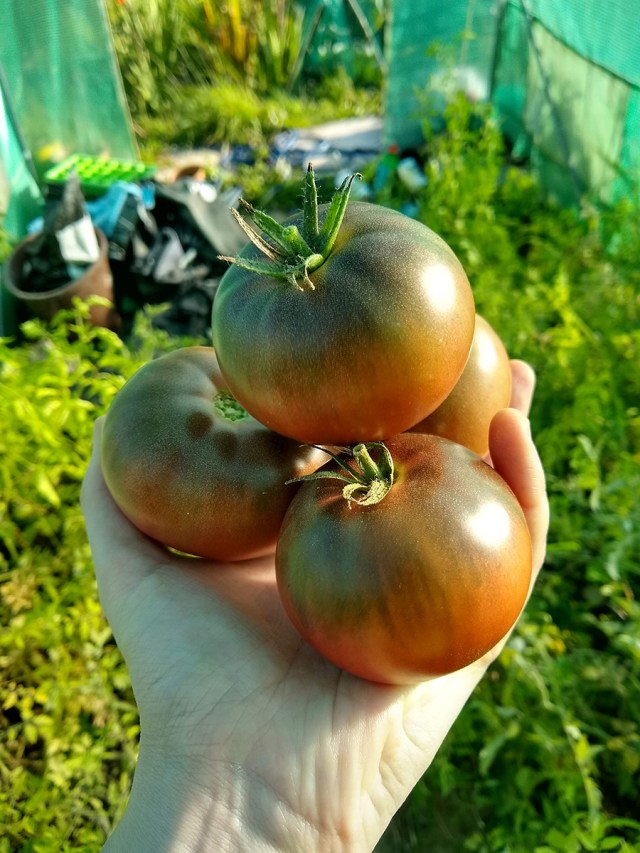
For me, the strongest factor in overcoming my apprehension about tackling an allotment was the tantalising prospect of bountiful and unusual produce for the kitchen. This only intensified after my wife made a preposterous claim that she could grow more tomatoes than I’d know what to do with and, as we prepare for our fourth growing season, the motivation remains strong to deliciously prove her wrong.
Taking such a goal-oriented approach to a notoriously fickle pastime is probably a foolish endeavour, and I clearly see that where Gillian gets more out of gardening than me is her revelry in process over product, from the sprouting of the first seedling to lugging sacks of potatoes home.
And yet there are multitudes more incentives to grow-your-own. For us, with full-time jobs and no equipment to hand, it was unlikely we’d be able to grow many crops more cheaply than your average amoral multinational agri-business, but there are definitely ways to economise if that’s your focus. Even the most casually ethical queer will surely appreciate the benefits of organic crops where you know exactly what literal shit has gone into them, and the possibility of cooking with ingredients measured in food inches rather than food miles. Why even limit it to such earnest considerations: do you want to plant the world’s gayest garden ever (think Gayfeathers, Gaillardia, Galium, Kale), do you want to grow pink and blue-fleshed spuds so you can eat bisexual mashed potatoes? The possibilities are endless.

Winter Jobs
Of course, “winter” is a vastly variable term when it comes to climate, but here are some jobs you might be thinking about if now happens to be roughly the time of lowest temperature in your region. Obviously, seasonality varies massively according to where you are! Always follow local guidance when planning your planting. In general, starting things off too early is bad, so lean into prep work if you’re finding yourself with abundant enthusiasm.
Some things to consider:
- Prune fruit trees
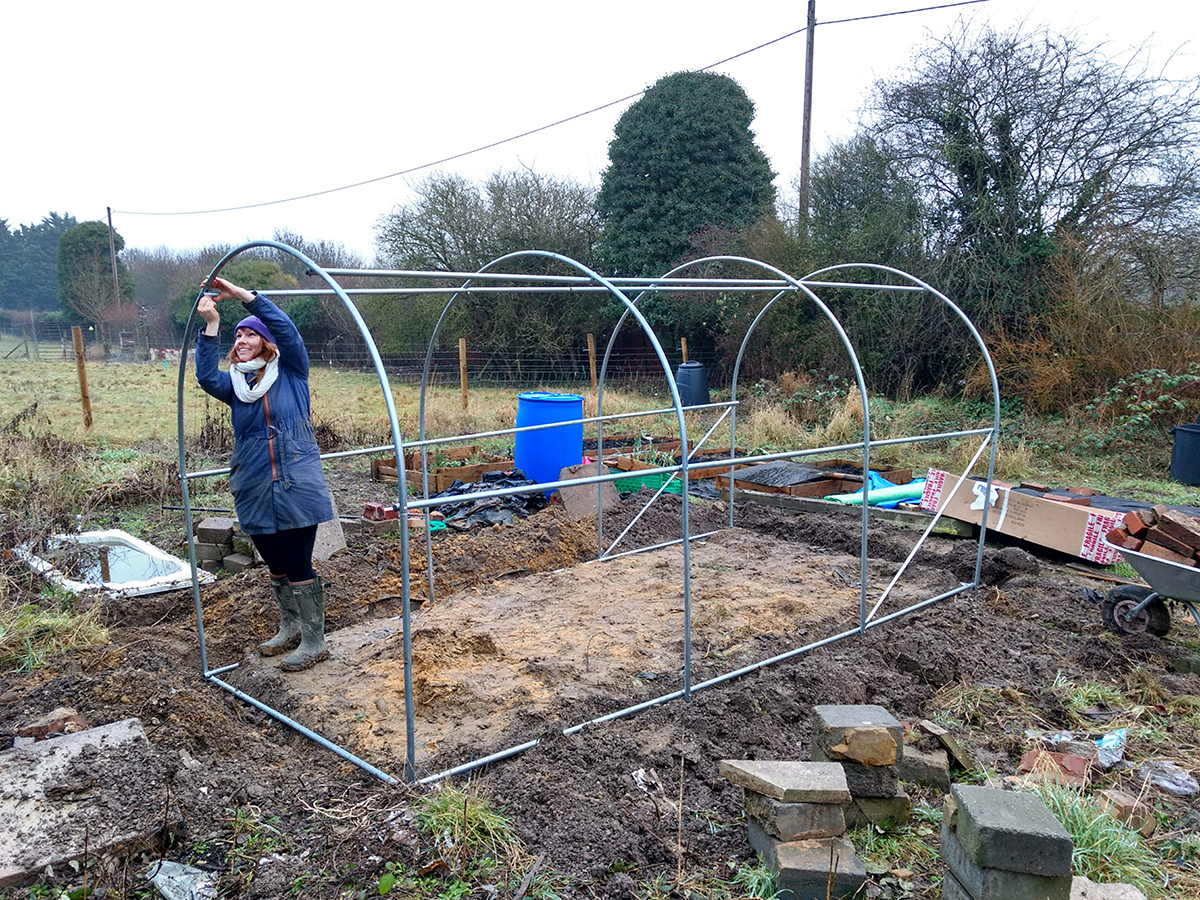
- Put up sheds, poly-tunnels, greenhouses, trellises and anything else that make you look pro while also hopefully serving a practical purpose
- Wash out old seed pots, buy new ones or (preferably) repurpose containers you have hanging around the house
- Research if there’s compost you can get hold of cheaply or free, via allotment associations or local councils. Once you’re weeded, you’ll want to get compost down a while before you start planting, but not so soon that nutrients could get washed away!
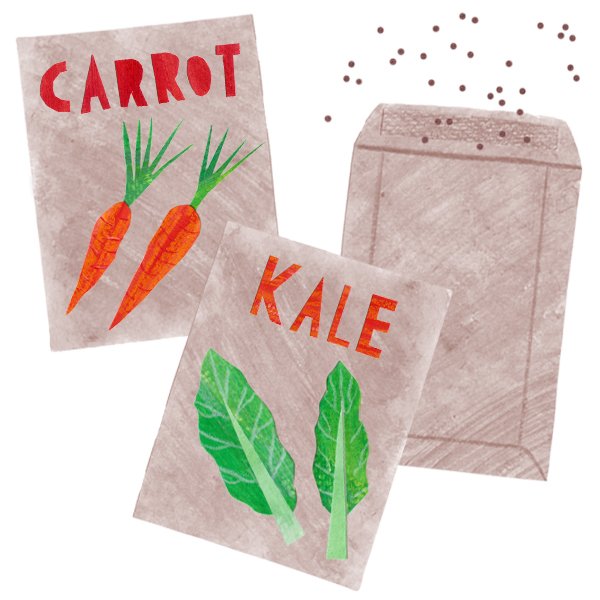
- Buy some seeds!
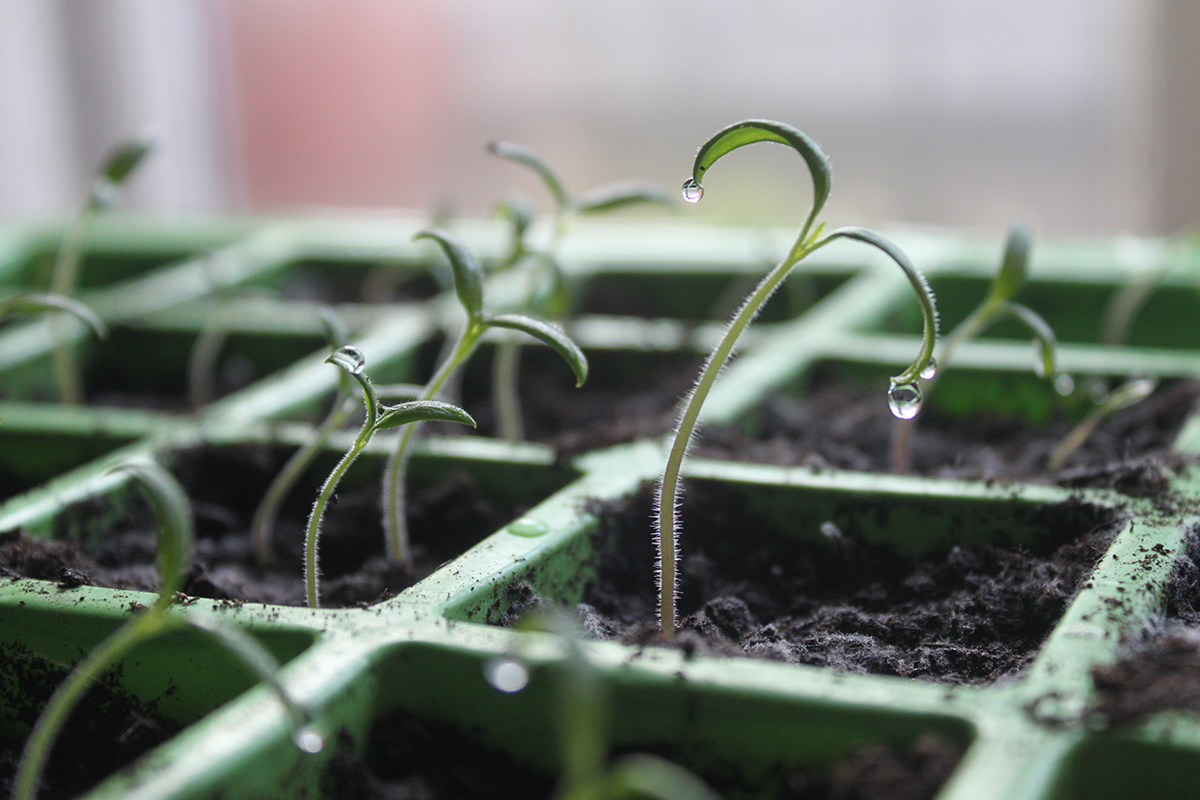
- Start seedlings indoors – pretty much any crop can get a head start if you start it indoors, the only limit is how much of your dwelling you want to devote to it!
- Chit early potatoes: get them sprouting prior to planting
- Force rhubarb, because why wait ’til summer? “Forcing” is an act of plant cruelty where you cover the rhubarb to trick tender young stems to grow in search of light. Also, it makes super-weird sounds.
- As soon as you can get a spade in the ground, consider planting green manure to mulch up your soil
If the early months of the calendar year yield a very different climate where you are, please share in the comments what seasonal tasks you are up to right now!
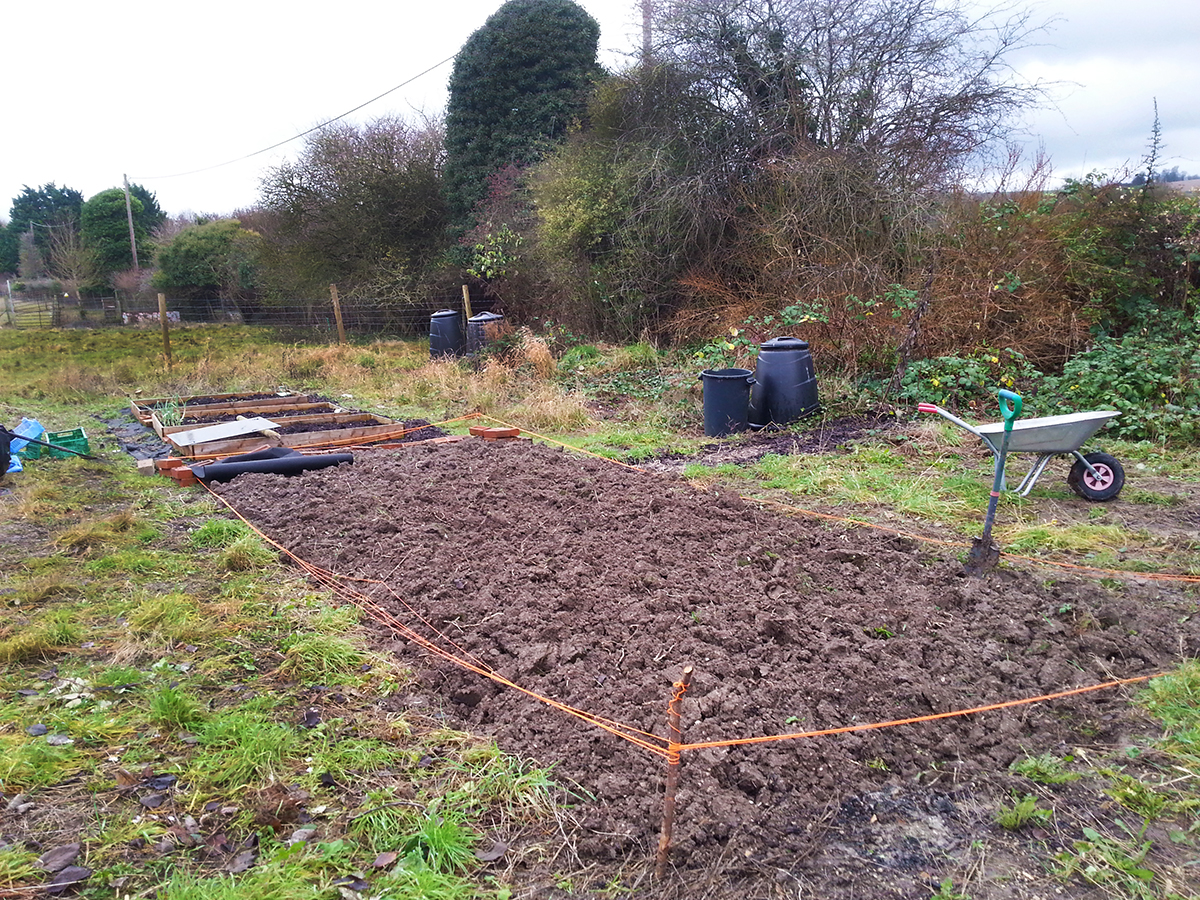
Preparation
When the thermometer is in the doldrums, it’s the perfect time to attack your land while weeds don’t have the energy to fight back. If you’re taking over a new plot you’ll want to get rid of any invasive plants before you start getting your own crops sown; hopefully an established plot will have beds covered over after the last harvest.
Now’s also the chance to make any alterations to your plot. Shed envy is a real feeling that you may have to address. If it’s possible, dig new beds or alter existing ones. Much of Britain retains workable soil around the year, a marvel to my wife who grew up on a Canadian dairy farm and is used to frozen ground for nine months of the year, so we can take the opportunity for a bit of remodelling each year. You may have to wait a bit longer!
Seeds
However advanced your gardening skills you’re still gonna need to work out what the hell you’ll be planting for the year. Every growing cycle, you’ll learn more about the parameters and capacity of the land you have available, plus your own capabilities and predilections. Perennial truisms – like inevitable courgette/zucchini gluts – married with your own personal tragedies and triumphs create the micro-dramas specific to your own land. For Gillian and I, that means anticipating which of the peas and beans the wood pigeons will decree their preferred snack, accepting that 67 corn plants was probably a bit too much, and resigning ourselves to being failures as lesbians because the whitefly always gets the kale.
While it’s possible to buy plants as ready-established seedlings, growing from seed yourself will guarantee the widest varieties to suit your local conditions and your desire for weirdo heritage varieties.
If all of this seems like an impossible dream, maybe the biggest thing you can do is look up allotment and community garden projects near you.
Where to Buy Seeds
Let’s not mess around here, we’re looking for certified organic seeds, ideally from co-ops or small companies and definitely no-one that’s ever been pals with Monsanto. I’ve not been able to find any queer-owned seed companies, but please pipe up in the comments if you know of any!
In the US/Canada:
- Seed Savers
- Fedco Seeds
- Hope Seed
- Note: although Seeds of Change is perhaps the most widely-distributed certified organic brand in the US and has signed the Safe Seed Pledge, it’s owned by Mars. Bummer.
In the UK:
- Chiltern Seeds – good for flowers too!
- Thomas Etty – broad range of old school heritage varieties
- Seed Cooperative
- Tamar Organics
Seed swapping is also a thing! Search for events in your local community.
When it comes to knowing what to buy, obviously what you like to eat is the main deciding factor. My own personal decision tree is something like:
- Does it taste good
- Will it actually grow here
- Does it have a rude name/the potential to grow into a shape with puerile appeal
While researching seeds, you may also want to keep an eye out for what’s marked as a good pollinator (save the bees!), and take into consideration companion planting – aka what plants get along together.
Inspiration
These are just a smattering of further resources that may help your interest bloom. Please shout out in the comments what your motivators and inspirations are!
Read
For herbs: A Modern Herbal by Alys Fowler.
Alys Fowler is a Guardian columnist and one of the only out lesbian gardeners regularly working in the media. She came out a few years ago, and even wrote a book about it. A Modern Herbal is a great compendium of herbs, how to grow them and their many uses.
For vegetables: Carrots Love Tomatoes, Roses Love Garlic by Louise Riotte
Two classics about companion planting have been combined into one, covering vegetables and flowers. Use this to find natural ways to protect and proliferate your plants by getting them to work together, like they are in a superhero team film.
For everything organic: New Organic Grower by Eliot Coleman.
For anyone looking to get super serious about organic growing.
For dreaming of a rural queer life: Patience and Sarah by Isobel Miller.
Set in the early 19th century, this classic of lesbian literature charts the titular characters as they attempt to flee their repressed lives and set up a farm together.
For trying to express your unrequited lesbian crush via the language of gardens: Sister Arts: The Erotics of Lesbian Landscapes by Lisa L Moore.
This academic look at four queer women of history who used various forms of horticulture to express their forbidden sapphic desire is not for the faint-hearted.
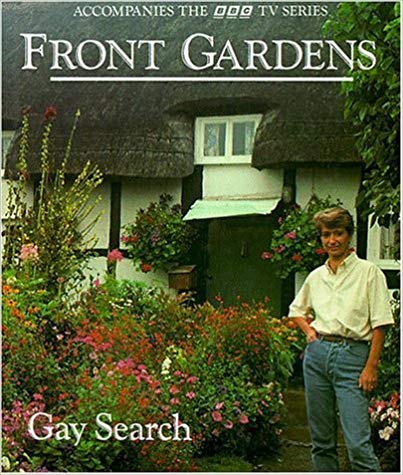
For no reason in particular: Front Gardens by Gay Search.
Watch
An amazing documentary about the transformative power of urban gardening in L.A.
A British institution that I cannot omit. The opening seconds of every episode instantly transport you to a place outside time and reality. Be careful, it may turn you into an adult.
Charles Dowding: No Dig Gardening
Another gentle watch, and excellent for people like me that hate digging and incidentally all forms of physical labour.
How are things looking in your neck of the woods? Show us in the comments how your mid-winter (or summer!) gardens are looking, and share your hopes and dreams for the horticultural year ahead. If you’ve got any hot tips on queer gardeners, businesses or organisations you’d like to see featured, hit me up at: sally [at] autostraddle [dot] com
We’ll be back in a couple of months for the joys of spring!
How To Post A Photo In The Comments:
Find a photo on the web, right click (on a Mac, control+click), hit “Copy Image URL” and then…
code it in to your comment like so:
If you need to upload the photo you love from your computer, try using imgur. To learn more about posting photos, check out A.E.’s step-by-step guide.
How To Easily Grow Your Own Onions (And Other Root Vegetables)
You like scallions. I like scallions. Everyone likes scallions. What if I told you you could have infinite scallions from just one bunch? Are you calling me a liar? Fools! I’ll show you all! No, but seriously, what if I taught you how to regrow whole new scallions from the bits you trim off before cooking them? Wouldn’t that be awesome? Well here you are.
You will need:
+ Kitchen knife of some kind
+ Scallions with some of their roots still attached
+ Jar, mug or little

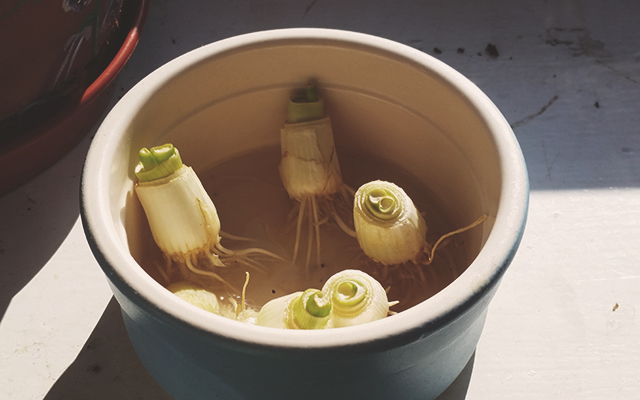
All you have to do is take the ends you’ve trimmed off and set them in water in the jar/little dish/whatever. Supposedly you need to leave an entire inch of the white stuff above the roots when you do this but I’ve found it works even if you cut it right down to the line, though I’ve left a little more on than I usually do in the pictures just in case. It also won’t work if the roots have been removed. You can see my little friend who doesn’t have any roots is in there anyway, but he didn’t make it, even though he did put out some new growth before giving up the ghost. RIP little friend, you tried.
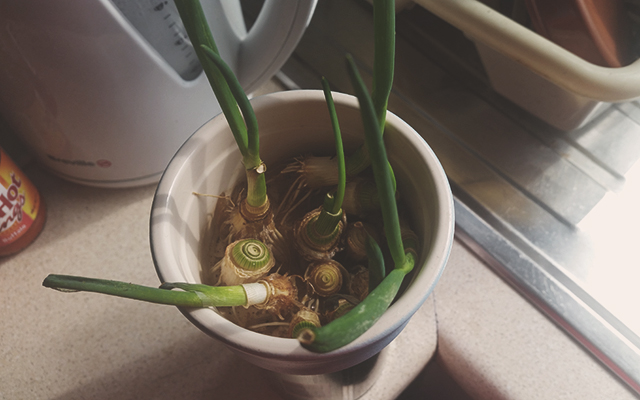
You want to leave them alone for a bit other than topping up the water until they’ve put out a good amount of green. Some people just leave them in the water jar and apparently that works fine but I always think they’ll grow better/last longer if you transplant them into soil. You do need to wait until the roots and the green have grown a reasonable amount first, though; otherwise they tend to die off after you’ve transplanted them. If you’re transplanting them, stick your finger up to the second knuckle into the soil to make the hole and then push it in. If you plant them too shallowly they tend to work their way up and out and that isn’t good.
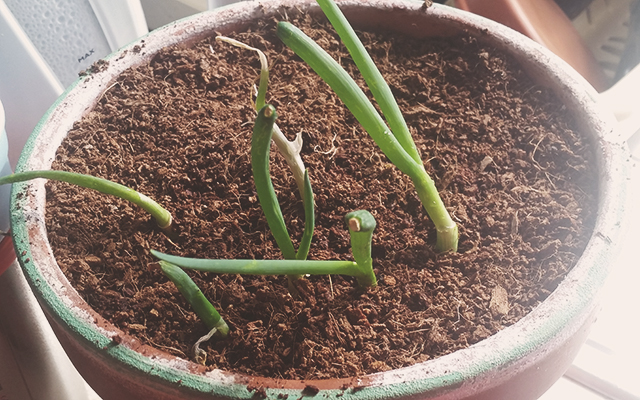
Now all you have to do is let them grow and trim some off whenever you need them! Make sure to water the soil whenever it looks dry and move them back a bit if the sun gets too strong and they start to look burnt (weird Scottish summer heatwave has made mine a bit patchy). If they start getting yellowish that means the soil is sad and nutrient depleted and you should give it some strong black tea (seriously), black coffee or actual fertiliser of some kind, I guess. They won’t actually last forever but you should be able to get at least one pretentious coffee’s worth of savings on your grocery bill out of doing this, as well as the ability to brag to your friends at the co-op about how you grow your own vegetables on the windowsill.
You can also do this with leeks, celery, lettuce and cabbage but that tends to work less well, probably because the supermarkets usually remove most of their roots before selling them. No harm in trying though.
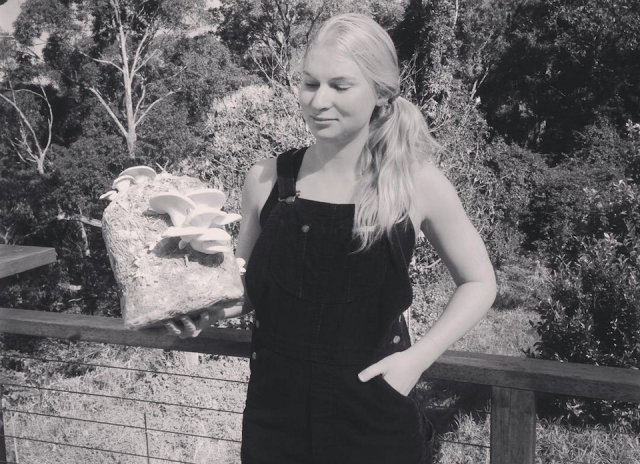
Follow Your Arrow: Mushroom Grower Marita Smith on Patience, Permaculture and Petri Dishes
Marita Smith has one of those jobs you never knew you wanted. That’s right: she’s a mushroom grower! Working at the fabulously fungal intersection of biology and what I can only describe as sheer magic, Marita spends her workdays in a converted caravan or out on the hillside encouraging the world’s weirdest not-actually-a-plant to grow, so she can harvest nutrient-dense mushrooms for happy customers in Milton, Australia.
In this interview, Marita tells the story of her three-year-old gourmet mushroom farm, from its beginnings as an experimental side-project to her now-daily routine as the sole trader running Milton Mushrooms. This is also a story of living frugally, and of the role of patience and flexibility in a business that relies so heavily on nature. If you’ve ever fantasised about making a living from farming, or wondered if it’s possible to turn that gardening side-gig into something more, Marita’s passion for shrooms and growing will inspire and encourage you.
Marita Smith, Mushroom grower, Milton Mushrooms
Age 27, Milton, NSW Australia
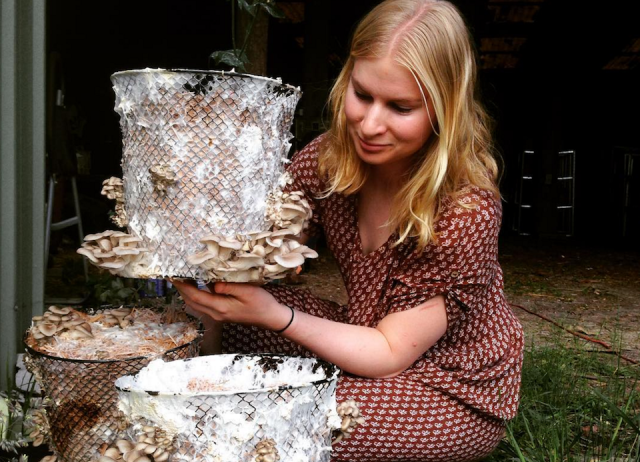
Experimenting with growing containers.
Hi Marita! Can you introduce your business? What’s your mission? Who do you serve?
I run a one-woman gourmet mushroom farm. My aim is to grow nutritious food for my local community and provide others with the means to do the same. I believe we should be growing as much of our own food as possible, and mushrooms fit neatly into any sustainable growing system.
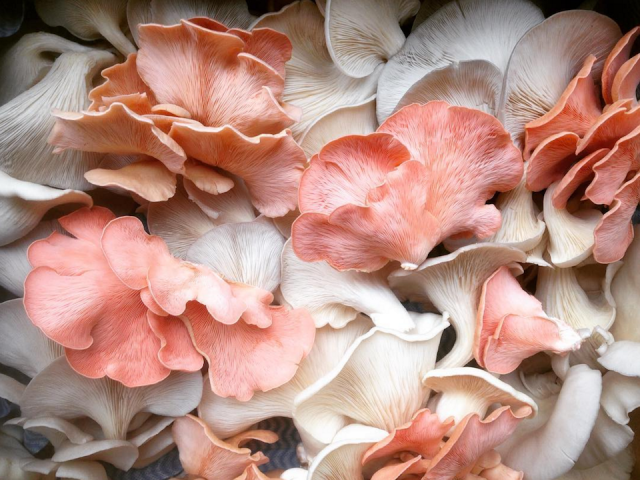
I grow a variety of unusual mushrooms, mainly oyster mushrooms (pink, white, phoenix and king oyster), so my growing shed is always a riot of colour! I sell mixed bags of fresh mushrooms at two farmers markets per week and also sell petri dish cultures and grain spawn cultures online.
How would you describe your approach to business? What personal qualities inform your approach?
When I started, I was definitely winging it. I was just excited to be growing and trialing new methods, foraging and starting culture lines. As a result, I would have waaay too many mushrooms one week and none the next. It took time to work out how to get a consistent supply of fresh mushrooms.
I still feel like I’m winging it to some extent, but I think that’s part of primary production — a really hot week can reduce yields, while a nice cool, wet series of days will have the mushrooms going ballistic. Now that it’s a proper business, I’m definitely more of a planner. I’m an INFJ, so I like to feel like I have control over the process. I sit down and calculate how many cultures I need to create, how much substrate to pasteurize, and approximate yields based on previous seasons. Probably the biggest lesson has been learning to be adaptable week to week.
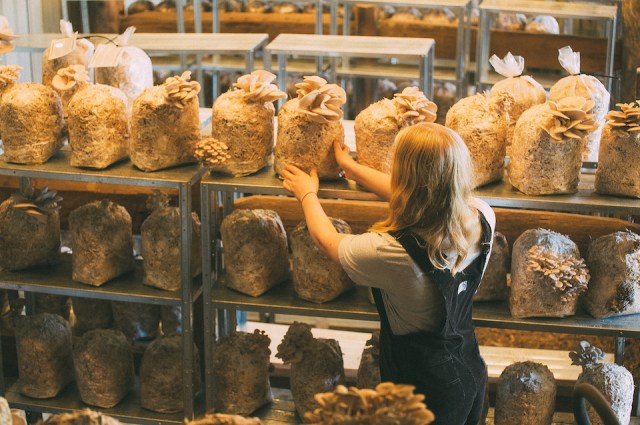
What does a typical day look like for you? What is your workspace like?
I have a pretty unusual work space. My laboratory is a converted caravan annex and the growing shed is a simple structure built into the side of a hill, which provides great thermal mass.
On a typical day, I get up around 6am. I have two semi-industrial pressure cookers that I use to sterilize growing media (both home-made nutrient agar for culturing and soaked grain for mature cultures). I typically run both pressure cookers twice a day, once in the morning and once in the afternoon. I’ll spend a few hours in the lab working on new cultures and then move outside to prepare 200 – 400 litres of growing substrate, mix through spawn and bag up for fruiting in the growing shed. I tend to prioritize this sort of work before checking emails and mailing customer orders, which I do later in the afternoon. I always make time for a run or a walk, whether first thing in the morning (typically in the summer) or in the afternoon (winter).
During the growing season (about 6-8 months of the year), my working week is full-on. I do all the physical and technical labour, but I always try to ‘knock off’ by dinner to chill out. I really enjoy the production process (it still feels like magic to see an entire shed filled with mushrooms), so it doesn’t really feel like ‘work.’ Plus, homegrown mushroom breakfasts are pretty kickass.
When did you know that this was what you wanted to do? And what were your early goals, your first steps?
I studied science at university, and after my honours year I decided to take a gap year before starting my PhD. That gap year turned into three. I worked on organic farms and farm-sat overseas before returning back to my hometown, where I worked on the family farm for a few months and decided to re-train in horticulture. I love how growing is both a way to commune with nature but also a way to apply tenets of biochemistry and microbiology. It just makes sense to me.
I was lucky enough to get a job as a market gardener/waitress at an incredible local restaurant, St Isidore. The proprietors, Jo and Alex, knew I was a science nerd and sent me to do a mushroom growing course. I loved it. For me, growing mushrooms is the perfect intersection of science and permaculture. I started experimenting and gradually scaled up, leaving St Isidore in the process. Now I’ve been growing for nearly three years.
What’s the best thing about the work you do?
I love that I’m in control of my work day, that I’m feeding my local community with nutrient-dense produce, and that I have a real place in the fabric of our town. I’m always coming up with crazy ideas, whether that’s creating bioluminescent t-shirts with a native glow-in-the-dark mushroom I’ve cultured or altering the nutrient profiles in my nutrient agar (malted milk powder is the bomb). It’s genuinely exciting work that feels like play.
And the worst?
Weather extremes. Last summer we had a series of crazy hot weeks and I lost successive crops. When each fruiting bag of mushrooms represents six weeks of labour, it’s a punch in the gut.
What are the key challenges you face in your work? What are your tactics for overcoming these?
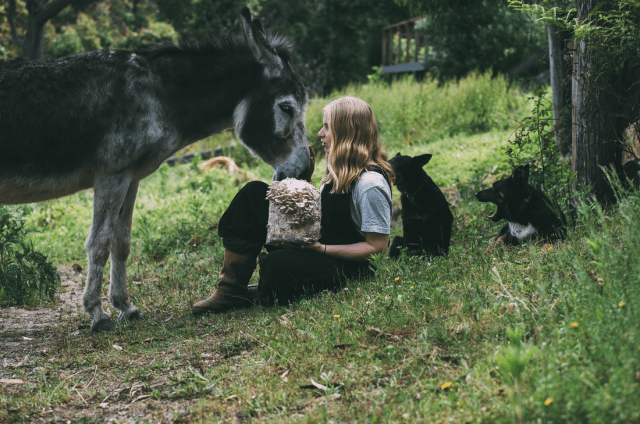
Probably the fact that I work solo. I am really lucky to be leasing some land from my parents, so there are always people around on the farm. Market days are brilliant for catching up with farming friends, and I make an effort to lure friends down for visits (Home-grown food! Beaches! Mountain hikes!). There’s a great network of small farmers in Australia and we typically meet up every year in ‘Deep Winter’ for an unconference of ideas, stories, and feasting.
At the same time, I’m a bit of a hermit and hate it when people drop in unexpectedly! It’s a balancing act that I’m still working on perfecting.

Marita’s mushrooms at a TedX event.
How do you approach time management?
I always aim to get a good chunk of my actual work done before I even think about checking emails and orders. I let my phone ring to voicemail while I’m working in the lab or outside. I also love getting started early. My Dad always says that ‘half the day’s gone by 9am’.
Let’s talk money. Can you tell us about your financial situation when you started out?
Growing mushrooms is definitely not a get-rich-quick scheme, but can luckily be done on a shoestring budget with some ingenuity. Large commercial operations import spawn from the Netherlands and employ dozens of professional pickers. I’m just one woman! When I started out, people knew me as the ‘girl growing mushrooms in her caravan,’ which was perhaps not the most flattering anecdote to have attached to your name. I grew sporadic buckets of mushrooms and gleefully shared them with friends. I expanded slowly, investing in movable infrastructure (shelving, my pressure cookers, a HEPA flow hood) from my savings. My first year, I made a pittance. My second, I covered all my costs. Now I’m making a bit on top of covering my costs.
Is your business sustainable now? How do you feel about the money side of ‘following your arrow’?
I cover all my costs and make enough to live on, so I count that as sustainable. I’m still learning how to make production more viable and streamlined. I never want to reach a point where I’m not assessing and tweaking my methods.
I also have a side-hustle, a small academic editing business, which helps cover any lean times. I live on about $15,000 a year, so I’m yet to pay tax. For me, it’s about finding a way to live simply, support myself, and contribute to my community. I feel really blessed to be able to live a self-directed life. A perk of my business, with its 6-8 month growing season, is the down-time over the winter, which I wouldn’t trade for any money. I get to spend time on my writing, exercise and exploring.
Where would you like to see yourself in five, ten years’ time?
I’ll be living in my tiny house (I’m still half in the caravan, half inside the main farmhouse right now) and ideally be supplying even more mushrooms to my local community. I’d also like to be producing medicinal mushrooms and extracts (two of my sisters have Crohn’s disease and it’s a passion of mine to grow some immune system-boosting mushrooms). Hopefully I’ll have perfected my bioluminescent mushroom experiments too!
How do you market your business?
I rely on direct farmer-customer contact both at market and via instagram. Instagram is great for communicating about growing successes and failures, and I’ve grown specific species based on insta feedback!
What’s the most valuable tool in your kit?
Oooh, that’s a tricky one. I think it’s my ability to find the zen in repetitive tasks like culturing.

Culturing mushrooms in petri dishes.
How does being LGBTQ impact on your business (if at all)?
I don’t make a big deal of being a total gay-mo, but most people in my community know I’m gay and are cool with it (which is awesome in itself because I live in a regional area).
What three websites, blogs, books or people do you rate for business advice or ideas about your work?
The mushroom grower’s bible is Growing Gourmet and Medicinal Mushrooms by Paul Stamets. It’s my go-to for questions about species-specific growing conditions, trouble-shooting, and beautiful, inspiring photos.
My living ethos is pretty well captured in The Art of Frugal Hedonism by Annie Raser-Rowland and Adam Grubb, which I recommend if you’re into simple living and skirting scary things like Mortgages and Big Debts.
For a general kick in the pants to start your business, check out The $100 Startup by Chris Guillebeau. You definitely don’t need lots of coin to get your idea off the ground.
What’s your hot tip for queer women who want to start their own business?
Do it. I’m so glad I had the guts to do it. I’m the happiest and most empowered I’ve ever been in my life. Associate with people conducive to your business idea and your way of life and your days will be more vibrant, exciting, and rewarding. We’ve only got, what, eighty or ninety years of life? Why not spend them doing things we truly believe in? I think Seneca, in his treatise ‘On the Shortness of Life’, sums it up: “So it is: we are not given a short life but we make it short, and we are not ill-supplied but wasteful of it.”
Don’t waste it. Don’t be ninety five and wishing you’d grown root vegetables, met a hot lady farmer in overalls and raised dairy goats together; started your lunar cycle consulting business; converted a bus to a retro diner on wheels; taught people how to survive in the wilderness; or written that book.
Just Freaking Do it.
Marita with her neighbour, Mindy.
If you wanna do it (I do!) you can find inspiration and information at Milton Mushrooms. For more shrooms, head to @miltonmushrooms on Instagram, or hang out with Marita herself @marita_smith.
Spring Gift Guide: Gardening Stuff for the Tree-Hugger or Plant-Grower in Your Life
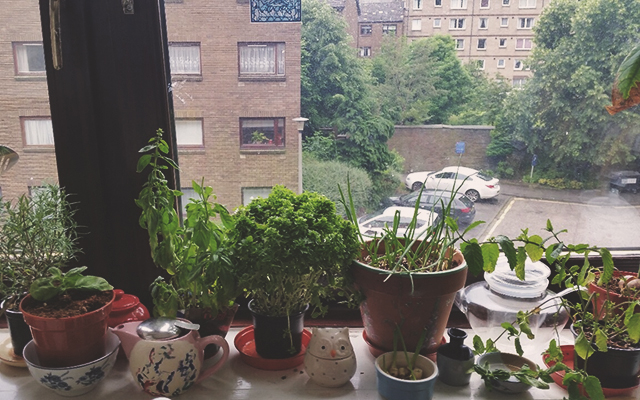
I’m not that great with plants, you guys. But damn, do I try. I dream of being a world class gardener who grows everything she eats, works among indoor hanging plants, and plucks her own herbs in the morning for breakfast. My mission is to get much, much better at gardening, growing, and sustaining life that comes out of soil — for decoration, for food, and for fun.
And thus, this guide: a roadmap to the books, accessories, and tools that will make tree-hugging, plant-growing garden hippie gnomes like me very, very happy. And just in time for spring, coming soon to a planet near you! (It starts on Sunday; get into it!)
Books and Magazines
Some of us want to look at pretty gardens and pretend we’re good enough to grow them. Some of us want to grow our next meal. And some of us just want to make things prettier with plants. The thing that unites us all, though, is that a book or magazine lighting our way can do a whole heck of a lot of good.

+ Rodale’s Basic Organic Gardening: A Beginner’s Guide to Starting a Healthy Garden
+ Birds & Blooms Magazine Subscription
+ Gardening Without Work: For the Aging, the Busy, and the Indolent
+ Indoor Kitchen Gardening: Turn Your Home Into a Year-round Vegetable Garden
+ Outstanding American Gardens: A Celebration: 25 Years of the Garden Conservancy
+ Hellstrip Gardening: Create a Paradise between the Sidewalk and the Curb
+ Garden Gate Magazine Subscription
+ Groundbreaking Food Gardens: 73 Plans That Will Change the Way You Grow Your Garden
+ Roots, Shoots, Buckets & Boots: Gardening Together with Children
+ Homegrown Harvest: A Season-by-Season Guide to a Sustainable Kitchen Garden
Indoor and Outdoor Planters
You can’t plant a plant without a place for the plant to be planted, is what I always say. I’m really into finding unique and adorable homes for my houseplants, and I guarantee the person in your life who loves flowers or herbs or succulents or whatever feels similarly. Get ’em something that makes the plants stand out even more and their love for said plants will only, um, grow.
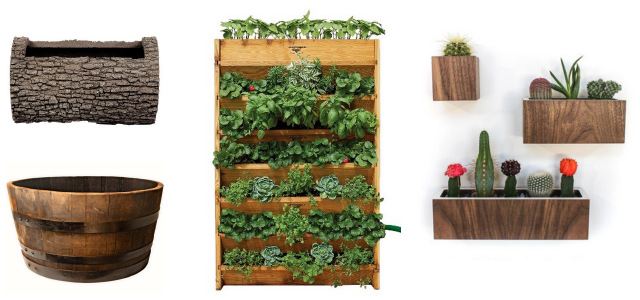
Oak Log Planter | Recycled Oak Barrel Planter | Wooden Vertical Garden | Wooden Hanging / Tabletop Planters
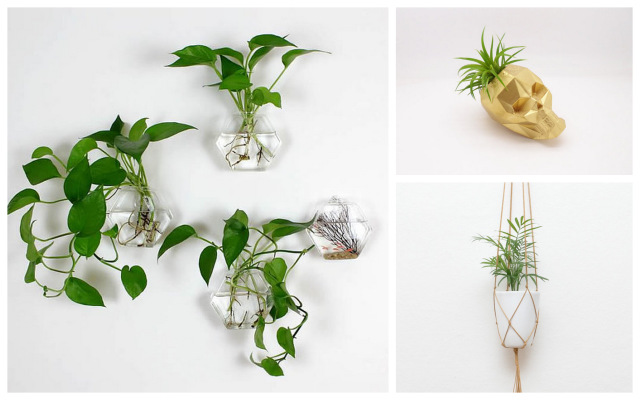
Wall-Mounting Terrariums | Skull Planter | Macrame Plant Hanger
Gardening Supplies
How am I supposed to become a world class gardener if I don’t have any of the necessary supplies? If someone made me a starter kit, I know I’d be able to hack it. The only problem is that nobody has done that, probably because I’ve never directed them to this pile of awesome goods related to being able to garden at all.

Reusable Stainless Steel Garden Markers | Translucent Watering Can | Pink Garden Tool Kit | Vintage Chalkboard Trug | Deluxe Soil Knife Gift Set | Gardening Tote
Garden Decorations
Put a bird on it. Or just a home for one. Or just a cat statue. WHATEVER, Y’ALL.
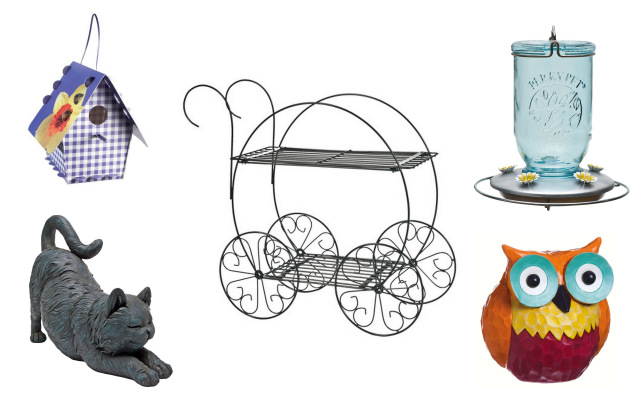
DIY Bird House | Garden Cart Plant Stand | Mason Jar Hummingbird Feeder | Stretching Cat Statue | Owl Statue
This Is How We Do It: Drying and Preserving Herbs
Welcome to This Is How We Do It, a series wherein we’ll be discussing projects both inside the home and out and explaining, you know, how we do it.
Summer is a verdant, bountiful time of growth and plenty; a time when for many of us, it’s totally feasible to walk out into your backyard or nearby green area to pluck a few fresh mint leaves for your drink. Unfortunately, as summer draws to a close, so does that possibility; whether you’re gathering fresh herbs from a garden, a window ledge of potted plants, or foraging wild herbs from around your neighborhood, that door is closing with the season. So it’s getting to be time to preserve those lil guys so you can enjoy them all year round. Here are two ways to do that!
I am not a Certified Herb Person, and it’s totally possible that there are ways in which my approach can be improved. If you have tips, please do share them in the comments!
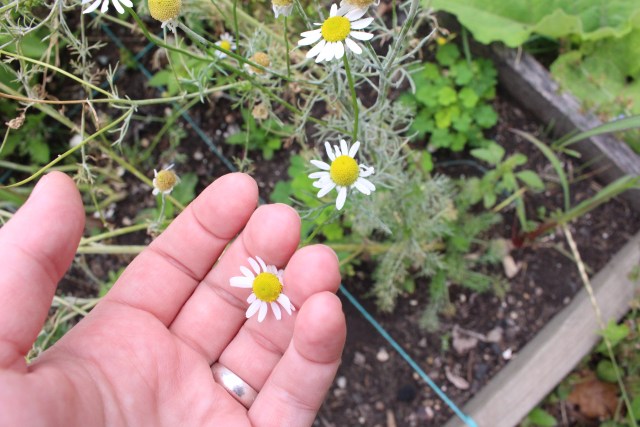
Dry and preserving herbs
Time: Maybe 15-20 minutes
Materials
Herbs of your choosing
Scissors or garden shears
Twine or string (preferably not treated or coated in anything)
Coat hanger(s), wire if possible, and potentially nails to hang it from
A baking pan or wire cooling rack that you can live without for a few weeks
For leafy herbs
1. Gather your herbs
I’m using rosemary, mint and chamomile for this example. In the case of rosemary and mint, the part of the plant we want to use is the leaf, so I’m just harvesting whole stems to keep all the leaves in one place. In the case of chamomile, the part I want is the flower and cone, so I’m just grabbing that off the top of the stem and placing them carefully in a bowl.
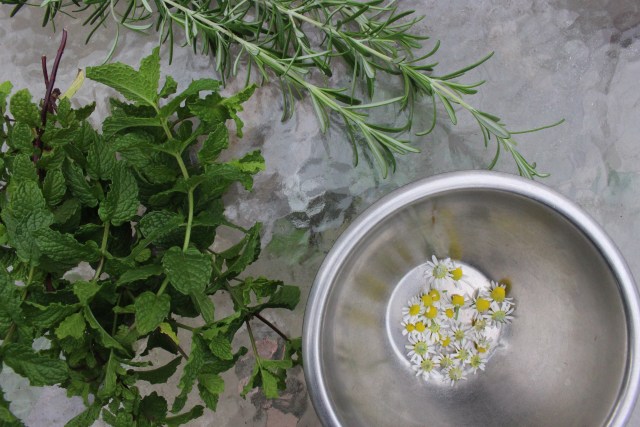
2. Gather your other materials
You’ll need a clear workspace, your coat hanger/s, scissors, twine and of course herbs. For this part, you just need any stemmed, leafy herbs you have — like my rosemary and mint or thyme, sage, parsley, etc.
 3. Bundle your herbs and tie them up
First, it’s easiest if the bottom few inches of your stems are clear of leaves because then you can see what you’re doing, so feel free to strip the very ends of your stems. Once you’ve done that, cut a length of twine about eight inches or so; bundle one kind of herb together, as much as will comfortably fit in one bundle without being totally crushed together, and tie it together by the end stems. Full disclosure, my knotwork is not great — my Girl Scout troop unfortunately focused more on arts and crafts than useful skills — and this still works pretty well for me, so don’t stress.
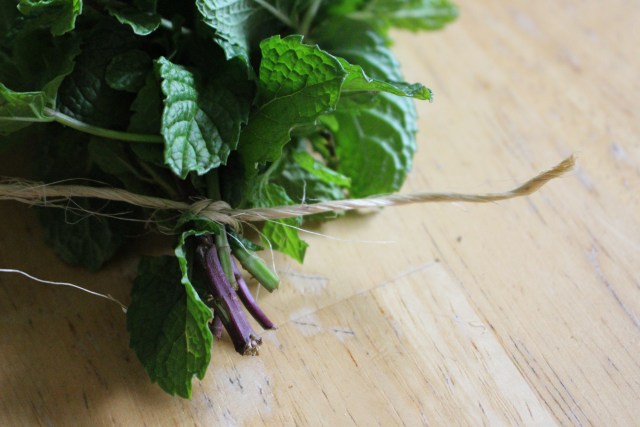
Next, using the same twine that’s already attached to your herbs, tie the end of your little bouquet tightly against the long edge of your coat hanger. By trial and error, I have figured out that the easiest way to do this is to tie the bundle in the middle of your length of twine, leaving two long ends, and then laying your coat hanger over the knot on your herb bundle and using the two long ends of twine to tie more knots over the wire.
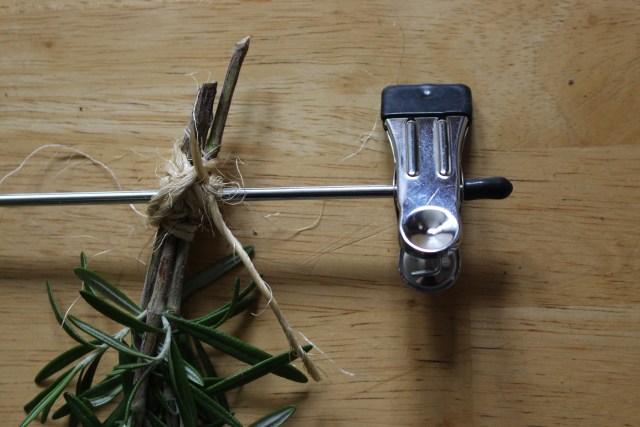
Once done, you should have X number of upside down bouquets securely tied to your coat hanger. Don’t crowd these guys together; the whole point is that they need air in order to dry, so get more than one coat hanger if you need to.
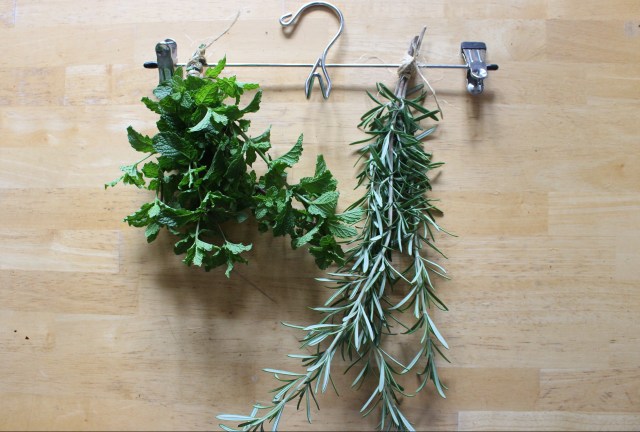
4. Hang them up
They’ll need to be somewhere where they won’t be disturbed for a few weeks, and also preferably somewhere that gets good airflow. I chose this spot on my kitchen wall, because the kitchen probably gets the most fresh air in the house. It would have been nice to find someplace where the herbs were exposed to air on all sides, like a doorframe, but none of the doorframes in my apartment are really viable options.

can you spot the a-camp artifact in this photo
These just have to hang out for several weeks, or until they’re totally dehydrated. You don’t have to actively do anything; just let them chill out. You can test whether they’re done by pulling off a single leaf; if you can bend it at all and the leaf stays whole, give it more time.
Once they’re done, you could just throw them in a container as is, although that’s not very space-efficient. Probably what you’ll want to do is remove the leaves and store them in a jar or bag and toss the stems — you can harvest the leaves pretty quickly by pinching the stem at the far end (the end that would have been closer to the sky than the ground while the herb was growing) and just running your fingers all the way to the other end; the leaves should shuck off pretty easily.
For flowery herbs
Remember the chamomile flowers I harvested? I’m gonna dry those too, and it’s an even easier process. You can also preserve other herbs and plants like lavender and rose like this.
1. Spread your herb out on a flat, dry surface
I chose this wire cooling rack and put it on a shelf in my office, one of the few surfaces in the apartment that the cats have not demonstrated an interest in jumping onto. I covered it with a paper towel so that the smaller flowers wouldn’t fall through the gaps in the wire, although in retrospect cheesecloth would probably have provided better aeration.
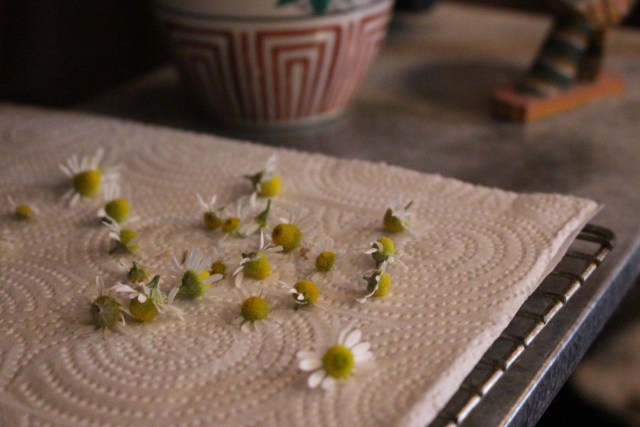
2. Wait for them to dry
That’s it! That’s literally the whole process. This, too, will probably take a few weeks. When the flowers are thoroughly dry, you can move them to a jar or other storage container.
After the drying process, your herbs are ready for use in a number of applications — cooking, making herbal teas, even medicinal uses like tinctures or infused oils. (A note: if you are going to try an infused oil — which is awesome! I recommend it — you need to make extra double sure your herbs are 110% dried, because any water content at all in the oil can cause botulism, for real.)
Join me later in the season when I maybe take a stab at harvesting echinacea root! Or not, we’ll see.
This Is How We Do It: DIY Liquid Garden Fertilizer
Welcome to This Is How We Do It, a new series wherein we’ll be discussing projects both inside the home and out and explaining, you know, how we do it.
I planted my garden at the beginning of summer, when it was just starting to get hot more than occasionally. Were we ever so young! The yard of my apartment was blessed with a compost container, so I was able to plant my baby vegetables with lots of compost to help them grow strong and healthy. Now that my plants are grown, they need more plant food, and I want to feed it to them without disturbing their root systems by shoveling around in there. The solution: liquid fertilizer! I could buy Miracle-Gro, or I could make some easily (and organically) at home. There’s more than one way to do this, but I made what’s called “compost tea,” or liquid fertilizer derived from compost. It’s just stupid easy, I promise.
1. Find a bucket or other large container, and fill it halfway or so with compost.
It’s okay if it’s not all totally decomposed/composted or if there are still chunks of vegetable matter, just shovel it all in there.
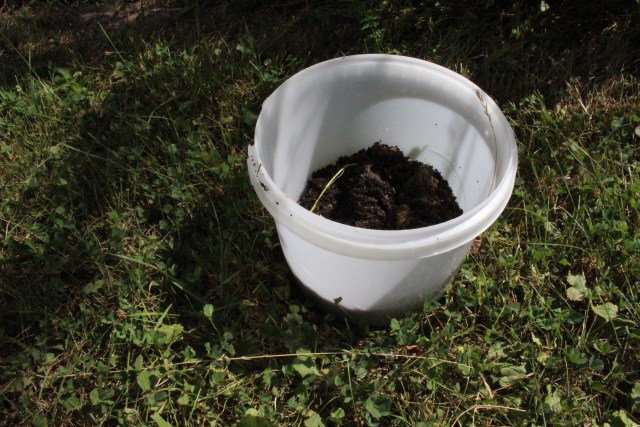
2. Fill the rest of the container with clean water.
You can cover the bucket with a lid at this point if you wish; it’s not a big deal whether you cover it or not, it will just smell a little less like compost if you do.
Delish!
3. Let the “tea” sit for a few weeks, stirring frequently.
Most instructions call for about three weeks, although if your compost is really A+ material and is already very nutritionally rich, you could do less time. It should be stirred frequently, once a day if you can, to introduce oxygen into the mixture, which will help the microbes you need.
4. Dilute and feed to your plants!
The liquid in your container should now be fully functional liquid fertilizer! You can strain the liquid through a mesh or an old t-shirt to separate out the plant matter. Dilute the liquid with water at a ratio of about 1 part fertilizer to 9 parts clean water, and use to water your plants. It should be a light translucent brown, not unlike a glass of iced tea. You can re-use the plant matter with more liquid to create more fertilizer. Your plants will thank you.
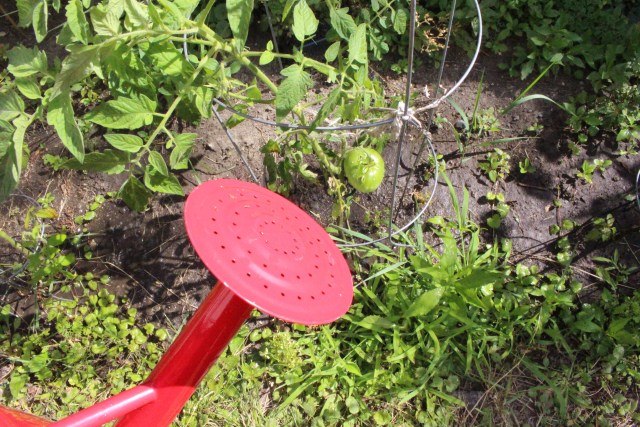
Maybe someday, with enough plant food, this tomato will finally ripen
If you don’t have any compost to work with (here’s an easy way to get started!) you can use grass clippings or leftover vegetable and plant matter instead. While not technically a fertilizer, you can also use Epsom salt as an additive either to the soil or in the form of a spray for tomato and pepper plants; you can dissolve two tablespoons of Epsom salts in one gallon of water and use the resulting liquid as often as once a month.
Holigay Gift Guide 2013: Urban Explorers
![holigays-2013-banner[1]](https://autostraddle-develop.go-vip.net/wp-content/uploads/2013/11/holigays-2013-banner1.jpg?resize=640%2C150)
I’m a city transplant, and even though I like where I am, I miss a lot of things about the rest of the world. The occasional reminder that there’s more to life than concrete, commutes, and humans does me a lot of good. Here are some great ways to get yourself (or someone else) deep into whatever outdoors you happen to have, and to condense the vastness of nature so it’s more apartment-sized!
For Bringing the Inside Out
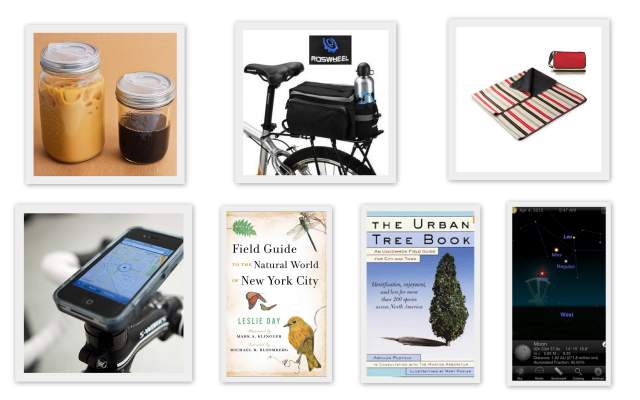
One recharging activity that I really enjoy is packing a book and a lunch, biking as far as I can and then stopping whenever I land at a park, shore, suburban trailhead, or other picnicable place. These reusable Cuppow Mason Jar Lids turn a household staple into a de facto water/coffee/smoothie bottle (and no, your jar won’t shatter, especially if you tuck it into the water bottle holder of the Bike Rack Bag where you packed the rest of your stuff). I stole my picnic blanket from an international flight, but YOU can get this Picnic Time one that is water-resistant and turns into a tote bag. Avoid getting lost (and give yourself a soundtrack) with this Smartphone Bike Mount.
Even if you’re just getting from one place to another, having something to pay attention to while you do it can make all the difference. The various US City Bird Guides will help you get to know your more feathery neighbors — they’re pretty old, but there’s one for most major cities. For first-time trackers, The Urban Tree Book might be even better, because your subjects can’t run away. Although it’s got a limited intended audience, Leslie Day’s Field Guide to the Natural World of New York City is actually a cool read for anyone. And after the sun sets, the Star Map 3D app can help you memorize some nearby constellations while you’re waiting for the train. Cute girls love constellations.
For Bringing the Outside In
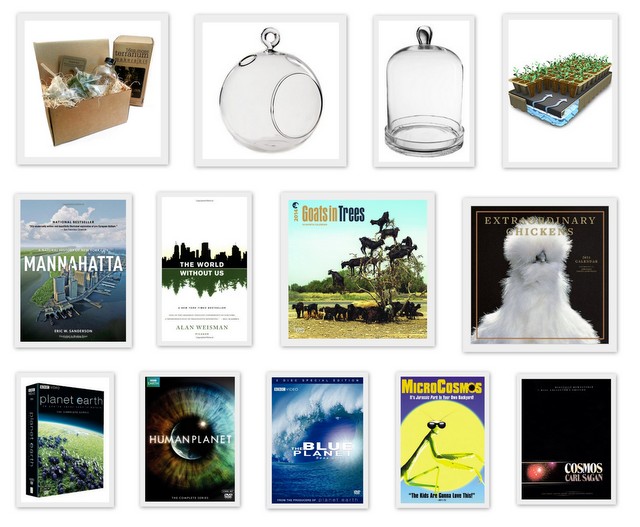
Having a few green guys around can really bring some air into your life, literally and figuratively. Beginners might want to start out with an all-in-one Moss Terrarium Kit, while those who are ready to go it alone can choose from a variety of options, like this space-sensitive Hanging Terrarium (which comes six to a pack!) or this larger Glass Cloche. If you’d like to get more practical (read: delicious) use out of your plants, and you’re willing to raise them from infancy, try out this Seed-Starting Tray, which comes with watering and seed trays, growth pellets, and fertilizer.
If you’d like to spend your time indoors imaging what once grew where your apartment used to be, check out Manahatta, which traces the natural history of New York back to “the forests of Times Square, the meadows of Harlem, and the wetlands of downtown.” If you’d rather project a semi-apocalyptic future, The World Without Us is a total mind trip. Both these books are pretty heavy, so even things out with a Goats in Trees or Extraordinary Chickens calendar.
Sometimes your laptop screen is the best portal to the outside world. Planet Earth is the obvious choice for a reason, but if you’ve watched jumping baby ducks one too many times, I can also personally recommend Human Planet and Blue Planet, both from the same production team. I also really love Microcosmos, which instills insect lives with high drama. And if you’d rather go huge, there’s always Carl Sagan’s galactic classic Cosmos.
For Remembering Everything

There are lots of ways to remember your adventures, keep track of succulent growth, and plan for the future. If you want to use more than just your brain, I recommend this set of 12 Rainbow Notebooks. I’m also intrigued by this Oregon Scientific Movie Camera, which I think is technically for children, but is inexpensive, seems durable, and looks like it could affix easily to my handlebars. As for pictures, this iPhone camera kit comes with three different lenses and a mini-tripod, so it’ll be like shooting fisheyes in a barrel.
Visit the Autostraddle Store ┊ Shopping online? Use our affiliates!
Make A Garden Thing: Twig Plant Markers
![]()
Holy crap, it exploded into summer. My girlfriend just moved in and between the two of us we’ve amassed two dozen plants that are getting all sorts of bushy. Now they can’t keep their leaves to themselves, won’t stop poking each other in the areoles and are acting like the bratty children you imagine they’d be. Plant parenting is hard.
You could just lie to yourself and pretend you remember the difference between cilantro and parsley shoots, or you can just whittle some wood and let the plants do the talking. When it comes to leafy friends, you should name them so they feel special and don’t develop a complex and off themselves out of spite and loneliness. (RIP unnamed plant I forgot in the corner of my bedroom!) Or you know, label them by type.
Is it morbid to make nametags out of dead relatives? Probably
To take a cue from Make A Thing, this is about as easy as peeling a carrot but slightly harder than labeling your pencil crayons. Did anyone else use scissors to scrape off the paint at the end? No? Maybe my mom just knew about my tendency to lose things and didn’t trust my eight-year-old peers.
Things You Will Need
+ A dead plant
+ A live plant
+ A saw, pruning shears, Stanley knife, etc.
+ A vegetable peeler or some fancy knife skills.
+ Permanent markers or lettering stamps and ink.
+ Sealant, clear lacquer, clear nail polish, top coat, etc
1. I say you need a dead plant because it’s mean to desecrate a live one. So go into the woods and collect some dry sticks about 1/4″ to 1/2″ in diameter. If you happen to have a plant that needs pruning, trim your topiary and let the cuttings dry out. Cut into 6″ lengths.
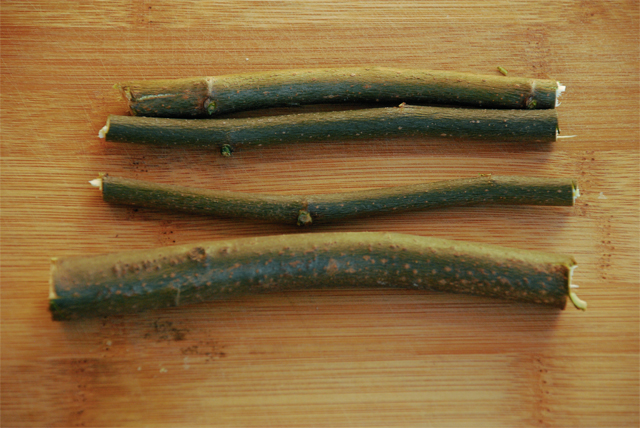
I looked out my window and my bush grew a foot-long branch in a week. I call him Jumangi for a reason.
2. Use your vegetable peeler (or impressive knife skills) to shave a patch off bark off from one of the ends. An inch and a half is a good start, but obviously you’ll need more space if your plant’s named Bubba Gump Shrimp the Third.
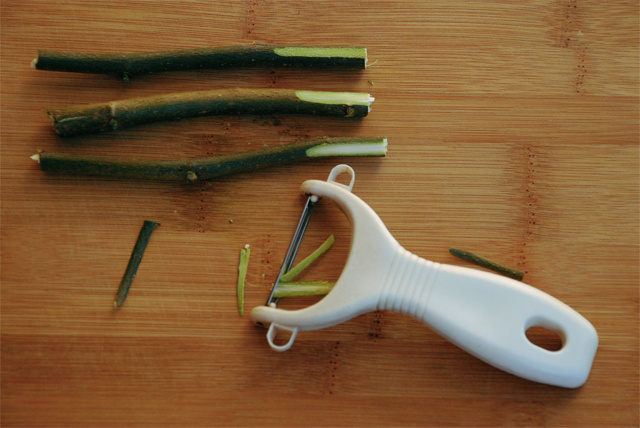
It’s almost as easy as cutting yourself!
3. Then start naming your plants! Use your best penmanship to write out the names. Or use a set of stamps to spell them out, causing your friends to be wonder if you shoved a twig in your typewriter. Or go hardcore and draw a plant portrait, so your tiny plant baby knows what to aspire to.
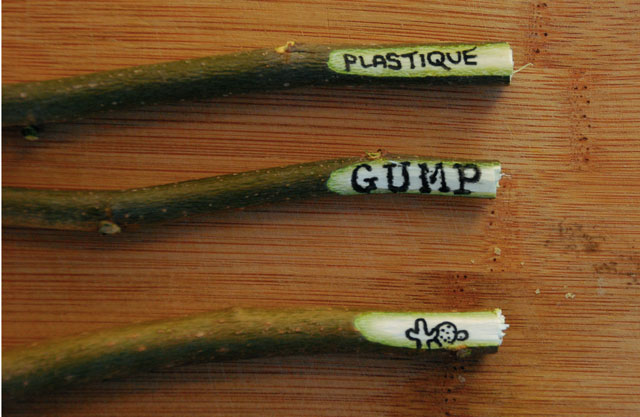
I never said we had a naming theme.
4. Apply a protective layer of spray or polish to prevent water damage to your twigs. You are totally going to remember to water this plant.
5. Put it in the pot! Just make sure you give it the right name, lest your plant becomes even more depressed.
Now My Gump is Less of a Grump
Grow a Little Love: Making Plantable Paper Notecards
My mom is the queen of weird and fantastic presents. This year for Easter she mailed me a tiny greenhouse, basil seeds and henna. In an Easter basket. It’s tough keeping up with the most thoughtful lady in the land. Luckily I have the Internet on my team. A few weeks ago, seed paper poped up in my Google Reader and, at $3 a sheet, I thought, “I can make that.” You can make it too!
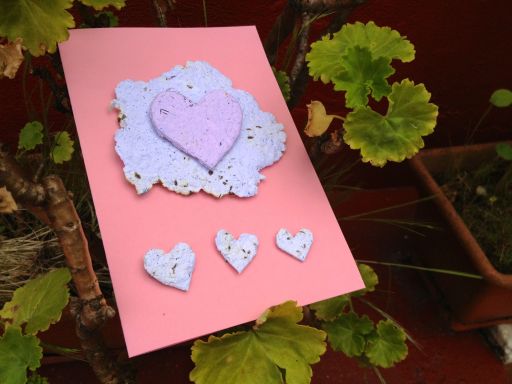
You Will Need:
+Old White(ish, text is fine) Paper. Junk mail works great because it’s real paper, newspaper does not because it’s too thin and shiny.
Construction paper or tissue paper in various colors
+Water
+Seeds. The smaller they are, the better they stay stuck in the paper. I used parsley.
+A Blender
+A shammy or a piece of smooth, very-absorbent cloth. This should ideally be a screen but let’s be real, who has a heavy-duty screen laying around? No one, that’s who.
+Newspaper
+Something flat (and hard, like a piece of wood, if you want really great paper)
Instructions:
1. Rip the white paper up into pieces roughly an inch by an inch. Soak it in water for at least an hour before you want to start the actual project so that you don’t murder your blender.
2. Rip the pieces of colored paper up and let them soak in their own cups.
3. After the paper has been completely drenched and is nice and soft, scoop it out of the water. and into a few different containers so that you can make different colors. Add fresh water to each container. You’ll want about the same volume of water as paper, a 50/50 mix.
4. Blend each batch individually, making sure to rinse your blender in between each color. Now add the seeds and stir them so they’re evenly dispersed.

yum
5. Set up your work station. You’ll want a bunch of newspaper, then the shammy, (then the paper pulp, but we’re not there yet), then another shammy, then more newspaper, then your flat surface. When I went to art camp as a baybay, we used to do this on the floor so that we could dance on the piece of wood we used to squish the water out. Feel free to use this method.
6. Grab a handful of pulp and put it on the shammy in a sort of thin layer. We’re talking half an inch thick max before patting it down. If you want to make polka-dotted or specially-shaped paper, now’s the time to do that. Try to make that lump of gross-looking pulp look pretty. Ready? Okay now…
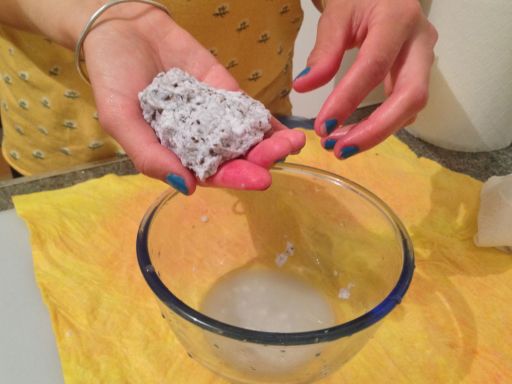
do as i say, not as i do. using food coloring will dye your hands and make unevenly-colored paper
7. Smash it down with the other shammy. Now put a few layers of newspaper on top. Now your flat thing. Smash it down with your hands or your feet or any body part you prefer until allllll the water is gone. Now flip the shammy and pulp sandwich over and squeeze some more.

push it real good
7. Carefully peel the top shammy off the paper. It should come right off. If it doesn’t, you either have too much water left in the paper or you started with too much pulp.
8. When you’re satisfied, peel the paper off and place it on some dry newspaper to dry.
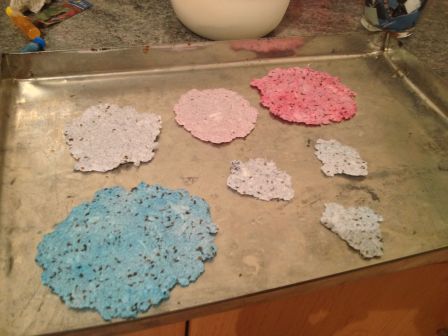
they look like some kind of futuristic meat alternative
9. Okay, after a day or two it’ll be dry and ready to go. You can either use the pieces as they are or use very VERY sharp scissors to cut them into shapes. I did both.
duct tape works for everything
10. Glue or tape the bits of homemade paper to cardstock. That’s it! Write a note inside – don’t forgot to mention that they can plant the card – slap a stamp on it and put that future garden in the mail.
Cacti For All: Don’t Let a Black Thumb of Death Get You Down
It’s fucking spring you guys! I woke up this weekend to an actual honest-to-goodness sunbeam and walked outside wearing only two layers. I saw a woman running in a sports bra which was simultaneously thrilling and confusing because it was still barely 4°C out. But hey, who am I to argue?
When the grass starts poking through the snow and I see my back alley feral cats waddling around full of soon-to-be kittens, the urge to fill my apartment with living things ramps up. By living things, I mean plants not cats. I headed down to Homo Depot to buy a new lil guy for Succulent Spring, but as soon as my girlfriend posted a photo, the warnings started flooding in. “DON’T KILL THIS ONE!” “Please, have mercy…” My friends don’t have a lot of faith in my ability to keep things alive.
Admittedly I have killed quite a few plants (RIP Deceasey the Basil Plant), but I will tut-tut their concern this time. Succulents are a thing both you and I can do!
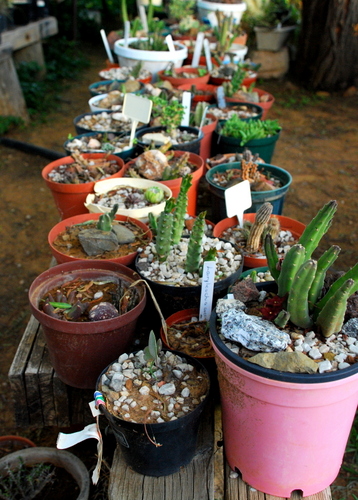
This gardener in ZA put me to shame.
Succulents are The Most Thoughtful Houseplants Ever because they want you to ignore them. They store water in their leaves, trunks and roots making them the independent cats of the plant world. In fact, if you give them too much care or attention, they’ll freak the fuck out. So much like your teenaged emo self, give them plenty of space and they’ll happily chug through life and possibly even flower.
If you’re a Level Eight Gardening Master, you can try your hand at hanging succulent balls or framed succulent gardens while the rest of us will stick to low-lying pots. I usually look to Martha for my basics, but if you want more in depth growing tips, head on over to Cactuslands or the Cactus and Succulent Society of San Jose. You can tell they know what they’re doing by the quality of their web design.
Major Tips
- Give ’em space. Succulents need airflow for their leaves and roots. Choose a soil mix specifically for cacti or combine botanical grade sand and/or grit with your normal potting soil. You want to make sure that the earth stays loose enough for water to quickly drain.
- Keep it dry. Let the soil dry out completely before you give your plants another round. You can get away with watering monthly in the winter and biweekly in the summer.
- Keep ’em hungry. Given that succulents are native to areas with poor soil, too much nitrogen will kill them. If you want to use fertilizer use them at 1/4-1/2 the recommended dose.
- Don’t let them burn. Even though succulents like light, full sun exposure will result in a crispy version of its former self.
If you still have no idea what you’re fucking doing, download an app like Koubachi so your iPhone can chastize you for forgetting to water your plants and not calling your mother.
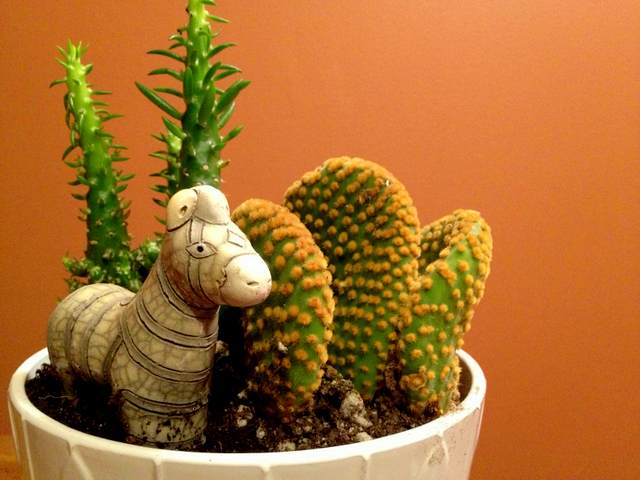
Charlie the Zebra in his natural habitat.
Protip: Add a bit of personality to your plants when you pot! If you fill your containers with shells, knicknacks or souvenirs from your travels, people will be less apt to notice the slowly shrivelling succulents.
If keeping a thing alive makes you secretly (or not so secretly) weep, there are still ways to bring greenery indoors without relying on silk plants from the 1980s. If you do it well, people will applaud your creativity instead of realizing your apartment is a barren wasteland where plants, dust bunnies and heteronormativity go to die.
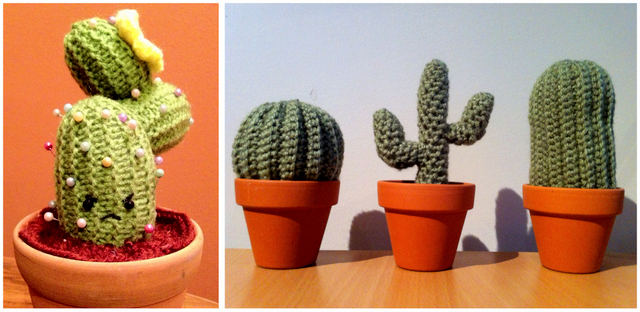
Crocheted cacti have been on the rise, probably due to all of my fellow Black Thumbs. I told myself I’d learn to crochet this year, but I’ve only mastered chainstitching “toys” for my roomie’s cat. My favourite crocheting Etsy-ers SIXIT and Harvesting Hart both come to the rescue with their Unkillable Plants. If you happen to be friends with your hook, you can crochet a graceful saguaro cactus or some amigurumi cacti with a bit more personality.
If you are made of thumbs, and unfortunately none of them are green, there’s a pathway to plant parenthood for you too. Make an immortal cactus from green socks and pompoms, some extra green felt or a moustache and your sewing machine. Plan B made her own fake cacti using nothing more than fabric, leather, cotton batting, yarn, cardboard and a plant pot. While this looks about 8x easier than any of the crocheted patterns I’d seen, I figured I could do it in even fewer steps while making a somewhat useful knicknack.
Cactus Pincushion
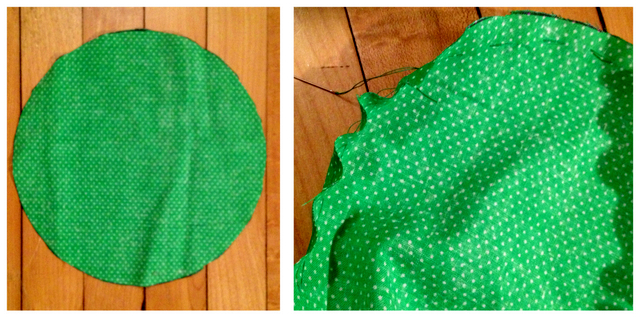
Your journey to Cactus Parent stars by cutting a green circle from whichever fabric you have handy. My circle (and my side plate) just so happen to be 7.5″ in diameter. Loosely stitch around the circumference in a similarly toned thread, staying 1/4″ in from the edge.
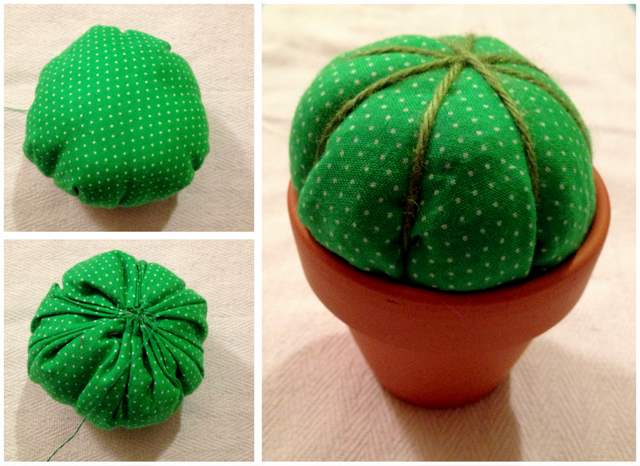
Stuff your soon-to-be-cactus with cotton batting (or in my case, the remnants of a shredded plaid rainbow shirt I found by the side of the road) until it’s delightfully plump. Use a few more stitches to sew it shut. Tightly wrap your ball with yarn, forming eight puffed segments. Stuff it into a mini pot and thread the extra yarn through the hole at the base. Pull on the yarn tightly to ensure a snug fit for your cactus. Look, no glue or cardboard necessary!
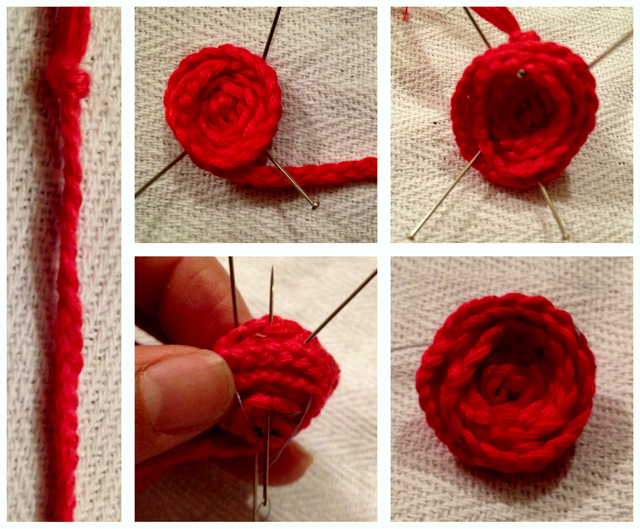
I wanted to add crocheted flowers, but I realize you can’t get that far in life with only a chain stitch. Thankfully Homespun with Heart, proved you could achieve the same effect without ever picking up a hook! Break out the needle and thread instead of her requested glue and cardstock to make flowers with a bit of dimension.
Braid together three 12″-14″ pieces of embroidery floss or yarn, double knotting both ends and cutting off the excess. Spiral the braid around one knot, pinning as you go. Misalign your spirals so the coil takes on a bowl-like shape. When you have few inches left, wrap the rest behind the bud to support the “petals.” Moving outwards from the central knot, stitch in a radial pattern to connect the chain (think the spokes of a basket.) Before you tie off your thread, pull it tightly to cause the flower to take on a bit of a wavy shape. Stitch on the bud, slap in a few needles and bam! Not safe for children!
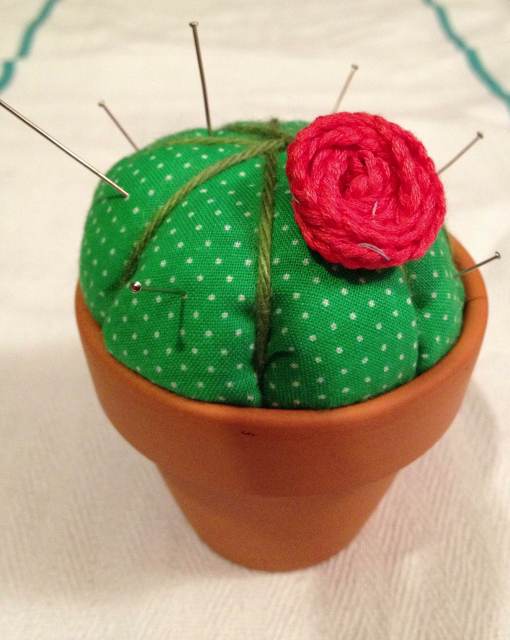
I could have used pink thread, but that would’ve required me to refer to my shopping list.
Depending on how black your thumb is, and how coordinated your other fingers are, you too can make your house a little bit greener! Or at least for a few weeks.
Ode to My Pantry: Sprouts
Learning to feed yourself can be one of the most terrifying things. Am I about to give myself food poisoning? If I eat this too often will I end up with scurvy? How can I get the most nutritional bang for my buck? Why does this still taste like ass?
With Ode to My Pantry, learn to navigate a grocery store without having a meltdown in aisle three. Give a man a fish and feed him for a day, teach a queer to cook and stave off malnutrition for another semester.

I’m growing my own sprouts. This is a Big Deal for me. See, I have what I like to call The Black Thumb of Death. I am just not gosh darn talented at keeping plants alive. Wilty the Basil Plant? Dead. Deceasey the Succulent? Gone. My Herb-B-Q full of thyme and Thai basil? Dead once my roomie left. Dragon trees? Money trees? Jade plants? All were put out with the garbage last week. Just to let you know how terrible I am, I’m currently enamoured by these crocheted cacti because there’s a 90% chance I can keep them alive. But sometimes in the face of known adversity, my tummy rumbles are louder than reason.
I get crunch cravings. Sometimes these textural cravings are fulfilled with kettle chips or popcorn, but more often it’s the snap of fresh veggies that I’ll actually heed. Throughout the wintry months I’ll eat kale, beets and carrots dutifully, but I just want something juicier. Is that weird? Probably, but I’m not one to argue with my stomach. My friend showed off her green thumb with her winter Zombie Veggie Garden and while inspiring, it still requires you to plant them in a pot. Sprouts are a different story.
While I am still sceptical about sprouts as an enzyme-filled magical bean wonder food, I’ll agree that they are tasty. Compared to their hibernation state, they contain more vitamin C (but still not that much), fewer carbohydrates and a comparable amount of protein. If you were planning on using your sprouts as a protein source, keep in mind you will have to eat a lot more by volume to make up for the added water content. Do they contain a life force or magical enzymes that will help you through your day? Only time will tell. The one thing research shows is that sprouts are generally more digestible than beans. Since they have to use up their stores of oligosaccharides to grow, your gut bacteria will have less problematic carbs to nosh on. So if you consider not farting your girlfriend awake a superpower, think of sprouts as your radioactive spider.
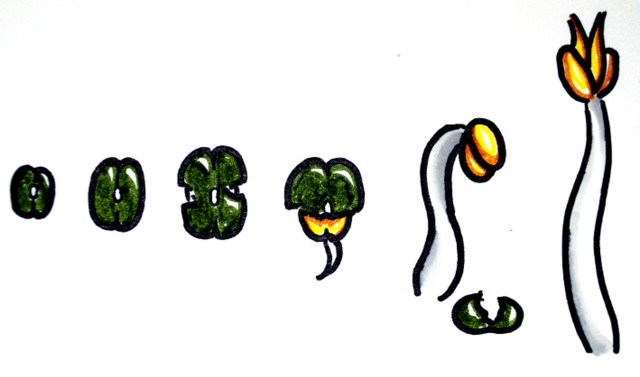
Sprouting your own beans! It’s almost as exciting as hatching a chick in kindergarten.
When it comes to making your own sprouts, you could go the sprouting jar route or rustle through your pantry and make it yourself. I start this helpfully snarky Instructable yesterday and didn’t double over in fear! Maybe it’s because it seems more “DIY” than “Gardening Makes Me Cry.”
Start by gathering and washing your beans. Be sure to remove any rocks, twigs, broken beans and other non-sproutable/edible
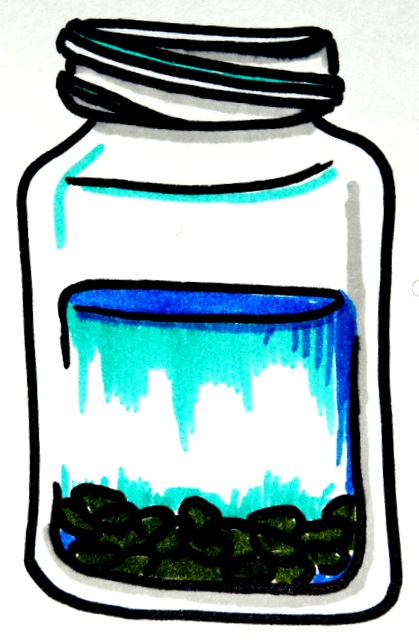
All of my advice can be summarized as “put into a jar of water”
object. Fill a mason jar a quarter-full of beans and the remaining space with clean water. Cover it with a piece of cheese cloth, a pierced lid, mesh screen or sprouting lid and move to a cool, dry place overnight. Within one day you should have bloated beans. Drain, give them a rinse and drain again. Store them inverted so air can circulate and the sprouts can stay moist without soaking in their own juices. Keep up this rinse, wash, rinse, drain dance. If you want them to become green (like alfalfa), move them into the sun to produce chlorophyll. Otherwise, keep ’em hidden to preserve the whiteness. If all goes well you (and I) will have a jar o’ sprouts within 2-5 days. Throw them into a bowl of water so the seed coats can float away and you’re ready to go. I don’t even think I can fuck this up.
(As a future note, if I ever show a gardening project you should immediately assume that someone else did it for me. Unless of course I did grow it myself, then I’ll be as surprised as you.)
If you’re going the Black Thumb of Death route (ie. Purchasing them from the store), just make sure you are buying the best babies you can. Look for mung or soybean sprouts that are bright white, thick and turgid. Starting to look rusty? Give it a pass. Water pooling in the bottom of the container? Nope. Translucent scarring? Nope. Do they feel slimy? Hell no!
One way or another, you have a shitton of sprouts. How should you store them? There are two belief systems when it comes to sprout storage: keep ’em super dry or keep ’em super wet. If you’re going for dry, give your sprouts a thorough rinse and dry with a colander or a salad spinner. Berry clamshells works well as containment units since the slits allow for air flow and moisture drainage. Just be sure to line the top and the bottom with paper towel. If you want to try wet, fill a container with frigid water and plunk your sprouts inside, making sure they stay immersed. Just like your barely-alive sea monkeys, you will have to change the water frequently. You could also freeze your sprouts if you were planning on eating them cooked.
In their fresh form, sprouts lend a juicy bite to sandwiches and salads. My favourite salad to make started off as an offshoot on vegetarian Banh Mi when I wasn’t coordinated enough to buy baguettes. Julienne carrots, daikon, jalapenos and red bell peppers and combine with washed mung bean sprouts. Toss peanuts and firm tofu cubes in a pan until lightly toasted. Combine everything with nuoc cham. Top with fried shallots and shredded cilantro (if you roll that way) and dinner’s ready! You can also add some rice noodles for a more substantial meal.

Tastes like a delicious mistake!
When my sprouts are reaching the end of their lifespan and starting to wilt, it’s time to think about your cooked options. Having a stirfy? Throw them in. Making hotpot? That’ll work too. My favourite way to kill sprouts is kongnamul muchim, a soybean sprout side dish combining blanched sprouts, sesame oil, garlic, chili and salt. Depending on which type of sprout is meeting its demise in my fridge, I’ll substitute mung bean sprouts for soy bean sprouts. My friend assures me that there is no such thing as nokdu namul muchim, but that won’t stop me from making it anyways.
But as with any food that’s fun to eat, there’s gotta be a controversy. Are your sprouts toxic? Are they indigestible? Are you going to end up with food poisoning? When it comes to sprouts, I will trust alfalfa, mung bean, soy bean and the other offerings readily available on store shelves. When it comes to more “exotic” beans, I rely on the power of the Google and then listen to my gut. And by that, I mean if I end up horrendously ill, I’ll take it as a sign I shouldn’t eat them. Keep in mind that since bean sprouts are tiny edible sponges, they’re commonly tied to food poisoning outbreaks. Make sure you grow and store your sprouts in clean water. This doesn’t mean you should abstain from them completely, just pay attention to any outbreak news in your area. And wash ‘em well for gosh sakes.
Time will only tell if I managed to fuck up these sprouts. Until then, I’ll eat the store I have in my fridge. Have you successfully sprouted your own seeds or beans?
A Custom Fit: Container Gardening

Inspired by how happy you are that o.b.® tampons expand all around to custom-fit your body, Autostraddle’s “a custom fit” article series will tackle how to make all the other parts of your life expand/adjust all around to custom-fit your life/self. You’ve got your own place, you’ve got clothes that fit you just right and you’ve even figured out how to work exercising into your schedule. Congratulations! Today, because everybody can use a little more life in their life, Laura’s going to talk to you about plants.
+
![]()
In an ideal world, you’d get to climb a tree every once in a while, but it’s be real here: the most nature a lot of us get to experience is that (terrifying) tiny spider that crawls across the ceiling above our bed at night. Even those of us who live in the greyest of cities haven’t totally managed to escape romanticizing nature, though; we look forward to blueberries in the summer and pumpkins in the fall and count down the days until crocuses finally bloom in the spring.
But Christmas trees (real or otherwise) don’t have to be the only plants you invite into your house. You can start a garden in your kitchen, bathroom or bedroom and have something living and breathing and green in your house all year long. Container gardens can be miniscule things you start in your window sill or massive jungles your cultivate on your porch. All you need is a potted plant to get started. And you really should get started; plants are damn useful things to have around. They keep your space cool, clean your air, calm you down, feed you and add something dynamic to rooms that spend most of their time empty while you’re busy whirling around working and generally being a person.

+
we all want to grow with the seeds we will sow
The first thing you need when you’re building a container garden is not, in fact, containers; it’s plants. I say this because, as a person who has a habit of starting projects and never finishing them, it’s really easy to collect a hundred and twenty-seven fancy containers and never find time to fill them with anything. Instead of letting your pots gather dust, motivate yourself by going out and getting plants first so that you’re forced to do something with them before they die.
I’d recommend starting your garden with a mix of plants and seeds. Like remembering to take my vitamins, watering is something that I have trouble remembering to do daily (there’s a reason I don’t have pets, y’all), especially when there aren’t actual wilting plants around to remind me that they need watered. I also make sure to start with a plant or two that I’ll use when I cook–something like basil or cilantro–so that I remember to water my plants when I go to grab a leaf or two for dinner. Seeds are a good thing to have because there’s so much more variety available whether you’re buying them from Home Depot or ordering them online. They’re also crazy cheap compared to plants and last for years, which means you can keep your garden going all through the winter.
Here are some of my picks for plants and seeds:
+ Avocados: My avocado plant is my pride and joy. I’ve nurtured it from a tiny(ish) seed that came from an avocado that I used to make a sandwich, to the 14-inch tall plant it is today. In nine years, all my hard work will be worthwhile when my tree finally grows its first avocado and I move to guacamole heaven. All you need to start your own plant is an avocado, three toothpicks, water, and a cup. It takes almost 2 months to even sprout, but don’t get impatient: it’ll happen!

+ Mimosas: Not the drinks, the plants. Mimosa plants are good to have around when you’re having a lot of feelings. They curl up when you touch them and go to sleep every night which makes them slightly better pets than hermit crabs which, as far as I can tell, do nothing.
+ Herbs: Everyone needs herbs in their life. I’d go with basil (for pizza and pasta), cilantro (for everything), mint (for tea), parsley (for tabouli) and lavender (because it smells good). Buying cut herbs at the grocery costs an arm and a leg and they always manage to go bad before you can use the whole bundle so why not grow them yourself?
+ Beans: Beans are hands down the easiest and fastest things to grow. If you’re easily bored or bad at keeping things alive, try starting with beans.
+ Flowers: Everything you grow doesn’t have to be useful; you can grow flowers just because.
+
contain yourself!
Okay, now that you’ve got some plants, you can start hunting for containers. You’re going to need big ones and little ones because the name of the game here is variety. Ideally, the containers you plant in will be things you collect over time, but since you’re just beginning you’ll need to jump-start your collection.

I’ve used:
+ Terra cotta pots: These guys are the most obvious for planting, but are also the most expensive and potentially the most boring. A pot or two never hurt anybody, though, so grab a couple and break out your paint. Acrylics work great on terra cotta and can be sprayed with a matte finish to keep the paint from chipping off.

+ Egg cartons: Because they’re biodegradable and already divided up into 12 sections, egg cartons are perfect for starting seeds. The cardboard they’re made out of also makes it really easy to tell if you’ve over- or under-watered because it will be just as wet or dry as the soil it’s holding.
+ Eggs: Don’t just use the cartons, save your eggshells! You can plant seeds or tiny seedlings in eggshells and put them in bigger pots for decoration.
+ Tea cups, mugs, bowls & glasses: Thrift stores, your parents’ basement and the sale section of places like Anthropologie are fertile hunting grounds for these babies.
+ Mason jars: You’d be surprised what you can find at thrift stores. Last week, I bought a pack of 5 giant mason jars for 69¢ which pretty much blows the grocery store’s 12 pack for $10 out of the water. Basically what I’m trying to say here is: don’t spend money when you don’t have to.
+ Cans and jars: Tomato sauce jars and soup cans are easy and weirdly pretty things to plant in. Just make sure you wash them well before you use them because mold is not something you want growing in your garden.
+ Hanging pots: If you’re feeling ambitious, places like IKEA sell pots that you can hang from your ceiling if you’re handy with a screwdriver.
+
randomness is very difficult to achieve
Once you’ve assembled all your pots, you need to start putting together your garden. There’s nothing wrong with throwing all your containers onto the table and calling it a day, but you can go the extra step and make things doubly pretty.
Consider:
 + Surfaces: If you don’t already have a table or counter top that you’re going to use for your container garden, head right back to the thrift store.
+ Layering: To keep your garden from looking monotonous, you can build layers by stacking books and cigar boxes so that your pots all sit at different levels.
+ Watering cans: Keep a full watering can nearby so that watering doesn’t become a chore. If you don’t have a watering can, a wine bottle or olive oil bottle works just as well. If you can get unsoftened water (or hose water: yum), it’ll be better for your plants, but I’ve lived plenty of places where a sink was all I had and my plants were healthier than a horse.
+ Fake flowers: Just because it’s a garden doesn’t mean all your flowers have to be real. I’ve got all kinds of tissue paper flowers, pictures of flowers cut out of magazines, and silk flowers I got from Hobby Lobby mixed in with the real ones.
+ Cut flowers: You can also go for real flowers that are no longer technically alive. Beer bottles, especially ones with nice labels, make good vases.
+ Cutlery: Have you ever seen those hammered spoon plant markers on Etsy? You can make them! All you need are spoons, forks and knives, a heavy hammer, and a set of metal stamping letters (which you can get for ~$8 at a craft store).

+ Sun: Your garden needs to be somewhere where your plants will get enough light. A south-facing window is a good place, but if you happen to live on the east side of your building, a grow light works too. If you’re sticking with the real deal, don’t forget to rotate your plants every once in awhile or they’ll all grow lopsided towards the sun.
Get Baked: Dandelions, More Than Just a Weed
You’re broke and bemoaning the fact that money doesn’t grow on your lawn. Well, dear Autostraddlers, lucky for you, your food does! And even if you don’t have your own lawn, your food grows in other peoples’ lawns, in yards, and in parks! Don’t worry, I’m not calling you a cow. I’m just suggesting you eat dandelions.
You may be broke as fuck, but who needs money when you can look at pretty flowers and then pick them to serve your needs — and I mean all your needs. Need to get drunk? The dandelion is here for you. Need to chill out with some anti-cancer tea? Look no further than the dandelion. And finally, who doesn’t want pretty flowers in their salad? Yeah, that’s right, dandelion flower salad is a thing — it is a nice complement to the toast from your toaster oven and should be the staple food at all your AS brunches and lesbian potlucks!
Dandelion Wine

via tppermaculture.blogspot.ca
Dandelion Wine is a classy drink. Sure, you can use it to fulfill your drunken-debauchery quota; but when I imagine people drinking dandelion wine, they are in a garden wearing pretty hats and perchance speaking with British accents.
Here is what you’ll need:
The flowers from enough dandelion flowers to fill a big-ass gallon-sized bucket.
3lb of sugar
2 lemons
2 oranges
½ oz of yeast
Here’s what you do:
Start by pouring a gallon of boiling water over the flowers. Leave it for three days (yes, this recipe requires patience) and stir the mixture every day (yes, this recipe requires persistence). Finally, after three days, strain into a deep pan or pot and add lemons and oranges. Bring the mixture to a boil for about five minutes. Then cool. Add yeast and let ferment for three more days. Cork, leave for two months, bottle. Then invite a bunch of classy ladies over, wear fancy hats, discuss kittens in fake British accents. Unless you have a real British accent.
Dandelion Tea

via weheartit.com
Dandelion tea is really good for you. In addition to being anti-cancer, it’s a diuretic, helps cleanse your liver and your gallbladder. Researchers are spending 157 thousand dollars to figure out what makes it so special; but you don’t need to spend anything to make this tea.
Here’s what you need:
Dandelion roots
Here’s what you do:
Pull the roots out of the ground. You may have to dig a bit for them. You can use your hands, if you’re hardcore like that, or a small shovel. Once you have gathered a cupful of roots, wash them and use a coffee grinder to make dandelion root powder. Steep your powder in hot water and you have tea! You can drink it just like that or add nutmeg, clover, sugar, anything really for taste.
Flower Salad

via iscreamicecreams.tumblr.com
Easy-peasy.
Here’s what you do:
You get some dandelions, you chop off their flowery heads, you put said heads in a salad. What kind of salad? Any salad! That’s the wonderful thing about dandelions. They go with everything. Greek salad. Caesar Salad. Salad that you hastily throw together with the veggies in your fridge before they go bad.
Enjoy eating flowers. Just remember to ensure the dandelions you’re using haven’t been sprayed with pesticides. This is about eating flowers, not poison. Remember how magic happens when girls and flowers are together.
Get Baked and Toasted: Get Out of Your Gardening Predicamint
Sometimes you look around your garden and think, “Gee… that gardener at Home Depot was 4000% right about the mint. It will take over my entire garden.” You want to go back and apologize for having doubted the Plant Wisdom, but instead you are up to your elbows in Mentha longifolia trying to prevent the plant from choking your poor defenseless tomatoes.
When life gives you tasty weeds, make mojitos! Or mojito like things, because rum isn’t always work appropriate.

Mojito Couscous, Caramelized Peaches and Caramelized Peach Mojito via the Fooditarian. Mojito Granita via Mac and Cheese Review.
Mojito Couscous
Mojito couscous is my go-to dish when the sun is out and I’m too sweaty to turn on the stove. You can cook, mix and serve the entire dish in one bowl! The fact that it has no meat, dairy or eggs means it’s perfect to take on a picnic. Although this salad is full of tasty, it admittedly lacks protein. To balance the dish, you could substitute quinoa for couscous (which would require another pot) or accompany it with tofu.
Ingredients:
– 1 cup of dry couscous
– 2 cups boiling water
– 8 stalks-worth of mint leaves, fancy chopped* (look down for the technique)
– 2 ½ Tbsp olive oil
– ¾ tsp kosher salt
– 1 Tbsp green peppercorns, crushed in your hands
– 1 ½ limes, juiced
– ½ English cucumber, seeded and diced
– ½ red onion, diced

Fancing chopping technique*
Directions:
Place couscous in a bowl in and pour the boiling water over it. Cover with a plate for five minutes. Uncover and fluff with a fork. If the grains are still hard, add more boiling water and recover. Form a well (imagine you’re making a coucouscano). Fill the well with olive oil and mint to extract more of the mint oils, thus reducing marinating time. Add the rest of the ingredients, toss and refrigerate.
Caramelized Peach Mojitos
Peaches add a summery fruitiness to an otherwise classic drink! Plus they double as a filter, preventing you from packing shredded mint between your teeth. Oh and then you have a slightly macerated peach for dessert (if you haven’t gotten your act together to make granita).
For the Caramelized Peach:
– 1 peach (or any firm pitted fruit), halved and depitted
– 2 pats/knobs/units of butter
– 2 Tbsp brown sugar
Melt the butter and brown sugar in a saute pan until bubbly. Place the peach halves in the pan, cut-side down. Let it cook for two minutes and flip. Wait another minute and remove from the pan.
For the Mojito:
– 8 mint leaves
– 1+ shot of white rum (pisco or any other white spirit)
– 1 ½ tsp brown sugar (works as a great abrasive)
– 1 lime, juiced
– Ice
– ½ Caramelized Peach
– ½ can of tonic (I like that the quinine adds a slight bitterness)
– Sprig of mint
Give your mint a slap to break some cell walls and release essential oils. Add the mint, rum and sugar to your glass.

Muddling-type-devices. (Option three is up for interpretation: Crescent Moon Wand or spoon?)
Use your muddling-type-device to crush and grind the leaves for at least 30 seconds. Add the lime juice once the mint is bruised and the brown sugar dissolved. Add ice, the peach half and top with tonic. Garnish with the extra sprig of mint.
Mojito Granita
Adapted from David Lebovitz by Mac and Cheese Review (because chefs like spitchains too).
Most drinks taste better frozen and slushy in the summer. Omar Knedlik knew it and chances are you do too. I’m just going to bet right now that you don’t have an ice cream machine or a frozen beverage churning device. Hopefully you have a freezer and a fork!
Ingredients:
– 2 ½ cups water
– ½ cup sugar
– 2 limes-worth of zest
– 1 cup mint leaves
– 6 limes, juiced
– 3 tablespoons rum
– 5 mint leaves, fancy chopped*
Simmer the water, sugar and lime zest in a saucepan until the sugar has dissolved. Steep the mint leaves in the sugar solution until the liquid has cooled. Strain the solution into a shallow container suitable for the freezer. Mix in the rum and shredded mint. Place the pan in the freezer and wait an hour.

What your pan scraping technique says about you.
Scrape the pan with a fork to break down the larger ice crystals and shove it back in the freezer for an hour.
Scrape the pan with a fork to break down the larger ice crystals and shove it back in the freezer for an hour.
Scrape the pan with a fork to break down the larger ice crystals and shove it back in the freezer for an hour.
Scrape the pan with a fork to break down the larger ice crystals and shove it back in the freezer.
Fluff.
Congrats! YOU MADE SUMMER SNOW. Now shove it in a glass and woo a fancy lady.
* Haha, made you chiffonade.
Let’s Pick Flowers, Save Flowers, Make Flower-Saving Books Together

click for more on a-camp
Have I mentioned I love flowers? When I found out Autostraddle Camp was happening and that I could suggest activities, I immediately thought “flower picking.” It seems like the most ridiculous thing, but it’s all I want to do while I’m there. I want to pick lots of daisies! But don’t worry, I know that’s not allowed. That’s why we’re bringing our own.

Whether or not you’re at Camp, a flower-filled life is a ful-filled life, so let’s learn how to press flowers together! And then let’s make pretty books to hold them in. We’re doing this in real-time today at A-Camp, but as you’ll see, you have a slight advantage doing it at home.
Get ready to get sunny, crafty, and a little more adorable.
PRESSING FLOWERS
=

What You’ll Need
+ A heavy, heavy book
+ Sheets of notebook paper
What You’ll Do With It
Pressing flowers sounds much easier than it is, mostly because you do it without a machine and everyone else is good at it but me. I had to compile a pressed flower collection for the first time in middle school and it was so bad: I handed it in with petals falling out of pages in a shitty photo album and the book became so thick (since none of my flowers were flattened) that it was hard to transport. I’ve been practicing for you.
1. Once you’ve picked your flowers, create a machanism with which to press them. Start with something as simple as a notebook or as impressive as an encyclopedia, and then find heavy somethings to put on top. I used an old textbook, and I stacked Vogue copies on top until I felt it was a lean, mean, flower-pressing machine.

2. To press, get two sheets of notebook paper and lay one on each side of an open textbook (when they close, they will be sandwiched on top of one another). Each pressing section should be, at minimum, about 25 pages away from the others.
3. Put one flower inside at a time. Lay them in the position you want them to be memorialized in: are the petals open and the contents all flat? Is that tulip going to look like an anatomy presentation or a tulip someone sat on? It’s all up to you.

4. Afterward, close the book and, if possible, weigh it down a little bit. Try to resist the temptation to look at them a lot – it disturbs the process. I gave myself a once-a-day check where I quickly opened sheets to check on “the progress,” also known as “the flowers I love to look at.” It’s a warehouse for the future now.

You have the honor and privilege, as someone reading this at home, to take real care in pressing your flowers and let them be “pressing” for a while. Take all the time you think you need! I left some of mine inside of that textbook for a month before they seemed done. A pressed flower should be dry, without any bulbous or emerging parts, before you put it inside your flower book.
MAKING YOUR FLOWER BOOK
Dedicated to Kennedy Nadler, who helped me make my first book and therefore made me more pretentious.

What You’ll Need
+ FOR COVERS AND PAGES: Whatever kind of paper you want to use in whatever amount. Mixing and matching is allowed and often encouraged for a project like this! You’re going to want them to be all around the same size… or will you? It really is up to you. For mine, I am using one kind of paper: tall craft paper in white. It has a texture to it and it’s equivalent to card stock, which makes me feel like my flowers will be safe.
+ FOR BINDING: A hole punch and thread. (Go for thick if possible! I’m using chunky knitting thread.)
+ CRAFTING SUPPLIES: Think glue, scissors, tape, paper of all kinds, pictures you like and might want to collage, thread, markers, pens, pencils, paints, crayons, and feelings.
+ A collection of pressed flowers!

What You’ll Do With It
1. Fold your paper and cut it into various sheets. Get creative! Mine’s a landscape book, and I cut each big sheet of paper into three smaller pieces. I kept two sheets folded over one another to make a sturdier binding for later.
2. Next, you’re going to decorate the book page-by-page and by hand, unless you have an intern. Remember: the book is your oyster. Whatever you want it to be it will be. I’m doing it museum-style.

3. Once the pieces are done, assemble them like a book! Lay pages on top of one another! Be very careful, of course.
4. For binding, decide whether you’ll bind it on the side, the top, the bottom – whatever. Then, take your hole-punch and punch three holes for binding in that area, with space between. Make sure you do this with the book assembled as you wanted it binded. Then, take some yarn and devise your own magical method for keeping those pages from falling apart, AKA tying a knot around each hole.

Pressed flowers as a whole never particularly moved me. But at one point in time, a pressed daisy from the sheets of a 70-page spiral-bound CVS notebook kind of rocked my world. I watched my dog eat it months later and I kept repeating, “the daisy, the daisy.”
A couple weeks later, spring came. And all of these different things – bulbs, big sprawled out flowers with narrow petals, flowers growing in little bushes on the arms of trees – were suddenly breathing all alongside me as I walked to and from school, and work, and the store. (It was overwhelming. I did a lot of crying.) I began sort of instinctively picking them, still acting as if I’d be putting them in a cup on her nightstand when I got home.
I pressed each and every flower I picked this spring to make this book. I’m hoping this time they last a little longer.
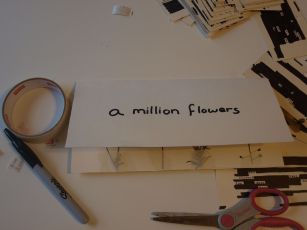
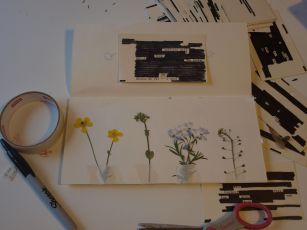
Carolyn’s Team Pick: Altoids Tin Gardens
I live in an urban center where the closest thing I have to green space near my apartment is the moss growing on top of the parking garage I can see from my window. And while there are trees and parks and things fairly nearby, sometimes it’s raining and sometimes you’re lazy and sometimes you just want your own garden to reassure you that your urban center existence isn’t all bleak minimalism and IKEA furniture, you know?
And if people can put everything from tiny survival kits to tiny BBQ grills in Altoids tins, a garden is the next logical step. Depending on your sense of logic. Plus, look how neat they are!
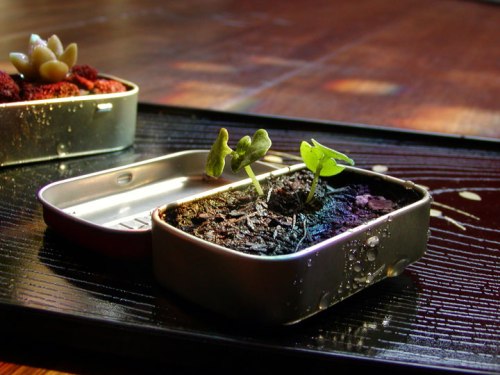
You basically need a tin, some seeds, and some tissue. You could use dirt, but also: you could use toilet paper. There are official instructions at Instructables.
Photo from GOMI Style.