I’m gonna say something here that iIve often been in the habit of keeping to myself; I despise this time of year. New Year’s season when everyone is comparing their current selves to their past selves (and each other), professing loudly how they’re going to be better than who they were the day before, and very commonly in that professing, saying a bunch of fatphobic things. This is the time of year when I’m most likely to bring a dessert to a friend’s party and overhear people talking about how it’s level of deliciousness makes it “dangerous” to their goal of making sure they never end up looking like me, a fat person. GASP. The horror. It’s tired, and I’m tired.
As a result, more than any other time of year, this is the season that I just don’t. I don’t make resolutions anymore since past me spent so many years feeling obligated to make them and tell the world just how much I hated my body and myself cause that’s what was expected of me. I don’t get on social media because it’s not fun to see people put themselves and others down in a way that masquerades as a healthy positive action. I don’t watch TV, I don’t engage in the conversations, I don’t allow myself to start the year being reminded of just how much the world fears people like me, and wants all of us to fixate on how we are not enough. A few years ago I just stopped. I realized I had permission to make other choices, and now I do.
I choose to highlight what I did well during the past year, and to look at the places that the world is clearly lacking love and understanding, and do my best to decrease that deficit. I also cook and eat whatever I want, and this year it was these muffins. I’ve been craving a cranberry orange something since the cranberries starting showing up in stores in November, but never managed to get around to making it happen until the blur of days between Christmas and New Year arrived. I tend to crave muffins when I’m feeling a little down and out about the world, so all those powers combined to bring these muffins into the world as my first recipe creation of 2020.
They are not dangerous, but they’re real delicious. VERY cranberry given the cup and a half of berries that get all bursty and juicy in the oven, and VERY orange thanks to the zest and juice of a whole orange, plus just enough sugar to avoid any pucker response and lend creamsicle vibes. It’s a sweet-tart winter muffin delight. I smile every time I eat one and think of how happy I am to just be me, accepting myself completely, and having breakfast figured out for the week.
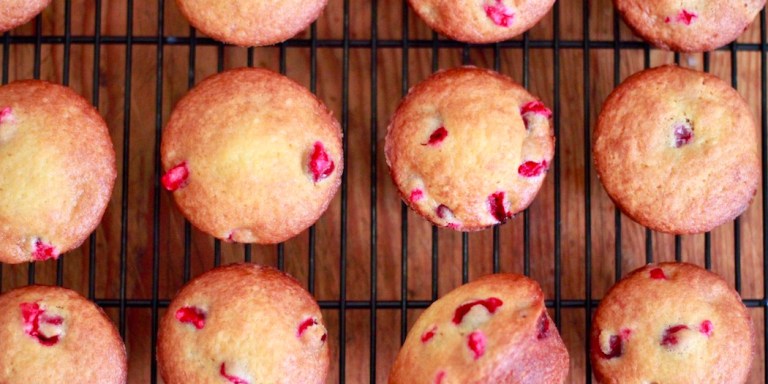
You can be channeling citrus sunshine and tart jammy cranberry brightness too with a small amount of effort and 30 minutes of your time. Happy New Year.
Ingredients:
2 cups (240g) all purpose flour
1 1/2 teaspoons baking powder
1/ teaspoon baking soda
1/ 2 teaspoon salt
1 1/2 cups (185g) fresh or frozen cranberries
3/4 cup (150g) granulated sugar
zest of one orange
1 large egg
1/2 cup (4oz) orange juice
1/4 cup (2oz) milk
1/4 cup (2oz) coconut oil, melted
1 1/2 cups (185g) fresh or frozen cranberries
Preheat the oven to 375° F / 190° C. Oil a standard muffin pan and set aside.
Sift together the flour, baking powder and soda, and salt in a medium bowl. Add the cranberries and toss in the flour mixture until coated then set aside.
Pour the sugar into a large bowl, then add the orange zest and rub it into the sugar with your fingers for a minute or so until it’s evenly distributed and you can smell the orange oil. It’s been so long since I’ve asked you to rub zest in sugar! Enjoy it.
Next whisk in the egg, orange juice, milk, and coconut oil until smooth, then add the flour and cranberries to the large bowl and stir to combine just until there are no dry spots left in the batter.
Divide the batter as evenly as possible among the muffin cups and bake for 15-20 minutes, then allow to cool in the pan for 5 minutes before transferring to a wire rack to continue cooling.
Wait about 10 minutes and you’re golden.
You can eat them warm.
Or, if you prefer room temp muffins just keep waiting around while they make your home smell delicious.
Regardless, your new year will be off to a mouthwatering start.
Well It happened! It really happened. Let’s be clear, I’d given up hope it was actually going to happen, but it did! Trump was impeached, history was made, and tbh I feel pretty jaded about it. It likely doesn’t mean he’s going anywhere, and even if he does all the people and problems that allowed him to seize the presidency in the first place are still here. White supremacy is still a cornerstone of existence in this country and the world at large. Yes, it’s good that the right thing was done, his abuse of power was called in, and he will forever be known as the first president in U.S. history to be impeached in his first term. Good. But he still holds that office and will likely continue to; he could still run for it again; everything he stands for still has the support of just under half of this country.
I can’t help but look at this impeachment as governmental call-out culture, meaning important but ultimately inconsequential. He still holds an immense amount of power, still threatens the livelihood of everyone I hold dear, and will presumably continue living a golden-boy life of wealth and ignorance long after this is over. We do not live in a world where accountability means more than a slap on the hand in terms of white supremacy. I wish we did, but we don’t. We have villains who all “happen” to look alike, wield the most power and privilege, and are content to wreak havoc on the lives of everyone outside their toxic little club to maintain it. Oppressing, traumatizing, and extinguishing us on a large scale. Shit is truly twisted in this world and as far as I’m concerned we live in the upside down, so when it comes to baking out my distress about it, that’s where my mind is. Upside down cake. The best way I could think of to acknowledge both the importance of this moment, and all the complicated baggage that comes with it in a baked good.
Of course, for the theme and deliciousness, there’s peaches. Juicy, sweet, wholly out of season in the US right now so we’re using frozen ones, peaches that caramelize in butter and sugar as they bake. Said caramelized peaches are nestled into a wonderfully moist cake made with two unexpected ingredient appearances ’cause I wanted it to be just as unique as impeachments are (lol).
First, there’s creamy tangy chèvre goat cheese whipped in with the butter that gives the cake a wonderfully luscious texture and a hint of acidity to counter the sweet. Next, fresh sage is steeped in the milk before it’s added to the batter ’cause you’ve likely learned from following my recipes over the years it’s that I love any excuse to add fresh herbs to desserts. Sage tastes incredible with peaches and cream, both of which are present at this impeachment cake party, and with the addition of a little nutmeg it all works together to blend a typically summery sweet fruit with the warm earthy spice flavors of winter. It’s kind of like a cheese plate but cake.
You might think this sounds weird, and I feel you, it does! Sometimes weird works though, and this is truly one of those times. The first bite was bliss and by the time I finished I’d almost forgotten why I baked it in the first place. This cake is also special in that it tastes the absolute best warm from the oven while the peaches are meltingly soft and shimmering with caramel that’s also soaked into the sides lending a nice crunch to the edges. Perfect for picking off a little piece whenever you walk past the kitchen. I’m drooling just writing about it so honestly, enough talking, lets get to the baking.
For the batter
1/2 cup milk
6 large or 8 small fresh sage leaves
1/2 cup (113g) unsalted butter, softened
5 oz chevre goat cheese
3/4 cup (150g) granulated sugar
2 large eggs, room temperature
1 1/4 cups (150g) all purpose flour
1 1/4 teaspoons baking powder
1/2 teaspoon salt
1/4 teaspoon nutmeg
For the topping
4 tablespoons (56g) unsalted butter
1/2 cup brown sugar
16oz bag frozen peaches
2 teaspoons all purpose flour
1/2 teaspoon cornstarch
Preheat oven to 350° F (177° C). Butter a 9 in springform or deep cake pan and set aside.
Tear the sage leaves in half and place them in the milk before heating it either in the microwave or in a saucepan just until it’s hot and starts to steam, but not boiling. In my microwave this was about 1 minute 20 seconds, or on the stovetop over medium heat, about 3 minutes. Set aside and allow the sage to continue to steep.
In a large bowl or the bowl of a stand mixer, combine the butter, goat cheese, and sugar and cream together on medium speed using a hand mixer, or with the paddle attachment of a stand mixer until light and fluffly, 3-5 minutes. Next add in the eggs one and a time and mix until fully incorporated. Follow the eggs with the flour, baking powder, salt, and nutmeg and blend them in on low/stir speed. When it starts to clump together, pause and strain the sage from your milk then stream it into the batter while continuing to mix on low until there are no dry spots left and everything is smooth. Set aside.
Make the topping! Melt the butter, then whisk in the brown sugar until glossy. It should be thick, but still pourable. Pour this into your prepared cake pan and spread it out to the edges.
Next, toss the frozen peach slices with flour and cornstarch in a large bowl, then arrange them around the bottom of your baking pan in the caramel sauce. The peaches will likely start to harden the sauce because they’re so cold and that’s totally fine, it’ll all work out in the oven.
Finally, pour your prepared butter on top of your expertly arranged peach slices, making sure it’s evenly spread in the pan.
Bake for 40-55 minutes, or until a cake tester comes out clean, and the edges of the cake have started to brown. There’s a wide baking time range here cause I know every oven is different, and given the varying size of the peach slices and the fact that they’re frozen, the baking time can be a little relative. Start checking around 40min! Once it’s done and your tester is coming out totally free of batter, remove the cake from the oven and transfer to a cooling rack.
Allow to cool for 10 minutes, then run a butter knife around the edges to loosen the cake from the pan, then invert it onto a cutting board or large plate. Your cake should drop right out. Some of the peach slices might stick to the pan and you can just lift them off with a fork and put them back in place on top of the cake, and garnish with some extra sage if you’d like.
Cool for 5 more minutes so the peaches aren’t scorching hot, then slice.
Serve.
And of course, savor.
This week’s Femme Brûlée is brought to you by the fact that sometimes you just want cookies. Or at least I do! It doesn’t happen often, I can go months and months without ever thinking about them but then suddenly a day will come when my brain is fixated on the idea of a warm, gooey, freshly baked chocolate chip cookie being in my mouth as quickly as possible. Sometimes it hits me in the middle of traffic or a night when i’m struggling to sleep. I’ve also been known to love an OH MY GOD HOW WILL I EVER SURVIVE THIS CRUSH I GUESS I SHOULD BAKE ABOUT IT cookie making marathon.
I never know when mood will strike, but I can say that I’ve never EVER regretted answering that call when I get it. Especially with chocolate chip cookies. They’re so perfect! So dependable! So beloved that there’s too many recipes for them and arguably nothing new to say about them which honestly is pretty refreshing. Unlike a tinder date you know exactly what you’re getting from a chocolate chip cookie.
From this specific iteration of the cookie you’re getting little pools of melted chocolate encased in soft-in-the-middle but crisp at the edges buttery vanilla crumbs, then finished with a sprinkle of flaked sea salt. Just enough to elevate the chocolate — which there’s a whole lot of — and nicely counter the sweetness. I’ve never understood chocolate chip cookies that are mostly cookie dough with just a few chips suspended like islands in the middle. The first two words are chocolate, and chip! They’re the star so why not let them shine.
Assuming you’ve evenly distributed the chips in this dough, and that you replace any that might get eaten before they’re folded in, there should be no chance you’ll ever get a bite of cookie without chocolate. My dream. These are also the cookies that will leave thin swirls of melted chocolate trailing through your glass of milk when you dunk them, and smudges to be licked off your finger/the plate/anything they touch once you’re done. Blissful.You deserve the gift of these cookies waiting for you warm from the oven and ready to put a smile on your face, and twenty minutes from now (or whenever your heart insists) you can!
Ingredients:
1 3/4 cups (210g) all purpose flour
1/2 teaspoon baking soda
1/4 teaspoon salt
1/2 cup (113g) unsalted butter, melted
1/4 cup (50g) granulated sugar
1 cup (200g) brown sugar
1 large egg plus 1 large egg yolk
2 teaspoons vanilla extract
2 cups (one 12oz bag) semi-sweet chocolate chips
Flaked sea salt – I use Maldon
Makes 2 to 2 1/2 dozen cookies
Preheat oven to 350° F. Line a baking sheet (two if you have another!) with parchment paper or a silicone mat and set aside.
In a medium bowl sift together the flour, baking soda, and salt. Set aside.
In a large bowl, whisk together the melted butter and both sugars until it forms a paste, then add the egg and egg yolk, and vanilla extract and whisk until smooth. Pour the dry ingredients into the wet and stir together until no clumps of flour remain. Lastly fold in the chocolate chips!
Scoop out tablespoon size rounds of dough, and place them on your lined baking sheet spread evenly apart.
Sprinkle each one with a little sea salt.
Then bake for 10-12 minutes, just until they’ve lightly browned then remove from oven and allow to cool on the sheet pan for two minutes before transferring to a cooling rack.
You can also freeze the dough balls and keep them on hand for any sudden cookie cravings! They can be baked from frozen using the same directions above but will likely need 2-3 more minutes of baking time.
Allow them to cool for at least five minutes, we want melted chocolate not molten tongue scorching chocolate.
Then it’s time to throw down.
Lately I’ve been learning hard-earned lessons about patience. For some reason, I thought I’d be able to jump straight back into my life in LA, completely seamlessly, after being away for almost three months. To the point that I had plans to do something every single day including the same night I arrived. I’d floated around to so many time zones by that point that I really thought coming back would be simple, and it was everything but.
I was jet lagged like I’ve never been jet lagged before, had an incredibly intense emotional hangover from the trip, and as always all the feelings my Sagittarius sun was running from were right here waiting for me when I got back. Instead of taking a break when I realized I could use one I stubbornly decided to try to power through and keep all the commitments I’d made then rest later. Unsurprisingly, my mind and body had other ideas and the minute I let my anxiety and exhaustion levels approach the red zone, they shut me down. That’s why there was no Femme Brûlée the week before last (about which I am very sad cause I missed you all so much) and it’s also why I took the cue and shifted my mindset last week to focus on doing things simply, with intention moving forward, and being patient with myself and my process, whatever it may be.
Fortunately for me, the kitchen is a really great place to apply life lessons and my focus on patience and simplicity in other parts of my life has filtered into my recent cooking preferences as well. I’ve been making things that are very simple and use only a few ingredients, but have one step that requires time and the ability to be still and wait. This week’s recipe is the perfect example of what I mean. It’s just a breakfast toast.
Only six ingredients, including the bread and it take less than five minutes to assemble. It’s one of the quickest most delicious breakfasts in my arsenal save for the fact that the almond butter is homemade.
Making almond butter is overwhelmingly easy in terms of the process. You just pour toasted almonds into a blender or food processor, turn it on, and wait. If you struggle not to stand around and watch for pasta water to boil, making this almond butter might just be excruciating for you, but the end product is so much better than anything I’ve ever bought pre-made. For one, you can flavor it exactly how you want. I go with a good amount of salt and maple syrup, but you can also cinnamon, nutmeg and a pinch of cayenne. blend in dates or honey instead of maple syrup, and even add a splash of vanilla extract. If you can make it through twenty minutes of noise and anticipation for something hard and hefty to transform into a smooth roasted almond spread ready to be slathered on every piece of bread in site for weeks, you can make this almond butter.
My specific suggestion for said piece of bread slathered in almond butter is to follow it with fresh, crisp, juicy apple slices, sprinkle on some wonderfully crunchy chia seeds for texture and their complimentary nutty flavor, then joined by a generous heap of pomegranate seeds bursting with tartness. I’m a sucker for a drizzle, so a little maple syrup gets poured on top, and possibly my favorite thing about this toast, the bottom is spread with a thin layer of butter, preferably straight from the toaster while it’s still hot enough to melt the butter, and a pinch of cinnamon. You get the cinnamon buttered toast flavors first, then the maple and fresh fruit juices run into your mouth when you bite down and it’s all held together with the decadent almond butter. I stan this toast. Join me in that endeavor and add it to your rotation this week!
Ingredients:
For the Almond Butter:
1lb (450g) Raw whole almonds
2 tablespoons maple syrup
1/2 teaspoon kosher salt
For the toast:
One slice of bread
1 teaspoon butter
pinch of ground cinnamon
3 tablespoons almond butter
1/2 an apple, sliced
2 tablespoons pomegranate seeds
1 teaspoon chia seeds
1 teaspoon maple syrup
If you’re opting out of making the almond butter, skip down to number 11, if you’re down for this journey preheat your oven to 350° F
Place the almonds on a baking sheet in a single layer, and once the oven is preheated bake for 10 minutes.
Allow the almonds to cool for five minutes, then pour into your blender or food processor.
Process on the highest setting–or the one suggested in your machine’s user manual if available–and tap into your patience! At first It’ll be like a sandstorm in the machine.
Then after a few minutes it will start to stick together and resemble graham cracker crust. In my machine this took 4 minutes. You may be convinced at this point that nothing is happening and the almonds aren’t even moving in there but I promise they are. Hold steady.
Another few minutes (about 5 for me) and it should form a giant lump that gets stuck on the side of the processor. You might now be convincing yourself the ball is too large and couldn’t possibly be unstuck by your machine, and while you could interfere and break up the ball, it will just form again immediately. This is however a great time to scrape down the sides of your container before continuing to process. It’s also a good time to put on an upbeat playlist you love and maybe even roll your hips in a circle just like the blades in your food processor to really get in the spirit of butter making. I did this to Call Your Girlfriend.
Another 3-5 minutes and things should finally come together, even out, and be closer to the consistency of almond butter.
Allow to process until smooth. We’re Almost. There.
Finally, add the salt and maple syrup and any spices you may be using and continue blending until the mixture smoothes out again, likely around 5 minutes. Your almond butter is done!
It should be thick enough to cling firmly to a spoon, and will be warm which I like but if you don’t, allow the butter to cool before assembling your toast.
Grab your toast and spread the butter on one side. This will be the bottom of your toast. Once the butter is spread and melted in, sprinkle on the pinch of cinnamon, then turn the toast over to the other side and spread on your almond butter. Again, be generous but feel free to use more or less than 3 tbs. This is just the amount I suggest based on the almond butter recipe above.
Next arrange the apple slices, chia seeds, and pomegranate seeds on your toast as neatly or haphazardly as you’d like .
Drizzle with maple syrup to finish.
Now dive into the incredible seasonal toast moment you just curated for yourself!
When I was younger, I, like many baby queer women, had a real strong love of all things witchy. I stayed up late to watch Bewitched and The Addams Family reruns on Nick at Night, played The Craft with my friends and modeled my middle school style after Rochelle, inhaled every Harry Potter book the day they were released, and watched Practical Magic so many times I could probably recite the script by heart. Even my root (The Little Mermaid don’t you dare judge me) has one of the most iconic witches with arguably the best song in it. What can I say, I just really love a witch.
This love took many shapes over the course of my life, but somewhere along the way during my teen years it fused with my love of fire. I got really into candles and learning lighter tricks and started hiding matches and candlesticks under my bed cause witches simply did not fly in my mothers house. Of course there’s only so long you can keep something like that secret, so I got in trouble and my step parent at the time was sent to warn me that if they found one more fire related thing in my room I’d be grounded for eternity.
I had no interest in eternal grounding and with no outlet for that fire sign energy of mine, it should surprise no one that this coincides perfectly with the time I started to get really into cooking. Fire is fine if it’s happening in the kitchen! Plus if you don’t think cooking is magic, well, you’ve been mislead! 
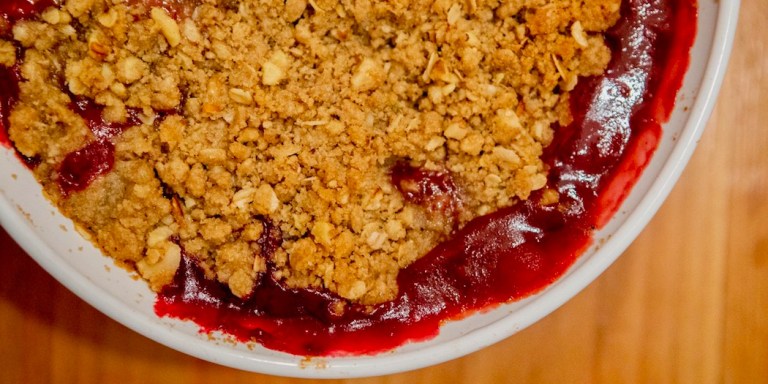
I can’t think of anything more stereotypically magical and witchy than stirring together a bunch of ingredients, adding heat, walking away, and coming back to find a completely new structurally and texturally transformed delight that you can eat while daring to see if you’ve got it in you to finish watching Marianne on Netflix. This time of year while everyone is gearing up to get dressed up for Halloween and there’s so much focus on the magical and occult energies in the world I can’t help but feel like I’m an adorable kitchen witch whipping up edible spells and potions and bringing happiness into the world.
I think this week’s recipe is really big on happiness. Especially since it’s made special for my-pumpkin loving vegan friends! It’s also my absolute favorite coffee cake recipe i’ve ever written. I decided I wanted every aspect of fall coffee cake and quickbreads that I love to be incorporated into this bread and as a result we’ve got a sweet & salty (vegan) butter crumb topping, a lightly spiced and not too sweet pumpkin cake with a wickedly moist crumb, a ribbon of cinnamon sugar running through it, and it’s finished off with a maple syrup glaze.
It’s basically a one-stop shop in pumpkin cake form and I can’t get enough. The way the saltiness of the crumb and the sweet maple glaze compliment each other really sends me over the edge. So does the moment my tongue finds that sweet cinnamon spiced ripple inside the cake. All the textures, all the flavors, all the fall happiness, none of the environment destroying dairy. Incredible. Of course you can very easily make this with non vegan eggs and butter, but whatever your dietary life involves I hope you’ll give this iteration of the recipe a try first. It’s so good my picky best friend who doesn’t like dessert ate it and asked for more, and the other wrapped some up and took it to go and only informed me of such on the way out cause she knew I might fight her on it. This has made waking up to less and less light every morning a breeze cause I know there’s a perfect slice of cake and hot cup of coffee waiting for me on the other side of the blankets.
So throw on a spooky playlist, maybe a witch hat if you look cute in them which I bet you do, and make some magic in your oven this weekend.
Ingredients:
For the crumble:
2/3 (40g) cup all purpose flour
1/3 cup (65g) brown sugar
1/4 teaspoon ground cinnamon
1/2 teaspoon vanilla extract
1/2 teaspoon salt
4 tablespoons (57g) unsalted vegan butter, melted
For the cake:
1 1/2 cups (180g) all purpose flour
1 teaspoon salt
1 teaspoon baking powder
1 teaspoon baking soda
1/4 teaspoon ground ginger
1/4 teaspoon ground nutmeg
1 cup (225g) pumpkin puree (NOT pumpkin pie filling)
3/4 cup (150g) granulated sugar
2 flax eggs*
1 tablespoon apple cider vinegar
For the cinnamon swirl filling:
1/3 cup (65g) brown sugar (preferably dark brown)
1 1/2 teaspoons ground cinnamon
For the maple glaze:
1 cup (125g) powdered sugar
1/2 teaspoon vanilla extract
1/4 cup plus 2 tablespoons (3oz) maple syrup
1/2 tablespoon warm water
*note: One Flax egg = 1 tablespoon ground flax seed stirred into 3 tablespoons hot water. This recipe uses two!
Preheat oven to 350° F. Butter a 9 inch round cake pan or 8×8 square baking pan and line with parchment paper leaving a little overhang on the sides so you can easily remove the cake. Set aside.
Make the crumble. Whisk together the flour, brown sugar, cinnamon and salt until well incorporated, then stir in the vanilla extract and melted butter until you have a mixture that resembles wet sand. Set aside.
Make the cake batter! Grab a large bowl and whisk together the flour, salt, baking powder, baking soda, ginger, and nutmeg then set aside. In a medium bowl whisk together the pumpkin puree, sugar, 2 flax eggs, and apple cider vinegar until the sugar is dissolved. Pour the wet ingredients into the dry then set aside for 2-3 minutes to allow the vinegar to activate the baking soda.
While you’re letting science happen with the batter, make the cinnamon swirl filling. Just combine the brown sugar and cinnamon in a small bowl and whisk together. I also recommend using a fork or your fingers to break up any clumps of sugar and/or remove any that might be too hard to break down. Now you should have three bowls filled with delicious things that are ready to be layered together and baked!
Grab your prepared baking pan, pour in half the cake batter, and spread it to the edges of the pan using a rubber spatula, or my preference, just your fingers. Now sprinkle on all of the cinnamon sugar mixture as evenly as possible covering the bottom later of batter.
Next, spread the remaining batter on top of the cinnamon sugar. Again, I use my fingers here, it’s totally okay if some of the swirl mixture gets stuck in the batter as you spread, it’s getting topped with crumble anyway! I also promise you there’s enough batter to fill to the edges, just be patient with her and spread her with light slow strokes like…well..you know. Then once that’s handled, top the cake with the crumble mixture.
Once your layers are all in order, place the cake in the oven and bake for 35-35 minutes until a cake tester comes out clean, and the crumbs are a nice golden brown. Allow to cool for 10 minutes in the pan before removing and placing on a wire rack to cool the rest of the way.
While the cake is cooling, whip up the maple glaze! Just combine everything that’s left in a bowl and whisk it up until it’s smooth and glossy.
When the cake is COMPLETELY cool (if it’s still hot it will just melt the glaze and it wont stick!) place a silicone mat or some parchment or news paper underneath the wire rack, then drizzle the glaze all over the cake. Don’t be shy, use it all!
Ta da! You made a cake!
With gorgeous glaze drips.
A perfect cinnamon sugar ribbon running throughout.
Plus a crumble that makes pulling little bits off and eating them throughout the day hard to resist. I mean..this piece is basically smiling at you, how COULD you resist?
Yes, Virginia, vegans deserve epic fall desserts too!
It’s officially the time of year when comfort and coziness are the only thing on my mind. I’m living in sweaters and warm soft clothes that feel like a hug. I’m drinking copious amounts of tea all day long and wrapping up in blankets on the couch like the book loving lesbian that I am. I’m warming my hands on bowls of soup and sliding my feet into knit socks and slippers to walk around the apartment ’cause the floors are cool. It’s perfection.
Of course I’m not walking around my own apartment because I’m STILL on my extended trip and loving every minute of it! Especially since this is the first time in seven years that I’ve been reunited with fall. This week the coziness is happening at my mother’s house where socks are extra important cause she’s a fan of tile floors that give me the shivers if I dare touch them with my bare feet, plus if she ever sees me without foot covering of some kind I get a stern warning to put some slippers on so I don’t catch a cold and find myself resisting the urge to roll my eyes like I would have when I was a teenager.
Spending time at home is always an adventure. It’s like every day there are a million little things; smells, sounds, objects in the house and interactions between my mom and I that remind me of where and how I grew into the person I am now. It’s also so bizarre how quickly I fall back into following rules that I’ve completely left behind in my own adult life and space. Never leaving a dish in the sink, making the bed every morning, cutting out the lights if I’m leaving a room for even a second, and never ever daring to leave a door open and let out the heat. I’m not saying they’re not good rules to live by, I’m just saying my teen self couldn’t wait to relax on the rules a little, so when I’m home it doesn’t matter how grown I am, I feel a little childlike again folding back into them.
I was honestly nervous to cook here ’cause my mom keeps her kitchen spotless, and I am not a spotless cook. I set down spoons without thought, leave a little trail of flour wherever I go, and always end up smeared in butter, then get the satisfaction of cleaning it all up at the end while I wait for my dish to finish. I knew that wouldn’t fly in Regina’s kitchen though, at least not if she was around so I waited till I knew i’d have the house to myself to bake this crisp.
Once I was alone I turned on some Motown, grabbed all my ingredients, and started baking this crisp. Five minutes in I had a huge smile on my face ’cause I remembered that first place I really fell in love with cooking was in my mother’s kitchen. Different house, but same rules, and back then I’d also do my best to cook when no one was around and I could sing as loudly as I wanted, be careless with the dishes and just focus on the food. I made so many truly awful dishes here, but also some of the best. I mastered cheesecakes as a teenager in my mom’s kitchen and learned how to make pretty much every iteration of pasta under the sun.
It was also the place that I made my first crisp. It was apple and I got the crisp topping completely wrong, it just kinda sunk into the apples and turned gray-ish and mushy. It still tasted alright though so I ate as much as I could then threw away the evidence so my family wouldn’t rag on me for making yet another kitchen fail. I’ve gotten way better at making crisps since then. Where that first attempt failed at living up to its name, this one shines. If you bake this right, getting it just to golden brown, the sound that your spoon makes when you break through the buttery oat and nut filled lid will be so beautiful it might make your knees go a little weak. The first time I made this I brought it over to dinner with my friends Robin and Carly, and when I dished out the first bowl and we heard the crunch they both gasped and said “OMG THAT SOUND.” It was a very proud moment.
Once you get past the toasted crisp topping you’ll find a puddle of crimson plum syrup lightly infused with balsamic and rosemary coating the warm, soft, jammy plums that have married their own natural sweetness with the molasses hint of brown sugar, and just enough cinnamon and nutmeg spice to make this a dessert suited for those cozy cool weather moments of comfort I was talking about. There’s nothing better than eating a bowl of this crisp while wrapped up in a blanket cocoon staring out the window and marveling at the beauty that is the leaves changing, and when the scene outside turns to falling snow I’m sure it’ll be just as perfect.
Each bite of this warms me from the inside in the best way and leaves me incredibly pleased and maybe ready for a luxurious nap. All the herbs and spices plus the jammy plums give this a sophistication that I love, and the balsamic is an unexpected but very welcome touch that deepens the fruit flavors so nicely. All with the crunchy crisp crumbles adding texture and savory buttery flavor its worth mentioning throughout. I can’t wait to eat bowl after bowl of this, and make it for all my friends while we hang out and watch scary movies or just catch up and swap stories as the nights get longer and darker and the urge to leave the apartment fades away.
For the filling:
3 lbs fresh plums, pitted and quartered
1/2 cup brown sugar
1 tablespoon balsamic vinegar
1/4 teaspoon fresh chopped rosemary
1/4 teaspoon lemon zest
1/4 teaspoon ground cinnamon
1/4 teaspoon fresh grated or ground nutmeg
1/2 teaspoon salt
1/3 cup all purpose flour (maybe more depending on juiciness of plums)
Crisp topping:
1 stick salted butter, cold and cubed
1/2 cup brown sugar
1/2 cup rolled oats
1/2 cup walnuts or pecans
1 1/2 cups all purpose flour
1/2 teaspoon salt
Preheat the oven to 375° F. Butter a 9×9 or 2.5-3 quart baking dish and set aside.
Add the plum slices, sugar, vinegar, salt, rosemary, zest, cinnamon and nutmeg to a large bowl and stir to combine ensuring the mixture is coating all of the plums. Set aside for 10 minutes to let the juices release.
Meanwhile, make the crumb topping. Warm a small (ideally) non-stick skillet over medium-low heat then add the walnuts and toast, shaking the pan occasionally for 2-3 minutes. They’re done when you start to smell the warm walnut oil aroma rising from the pan. Remove from the heat to a small bowl and allow to cool. Repeat this step with the rolled oats, just until they’re lightly browned and again, start to smell oat-y and toasty then pour into the bowl with the nuts to cool. It should only take a couple minutes to cool.
Once the oats and nuts are cool, pour them into a large bowl along with 1 1/2 cups all purpose flour, and 1/2 teaspoon of salt. Stir everything until well combined, then add the cubed butter and smoosh it into the crumble with your fingers. You want to keep pressing the butter pieces into the crumble topping until it resembles wet sand and no large clumps of sugar or butter remain.
Now, grab your plum filling and stir in the remaining 1/3 cup of flour. If your plums have released a lot of liquid and are basically swimming in juice, you may need to add an extra tablespoon or two of flour. You’re looking for the liquid coating the plums to be the consistency of a thick a light syrup or melted ice cream, not runny like juice.
Pour the finished plum filling into your prepared baking dish, then top with ALL of the crumb topping. I use every bit of it and will ask you to do the same the first time you make this. If you decide it want less next time, okay fine, I don’t understand you, but fine. For me, this amount has always yielded the perfect crisp experience. Side note: how many of your moms and/or grandmas have this dish? I had flashbacks when I saw it!
Bake it! Put it in the oven! It’s time! Bake for 45-55 minutes or until the crisp topping is golden brown and the plum filling is bubbling and oozing up gorgeously around the edges of the dish. As I mentioned, my mom didn’t have the right size dish for this, so pictured here is a photo Robin Roemer took of my first test of the crisp in a correctly sized dish.
Allow to cool for at LEAST 15 minutes but more like 20-30 so you don’t burn your precious little tongue off. We’re queer, we need our tongues fully intact okay? It’s worth the wait I promise.
Once your crisp is cool, crack through that topping and serve. I think bowls work best for this. Another throwback dish! I can’t.
Finish it off by topping with a scoop of ice cream (I used butter pecan cause it’s the official ice cream of Black Southern moms, and therefore my mom’s favorite) and then greek yogurt tomorrow morning and you’ll be in a very good place.
VERY good.
As much as I would love to continue sharing about my travels and what I’ve been up to this week, that programming is delayed due to the fact that House Speaker, Nancy Pelosi, has finally announced a formal impeachment inquiry into Donald Trump. To be honest my optimism isn’t yet enough to hold my breath about, but I still see this as cause for celebration. I think it goes without saying that being a black queer woman living under this administration is painful and anxiety inducing beyond belief. I work far too hard to make it through each day and find a way to look forward to the next. I have asked the universe for this every single day for years and finally, we have an inquiry announcement, so I have to celebrate.
Today that celebration comes in the form of an apple, peach and cheddar appetizer. Since it’s only the beginning of this process it feels right to start with something small and light enough to be eaten without much thought while laser focused on whatever unbelievable spectacles are bound to cross our televisions in the months ahead, but sophisticated enough to feel fancy in a slightly hopeful and smugly celebratory way. I hope that as time goes on I have reason to bring out the truly magnificent recipes i’ve been dreaming up in anticipation, but for now we start with a snack.
I first put together this cheese and cracker combo when my best friends Nathalie and Constance were visiting me in LA. Despite their warnings I totally misjudged how soon we would need dinner after a day at the beach and somehow like a fool had no snacks in my kitchen to tide us over while dinner got made. I know the terror that is both of my besties being hangry at the same time so I stood in the kitchen starting at the random assortment of things I had on hand sweating and egging my brain to come up with something, ANYTHING that would save me. Just before I started to fear it was too late and set my mind to plotting the best way to discreetly lock myself in my room without them noticing to let them figure it out Hunger Games-style, the recipe creation powers that be dropped this idea in my head.
I didn’t even try to make it in kitchen cause I knew it’d be a better look for me if they could see the progress and promise of the food up close in real time, so I grabbed my cutting board, knife and all the ingredients, then set them in my lap and sliced and assembled these saving grace fruit and cheese crackers right there on the couch while they watched in silence. It was intrigued and anticipatory silence though, so I knew I was good. I layered the sharp, creamy, biting cheese with juicy peach and crisp apple slices, drizzled them lightly with a bright citrusy olive oil, and sweet floral honey, then finished with a little thyme for fresh earthiness and flaked sea salt to really bring out all the flavors.
When I’d finished assembling them, each of my friends grabbed one, took a bite and started nodding their heads up and down in unison. Then they informed me that I’d just barely managed to avoid the thunder and I took a breath for the first time that hour. I feel like if these came through for me in the midst of that storm, they can weather me, and you, through the arrival of this one as well. Or they can just be a really delicious, well-rounded appetizer to set out at parties with no stress or pressure involved whatsoever cause they’re so easy to make. Your choice! I know not all of us live for the kitchen drama. These pair very nicely with dry ciders and sparkling wines, and honestly make a great low-effort dinner if you’re part of the cheese board as a meal club. You can also easily swap out one or both fruits for others, and try rosemary or another herb instead but the peach and the thyme (cause it’s about time! so sorry, I had to) keep it on theme. Whatever you choose, they’ll be there for you when hunger strikes.
Ingredients:
10 multigrain or your favorite unflavored crackers
4 oz sharp cheddar cheese, sliced into 10 pieces
1/2 of a just ripe peach, thinly sliced
1/2 an apple, thinly sliced (I like gala or fuji here)
2 sprigs fresh thyme
1 tablespoon extra virgin olive oil
1 tablespoon honey
1/2 teaspoon flaked sea salt (I use Maldon)
Makes 10 single servings*
*Note: This is truly less of a “recipe” and more of a “make however many crackers you want and eyeball the toppings” situation, but for the sake of my loves out there who need a recipe, you can start with these amounts and adjust up or down as you see fit.
Stack the cheddar, apple and pear slices on the crackers.
Drizzle with olive oil and honey.
Finish with a sprinkle of fresh thyme, and a small pinch of sea salt. I used more than necessary for the sake of the photo, it should be just a touch of salt on top!
Happy eating, and (hopefully) happy impeachment season.
I’m officially running away from home. I’m three weeks into my east coast trip and was due to fly back to the land of sun and palm trees in a few days, but I am not getting on that plane. No way, I’ve joked about “missing my flight” almost every time I’ve come back east for a visit, and this time I finally meant it! For one thing I’m having too much fun to leave. Following that dream retreat in Vermont that inspired last week’s apple bread I spent time lazing on a dock looking out onto a gorgeous lake in upstate New York’s clear and blue as the sky surrounded by the Adirondack mountains, driving windy back roads, and eating my weight in maple flavored everything. I went from there to New York City for bagels and pizza till I dropped, the incredible Dapper Q New York Fashion Week show, and quality time with friends and the beautiful NYC Autostraddle crew.
This post however comes to you from Philadelphia where I’ve posted up the last few days for more relaxing, eating, and catching up with loved ones. This trip has been the ultimate comfort for my heart and soul. I guess that’s because I’m not so much running away from home as back to it. Back to the people and places that formed me, and I had no idea how thirsty I was for this connection until I got here. I’ve had a smile plastered on my face so permanently people side-eyed me in New York, I’ve spent enough time with friends to make new memories rather than just reminisce on old ones, and am sleeping so soundly at night that I’m starting to wonder if that new mattress I bought was really necessary, or if I just needed a change of pace. By far one of the biggest perks of freelancing is I can do my job from anywhere, so for now and possibly as long as it takes, that place is here.
This trip is also doing wonders for my kitchen creativity. I was in a bit of a dry spell before I left LA and now I have so many juicy, decadent recipe ideas floating through my head that I can’t wait to share with you, starting of course with this glorious flourless chocolate cake and its source of inspiration. I’m fortunate to have incredible friends lending me space in their apartments all up and down the east coast for this trip, and this week I’m staying with my friend Arden who is also an incredible cook. She’s one of the first people who taught me it was okay to love and enjoy food unapologetically, and that life is short so you might as well spring for the good stuff whenever possible! We also have a deep love of chocolate in common so when I asked what she’d like me to make while staying with her, chocolate was the only guideline she gave me. I took it and ran right into this luscious, irresistibly fudge-y cake.
With both melted bittersweet chocolate in bar form, and deeply aromatic almost coffee like cocoa powder in the mix, this is about as chocolate forward as you can get. The actual coffee added to the batter amplifies the mocha flavor and elevates this cake from “good” to exceptional, so please for the love of cocoa do not skip it.
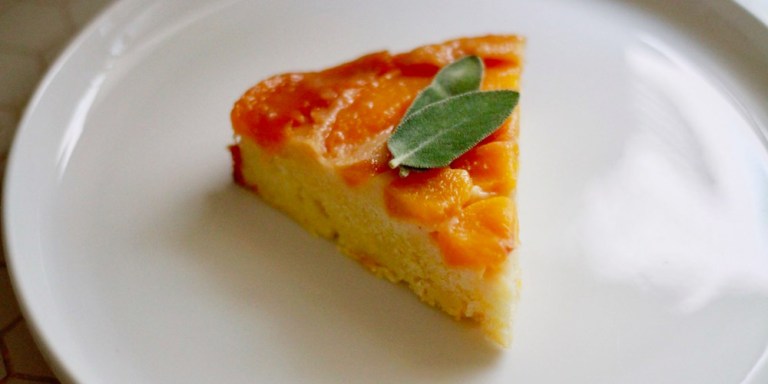
 Plus the lack of flour but ample use of butter lends a melt in your mouth experience with every bite that just might make your little heart flutter.
Like all flourless chocolate cakes, this is dense and succulent but in only the best ways, and just as comforting to eat as my trip has been to experience. I’ve always found that I like flourless chocolate cake on it’s own, but LOVE it with sauce that I can drizzle and dip to my heart’s content, so I’ve paired this with a simple, sweet cherry sauce lightly spiced with cloves and brightened with a hint of lemon. I use canned cherries for ease, but you’re welcome to try it with fresh! Apart, the cake and sauce are wonderful. Together, they’re what chocolate dessert cravings are made for. I would order this in a pre-menstrual heartbeat at any restaurant but fortunately, none of us have to! You can make it at home, preferably with some slow jams playing in the background so you can sway to the beat while you stir the silky batter and get ready to fall so, so in love with this cake.
Ingredients:
For the cake:
½ cup (113g) unsalted butter
1/4 cup (2oz) strong brewed coffee
4oz bittersweet chocolate
¾ cup (150g) granulated sugar
3/4 cup(95g) cocoa powder
3 eggs
1 teaspoon vanilla extract
1/2 teaspoon salt
For the cherry sauce:
One 15oz can sweet cherries (NOT maraschino, just regular canned cherries in syrup)
1/4 cup (2oz) juice reserved from can
1 Tablespoon lemon juice
1/2 teaspoon vanilla extract
1/4 tsp lemon zest
1 tbs maple syrup
2 whole cloves
Pinch of salt
Powdered sugar for garnish (optional):
Preheat oven to 350° F. Butter a 9 inch baking pan and line with parchment paper. Butter the paper as well, then set aside.
Melt the butter in a small saucepan over low heat. Honestly I just really liked this picture and that’s the only reason this is getting its own step.
Remove from the heat and add the coffee and bittersweet chocolate, and stir until the chocolate is fully melted.
Now add the sugar and cocoa powder, eggs, vanilla, and salt, and mix until incorporated.
You should have a smooth, glossy batter that thoroughly coats the back of a spoon when its done.
Pour into your prepared baking dish, and bake 25 to 30 minutes.
While the cake bakes, make the cherry sauce! Take the same small sauce pan and add in the cherries, reserved juice, lemon juice and zest, maple syrup, cloves, and salt. Stir to combine.
Bring the mixture to a boil over medium high heat, then simmer over medium-low heat until the liquid reduces by half, stirring and breaking the cherries into small pieces along the way. This should take about 5 minutes.
Once the mixture is thick and reminiscent of chunky applesauce, it’s done! Fish out the cloves, then set aside.
Once the cake is done, remove from the oven and allow to cool in the pan for 10 minutes.
Next, invert the cake onto a plate or cutting board, and allow to cool at least 10 more minutes before flipping back over. It’s very soft and prone to breaking (like mine did) if you move it too soon without cooling!
Post flip!
Now that the cake is sufficiently cooled, slice into that fudgy goodness and serve.
I like to put a swoosh of the cherry sauce directly onto the plate, then place a slice of cake on top so I can drag each bite through the sauce.
I mean…come on, can you even handle this?
Finally, garnish with a little dusting of powdered sugar, and you’re good to go!
I’m seven days into a month-long trip on the east coast and can feel fall approaching in the air, bringing memories of all the falls I spent here flooding back with it. Like the last time I went apple picking with my friend’s in Philly. I spent the whole day dreaming of arriving to the orchard and picking as many Fuji apples as I could carry into my baskets only to arrive and find caution tape wrapped all around the Fuji section of the orchard that said “no picking.” I was devastated. We walked up and down the rows filled with every other variety off apple imaginable and I begrudgingly filled my basket with them but I couldn’t stop thinking about the Fujis. They’re my favorite apple, there were so many of them just steps away, and the fire sign youngest child in me hated being told I couldn’t have any.
It was such a textbook Eve and the apple temptation scene that I resented myself for even making the mental comparison but once I did I knew exactly what I was gonna do. I waited till no one was around, ducked under the tape and quickly grabbed the most beautiful, shining, delicious Fuji apple I could reach then immediately ate the evidence so no one would ever know. It was the most delicious apple I’d ever eaten. So crisp, so sweet, so juicy, and so thrilling. Who knew temptation could taste so good.
I’ve never the been the best at resisting temptation, which makes where I am today — in a house full of powerful, talented, gorgeous women spending the week together loving our bodies — a bit of a challenge. I’ve been flirting non-stop, blushing so much my cheeks are permanently red, and looking for ways to release all this energy and tension; so naturally, I baked.
It seemed only fitting that what I baked be full of apples, the literal fruit of temptation. This bread reminds me of everything I love about fall. The cinnamon sugar lid that crunches when you cut into it like fallen leaves. The spiced batter reminiscent of apple pie that fills the air wand your mouth with warmth, and of course the sweet soft baked morsels of apple throughout. I think Granny Smith apples work best here given their sweet-tart quality but you can use pretty much any apple your heart desires with good results. The apples release their juices into the batter as they steam in the oven layering the batter with natural sweetness, and lending the perfect amount of moisture to the crumb. This is my favorite eaten warm with a pat of butter melted on top and soaked in, of course with a cup of coffee nearby for dunking the corners. A generous slather of apple butter is also perfection.
This really hits all my comfort food spots. It’s doughy, sweet, gooey, crunchy, and as if that wasn’t enough, beautifully rustic. So if you happen to be lucky enough to live where the fall season is approaching, I hope when the apples start dominating real estate in the stores and the orchards are open for business, you’ll keep this in mind.
For the apple filling
2 granny smith apples, peeled, cored, and cubed
2 teaspoons granulated sugar
1 teaspoon lemon juice
1 teaspoon all purpose flour
1/2 teaspoon ground cinnamon
For the batter
1 1/2 cups all purpose flour
1 1/2 teaspoons baking powder
1/2 teaspoon baking soda
1/2 teaspoon salt
1/2 teaspoon ground cinnamon
1/4 teaspoon ground nutmeg
1/4 teaspoon ground ginger
3/4 cups granulated sugar
1/2 cup (1 stick, 113g) unsalted butter, melted.
2 eggs, room temperature
1/2 cup milk
1 teaspoon vanilla extract
Cinnamon sugar topping:
2 teaspoons granulated sugar
1/2 teaspoon ground cinnamon
1. Preheat oven to 350° F. Butter a 9×5 inch loaf pan and set aside.
2. Combine the cubed apples, granulated sugar, lemon juice, and ground cinnamon in a medium bowl and stir until the apples are evenly coated in the spices. Set aside.
3. Make the batter! In a large bowl, whisk together the flour, baking powder and soda, salt, cinnamon, nutmeg, and ginger and set aside. Next, in a medium sized bowl whisk together the melted butter and sugar until smooth and glossy. Then, add the eggs, milk, and vanilla extract and whisk until combined then pour the wet ingredients into the dry and stir just until no dry clumps of flour remain. Then, pour your cinnamon apple filling into the batter and gently fold it in so that the apples are evenly distributed in the batter, and pour into your prepared loaf pan.
4. Lastly, combine the sugar and cinnamon for the topping in a small bowl and whisk or stir together with a fork, then sprinkle it on top of the apple bread.
5. Bake for 40-50 minutes or until the sugar is crackly on top, the bread is golden brown, and a cake tester comes out clean. Remove from the oven and allow to cool for 10 minutes in the pan before removing and transferring to a wire rack to finish cooling.
6. Once the bread has cooled, slice that beautiful loaf of spiced apple bread, take a bite, and dream of fall.
I’m super excited about this week’s recipe ’cause it’s inspired by and especially for our very own beloved Managing Editor Rachel Kincaid! It’s her birthday today and I believe every Leo deserves to be spoiled and adored during their season. How better to do that than with a personalized cake recipe and birthday shout out!? Also, how lucky for us that Leo season and stone fruit season are one in the same. But first things first, let’s talk about the birthday babe.
If there are people who demand attention and people who command attention, Rachel is definitely the latter. She leads by example as evidenced by her gorgeous and insightful writing –1089 articles and counting – on this site we call home. Taking her advice on how to navigate plant ownership in a depressive state, how to date, and how to leave when things aren’t good has been the right move and changed me for the better every single time. She curates a mean playlist, gives Incredible vacation vibes, and has real-life mermaid hair capable of mesmerizing anyone who happens to be nearby when she casually flips it with a smile. Readers beware. Also, she wrote this. I promise you don’t need an explanation, just read it. Then when you’re done you’ll be hot and bothered enough to be ready to make this cake.
When I asked for suggestions of what to make, Rachel said her favorite overall flavor is honey. Swoon. Weirdly enough I’d been itching to make a honey based cake for a few weeks and already had a few ideas written down. It was meant to be! I decided there had to be plums involved because every single one I’ve had lately has been the perfect plum. I can’t get enough! Specifically small plums cause they’re slightly more sour and almost as cute as Rachel was as a child.
I also can’t think of a seasonal summer fruit that would star better in a caramelized honey flavored cake than sweet-tart plums that soften in the oven and become deep, silky, jammy wells of flavor. The tartness of the ribbons of plum skins also plays up the flavors of the honey batter. All followed up with a slight touch of cinnamon to bring in a nice warmth.
It’s finished off with a honey and lemon juice glaze, poured on while still warm and allowed to soak into the cake for maximum honey enjoyment. When I took my first bite of this still slightly warm from the oven and sticky with glaze it made my knees a little weak. I’ve made three of these now and that hasn’t stopped happening. This cake also gets better with age which I think is a perfect attribute for a birthday cake. I’m so glad Rachel was born, cause now we can all eat this and think of her. What a gift!
Ingredients:
10 small or 5 large plums and/or pluots, halved and pitted (about 16oz)
1 stick (1/2 cup/113g) unsalted butter, softened
3/4 cup honey
2 large eggs, room temperature
1 1/2 cups (180g) all purpose flour
1 1/2 tsp baking powder
1/2 tsp baking soda
1/2 tsp kosher salt
1/8 tsp ground cinnamon
1 teaspoon fresh lemon juice
1. Preheat oven to 325° F. Butter a 9 inch springform pan and set aside. You can also use a standard cake pan but in that case i’d also suggest lining with parchment paper leaving a few inches of overhang on two sides so that you can easily lift the cake from the pan.
2. In a medium bowl sift together the flour, baking powder, baking soda, salt, and cinnamon. Set aside.
3. in a large bowl using a hand or stand mixer, whip the butter and 1/2 cup of the honey together until smooth. Next add in the eggs one at a time and once incorporated add the reserved dry ingredients to the bowl and mix just until there are no dry spots of flour left.
4. Pour the batter into your prepared baking pan, then lightly press all of the plum halves into the batter. I really enjoy this step. There’s something really satisfying about the way the batter gives under the weight of the plums being nestled into it that just does things for me.
5. Place in the oven and bake for 40-50 minutes or until a cake tester comes out free of batter. Because the sugar in this cake comes solely from honey, it will brown much more deeply than you’re likely used to in the oven. Don’t panic and take the cake out before the middle has set! After removing from the oven, allow the cake to cool in it’s pan for 10-15 minutes before removing and transferring to a wire cooling rack.
6. While the cake is cooling, whisk together the remaining 1/4 cup of honey in a small saucepan and heat for a minute or two just until the honey thins out and absorbs the lemon juice. This can also be done in the microwave (about 60 seconds). Pour the glaze over the cake while it’s still warm. Placing a lined sheet pan underneath to catch honey drips would be a good move here.
7. After pouring the glaze, use a kitchen brush to make sure the entire top of the cake is shining with honey glaze and allow to continue cooling. Cutting the cake while it’s still hot WILL make it fall apart so please wait at least an hour before trying!
8. No more waiting! Cut into that gorgeous plum filled cake.
9. I love it slightly warm exactly as it is.
10. Adding a little ice cream never ever hurts though.
11. Good thing you can have it both ways!
12. Happy eating, and Happy Birthday Rachel!
It’s stone fruit season here in the U.S. which means I’ve been very sticky lately. I never learned how to eat a perfectly ripe peach or plum or nectarine or any of their cute little rump shaped friends neatly. If I’m eating a peach, there will be juice running down my face and between my fingers leaving behind trails of goodness that I will absolutely lick with satisfaction at the end. A lot of people like watching me eat peaches. Even if I’m holding a napkin it ends up soaked through and somehow disintegrating but sticking to my fingers at the same time and I’m still a mess. I can’t help it! I get so overwhelmed by the experience. Biting into the slightly acidic peel to release a flood of peachy floral nectar sweetness. I love the way the peach flesh feels on my lips and coats them with juice so I know if I kissed someone it would taste so good. Plus when I close my eyes, it smells like I’m in an orchard and the only thing that matters is eating as much fruit as I can handle.
I really love stone fruit season.
I also love preparing these fruits that are perfection on their own in slightly unexpected ways. Specifically, peaches are my favorite fruit to make sweet and savory desserts with. They pair so well with other flavors, especially earthy ones that have a floral hint to them, like for example the olive oil, thyme, and honey in this recipe. Since this is such a simple recipe, it’s more about the quality of ingredients used so I’d suggest using the highest quality oil and honey you have access to. I used a yuzu (Asian citrus) infused olive oil in my preparation for this which if you can find I HIGHLY recommend (but any olive oil that’s more on the light/floral/herby side of the spectrum will work wonderfully here ) and dandelion honey to really bring it home with layers of lightly floral summer flavors. Finished with a little sprinkle of sea salt, they’re irresistible. The oil and honey drip into the grilled peach juices and pick up the slight char flavor from the grill so each bite is truly a journey. A playful and delicious journey that I hope you’ll be taking very soon.
This is a great dessert for a hot summer date. For that I’d recommend some ice cream and if it’s your style, an old fashioned on the side. Or, I’m always an advocate of just making it as a treat for yourself and eating it with your fingers standing over the sink like I just did. Either way I hope you eat as many peaches as your heart desires this summer.
Makes 4 servings.
Ingredients:
2 just ripe peaches, halved and pitted.
2 tablespoons yuzu infused olive oil
1/4 teaspoon chopped fresh thyme (plus 1 or 2 sprigs for garnish if desired)
2 tablespoons honey
1/4 teaspoon flaked sea salt
Preheat your grill or grill pan over medium heat. Combine 1/4 teaspoon fresh thyme and 1 tablespoon olive oil, then brush the mixture over the cut side of the halved peaches.
Grill peaches cut side down without moving until they’ve started to soften and grill marks appear. About 4 minutes.
Remove from the heat and immediately drizzle with honey.
And the remaining olive oil.
Then sprinkle each with a small pinch of sea salt, add thyme sprigs for garnish if using, and get messy!
Happy stone fruit season!
Earlier this month, while I was three days into my first large-scale catering job and finally feeling like I was getting into a groove and working more efficiently, my oven broke. I’d planned to make baked ziti and couldn’t bake a damn thing. I’ll be honest, I did not handle this roadblock well. I knew my only option was to put everything back on the stovetop and melt it that way, but I had a much fancier and (so I thought) more delicious plan that I was really excited to execute and present as my work. I wanted to send out piping hot ziti with a perfectly browned cheese lid that pulled into long gorgeous strings when they took a slice, but the reality ended up essentially being pasta in a cheesy tomato sauce which was fine, but not what I wanted.
I was so disappointed by it that I convinced myself no one would like it and they’d hire another caterer, so of course it turned out to be the most popular meal I’d made by far. They loved it, and I was so shocked by that. As far as I was concerned i’d failed, so I really couldn’t believe that everyone raved about it till I finally realized it was because I was thinking of the dish as unfinished and flawed when it was really just simplified. It was a timely reminder that simple is also delicious, especially since my oven stayed broken for a week and half!
I finished the catering job using my crockpot and some serious stovetop adaptations, and the entire theme of my week became simplify. Since I was down an appliance I typically heavily rely on, I had to make simpler plans to get dinner on the table, and the same for dessert! Naturally the day my oven went out was the day I’d planned to make strawberry shortcake with the unbelievably sweet strawberries I found on sale. I had all the ingredients but couldn’t make the biscuits so I decided I didn’t need them, I’d just make the strawberries and whipped cream, and eat it parfait style. I have no clue why I didn’t think of this sooner. It’s like i needed to give myself permission to eat strawberries and cream without cookies or pie or biscuits involved and i’m really glad I did.
I added a little cream cheese to the whipped cream which gives it deeper flavor and more luscious texture, basically clouds of cheesecake whipped cream dotted over fresh berries that are lightly sweetened, sprinkled with a little balsamic and lemon zest, and left to sit for a while. This allows the berries to soak in the flavors and get juicy and plump so refreshing strawberry flavor spills across your tongue when you take a bite. I wanna eat this on a lake at sunset or literally every hot summer morning for breakfast. I’m sure it’d also be amazing with graham cracker crumbs or granola sprinkled on top. I was so, so sad when it was gone. Luckily i’m off to the store again tomorrow, and honestly if you don’t already have the ingredients for this at home, you should be too.
1 pint fresh strawberries, washed hulled and quartered
2 tablespoons granulated sugar
1/4 teaspoon balsamic vinegar
1/8 teaspoon lemon zest
pinch of kosher salt
1 cup heavy whipping cream
1 tablespoon cream cheese, room temperature
1/4 teaspoon vanilla extract
1. Combine the quartered strawberries, sugar, balsamic vinegar, lemon zest, and salt in a medium bowl and stir until sugar is dissolved. Set aside for 15 minutes to allow the juices to release.
2. Meanwhile, combine the heavy cream, cream cheese, 1 tablespoon of granulated sugar, and vanilla extract to a large bowl and whip using the whisk attachment on a hand or stand mixer on medium-high speed for 2-3 minutes until it holds it’s shape on the back of a spoon and has reached your desired thickness.
3. Grab your strawberries and spoon a layer of berries into two 10-12 ounce glasses.
4. Now add a layer of whipped cream.
5. Then follow with another layer of strawberries, and finish with whipped cream. As always when it comes to whipped cream, I highly suggest you pause here and lick the bowl.
6. Now that that’s handled, garnish each glass with two mint leaves.
7. Then enjoy your deliciously simple summer treat!
As a teenager I had a brief but intense love affair with the blondie sundaes that became super popular at chain restaurants back then. If I had my way I would’ve eaten one every single day and then drifted off to sweet, buttery, blondie-induced dreamland. I had also never heard of a blondie until they became a foodie fad because brownies always got the spotlight. Finding out they had a butterscotch-adjacent flavored cousin that’s just as delicious and easy to make but plays better with fruit was a game changer for me, especially when summer fruit is involved, and extra especially when that fruit is cherries.
The catch, though – as with most desserts – is that I often find myself craving a single serving blondie but almost every recipe is for a dozen a more. Even cutting that in half is way more blondie than I want on a casual weekday night or during my at home self-care spa days during which I take a bath, watch Netflix, drink wine, and have dessert while getting my Korean face mask glow on. I’ve fixed this problem with other desserts before, which is how my mug cake was born, this recipe is my fix for blondies! Admittedly this is solidly on the cake side of the spectrum vs the dense gooey fudgy version of blondies you can also find, and I love that because it allows the cherries to shine. They sink into the batter and slowly steam while baking so the result is a deep, almost plumlike sweet burst of cherry surrounded by luscious wells of silky melted chocolate that swirl into each other when you take a bite — all encased in the buttered vanilla blondie batter with a nice, soft, moist crumb. It’s the kind of dessert that’s best eaten with closed eyes and long slow pulls on the spoon as it leaves your lips, making sure you get every bit of chocolate off before taking your next bite. If you wanna give yourself even more reason to savor and linger, taking an extra minute to brown the butter (and maybe even adding an extra tablespoon cause yes, more butter) and/or adding a splash of brandy to the batter always pays off. Whatever you choose, I’m sure it’ll be delicious.
Ingredients:
2 Tablespoons unsalted butter, melted
1/4 cup brown sugar
1 large egg
1/4 teaspoon vanilla extract
1/4 cup plus 2 tablespoons all purpose flour
1/4 teaspoon baking powder
pinch of salt
2 tablespoons semi-sweet chocolate chips
1/4 cup fresh, pitted cherries (5-6 cherries depending on size)
1. Preheat oven to 350° F. Butter a 6 inch pie plate or ramekin and set aside.
2. Add the melted butter, sugar, egg, and vanilla to a small bowl and whisk to combine, then stir in the flour, baking powder, salt, and one tablespoon of chocolate chips. Once the dry ingredients are fully incorporated, pour the batter into your prepared pie plate, sprinkle the rest of the chocolate chips on top, then press the cherries into the batter. Don’t forget to pit the cherries! Cherry pits can break your teeth! I care too much about all of you and your beautiful teeth to let you break them!
3. Place in the oven and bake for 20-25 minutes or until a cake tester comes out clean and the top and edges are golden brown. Allow to cool on a wire rack for at least 5 minutes if you like your blondies hot & gooey, 10-20minutes if you like them soft & warm, or if you’re team cold & hard blondies, pop it in the fridge for an hour or so!
4. Once cooled to your liking, you can eat it straight from the pan! Just be careful cause it’ll still be hot to the touch.
5. Or my personal favorite option is to top the warm blondie with a scoop of ice cream and finish it with an extra cherry on top.
It’s here! It’s here! Summer is finally here! I’m SO excited. I have great plans for summer this year. I’ll be kicking it off with a girls trip to Flagstaff with my high school friends, then spending as many days as I can picnicking at the beach and lounging poolside with yummy snacks. I’ll specifically be channeling the vibes of the incredible QTPOC pool party the speakeasy hosted at A-Camp this year. There were beautiful black and brown queer bodies enjoying the water, or not, without any fear of surveillance, judgement or taking up too much space. The playlist was, of course, on point, and my favorite moment was being handed a sweet, icy lime popsicle to enjoy and cool off with while Juice by Lizzo played in the background.
It was perfect, and a timely reminder of just how much I love popsicles. They’re one of the best parts of summer for me. I love buying rocket pops from the ice cream truck, eating my way through all the paleta flavors at my neighborhood ice cream shop, and flirting unabashedly with my crushes over freeze pops at the beach. Keeping your freezer and cooler stocked with popsicles all summer is definitely a move, especially if they’re homemade with both coconut milk and coconut cream, fresh lime juice and finished with a sprinkle of Tajin. Yes. If you’re fan of spicy margaritas I’m pretty sure you’ll love these popsicles.
For those who aren’t familiar, Tajin is a perfectly balanced chili, lime, and salt seasoning that tastes like heaven on fruit. It’s available at most major grocery stores and Target in the US, and it really puts these popsicles over the edge in the best way so I hope you’ll try it!. The bright spice of the chili is followed by lusciously creamy coconut milk with a twist of sweetened lime to finish. These are so deliciously refreshing that i’m looking forward to the first LA summer heat wave this year instead of dreading it. With a batch of these in my fridge I’ll be all set. They’re also the perfect excuse to justify buying popsicle molds if you’ve been looking for one. Tis truly the season. Once you get them you’ll be just two hours away from these fresh coconut lime cuties that taste like a Caribbean beach side vacation you can reach for anytime.
1 can coconut milk, 13.5 oz
1 can coconut cream, 13.5 oz
1/2 cup fresh lime juice
1/2 cup granulated sugar
Zest of one lime
pinch of salt
2 tablespoons Tajin seasoning for garnish
Makes twelve 2.5 ounce popsicles OR 6 popsicles and 3-4 future piña coladas if you freeze the leftovers into ice cubes then blend with frozen pineapple and rum.
1. Combine all the ingredients in a blender and blend on high for one minute.
2. Pour into popsicle molds!
3. Freeze until set, at least 2 hours and up to 5 days. After that they should be moved to an airtight freezer safe dish or bag for safe keeping.
4. When you’re ready to eat your popsicle carefully remove it from the mold.
5. Then sprinkle it with Tajin! I use a napkin to ensure i’ll get a nice straight edge.
6. Ta da!
They’re also incredible with sriracha.
But of course if spice isn’t your friend, they’re perfectly delicious without it.
HAPPY SUMMER!! Here’s hoping it’s a sweet one.
If I had to pick a theme for the way things have gone for me the last few weeks, it would absolutely be “when life gives you lemons, make lemonade.” Of course as a black queer woman making lemonade from the sour fruits in life is a highly curated skill of mine, but every once in awhile there are those moments where I just can’t seem to add enough sugar to make things palatable. Where making lemonade is just not gonna cut it and a new approach to the situation is needed. Sometimes this looks like more self advocacy or having direct conversations I’d rather avoid. Or it could be taking time alone to process and refresh my energy stores in order to better face life’s challenges. For today’s purposes though, it’s more literally to bypass lemonade completely and make this pink lemonade tart.
The more stressful my days are, the more important spending time in the kitchen becomes for me. It’s my safe space for feeling in control. For meditation, exploration, processing, connection. Truly much of my resilience comes from taking time to connect with myself, my feelings, and this world we live in is via the food that grows from it’s soil. I’m generally not one for religious references but the kitchen truly is my sanctuary. During this heightened period of stress I’ve been navigating I found myself thinking of my grandmother. More specifically of the summers I used to spend with her and my brother in the south catching fireflies, eating honeysuckles from the bush one by one, going to yard sales, trying to avoid getting my hair straightened with a hot comb at all costs, and drinking as much Country Time pink lemonade as I could manage to gulp down before being scolded and cut off. They’re some of my favorite memories.
I’ve tried many times to quench my homesickness and cravings for my grandma’s pink lemonade by going to buy the powder and mixing it up myself, but it’s never the same when it’s not in her kitchen, in her diamond patterned rippled green glasses, straight from her hand to mine. So when I found myself dreaming of it but with full awareness I couldn’t replicate it, I decided to take that flavor I love and pour it into a tart instead. When I took my first bite I almost cried. It tastes like summer, and love, and the best balance of strawberries and lemon I could’ve asked for. It’s bright and juicy, sweet and tart, encased in a luxuriously buttery shortbread crust, and when eaten cold the perfect end (or beginning) to a hot summer day. It’s also made entirely in the food processor (or blender) with a whole entire lemon. No boiling or straining the curd here, just a recipe that’s as efficient as it is delicious. I hope you’ll make it and smile while thinking of your favorite childhood summer memories in the process.
Ingredients
One pre-baked 9-inch tart crust*
1 average-sized lemon (about 4 1/2 ounces; 130 grams), scrubbed
1 1/2 cups (300 grams) sugar plus 1 tablespoon
1 stick (4 ounces or 115 grams) unsalted butter, cut into chunks
8 oz strawberries (fresh or thawed from frozen)
4 large eggs
3 tablespoons (14 grams) cornstarch
1/4 teaspoon salt
2 teaspoons Cream of tartar
*Note:I used the recipe and directions for my lavender shortbread crust, omitting the lavender. If you have a favorite use that!
1. Preheat the oven to 350°. Place your tart crust onto a baking sheet in case of leaks in the oven, and set aside.
2. After scrubbing the lemon to remove any stickers and/or wax that may have been applied, thinly slice it and remove the seeds.
3. There are two textural options here. for a smoother tart place the lemon slices, sugar, and butter into the bowl of your food processor or blender and blend on high for about 3 minutes or until the lemon is fully processed and the mixture is smooth. Then add the rest of the ingredients and blend until combined. If you want a tart with a little pulp remaining in the filling, you can process everything together at once until it’s smooth as pictured above!
4. Pour the filling into your prepared tart crust and bake for 30-45 minutes. There should still be a slight jiggle in the middle of the tart pan when it’s ready. Remove and allow to cool for at least 20 minutes before pushing the tart out of your pan.
5. Garnish with a little extra powdered sugar if your heart desires. Fresh strawberry slices are also a nice touch.
6. I highly recommend eating this chilled, but if you’d rather eat it right away, nothing is stopping you!
Happy (almost) summer, happy eating, and good luck with those lemons.
Yall, somehow Pride season is right around the corner and I cannot believe it! It really snuck up on me this year. Probably because all the terrible news is making time move in strange ways for me. I know I’m not alone in that and it makes me really thankful that It’s almost Pride, ’cause that means its almost time for A-Camp which I could not possibly be more excited for! Time to see my amazing friends and fellow writers from the site, bake cupcakes in my cupcake crop top, be in community, and share five beautiful proud days of queer life together.
This is absolutely my favorite holiday of the year. I am so proud to be a black queer woman, and while I do celebrate that year round, I celebrate a little harder during Pride. The first time I kissed a woman was during Pride, I came out during Pride, and every year I learn a little bit more about myself during Pride so it feels more like an anniversary or the mark of a new year than January 1st for me. Pride season’s approach also means it’s almost time for rainbow treats and your queer Gemini friends birthday parties to bring them to! This year I suggest you show your Pride with these adorable, soft, buttery, rainbow sprinkle adorned sugar cookies!
While you could go big and make a rainbow layer cake or a funfetti cake, that’s a major time commitment and you’ve got awkward ex encounters to struggle through at Pride events and those aforementioned parties, so finding the time to bake a cake is likely off the table. That’s completely okay, ’cause these are pretty much the cookie version of those cakes but with more butter flavor which I of course see as a win. I also love the crunch of the sprinkles within the wonderfully chewy crumb of the sugar cookies. It brings a smile to my face every time I take a bite. Part of that smile is definitely caused by how amazingly grateful I am that it’s my job to make and eat these cookies, and possibly be part of your Pride celebrations if you bake them as well!
These cookies are also just so fun to make. Rolling the dough in the sprinkles is definitely as fun in adulthood as it was as a child. Plus now we can put on as many sprinkles as we want. These could be sprinkles with a side of cookie. Do you. There’s a little cream cheese in the batter to keep the cookies moist but I’d also recommend spreading a little of the extra cream cheese on top. I’m weak just thinking about it. A scoop of ice cream, swirl of whipped cream, and an extra shower of sprinkles on top of a warm cookie or two is also an excellent choice. I’d say making these cookies is the most excellent choice but that’s actually being proud of who you are. The cookies are happy to come in second.
Ingredients
1 1/2 cups (180g) all purpose flour
1 teaspoon baking powder
1/2 teaspoon kosher salt
1/2 teaspoon baking soda
1/2 teaspoon cream of tartar
1/2 cup (113g) butter, softened
3/4 cup granulated sugar
2 tbs cream cheese, softened
1 large egg, room temperature
1 teaspoon vanilla extract
1/4 teaspoon almond extract
1/2 cup sprinkles plus more for rolling
Makes 18 – 24 cookies
1. Preheat oven to 350° F. Line two baking sheets with parchment paper or silicone mats and set aside.
2. Combine the flour, baking powder, salt, baking soda, and cream of tartar in a medium bowl and whisk to combine. Set aside.
3. In a large bowl, cream together the butter, cream cheese, and sugar using a hand mixer or the paddle attachment on a stand mixer on medium speed until light and fluffy, about three minutes.
4. Add the egg, vanilla and almond extract to the creamed butter and mix just until there are no dry spots left in the batter, then gently fold in the sprinkles.
5. Use a tablespoon or small scoop to make balls of dough, then press the tops into the extra sprinkles. You can also roll the entire ball of dough in sprinkles if you really wanna live a bountifully sprinkled life. The size of your scoops here will determine how many cookies you get. Generous tablespoons will yield 18 large cookies, precise ones will yield 24 medium cookies.
6. Place 12 cookies on your lined baking sheets leaving 2-3 inches of space between them, then place in the fridge to chill. You have two options here, Chill for 30 minutes for thinner cookies (my fav) or an hour or more for thicker cookies. You can chill the dough in the bowl before scooping the cookies if you’d like, it’s just more effort to scoop that way. The balls of dough can also be frozen at this point and saved for later!
7. Once your dough has chilled, bake for 10-12 minutes, just until the edges start to brown. Repeat this step for the remaining cookies if you’re using one baking sheet for both batches.
8. Transfer to a cookie sheet and let them cool for just a minute! So they wont fall apart!
9. Transfer to a plate for serving, then devour.
10. Happy sugar cookie-filled Pride!
I spent the majority of last week at a body positive retreat on the coast of Oregon channeling my best “How Stella Got Her Groove Back” vibes. It was an incredible and much needed escape. We stayed in a gorgeous oceanside home that has a GIANT kitchen with two dishwashers and a clear view of the beach. Now I know what heaven looks like! When I saw how impressive and well stocked the kitchen was I made a meal plan for the week to make the most of it and made so many incredible things! Like waffles topped with Oregon marionberry jam for breakfast, garlicky chicken thighs with arugula salad for lunch, and herbed mushroom and goat cheese pasta for dinner. I was very, very happy with my meals. I cooked and ate so well, without judgement, every day. It was deliciously liberating and I was almost completely satisfied but there was one thing I found myself wanting every morning that sadly I didn’t plan to make: coffee cake.
Something about being near the ocean makes me an early riser. As soon as the sun filters in I’m up and in search of the hazy damp air and soft morning waves . It’s so soothing. So, in Oregon I’d be up at 6:00am, make coffee by 6:30, and immediately wish I had a piece of coffee cake. It’s the perfect thing when it’s early enough to want a morning snack but too early to think about making an actual meal yet. All I wanted was a crumbly topped buttery cinnamon swirled cake in my hand while I journaled and got all in my feelings for the day. There’s nothing like writing with coffee and cake! It’s how I do my best work. It just didn’t seem worth it to go back out and buy a whole basket of baking supplies to make one thing when i’d be leaving in a few days though, so instead I put my cravings to work and dreamt up this coffee cake.
My favorite coffee cakes always have a little fresh fruit, a ton of cinnamon, and a nice crunch on top. I went with apples cause they’re especially nice here: soft, warm, sweet little gifts — but blueberries, blackberries, and rhubarb would all be winners in this as well. Two layers of cinnamon sugar (’cause you can never have enough!) swirled through a moist, tender cake, thanks to the sour cream. Plus, the crunch of toasted walnuts will hopefully bring you back to this recipe again and again. If I saw this cake at a potluck brunch, I would absolutely choose it first. This would be a solid Mother’s Day breakfast plan if you’re celebrating tomorrow! Otherwise make it anytime but especially for beachside mornings, slow weekends at home, and any day when waking up queer in this world could use a little sweetness.
Ingredients:
1 cup (200g) brown sugar
1 teaspoon ground cinnamon
2 1/2 cups (300g) all purpose flour
2 teaspoons baking powder
1/2 teaspoon baking soda
1/2 teaspoon salt
1/2 cup (1 stick/4 oz/115g) unsalted butter, melted (canola oil works too!)
1 cup (200g) granulated sugar
2 large eggs
1 cup (243g) sour cream
1 teaspoon vanilla extract
1 medium apple (about 1/2 cup), diced
1 cup (113g) chopped walnuts
4 tablespoons (1/4 cup/2oz/58g) salted butter, melted
1. Preheat oven to 350° F. Oil or butter a 9×13 baking dish and set aside. Whisk the brown sugar and cinnamon together in a small bowl and set aside as well.
2. In a medium bowl, whisk together the flour, baking powder, baking soda and salt. Next combine the butter or oil, sugar, eggs, sour cream, and vanilla extract and whisk together until smooth and fully incorporated. Finally, pour the dry ingredients into the wet and stir just until there’s no dry spots of flour left in the batter.
3. Pour half of the batter into your prepared baking pan and spread it out to the edges to fill the pan.
4. Sprinkle half of the cinnamon sugar mixture onto the first layer of batter, then top with the diced apples.
5. Pour the other half of the batter on top of the apples and spread it out to the edges as well. It might be a little difficult given the thickness of the batter, but you can do it and there IS enough I promise! Now sprinkle the top layer of batter with the remaining cinnamon sugar mixture and the chopped walnuts, and drizzle the melted salted butter all over everythang.
6. Place in the oven and bake for 35-45 minutes, just until a cake tester comes out clean, and let the cake cool for at least 10 minutes before cutting!!!
7. It’s a super light, delicate cake so if you cut it before it’s time, it may fall apart on you.
8. Honestly though, it’s delicious when it crumbles too.
9. Best served with a warm cup of coffee.
10. Or maybe dusted with powdered sugar with fresh berries on the side.
Have you ever eaten a peanut butter cup or two or three and wished you had more? If so please get your kitchen ready cause this recipe is for you. There are two times a year that I find myself eating all the peanut butter and chocolate candies I can get my hands on. One is halloween and the other now. My struggle with candy though is I never feel satisfied from it, and eventually find myself wanting a dessert that will fulfill all my peanut butter chocolate fantasies. Well, here’s that dessert! Sweet and salty peanut butter bars topped with salted pretzels. The amount of joy it brings to my heart to know there’s a whole container of these waiting for me in the fridge right now is unlike any other. I use salted butter here and less sugar than the average bar so the risk of overwhelming sweetness is very low. Throw in the addition of the crunchy bites of pretzel and you’ve got the reason these are an instant favorite everywhere I take them. One minute I’ve set down a full tray of bars and the next there’s nothing but chocolate smudges on the dish and people licking their fingers looking very satisfied.
I’ll also fill you in on a little secret: these taste best when eaten upside down. Something about the sequence of tastes being pretzel then chocolate with a peanut butter finale really amplifies the experience. You’ve gotta try it. I also find that while I love the presentation of using whole pretzels to top the bars, scattering lightly crushed pretzel pieces over the top is very much where it’s at. If pretzels aren’t your thing you can easily go with flaked sea salt or just eat them plain. They can also easily be made vegan by subbing vegan butter or coconut oil, and ensuring the chocolate and graham crackers used are vegan.
As for the peanut butter, you wanna go with the ultra smooth, thick, creamy store brand kind the likes of Jif/Skippy/Peter Pan. Natural peanut butters that are a thinner consistency and have to be stirred just don’t hold up well here.
This recipe is perfect for this time of year when summer is approaching (at least it is where I live in the US!) and a decadent treat is in order but the rising temperatures might already have you pushing the breaks on using the oven. These come together right on the counter top, go in the fridge for a chill and end up perfect little squares of delight, meaning you can whip them up whenever the mood strikes. Plus I’m sure it goes without saying that most children LOVE these and the ease of the recipe means this is a great one to enlist their help with if you’re a baker with little ones. Whoever you make them with or for, it’ll be all smiles from the first bite.
Ingredients
1 stick (1/2 cup/113g) salted butter, melted
1 cup (100g) graham cracker crumbs
1 cup powdered sugar (120g)
1 cup + 2 tablespoons (280g) creamy peanut butter
1 cup semi sweet chocolate chips
1 cup salted pretzels
1. Lightly butter the sides of an 8×8 (for higher peanut butter to chocolate ratio) or 9×9 (for equal peanut butter to chocolate ratio) baking pan then line with parchment paper or foil and set aside.
2. Next, combine the melted butter, graham cracker crumbs, powdered sugar, and 1 cup of peanut butter in a large bowl and stir till combined. Pour into the prepared pan and spread into an even layer. I also drop the pan on the counter a couple times and jiggle it. Set aside.
3. Melt the chocolate chips and remaining 2 tablespoons of peanut butter over low heat, stirring continuously to combine.
4. It should be smooth glossy and a little thick when done. Remove from heat.
5. Pour the melted chocolate mixture over the layer of peanut butter in your baking pan and spread out (it’s easiest with a silicone or offset spatula) as evenly as possible to the edges.
6. Place (or sprinkle!) your pretzels on top of the melted chocolate layers, then place it in the fridge to chill and set for at LEAST an hour, but 3 hours is best.
7. Once they’re chilled use a large sharp knife to slice your bars.
8. Or, if they’re just for you/your household you can always just throw a knife in the pan and let everyone choose their own adventure.
9. You really can’t go wrong either way.
10. Happy eating!
Something really strange has happened. Pretty much my whole life I’ve despised the flavor of almond extract; I couldn’t swallow marzipan the first time I tried it as a child and would pass on cake and frosting if I detected even the slightest hint of almond. Even just last year I bit into what I thought was a lemon poppyseed muffin to discover it was actually almond poppyseed and felt so betrayed I talked shit about that muffin for a solid week. The nerve! I love almonds themselves and almond milk is great but something about the extract has always turned me off, making the craving I had that led to these muffins and the fact that I love them mind blowing to me.
I know it’s common to grow into and out of tastes over time, but after 30 years of consistency around almond extract I figured I must be having some weird false craving when I started dreaming of strawberry muffins with almond instead of vanilla extract. I knew there was no way I’d actually like that and assumed the urge would eventually pass so I waited a few days. and the craving not only remained, it was stronger. I went out and stubbornly bought a giant strawberry crumble muffin, ate the whole thing and it absolutely did not hit the spot. So I finally sat down in defeat and wrote this recipe second guessing myself the whole way. When it was done I tested it with both almond and vanilla extracts, and while the vanilla version is delicious too, the almond is just… better?! MUCH better.
My friend Claire described it as the best strawberry cereal flavor but in muffin form and that’s totally it. You’ve got the sweet nutty almond batter filling in for the cereal, bursts of strawberry that are way better than the dehydrated cereal versions, and a sprinkle of white chocolate chips standing in for the creamy milk at the bottom of the bowl. Yes. You need these in your breakfast rotation. Plus, given that the strawberry slices on top bake up to look like little tongues and/or vulva (I know some of you were thinking it!) they’re pretty sexy too.
I’ll take a sexy strawberry cereal muffin any day. Maybe that’s what I should’ve named them! Either way, I’m sure you’ll find the experience of eating these muffins very pleasant.
Ingredients:
1 cup diced fresh strawberries + 2 extra strawberries sliced for garnish
1/2 cup + 1 tablespoon (114g) granulated sugar
1/2 teaspoon orange zest
2 cups (240g) all purpose flour
1 tablespoon baking powder
pinch of salt
1 large egg
3/4 cup (6oz) milk (dairy or non-dairy, they both work!)
1/4 cup (2oz) canola oil
1/2 teaspoon almond extract
1/2 cup (90g) white chocolate chips dusted with a little flour (about a teaspoon)
Makes 12 muffins
1. Preheat the oven to 375° F. Line a muffin tin with papers or oil the cups if you don’t have any and set aside.
2. Combine the cup of diced strawberries, 1 tablespoon sugar, and orange zest in a small bowl. Stir and set aside to allow the juices to extract.
3. Whisk together the flour, baking powder, and salt in a large bowl. Next, grab a smaller bowl and whisk together the egg, milk, oil, and extract. Pour the wet ingredients into the dry and stir everything together just until it’s fully mixed and no dry pockets of flour remain. Then add the reserved strawberries and chocolate chips and fold them into the batter.
4. Fill your muffin cups with batter until they’re a little over 3/4 of the way full, then place slices of strawberry on top to garnish.
5. Bake for 20-25 minutes or until a cake tester comes out clean. Remove from the oven and allow to cool for 5 minutes
6. Then remove the muffins from the pan and allow to finish cooling on a wire rack.
7. Or don’t, and eat them warm with your morning coffee, tea, or my personal favorite a glass of oat milk.
Finding inspiration for writing recipes, just like all writing, is a very unpredictable situation. Sometimes I’ve got ideas on ideas on ideas on ideas. My phone and the notebooks I keep scattered around my apartment are filled with delicious options to explore. I can go months without struggling for recipe inspiration, but once in a while my source of culinary imagination goes on vacation and that’s when I turn to requests.
I ask my friends if there’s anything they’ve been craving or wish they had as a standby recipe. Their responses are almost always something I’ve never considered making before. They put things on my radar, then I get to do the fun work of bringing those ideas to life instead of stressing about being inventive. It makes the cooking process feel more like giving a gift or fulfilling a wish. It reminds me that cooking/baking is a fun and connective experience. More importantly, it helps push me out of my comfort zone in the kitchen.
Which leads me to this vegan chocolate mousse that is my new true love. I realized last week that I didn’t have any recipe ideas sparking my interest, but should probably make something involving chocolate so I hopped on twitter and asked for help. Three of the responses to that call were about chocolate mousse. Mousse! I never make mousse! I don’t know why cause it’s incredible and airy and smooth and creamy and makes my eyes roll back in my head as I lick the spoon. I’ve been living a tragically mousse-less life and thanks to my readers on twitter everything has changed.
One of the votes for chocolate mousse also requested that the recipe be dairy free. It has absolutely been too long since I gave my vegan/non-dairy friends any recipe love, so this is fixing that too, and in such a good way. I wanted to make sure my vegan mouse wouldn’t dare be lacking any of the flavor or textural qualities you’d find in cream and egg based mousse. Thanks to coconut cream and aquafaba, the liquid from canned garbanzo beans, this mousse in fact does it better. The aquafaba whips up just like egg whites, adding the airy fluffy lightness every good mousse needs. The coconut cream brings luscious silkiness to the party. Then of course, there’s the chocolate. Use the best vegan chocolate you can find. Queer life is hard and you deserve it. This is the time to go to the fancy grocery store or artisan chocolate shop and splurge on something bougie with deep flavorful bittersweet cocoa that will shine in this cloud like state. Chocolate mousse is of course all about the chocolate so you’ve simply gotta use the best here. I used my very last Dandelion Chocolate bars from a box I was gifted by yet another angel A-Camper that deserves a shout out full of sweetness to, Christine! (I truly have the best readers ever! I could cry thinking about it – let’s be real I sometimes do. I am so incredibly thankful to you all for being here, reading my words, making my desserts, and unexpectedly gifting me with artisan food items!) I could not possibly love you all more, and if my love for you had a taste, it’d be this mousse.
2 ounces vegan chocolate
1/2 cup plus 2 tablespoons coconut cream
pinch of instant espresso powder (optional)
1/2 teaspoon vanilla extract
Aquafaba from one 16oz can garbanzo beans (3/4 cup if you wanna be precise)
1 tablespoon granulated sugar
Note that you want coconut CREAM for this recipe:
As in, the thick solid stuff that rises to the top of a can of good quality coconut milk. Aroy-D and Wild Harvest Organic are canned coconut milk brands that really kill the coconut cream game.
1. Place 2 tablespoons of the coconut cream in a small microwave safe bowl. Microwave for 15 seconds. Break the chocolate into pieces. Add it to the hot cream along with the espresso powder (if using) and vanilla extract. Let sit for about 30 seconds to allow the chocolate to melt.
2. Once the chocolate looks soft and melty, start stirring until it’s smooth and glossy. You may need to microwave it again to get the chocolate to melt fully. If so, work in 5 second intervals and be careful not to scald the chocolate. Set aside.
3. Place the remaining coconut cream in a large bowl. Whip on medium high speed with a hand mixer, or stand mixer with the whisk attachment, until it’s fluffy but still thick enough to stick to a spoon, about 5 minutes. Scoop cream into the melted chocolate. Stir and set aside.
4. Now add the aquafaba and granulated sugar to your large bowl. Whisk the ingredients together until it resembles whipped egg whites. It should be airy, foamy, and just stiff enough to cling lightly to the whisk. This can take anywhere from 5-10 minutes depending on the brand of aquafaba you use so be patient! Once it’s ready, fold the whipped aquafaba into the chocolate mixture. Place in the fridge to chill for at least 4 hours but overnight is best.
5. When you’re ready for that smooth chocolate love, take the chilled mousse out of the fridge and layer it up! Of course you can eat it plain straight from the bowl, but layering it with berries and your favorite vegan whipped cream cream feels the perfect amount of fancy.
Especially with a little cinnamon on top.