Kitchen Cabinet Nail Treatments From Nail Transphobia’s Charlie Craggs
Welcome to the final installment of our three-month series in which queer-friendly health and beauty professionals offer accessible ways to show yourself some love! Charlie Craggs is the founder of Nail Transphobia, a series of free pop-up nail salons that “tackle transphobia fabulously” by starting conversations with cis people who may not (to their knowledge) personally know any trans folks. Below, Craggs shares some simple remedies for common skin and nail concerns, using ingredients you probably already have at home.
https://www.instagram.com/p/BXGLxSrgeYu/
Using one tsp of olive or coconut oil as a base, mix in the following ingredients according to your individual needs — then rub all over your hands, feet, and/or nails for a super conditioning treat.
The Problem: Your Nails Keep Breaking
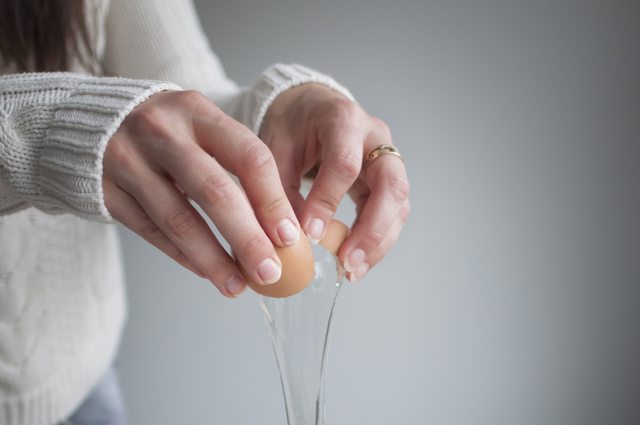
Whether you’re trying to grow your nails long or you’re simply tired of them flaking in general, protein-rich egg whites are a great strengthening serum. Just be sure to wash your hands thoroughly after with a bacteria-busting soap to avoid contamination.
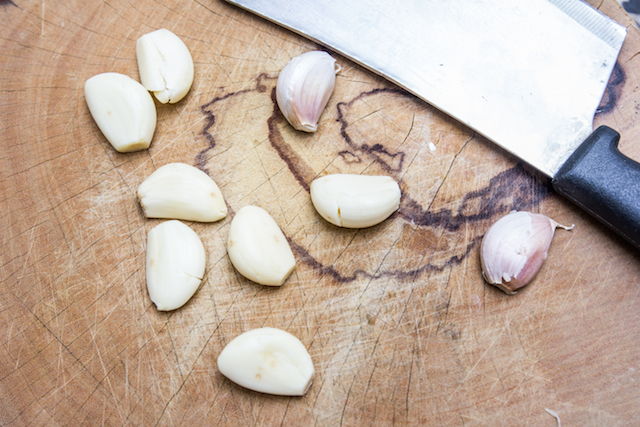
Vegan, or just kind of grossed out by the egg white idea? A minced clove of garlic can help combat brittleness, too.
The Problem: Your Nails Are Dull and Yellow

If your nails always look a little dirty no matter what you do, you’re not alone. Thankfully, adding a squeeze of lemon juice to your conditioner will help brighten and whiten nails.
The Problem: You Keep Getting Nail Fungus

A mashed ripe banana (including skin) is great for discouraging fungus growth, without robbing your surrounding skin of much-needed moisture. Combine it with the strained water from boiled neem leaves for fungus that’s extra aggressive.
The Problem: Your Skin Is Seriously Dry and Rough
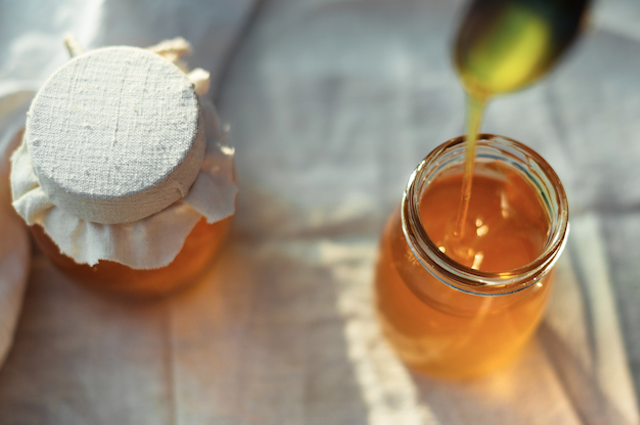
Whatever the reason for your skin dryness, honey is an incredible tool for moisturizing (just make sure your honey to oil ratio is such that you don’t get overly sticky!
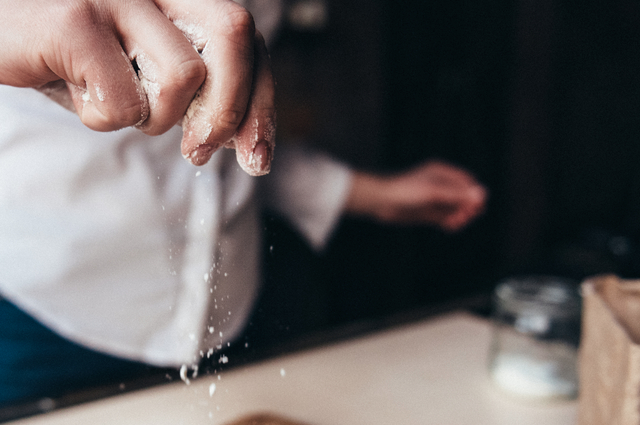
If you have a lot of excess skin that needs sloughing off, add a sprinkle of salt to your conditioner. The salt should be fine, not coarse, to avoid irritation, and should be used on callouses rather than hangnails (ouch!).
You don’t have to be ballin’ to be good to yourself! Use the above tips to keep your nail game strong, and take care.
You can see the June installment of this series here, and July’s installment here.
DIY Summer Skincare Recipes From The Body Politik’s Carmen Perez
Welcome to our three-month series in which queer-friendly health and beauty professionals offer accessible ways to show yourself some love! Carmen Perez is the owner and proprietor of The Body Politik, a body-positive, gender-affirming salon in Vancouver, Canada that offers services like waxing, manicures and pedicures, and brow and lash tinting. Below, Perez shares recipes for a body butter and scrub to keep your skin soft all summer long.
Many of us will be logging serious beach time in the coming months — but while the sun may feel good on your buns, all that salt water and wind can be drying for your skin! To keep yours soft and supple, and to help retain your tan, you’ll need a good scrub and moisturizer; and for just a few bucks and 30 minutes of your time, you can whip up enough product to last the whole season.
Moisture-Locking Scrub

Nikolay Litov, bigacis, and Peter Hermes Furian / all via Shutterstock
1. Combine the coconut oil and one cup of the sugar in a bowl and mix until creamy.
2. Add the essential oil (my favorites are cinnamon and nutmeg) while continuing to stir.
3. Add the remaining sugar until you reach your desired consistency (too loose/dry and it will be hard to use, too wet/oily and it will make your tub too slick).
4. Store in a mason jar.
This scrub is inexpensive and simple to make, and the sugar is a gentle but effective exfoliant that leaves skin smooth.
Now that you have a scrub to prep the skin, you’ll want to seal in your moisture. Shea butter is wonderful for this, and feels great on your skin. For a silky smooth body butter that’s easy to make, gather the ingredients below.
Silky Smooth Body Butter
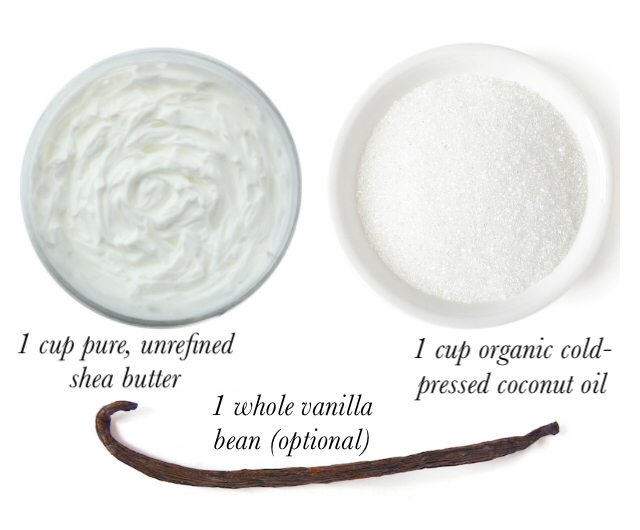
Africa Studio, bigacis, and Natalia van D / all via Shutterstock
1. Put your oils in a blender and process until smooth, making sure to break up the chunks of shea butter.
2. Transfer your mixture into a bowl and put in the refrigerator until it solidifies.
3. While your mixture is cooling, grind your vanilla bean using a coffee grinder until fine.
4. Using a hand mixer, whisk the cooled mixture until it takes on a whipped consistency similar to whipped cream. At this point you can add your ground vanilla bean.
5. Spoon whipped butter into a mason jar and store in the fridge. This will prevent it from liquefying in the heat, and it will feel great fresh from the shower.
I like to exfoliate about three times a week through the summer, following with moisturizer while still damp from the shower to stay soft and hydrated for longer.
Enjoy these recipes, and check in next month for more accessible ways to treat your bod!
5 Snacks You Can Wear on Your Face (Or 5 Face Masks You Can Eat!)
This may go without saying that it’s best if these ingredients are organic since you are welcoming them directly into your open pores, but what do we, have a million dollars somewhere? DO YOUR BEST! Also make these recipes vegan by substituting agave syrup for honey and almond or coconut kefir for greek yogurt.
Coconut Milk Latte

When I’m feeling like I deserve it I brew my coffee with a lil’ cinnamon and attempt to crack the coconut milk code on my milk frother, something I continue to fail at months into ownership. A spoonful of raw honey usually helps redeem the lifeless bubbles.
As a mask it’s my go-to because I always have the ingredients. Coffee grounds stimulate skin cells, honey has anti-bacterial properties, moisturizes, and its crystallized texture helps with exfoliation, cinnamon works as an astringent, and coconut milk has a cooling effect/is rich in vitamin C. Don’t be surprised if this brings out a rosy complexion – the coffee grounds and cinnamon are helping to activate everything just beneath your skin’s surface. (For this reason this mask may not be good for sensitive skin.)
How I tailor it:
Build off a tablespoon of honey as brands and styles of honey can vary in consistency
Tablespoon of coffee grounds
One teaspoon of cinnamon
I don’t froth the coconut milk and apply little drops of it until it’s pasty, not runny
Then apply in a circular motion and leave the mask on for 15 minutes. Warm then cold water rinse.
Avocado with Olive Oil, Lime Juice and Salt
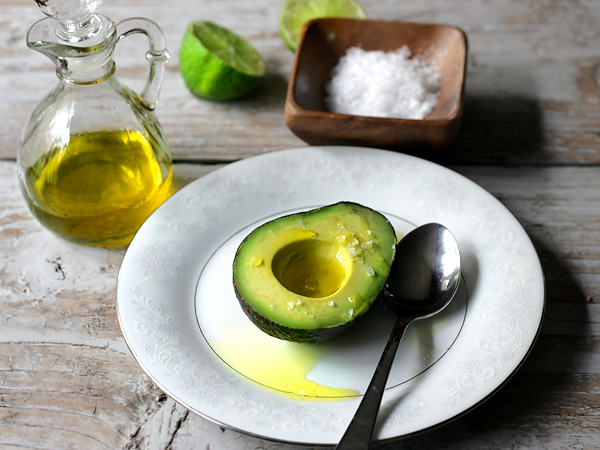
One time I was eating an avocado at work right out of its self-contained bowl and a co-worker goes, “What is that?” and I said, “Oh, I just took the pit out of an avocado and seasoned it,” and she looked at me like I’d just slapped her in front of everyone’s she ever respected. I still stand by it being a great snack!
It’s a great mask, too. It’s rich in antioxidants for when your skin is feeling drier than usual, which is why I go lighter on the lime juice and salt.
How I tailor it:
Half an avocado
Juice of a little less than 1/4 of a lime
Pinch of salt
Two teaspoons of olive oil
Mash it all together with your hands because it’s faster and you’re going to feel pretty animalistic with this one anyway. I lay down when I apply this because most of it wants to slide downward anyway, plus then you can leave it on for longer while you do some deep breathing. Warm then cold water rinse.
Dandelion Root Tea
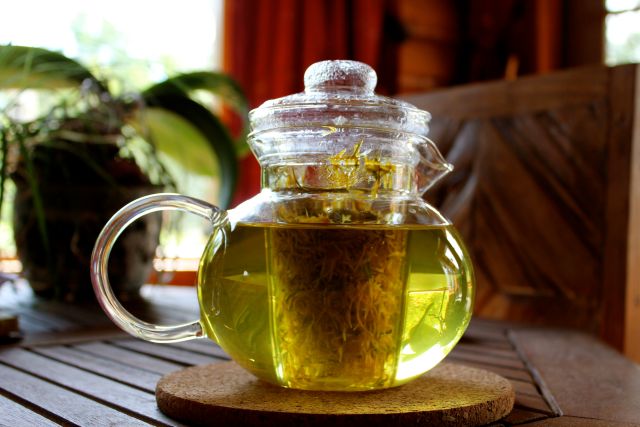
Dandelion root tea is a delicious summer tea with a woody flavor. Dandelion root seems like one of those things that you can only get online or at a specialized store for like 15 dollars per teaspoon, but here’s another option: go outside, uproot them, dry them, roast them at 250 for a couple of hours and then grind/cut them into tea-leave size pieces. Or you can get a packet at the store. Whatever works!
Dandelion root is good for external use, too. It’s full of vitamin A, boosts collagen, hydrates skin, is a blood purifier, and even helps protect against UV rays. What can’t this plant do!
How I tailor it:
I don’t! Brew enough (6 oz.) for a facial tonic that you keep on all day or as a quick rinse.
Obviously wait for this to cool and then get some cotton balls to apply in an upward swipe motion. Warm then cold water rinse.
Tzatziki
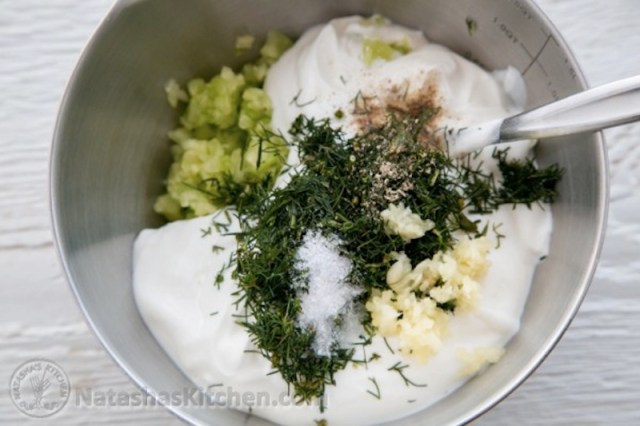
Tzatziki on your face, huh? We live in a world where it’s been made clear there are no rules and I intended to live as such. And that’s great because tzatziki is my favorite dip that goes with pretty much everything savory. When I die bury me inside a dill leaf store!
As a mask it targets problem skin, so it’s great for hormonal and environmental-caused flare-ups. The yogurt’s lactic acid aids in dissolving dead skin cells which can help prevent breakouts along with reducing the appearance of fine lines – EVERY WOMAN’S WORST NIGHTMARE – cucumbers have a cooling effect, lemon works as an astringent and detoxifier, dill contains potassium which helps with skin irritation, and olive oil rounds everything out by locking in moisture.
How I tailor it:
Leave out the garlic
1/4 cup of yogurt, drained
Juice of half a lemon
Tablespoon of mashed cucumber
Tablespoon of dill leaves
Teaspoon of olive oil
Mix together and leave on for 10 minutes. Warm then cold water rinse.
Chocolate Oatmeal
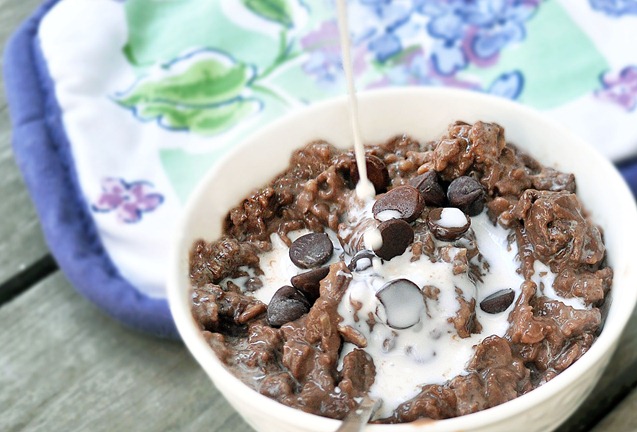
Something crazy is there are people that PREFER savory oatmeal. Not just like, can potentially enjoy it. Are you one of those people? I am a sweet oatmeal girl, because I feel deep in my bones that’s how it was intended to be eaten.
As a mask it’s great at replenishing. The oatmeal exfoliates and soothes skin irritants, honey clears bad bacteria away, cocoa has powerful antioxidants that eradicate free radicals, bananas have potassium to hydrate skin, and coconut milk’s vitamin C helps rejuvenate skin cells.
Here’s how I tailor it:
I leave out the salt and vanilla extract
Two tablespoons of uncooked oatmeal
Tablespoon of cocoa
Tablespoon of honey
1/4 of a banana, mashed
Mix together and leave on for 15 minutes. Warm then cold water rinse.
5 Rad Makeup Looks For Hooded Eyes and Monolids
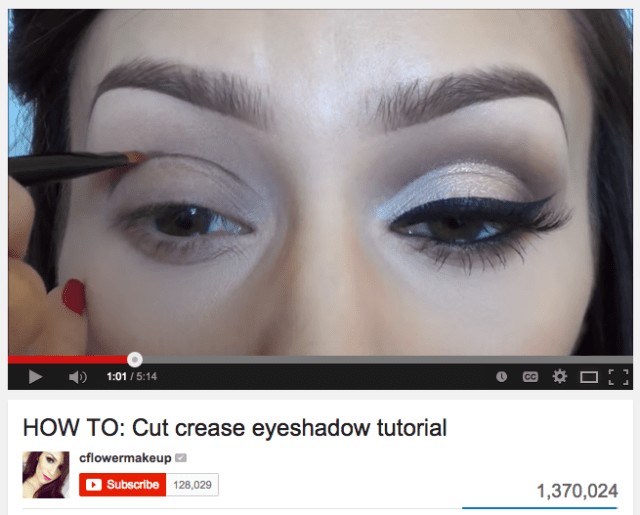
If you’ve ever spent a Saturday night in front of YouTube with a tub of ice cream watching makeup tutorials (wait… just me?) you’ve probably gazed longingly into deep set eyes telling you how to do a cut crease look, but when you try to test it out, all of the lighter color and the sharp line you worked so hard for, suddenly disappears when you open your eyes normally.
Possibly this has happened to you with your eyeliner too. I know I can spend all the time I want perfecting a cat eye, but as soon as I’m moving normally about my day, all anyone can see is a little bit of the black above my eyelashes.
We can spend all the time we want dreaming about deep eye sockets, but that’s not going to get us anywhere. I’ve been spending some time collecting my favorite looks on how to embrace my beautiful lil eyelids for all of you. Hopefully this will be helpful for all my hooded/monolid sisters out there. Our eyelids are the special snowflakes we didn’t ask for but they’re our special snowflakes so let’s celebrate them.
1. Faux Cut Crease
It really irked me that I wasn’t able to do a proper cut crease. It’s so artfully crafted and takes a lot of patience to achieve and I love makeup that makes me feel like I’ve accomplished something. I figured if I couldn’t have a line across the deepest part of my eye socket, I’d just make one up instead. I’ve seen this a lot lately in fashion magazines and on runways, but it’s a really easy look that you can try in any color you’re feeling.

You can use any liquid or gel eyeliner with an angled brush to do this. I think my next endeavor with this look will be trying different colors. I’ve been hearing good things about Makeup Monsters gel liners and at $8.95 a pop, they’re an affordable investment to mix up your look.
2. Inner Corner Color
The inner corner of mono and hooded eyelids is usually really visible but often overlooked. I like to pop a little silver or gold shadow in there with my fingers and it really brightens up my eyes and makes them look wider, plus the shine is super lovely outside when it catches the sunlight.

This is Makeup Forever’s Flash Color Pot in Gold.
3. Dots!
I saw something similar to my inner corner metallics while shooting backstage at Chromat SS15. Their makeup artists were applying perfect little circles of color with clean pencil erasers to get the shape right on all of the models.
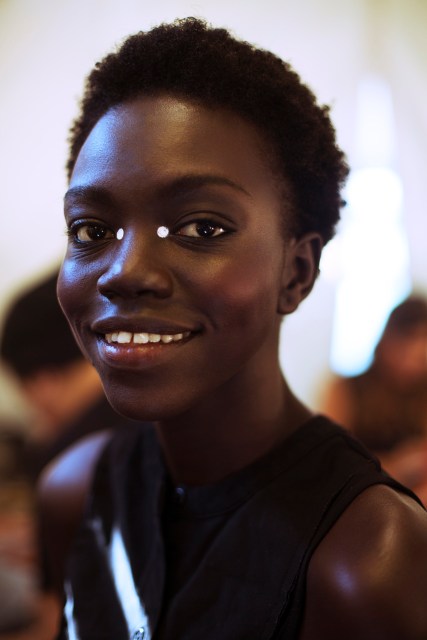
Nyamuoch Girwath, Backstage at Chromat SS2015, Photo by Tayler Smith
Symmetrical dots of eyeliner also look great under your eyes. Either one under the center of your lower lash line or lots in a row along the lash line are super fun.
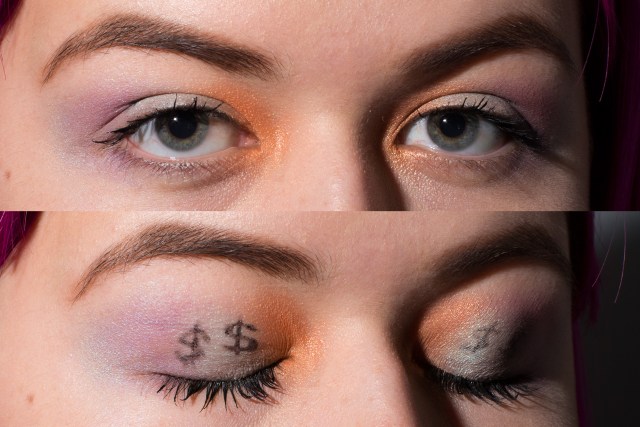
4. Go Full Alien
Put the faux cut crease + inner corner color together and go full alien. Achieve your #alienactualites.

Here I used MAC Blacktrack Fluidline and Makeup Forever’s Aquamatic Eyeshadow in I-30.
5. They’re Full of Secrets
If all else fails, they’re a great place to hide your money.
This Shit Rules: Loverboi Fresh
Hello fancy dandelions, hope the world is treating you well. And if it isn’t, I hope that you’re treating yourself so fkn good that the world is jealous.

This is my first post about beauty thangs ’cause I’m a pretty low-maintenance kind of weirdo. I’m like a five-minute shower, shake my jeans off the floor, scrape the last bits of deodorant from that plastic applicator thing and rub it under my arms type of kid. Not like if I’m going on a date or to work, but like if I’m just running errands, I’m not putting more than ten minutes into getting it together, feel me?
However, I’ve found myself in a relationship with a crafty little human who makes wonderful things. And without even realizing it, I’ve gathered an array of her homemade products and some very necessary queer/hippie extras that keep me feeling so fresh and so clean clean. Now I get to share that stuff with you and we’ll all be fresh together and the world will be so mad.
PS: I get most of this stuff for free cuz I’m the gf. But since I love y’all and wanna hook it up, if you buy anything from my girl’s Etsy page, use the codeword Loverboi for a 20% discount.
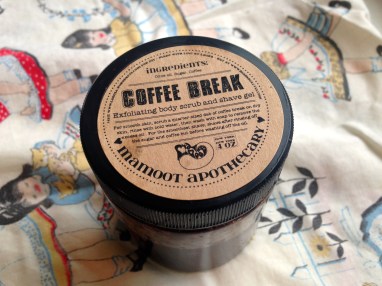
Coffee ‘n Peppermint Face Scrub
Yo, no lie, my skin is good to me. It’s not blotchy and I’m not prone to breaks outs. BUT it’s sensitive af, so I don’t normally use anything but plain old soap to wash it. And I have one of those strawberry noses which is a cute way to say that my nose is covered in mini-blackheads and I’ve never known what to do about them but hope other people can’t see them.
So I tried this wonderful homemade face scrub and it’s the best thing ever. It’s literally coffee, sugar, and peppermint essential oil which is basically like a candy cane double shot latte for your face.
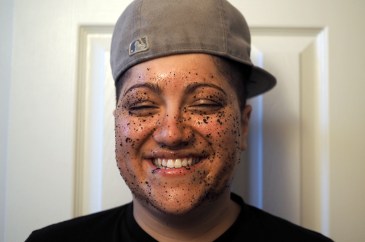
And something about the coffee grounds and the peppermint oil working together makes my face feel like it’s super clean and wide awake. Every other week, I’m scrubbing like a fiend.
Pro-tip: Be gentle when you rub it on your face because the coffee grounds are a little rough.
Coffee Break – One 4oz Jar $5.00
Easy, Wheezy! (Hippie Vicks Vaporub)
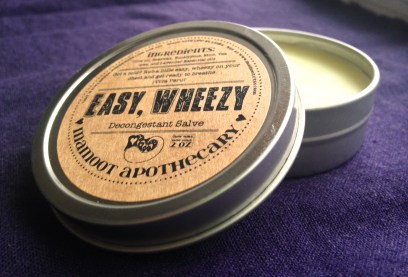
I’ve got some wicked asthma. Last winter, before I was put on the proper asthma meds, I’d wake up in the middle of the night wheezing and choking, unable to breathe for almost an hour at a time. It was hell and it worried my girlfriend and Lizz Rubin, my favorite almost doctor. After a month of wheezy nights, my girlfriend set out to make a healing salve cuz obvs she’s a witch and wanted to heal me.
The first time she rubbed it on my chest, the wheezing stopped within a few minutes and my whole body calmed down. It reminds me of the Vicks Vaporub my momma used to rub on me as a kid but minus the eye-watering chemicals.
Easy, Wheezy! not only alleviates the burning and whistling in my lungs, it calms me down and puts me to sleep. I think she loves me, y’all.
Easy, Wheezy! – One 2oz Tin $6.00
Cocoa Butter Lip Balm
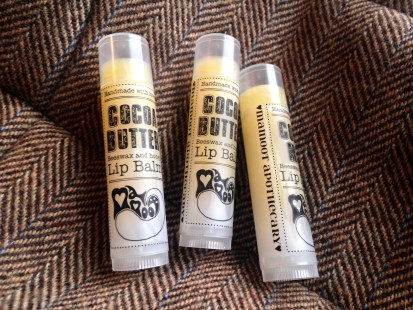
This winter was murder on my bembas. They were dry, peeling, and angry at me for never having things like lip balm in my pockets. My lips even cracked at the corners and that’s what broke me. As I was leaving for work, I dipped into my girl’s stash of hippie stuff, found a tube that looked like lip balm and prayed for the best.
The lip balm I snatched was on point.
It rubs on smooth like chocolate and tastes like chocolate but it works like real lip balm. Immediately my lips were cool and they healed up fast. Also, they were a million times more kissable, so… yeah. You want this lip balm in yer pocket and on yo lips.
Cocoa Butter Lip Balm – One .15 oz tube $3.00
Formidable Formula Deodorant

At first, I wasn’t too down with hippie deodorant. Something about it made me think I’d just be wet and stinky all day and have to rub tea tree oil all over myself just to cover up the funk. But I watched my girl rub the stuff she made under her arms and she didn’t ever stink, not even after going to the gym. I thought she’s either a super witch or maybe her hippie deodorant actually works. Both are likely tho.
She made me a batch cuz she was sure that the aluminum in my Dove deodorant would kill me faster than as asthma attack and so I gave in and I’m a believer. I even help her make it sometimes.
Don’t ever confuse lye for coconut oil.
Formidable Formula Deoderant – One 4oz jar $8.00
Lavender ‘n Honey Soap
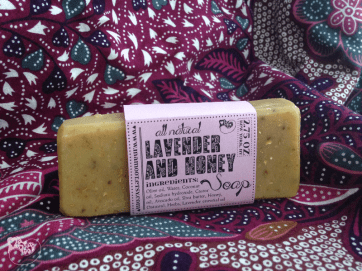
This soap is sweet. It smells good, is all natural, and doesn’t dry out my skin. Also, it’s made with tea leaves and this gives the soap an exfoliating quality. I’ve definitely rubbed it on my bum to get rid of dry skin. It’s cool. I trust you guise to keep that between us.
Note: This product currently isn’t for sale on her Etsy page but if you make a request because of this post, she’ll make some just for you!
Nature’s Blessings Pomade
Khane Khutzwell, one of the most talented queer barbers out in Brooklyn, put me on to this hair pomade almost three years ago and I haven’t used another product in my hair since.
shape up at Khane’s
It doesn’t crust up or make my hair stiff. It leaves my curls shiny and gives them some much needed body. It also gives me a natural look whereas regular gel has often left me feeling like a Gotti Boy.
Also, how can you not love a product that lists ‘good intentions’ as one of its ingredients?
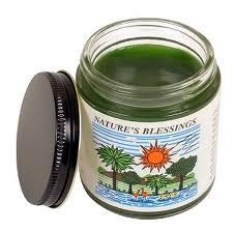
This product isn’t made by my, gf btw. Go see Khane Khutzwell in Brooklyn or order it online from Mystic Essence.
Nature’s Blessing – One 4oz Jar $3.50
DIY Fizzy Bath Bombs For Your Filthy Hot Bods

On March 14, we want our readers to stay in together as part of Autostraddle’s International Staycation Spectacular! Follow along with everyone’s hotel parties, spa days, and indoor picnics around the world with the hashtag #StaycationSpectacular, and join us on the day of for the A+ livestream!
Hello, beasts! I hope you’re getting amped for your staycations. My plans for the day include making a cheese plate, watching House of Cards, deep conditioning my hair, and taking a long, decadent bath in the blood of my enemies.
Just kidding on that last one. But a fancy bath is definitely on the agenda, and since I haven’t gone Gone Girl on anyone lately, there will be liberal use of bath bombs. Because when I staycation, I really mean it. I sit and I steam and I stay. Bath bombs. Go hard.
In preparation for some truly sumptuous soaking, I’ve been trying out different fizzy bath bomb recipes for the past month. After numerous trials, I’ve perfected my optimal mix. It has milk for moisturization. Lavender to aid relaxation. Corn starch to make the water nice and silky. Epsom salt to relieve sore muscles. Shea butter to smooth dry elbows and heels. Almond oil for shiny hair. Coconut oil for soft skin. And, oh yeah, look how soothing the fizzy bubbles are!
That’s right, they’re obscenely soothing. Bath bombs are the perfect treat to pamper your hot, filthy bod. Or filthy hot bod? Look, I don’t know your life.
(A note for fellow nerds: The fizzing comes from an acid-base reaction. Remember as a kid when you made the classic baking soda and vinegar “volcano” for science fair? That’s the same principle at work in bath bombs. I’m just using citric acid instead of vinegar here.)
Anyway, if you’re all ready to get started, we’re going to do this in two parts. First I’ll give you the exact recipe I use, then I’ll teach you how to make your own custom recipe. Because is there anything more badass than customized luxury bath goods? I mean, maybe, but just go with it.
Bombs away!
Badass Moisturizing Lavender Bath Bombs
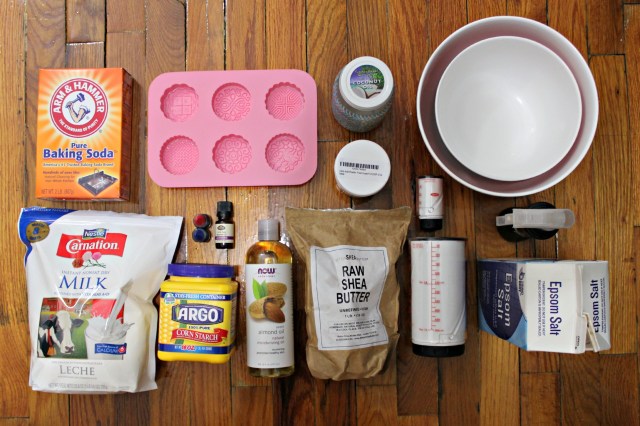
Ingredients:
- 1/4 cup Citric Acid
- 1/2 cup Baking Soda
- 1/8 cup Powdered Milk
- 1/8 cup Epsom Salt
- 1/8 cup Corn Starch
- 1 tsp Shea Butter
- 1 tsp Coconut Oil
- 1 tsp Almond Oil
- 10 drops Lavender Essential Oil
- 4 drops Blue Food Coloring
- 3 drops Red Food Coloring
- 100 ml water
Equipment:
- 2 bowls
- 1 spray bottle
- measuring cups & spoons
- microwave
- a mold (I used this fancy mooncake mold, but ice cube trays and muffin tins are also great)
Directions:
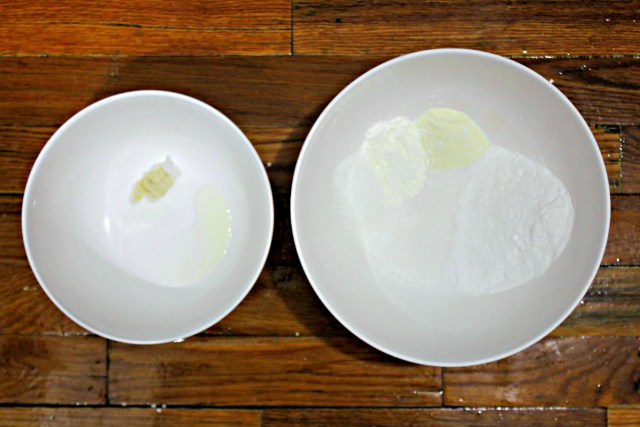
Wet ingredients to the left. Dry ingredients to the right.
- Mix dry ingredients (1/4 cup citric acid, 1/2 cup baking soda, 1/8 cup powdered milk, 1/8 cup epsom salt, 1/8 cup corn starch) in one bowl. Stir until well combined.
- Mix shea butter, coconut oil and almond oil (1 tsp each) in another bowl. Microwave for 1 minute. Stir until well combined.

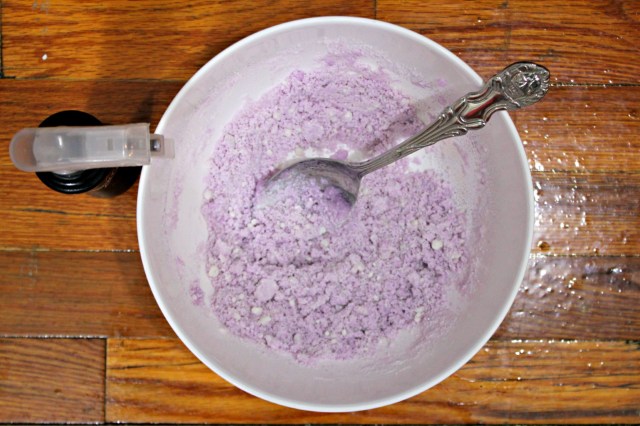
Quick! Stir stir stir.
- Pour wet ingredients into dry ingredients. Mix.

Other essential oils I love in bath bombs: spearmint, peppermint, grapefruit, eucalyptus, and tangerine. One time I tried lemongrass and it made me smell like potpourri. Which was… alright? I guess?
- Add 10 drops of lavender essential oil. Mix well.
- Put a small amount of water (I used 100 ml) in your spray bottle. Add food coloring (4 drops of blue, 3 drops of red). Put the top on and shake to combine.
Warning: food coloring will stain your skin if you put it directly on your body. Don’t do that. But a few drops diluted by an entire bathtub full of water is just fine.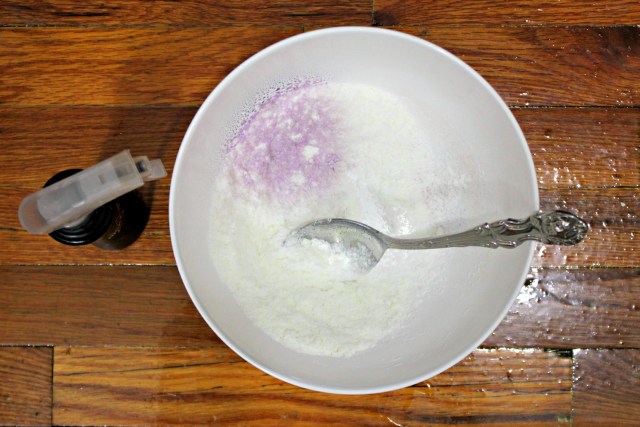
Tip: if you’re impatient and know you won’t want to wait for it to dry later on, you can add a little bit of alcohol to your colored water mix. It makes it dry quicker.
- Spray the colored water over your ingredients while mixing. You only want to do a little at a time, so the chemical reaction doesn’t start. If you hear the mixture fizzing, it’s too moist. Stir, or quickly add more dry ingredients.
Honestly, this is slightly too much water. My music was up too loud and I didn’t hear when it started fizzing.
Keep going until your mixture is about as damp as you’d need sand to be in order to mold a good sandcastle. Check the consistency of your mixture by picking some up in your hands and squishing it to make a ball. Keep spritzing and stirring until you can make a ball that stays clumped together (rather than immediately crumbling apart).
It’s okay if there are still white spots.
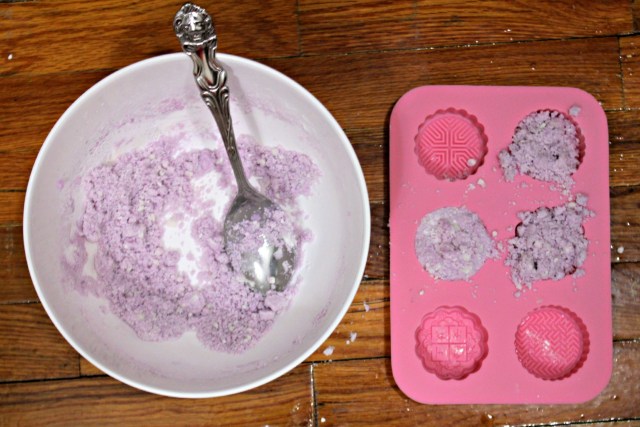
- Scoop the mixture into your molds. Pack it down tightly.
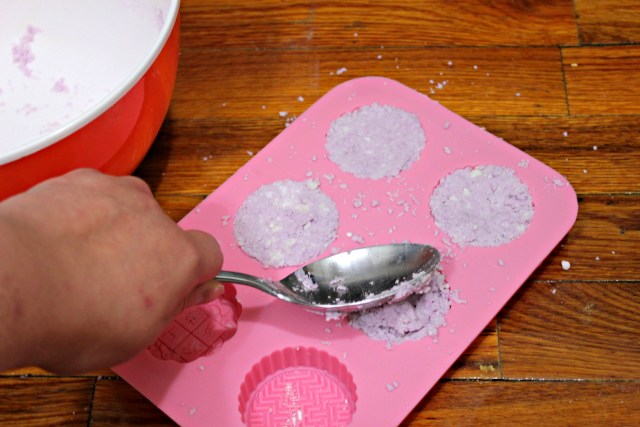
Use the back of a spoon to get more leverage when you’re packing the mixture into the mold. You can also use your fingers.
- Put your mold in the freezer to set. Drying time varies depending on how much moisture you added, but I generally leave mine for at least half an hour. If you’re patient enough to leave it overnight, that’s even better. The dryer and harder the ingredients are, the better they’ll hold their shape.
- When the bombs are done drying, pop them out of the mold. If you’ve done it too soon and they’re still moist, just crumble it up, remold, and wait a little longer. You can add more corn starch to the mixture if you think you really went overboard with the water. Or, if you didn’t add enough water, just crumble it up, spritz some more in, and put it back in the mold to try again. Keep in mind that a crumbly bath bomb will still work; it’s just not as pretty.
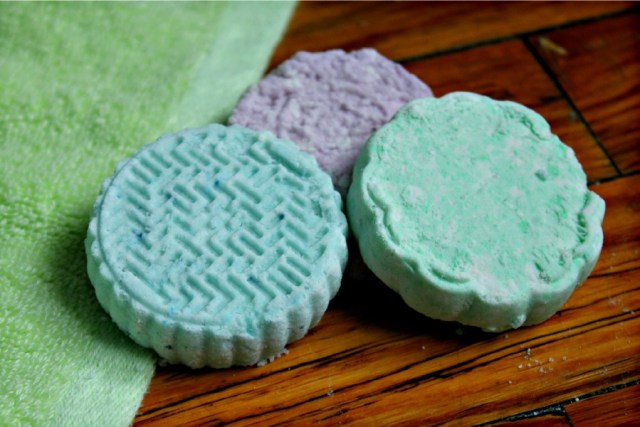
See? I left the blue one in overnight. On the green and purple ones I was too impatient to wait that long, so they got a little crumbly.
- Put one or two in your bath and watch them fizz away. As you’re steeping, take some time to reflect on your life and feel good about all the decisions you’ve made that have gotten you to this point.
Choose Your Own Adventure Bath Bomb
Remember when I said earlier that I’d teach you how to make your own bath bomb recipe? Of course you do, starshine, and that time has now come. Here’s what you need to know.
Magic Bath Bomb Ratio:
- 1 part acid
- 2 parts base
- 1 part powdered ingredients
- 10-20% binding agent
- Color, scent, floaty things as desired
As long as your concoction more or less follows this ratio, your bath bomb is going to turn out just splendidly. The stakes are very low here, so play around, have fun, and see which combinations you like the best!
To get you started, here’s a list of possibilities.
Acid (select one):
Base (select one):
- Baking Soda
- Baking Powder (although it has some acid in it already, so you’ll have to adjust the ratio; this recipe turned out well for me, if you want to try it)
Powdered Ingredients (use as many as you like, as long as the total follows the ratio):
- Powdered milk
- Bentonite clay
- Honey powder or grain powder
- Corn starch
- Sea salt, Epsom salt
Binding Agent (select one):
- Water
- Tea, floral water, male tears, rainwater you’ve personally collected from the heavens via champagne flute, etc.
- Cocoa butter, mango butter or shea butter (just melt it first, and be aware that the final mixture tends to comes out more crumbly)
Color, Scent, Floaty Things (go wild):
- Lavender, rose petals, flower petals
- Ginger, cinnamon, herbs
- Coconut oil, olive oil, jojoba oil, almond oil, avocado oil, baby oil, etc. (just add more powdered ingredients if your mixture becomes too wet)
- Cocoa butter, mango butter, shea butter (ditto)
- Essential oil, fragrance oil, witch hazel
- Oatmeal
- Lemon, Orange, Grapefruit
- Sprinkles, Jell-o, sugar decorations (but go easy on this, because yeast infections!)
- Cosmetic glitter, engagement rings, little toys
- Seaweed
- Honey
Again, these are just some possibilities. Dream big, and if you come up with something awesome, let me know.
DIY Beauty Bar: Soap Opera
Ever since I was little I’ve loved making “lotion potions.” My cousin and I would hunt through my grandma’s drawers, pulling out every hotel-sized lotion, soap and shampoo we could find. We’d grate the soap, mix up the lotions and sometimes even add a spritz of my grandma’s perfume – Eternity, which my grandpa still buys for her every year on her birthday – to make our creations smell good. Now that I’m all grown up (and have my own drawers full of stuff), I still love mixing up potions. There’s just something magic about taking whatever I can find and turning it into something that can clean, heal or beautify.
Soap is no exception. I started making my own soap last year for Christmas. It seemed easy enough and I wanted to give my brothers shaving brushes and soap. I ended up with 15 extra bars that I gave to my grandmas. They loved how soft it made their hands and so I, being the queen of dry skin all winter long, started making it for myself. Since I started making soap for myself, I’ve been learning a whole lot about the science and history of soap. On that note, let’s take a minute or ten to nerd out together.
For the sciency folk…
Soap is the metallic salt of a fatty acid. What in the world does that mean? Well, in chemistry, salt isn’t just the white stuff that always hangs with the pepper, it’s any product that comes from neutralizing an acid and a base. Let’s take kitchen salt (sodium chloride) as an example. When you combine hydrochloric acid (HCl) with sodium hydroxide (NaOH), you get sodium chloride (NaCl) and water.
HCl + NaOH –> NaCl + H2O
This is particularly cool because hydrochloric acid is crazy acidic (it’s the stuff that your stomach uses to break down food) and sodium hydroxide is suuuuper alkaline (remember the scene in Fight Club when Brad Pitt burns that ugly hole in Edward Norton’s hand? That’s lye AKA sodium hydroxide) which means achtung, baby! Put them together, though, and you get two completely safe and consumable substances.
Making soap – or saponification, if you’re savvy – is pretty much the same thing. Add lye to an oil and you get a salt that we call soap! More specifically, you combine a trigylceride with lye and end up with soap and gylcerine.
C3H5 COOR COOR COOR + 3 NaOH + (H2O) –> 3NaCOOR + C3H3 OH OH OH
You already know what lye is, but what about triglycerides? As it turns out, all the oils we’re familiar with are different types of triglycerides. If you look at the formula for triglyceride, you’ll notice there are some R’s up in there. Those R’s stand for fatty acid radicals, three of which are combined to create a single type of oil. Olive oil, for example, is made up of two oleic acid radicals and one palmitic acid radical. Because of their chemical makeup, different oils and fats have specific properties that can be helpful or harmful in soap making. We’ll talk more about this when we get to the recipe.
The glycerin that’s a byproduct of the reaction is one of the best reasons to make your own soap. Glycerin is a humectant (a thing that keeps moist things moist) and makes your skin soft and moisturized. Often, store-bought soaps have been stripped of most of their glycerin, which is then sold to be used in more expensive bath products.
Now that you know how soap is made, let’s take a closer look at how it gets you clean. Here’s a soap molecule:
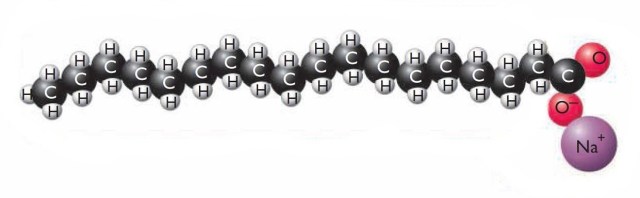
lalalalalalalala I’m a triglyceride molecule!
Can you figure out why it works? Hop in the high school time machine with me and think back to chemistry. Remember this?
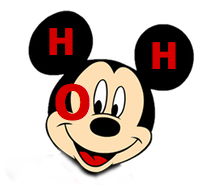
m-i-c-k-e-y-m-o-u-s-e
It’s a water molecule and it’s polar because it looks like Mickey Mouse. The big oxygen atom hangs on to the electrons more often than the tiny little hydrogen atoms, making the O part of the molecule partially negatively charged and the H parts partially positively charged.
Let’s stay in Chem for a little longer; remember “likes dissolve likes”? As it turns out, this rule is the reason that we can get clean. That big long tail on the soap molecule is definitely not polar. It’s a fat and it just wants to chill with all the other non-polar fats. Luckily, non-polar fats are exactly what the gunk on your skin is made out of! When it finds one, it grabs on for dear life. Actually, all the fatty tails of the soap molecules grab on because they love non-polar stuff, forming a ball called a micelle. This particular micelle (my belle, these are words that go together well) has a non-charged inside and a polar surface made up of the polar heads of the molecules. The outside of micelle latches onto water and carries the dirt down the drain.
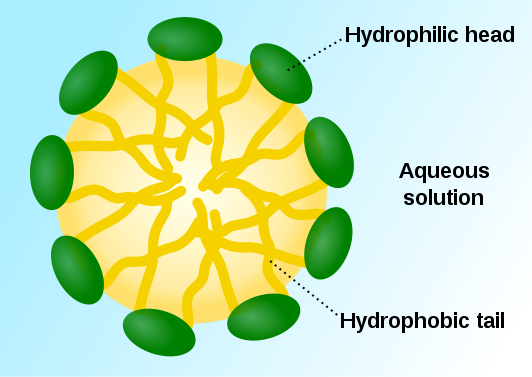
Here’s a micelle
For more reading on saponification, check out what happens in fire extinguishers, oil paintings and corpses.
If you’re inclined to literature and history…
Many many years ago, there was a mountain near Rome called Mount Sapo. In honor of the goddess Athena, the people from neighboring towns would carry goats and sheep to the top of the hill and burn them atop a sacrificial fire. As the animal fat melted and mixed with the alkaline ash, soap formed and was later carried to the stream below by rain. The women in the towns did their laundry in this stream, finding that their clothes got cleaner at Mount Sapo than anywhere else.
Athena and Heracles
Okay, so that’s probably not true, but it’s a good story, isn’t it? For one, Romans didn’t leave the fatty parts behind during burnt offerings; they took that with them to eat. Besides, the story doesn’t show up anywhere in mythology and no one can remember a Mount Sapo ever existing in the city of seven hills.
The real etymology of soap is still pretty fascinating if language is your cup of tea. The English word “soap” comes from Old English “sape” which comes from West Germanic “*siapo” (meaning dripping thing or resin) which comes from the Proto-Indo-European root “*seib” (meaning to pour out, drip, or trickle). These roots – all the way back to the Proto-Indo-Europeans – refer to soap’s creation using fats and oils.
The (pre-)history of soap makes it all the more bizarre that Europe was plagued with unclean habits for most of the last two centuries. Soap making guilds didn’t arise until the 7th century in Naples. Around the same time, chemists in the Arab world were making soaps with vegetable oils. Soap making really took off in France and Italy in 1200, but it wasn’t until 1600 that vegetable oil soaps started showing up on the continent.
Oatmeal and Lavender Soap

Recipe inspired by The Nerdy Farm Wife and Small Notebook.
Ingredients
5.5 oz of coconut oil – Coconut oil gives your soap moisture, big bubbles and a harder bar. I buy mine at Trader Joe’s or Costco, but it’s pretty trendy right now so you can find it just about anywhere.
8 oz of olive oil – Olive oil gives a dense creamy lather and a soft bar.
4 oz of water – Water is used to dissolve the lye. It will evaporate as the bar sets.
1.97 oz of lye – You already know what lye does, but you might not know where to buy it. Check the drain-unclogging chemicals sold at at Lowe’s or Home Depot. As long as it’s 100% sodium hydroxide, you’re good to go.
1/4 t of honey – Honey is a natural humectant and will keep your skin soft. It won’t dissolve into your soap, so don’t add too much or you’ll end up with honey bubbles and oozy soap.
5 drops of lavender essential oil – Lavender oil is calming and helps keep itching from dry skin at a minimum.
1 t of shea butter – Shea butter is incredibly moisturizing. If you don’t want to buy any, you can add a teaspoon of any oil or butter.
1 T of oats – Oatmeal soothes dry skin and scrubs off dead skin. Grind it up fine (I used my magic bullet because I’m fancy) so that it doesn’t clog your drains.
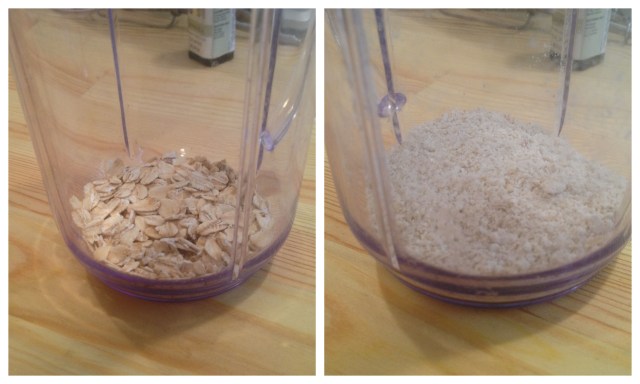
Pulverizing the oats to tiny bits
Other Equipment
An apron or old clothes
Non-latex gloves
Protective eyewear
Kitchen thermometer
Disposable container
Kitchen scale
Stick or hand-held mixer
Two stainless steel bowls
Mold for soap
Instructions
Let’s be real: soap making can be dangerous. You’re messing with a highly-corrosive substance and should avoid coming into contact with it. As long as you take normal precautions, though, it’s nothing to be afraid of. Open the windows while you mix the lye water. Don’t make soap while kids (or adults) or pets are running around and might bump something. Wear gloves and glasses and old clothes just so nothing accidentally touches you. Clean up with vinegar to neutralize any bits of lye afterwards. As long as you follow the instructions, there’s nothing to worry about and the world is your homemade soap oyster.
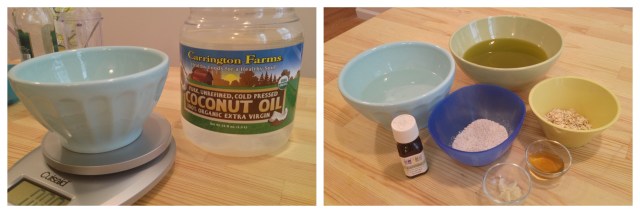
don’t forget to tare!
1. Soap making is all about the mise en place. Get all your materials out and measured before you even think about combining stuff. We measure everything by weight and not volume so that we’re sure we’ve got enough fat to react with the lye we’re adding in. First run your recipe through a lye calculator just to make sure you’ve got everything right. My favorite calculator is from The Sage and lets you easily make adjustments to recipes you find depending on what you’ve got in your cabinet. For example, most recipes call for palm oil (something I never have); I just substitute coconut oil for palm oil and plug in my values to a calculator and I’m good to go. I go for 5-6% excess fat so that my resulting bars are nice and moisturizing without being too oily. Pick whatever value you’d like as long as you stay within the green range on the chart.
When you measure the lye, make sure you’re using either a disposable container or a container that you only every plan to use for lye.
If you’re using a mold that isn’t easily removable, you’ll want to prepare it by lining it with saran wrap or parchment paper. I like to use silicon baking molds because they peel off, but you can use anything from capped PVC pipe to cake pans to cardboard boxes.
2. If your oils are solid, melt them in the big stainless steel bowl. When the oils reach 110°F, take them off the stove.

waiting for 110, the magic number
3. Pour your water into a stainless steel bowl. Pour the lye into the water. You always want to pour lye into other substances – and not the other way around – to avoid a “lye volcano.” The solution will heat up and give off fumes; try not to breath them in too much and wait until the solution cools down to 110°F.
4. Pour the lye water into the oils. Now it’s time to stir. You want to stir stir stir stir until the mixture reaches this mysterious and elusive phase called “trace.” Actually, it’s not that mysterious or elusive and it’s not a hard as people make it out to be. All trace means is that the lye water and the oils aren’t going to separate after they’re sitting for some time. With a stick or handheld blender, this usually takes about 10 minutes. You know you’re there when there’s a thin coating on the sides of the bowl and the blender. Trace will vary with different oils, but when you’re making a soap with a high olive-oil content, trace it going to look a lot thinner than cake batter.
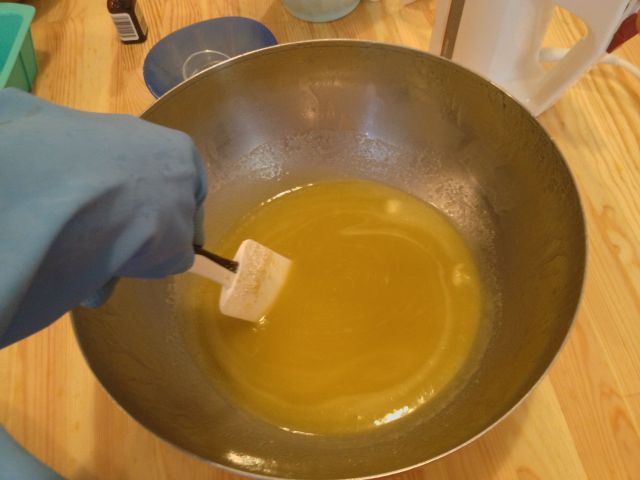
not quite to trace…
5. When the soap has reached trace, you want to add your shea butter, honey, lavender oil and oatmeal. Stir it all in and then pour it into your mold. Go ahead, sprinkle some whole oatmeal on top if you want.
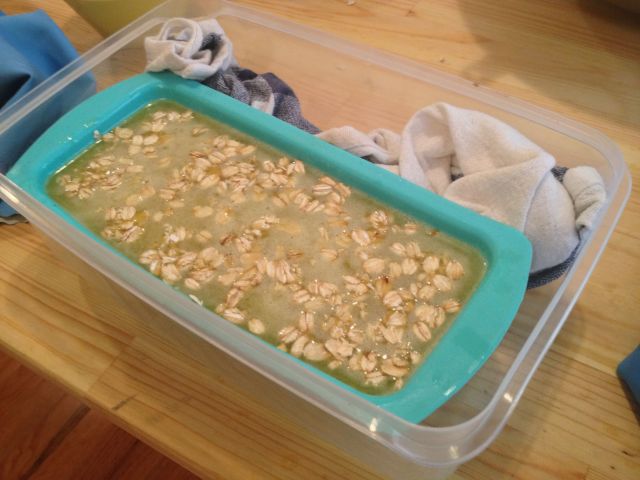
if you’re using a silicone mold, you can support it with an extra towel
6. Place the mold in a box (cardboard or otherwise) and wrap it in a towel to set overnight. Don’t seal the lid if it’s plastic! The box and towel insulate the soap à la mother hen while it’s curing. If you get cold, put the whole fandango on your lap; it’ll keep you warm!

the next morning!
7. The next day, remove the soap from the mold. It should be set but still soft, so now’s the time to slice!
8. Place the bars back in the box (again, not sealing it if it’s plastic!) and let it sit for a whole month. I know, the wait’s hard. I write the date I made the soap and the date it’ll be ready on a label so that I’m not tempted to use it too early. During this time, the water we used to dissolve the lye will evaporate so the bar gets harder and any leftover lye will saponify so that the soap is safe to use.
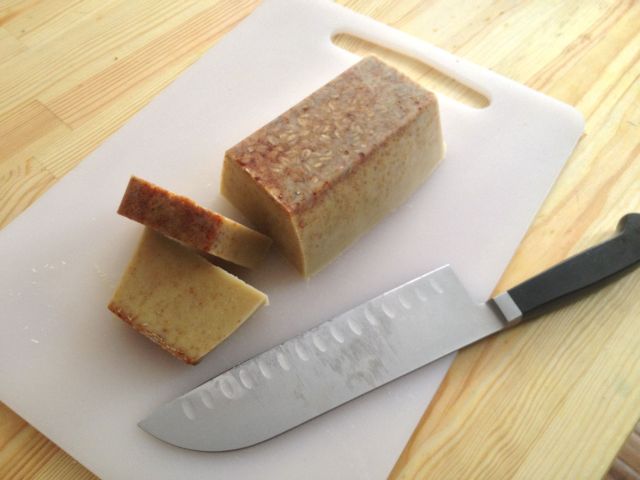
smooth like butta
Before using your soap, you should test to make sure it’s safe to use. Many soap-makers recommend the tongue test (stick your tongue on the soap and see if it zaps you). Considering that most of y’all probably consider your tongue one of your primary sex organs, I do not. You can buy phenolphthalein indicator solution for about $3 at a pool store or a winemaker’s store and it’ll do the same thing.
Once you’ve mixed, waited and tested, you’re ready to go! Happy showers.
DIY Beauty Bar: Bug Off!
 For years I never got a mosquito bite. My secret? Dryer sheets. Even though this is apparently an urban legend, I swear I wasn’t touched my the little guys for the past 5 years. Last summer, though, I found a new way to keep bugs away: essential oils. Diluting a mixture of whatever you need to keep the insects in your neck of the wood away from you in soap, lotion, or another carrier can keep you from getting bit in the first place. And the same essential oils – along with a whole list of normal household items – can stave off the itch if you forget to rub on some anti-mosquito stuff ahead of time.
Un-Buggable Essential Oils
Geranium: Repels ticks
Lavender: Repels chiggers, moths, mosquitos
Peppermint: Repels cockroaches, moths, mosquitos
Tea Tree: Repels chiggers, ants
Eucalyptus: Repels mosquitos
Bug-Repelling Lotion Bars
Making a solid lotion bar is an easy way to keep yourself un-bugged. 1 cup of coconut oil per 1/2 cup of beeswax is a good starter recipe. You can mess around with ratios if you want to add butters or use a liquid oil in place of coconut oil, but a good guideline is to use less beeswax when adding butters and more when adding liquid oils. After melting them together, add your essential oils and let the mixture solidify in ice cube trays so that you have convenient little bars to rub all over you next time you’re outside.
Bug-Repelling Spray
An easy way to get anti-bug oils on your skin is by using a spray. If you know you’ll be spending the day outside, using jojoba oil mixed with essential oils can be a good preventative measure. Jojoba oil is really similar to the oil produced by your skin, so it’s a good non-comedogenic yet moisturizing option.
If you want something that definitely won’t get your clothes oily when you spray it on, mixing equal parts of distilled or boiled water (so that you’re sure there’s nothing gross growing in it) and witch hazel with essential oils works. Adding vegetable glycerin will kept keep your skin moisturized and helps keep the essential oil suspended in the carrier liquid, but it’s very important to use really clean water if you’re going to add glycerin because it’s a sugar that will feed bacteria in the water and encourage it to grow.
Bug-Repelling Soap
Adding essential oils that bugs hate to a liquid castile soap (like unscented Dr. Bronner’s) can go and easy way to get the scent all over your body. Use 10-15 drops per ounce of soap.
Anti-Itch Remedies
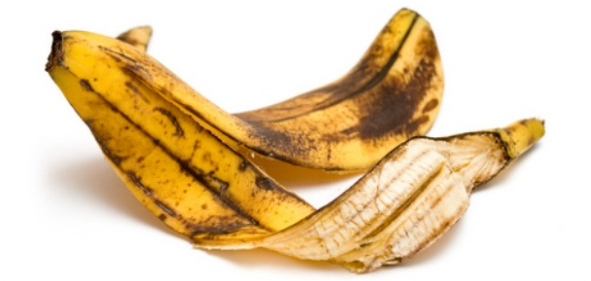
Honey helps stop itching as does soap, vinegar, tea, baking soda (but be careful if you have sensitive skin), plantain and basil leaves, the inside of a banana skin and citrus fruits. The itching in mosquito bites is caused by saliva, so if you’ve noticed you’ve been bit, you can help stop itching by running inside and washing the bite right away.
Resources: The Daily Green, Wellness Mama, Tip Nut
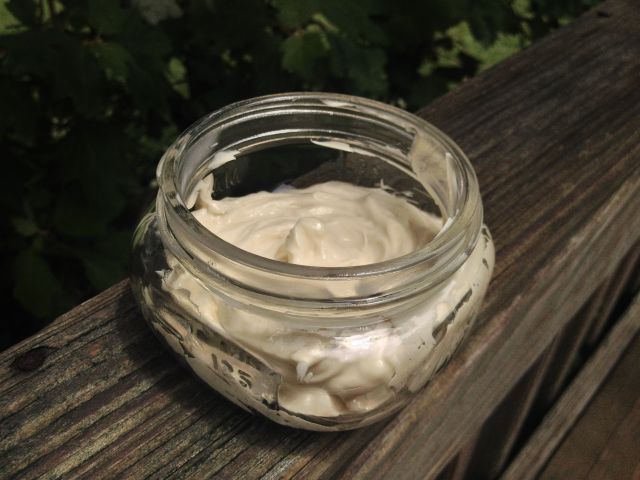
DIY Beauty Bar: Body Butter
 Not to be confused with Boy Butter (seriously you guys, oils don’t mix well with sex toys or condoms), this body butter is an excellent alternative to lotion. Why isn’t it lotion? Well, lotion is technically an emulsion of water and oils. Emulsions are really cool; they’re mixtures of two substances that aren’t technically supposed to mix created by adding a third (and something fourth or fifth) ingredient that lets them come together. Beeswax and borax are two emulsifiers that people like to use when making homemade lotion because they’re relative cheap and natural (technically the jury’s still out on borax, but hey! the more you know!).
Unfortunately, there’s that whole downside to water when making body stuff. I like my stuff to last and I have no access or desire to procure preservative, so I try to avoid water when I can. It’s pretty easy most of the time. This body butter uses a zillion oils that I already have lying around the house from other DIY projects, but you can simplify it for whatever you already have at home or feel like buying. In fact, some body whips only use one ingredient like mango, shea or coconut butter. I’ve added directions for substitutions in the recipe.
Because this is oil-based, you’ll need a lot less than you’re used to using with lotions. To help you get used to it, we’re going to whip some air into it to make it look like you have more than you really do and to help you smooth a small amount onto bigger bits of your body.

brought to you by boy butter
Price breakdown:
4T of cocoa butter @ $30/pound (whole foods) or $14/pound (mountain rose herbs) = $3.60 or $1.68
4T of shea butter @ $18/pound (whole foods) or $14/pound (mountain rose herbs) = $2.16 or $1.58
4T of coconut oil @ $6/pound (trader joe’s) = $0.80
4T of grapeseed oil @ $8/pound (mountain rose herbs) or light olive oil @ $5/17oz bottle = $1.00 or $0.59
2T vitamin e oil @ $3/bottle (trader joe’s) = $0.76
2t of honey @ $6/pound (trader joe’s) = $0.09
2t of beeswax @ $12.50/pound (mountain rose herbs) = $0.20
Total = $5.70 – $8.61
Body Butter
Ingredients
4 T of cocoa butter – Moisture! Smells like chocolate! Yum!
4 T of shea butter – Also awesome for moisture.
if you don’t have or want to buy both of the above, double the quantity of the one you’re using
4 T of coconut oil – More moisture. That’s what this stuff is for, anyway.
if you don’t have or want to buy coconut oil, you can achieve a similar consistency by substituting it for any liquid oil and adding an additional 1 T of beeswax
4 T of grapeseed oil or light olive oil – Honestly you can use any oil in this step; check out this article to help you choose the liquid oil that’s right for you. I’d recommend staying away from sesame oil as it will leaving you smelling like a wok.
2 T of vitamin E oil
if you don’t have or want to buy all of the above, substitute the oil you do have for the other
2 t of honey – Honey’s a natural humectant, which means it keeps the moisture in.
2 t of beeswax – Beeswax doesn’t do a whole lot for your body, but it’ll keep the lotion hard if you live somewhere hot.
Instructions
1. Add all the ingredients into a heat-proof glass bowl.
2. Create a double boiler by placing the bowl on a washcloth in a pan full of water.
3. Bring the water to a boil and stir stir stir to get all the ingredients incorporated. The beeswax has the highest melting point and will be the most resistent to melting, but wait until it all melts and you’ve got a uniform clear liquid.
4. Take the glass bowl out of the pan and let it cool. If you want to speed up cooling by refrigerating it, let it cool at room temperature for 20 minutes before putting it in the fridge to avoid cracking the glass shelves in your fridge. Glass has a tendency to do that when it goes from cold to hot really fast.
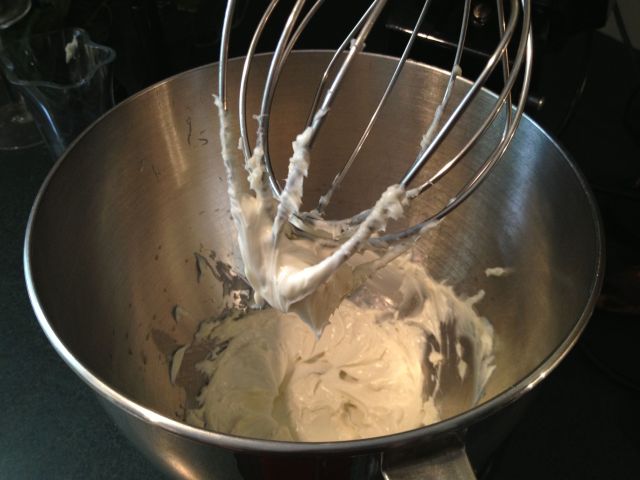
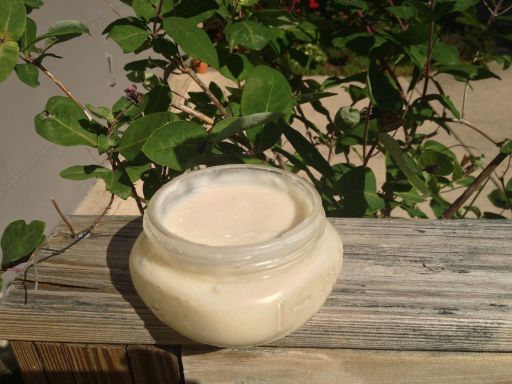
5. Once the mixture is back to room temperature, it should be semi-solidified. It’s also going to be kind of ugly and greasy looking. We’re going to give it some life by pumping air into it. Get out your mixer and whip it until it starts to look like whipped cream. Unlike whipped cream, you can’t over-beat this butter.
6. Transfer it into a clean container. The oils we’re using are all shelf-stable, but it’s still a good idea to put it in a container that can be sealed. You’ll also want to keep it out of direct sunlight. It won’t go bad in heat, but it will melt. If at any point your butter melts, you can use it regularly, or whip it up again.
Resources: Herb Mentor, Rebecca’s Soap Deli, Wellness Mama, Bloom Bake and Create, One Good Thing
DIY Beauty Bar: Flaxseed Gel For All Your Coiffure Needs
 Let’s talk about how sexy it is to run your fingers through someone’s hair after they’ve put gel or hairspray in it. Spoiler alert: it’s actually not that sexy. Even if you firmly reside in the “no one can touch my hair” camp (no worries, I’m your neighbor!), you have to admit that most hair holding concoctions leave a lot to be desired. They turn your thousands of lovely locks of hair into crunchy, hard clumps that have to be gently combed out so that you’re hair doesn’t break (ugh) or washed out before you even think about doing anything else with your hair (double ugh).
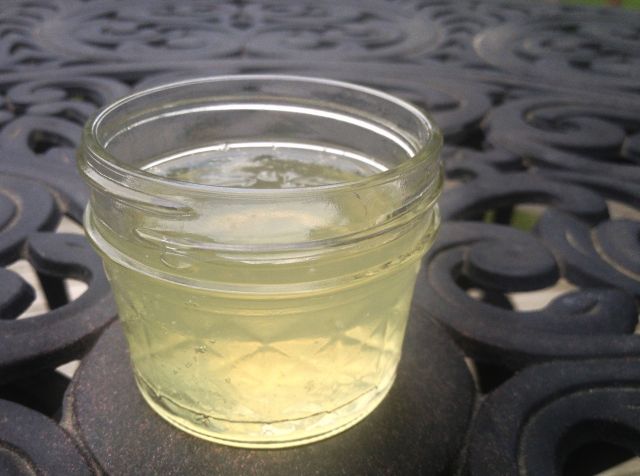
Flaxseed gel is not most gels. It somehow magically holds your hair in place while keeping it pliable. It doesn’t leave any buildup or flake off if you decide not to wash your hair immediately. And it’s next to free. The cost breakdown here is almost laughable because all you’re using is water, 2 tablespoons of flaxseeds (which go for $2-3/pound) and maybe a drop of essential oils. The only downside to it is that it’s a lot less shelf stable than most things I like to make. It’ll stay good for 2-4 weeks if you refrigerate it; meaning if you use a lot, you’ll probably have to make a new batch every month. Luckily, it takes less than 10 minutes to whip up.
Flaxseed Gel
Ingredients
1 cup of water – Whenever you’re making a homemade body product that involves water, you’ve got to take a few extra precautions. The short and short of it is that, just like water helps keep you alive, it can give sustenance to all kinds of gross things that you don’t want growing in your gel or lotion. If you want to know more, head on over to Crunchy Betty and read what she has to say. She’s funny and smart; I think you guys’ll get along.
2 T of flax seeds – When boiled, flax seeds turn into sticky mushy things that are perfect to use as eggs in vegan cooking, as glue for weirdo projects where you’re not allowed to use elmer’s glue and… as gel to keep your hair in place!
Essential oils (optional) I used tea tree oil and peppermint to make my gel smell good and to keep it from going rancid as quickly. You can also use lavender, rosemary or eucalyptus oil since they’re also anti-bacterial/fungal
Honey (optional) Honey provides a little extra hold and is a natural humectant, which means that keep your hair moisturized.
Instructions
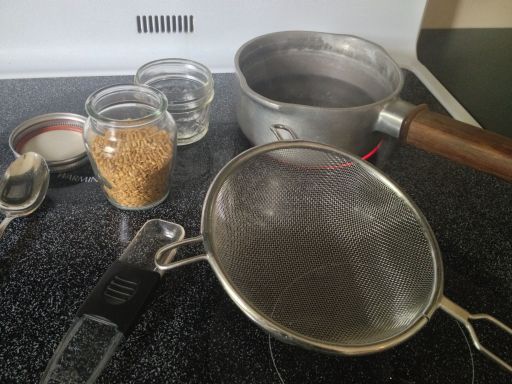
1. Pour the water and flax seeds into a pot and boil them.
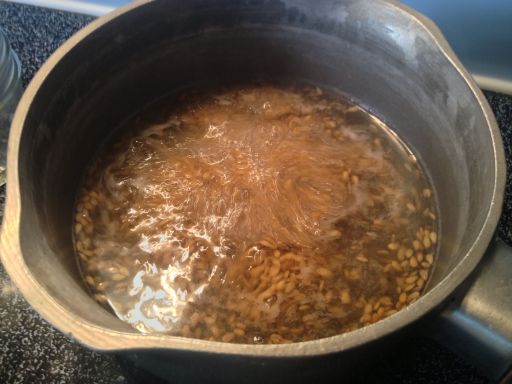
2. 5-7 minutes after it’s come to a boil, you should have a gel. Cook longer if you want a gel with more hold. My hair is really thick – meaning it needs a heavy hand when dealing with it but it’s also curly enough that if I stick it somewhere, it won’t really move on it’s own – and I go with 6 minutes.
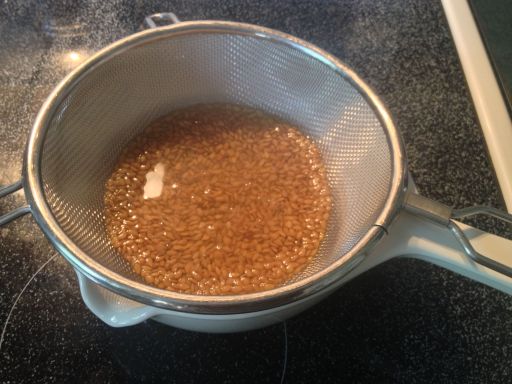
3. Strain the flax seeds out of the gel using a thin mesh sieve and/or pantyhose to squeeze out the really thick stuff that’s stuck to the seeds.
4. Add essential oils and honey if you want and put it in a sealed container, and store it in the fridge.
Resources: Naptural85, Black Girl With Long Hair, Crunchy Betty
DIY Beauty Bar: Pit Stop
 Contrary to popular belief, lots of hippies aren’t dirty. In fact, many of them smell pretty sweet, thank you very much.
I like to think that I smell positively floral. And a lot of that is thanks to my homemade deodorant. I’m gonna level with you here and let you know that the reason I initially switched to homemade deodorant (or any beauty products, really) wasn’t so much about my health as it was about a whole constellation of other things. Let me lay them out for you.
+ Cost: I find it really hard to part with my money when it comes to stupid things like toilet paper or tampons. Deodorant was just one more thing that I hated buying every month or so. But then buying the materials to make deodorant expensive too. $30 for a pound of cocoa butter? You’ve got to be kidding me. So I started with a cheap, easy recipe: coconut oil, arrowroot powder and baking soda. When I started making more of my own things, though, I started to realize that investing in raw materials wasn’t as expensive as I thought. Here’s let’s break it down:
2T of cocoa butter @ $30/pount (whole foods) or $14/pound (mountain rose herbs) = $1.80 or $0.84
2T of shea butter @ $18/pound (whole foods) or $14/pound (mountain rose herbs) = $1.08 or $0.84
4T of coconut oil @ $6/jar (trader joe’s) = $0.80
1 T vitamin e oil @ $3/bottle (trader joe’s) = $0.38
8 T of arrow root powder $6/bag (whole foods) = $.54
15 drops of essential oil @ $10/bottle (whole foods) = $0.10
7 T of bentonite clay @$5/jar (vitamin shoppe) = $1.09
OR
7 T of baking soda @$1.75/box = $0.38
Total = $3.88 – $5.79
And it lasts me 9 months. That is a thing that makes me very very happy.
+ Product: The real thing that drove me crazy about store-bought deodorant was how sticky it made me feel. I didn’t like that I had to scrub under my arms every time I took a shower and I didn’t like how I could literally shave it off my skin.
+ Consumerism: Call me a crazy anti-capitalist lesbian feminist, but I like when I don’t have to buy something that’s been researched and marketed to me. I like not putting money in the hands of giant companies. And yes, I know that Whole Foods is just another one of those companies that does things like base prices for their healthcare on discriminatory pseudoscience. You can’t win them all, you know? As soon as I can find cocoa butter somewhere else, I’ll be running in their general direction.
+ DIY nerdiness: In the words of Angry Chicken, I understand that there are plenty of people who would read this and say “why would I bother making that?” And to those people I say: I feel you. I have never in my life felt any need to knit or make my own pickles. But this is a thing I enjoy making!
+ Health: Last but not least. So I’m not quite sure what I think about aluminum and cancer because scientists aren’t quite sure what they thinks about aluminum and cancer. But hedging my bets on that is a nice little bonus of making my own deodorant.
+ + +
This stuff works differently from traditional deodorant and, as such, takes a little getting used to. Because it doesn’t block your sweat glands, you won’t feel quite as dry as you’re used to and this can be a little unnerving. I’m happy to report, though, that I’ve gotten nothing but positive reviews from my friends who I made smell me and assure me that I didn’t stink.
Even though it doesn’t prevent you from sweating, the powder added will absorb moisture, meaning that you won’t soak through your shirt. And if you’re worried about the oils and butters in this stuff staining aforementioned shirt, don’t worry! As long as you let it soak in for 30 seconds or so, you’ll be fine. I’ve been using this for months now and I haven’t noticed any oily (or sweaty) marks in my clothes.
Moisturizing Deodorant
Ingredients
2 T of cocoa butter (melting point 100°F/38°C) Cocoa butter is moisturizing and, as an added bonus, smells like chocolate. It helps keep the delicate skin of your underarms soft and prevents razor burn and ingrown hairs. It’s also incredibly shelf-stable and stays good for anywhere from 2 to 5 years.
2 T of shea butter (melting point 88°F/31°C) Shea butter does pretty much the same thing as cocoa butter moisturizing-wise. It’s anti-inflammatory and can help soothe razor burn.
4 T of coconut oil (melting point 76°F/24°C) Besides being moisturizing, coconut oil is antibacterial and anti-fungal. Which makes it perfect for deodorant. It helps fight the bacteria in sweat that cause odor.
1 T of vitamin E oil (liquid at room temperature) Surprise! Vitamin E oil is moisturizing. It’s also an antioxidant, which is great if you understand what that means. I don’t, but I like how the oil feels on my skin.
15 drops of essential oil (liquid at room temperature) Essential oils add a scent to your deodorant and, depending on which ones you choose, can also help fight bacteria. Lavender, tea tree, lemon, peppermint, grapefruit and rosemary are good choices because they’re antibacterial, antifungal and antiviral. Just a word to the wise if you’ll be exposing your underarms to the sun: citrus essential oils are photosensitive. Don’t use lemon or grapefruit (or orange, tangerine, lime, etc.) if you’ll be sunbathing as they’ll make your skin burn faster.
8 T of arrowroot starch or corn starch (solid, obvs. but just for fun: melting point 329°F/165°C) Arrowroot starch absorbs moisture and helps keep you less sweaty. If you’re concerned about GMOs or don’t like supporting the corn industry, arrowroot starch is a good alternative to corn starch, which does pretty much the exact same thing.
[7 T of bentonite clay: Bentonite clay is a weird, semi-magical substance that makes sure any possible smells stay away. A word to the wise: don’t store your deodorant in a metal container or stir it with a metal spoon if you use bentonite clay. I didn’t heed the warnings that somethingsomethingchargessomethingmetal and couldn’t figure out why I smelled so much worse when I travelled than when I was at home. After a little reading, I discovered that the metal travel container I stored my deodorant in was deactivating the bentonite clay.
OR
[7 T of sodium bicarbonate/baking soda: Baking soda absorbs odors and moisture. I used it in my first batch of deodorant but found it to be incredibly abrasive. The skin under my arms turned red and it looked like I got some kind of weird sunburn that only affected my armpits*. Avoid this if you think your skin might be affected my it.]
Optional: 1 T of beeswax (melting point 146°F/63°C) If you live somewhere that’s incredibly hot or if you just want a more solid final product, add a little besswax. It won’t do much for your body, but it will help the deodorant set up. If you don’t want to use beeswax but still want the benefits, try carnuba or candelilla wax.
Instructions
1. Sterilize your container. If it’s plastic, just wash it in really hot water. If it’s glass, boil it or run it through the dish washer. Pro tip: if you’re using a mason jar, either find 1 piece lids (good luck, I keep failing miserably) or hot glue that shit together. Otherwise you’re going to be annoyed every single time you go to open this stuff and have to lift off the disc part of the lid and end up getting goo all over your hands and your countertops. I speak from experience so just trust me here.
2. Set up a double boiler situation by placing a pyrex measuring cup or really any glass thing with a handle in a pot full of hot water. If you put a washcloth below the cup, it won’t jingle so I’d recommend doing that. Alternatively – if you’re not a massive hippy who care about things like potentially zapping the magic powers of cocoa butter – you can just melt everything in the microwave.
3. Measure out the cocoa butter, shea butter and coconut oil and stir them together while they melt.
4. Once they’re all melted, add the vitamin e and essential oil.
5. Stir in your powder(s) of choice.
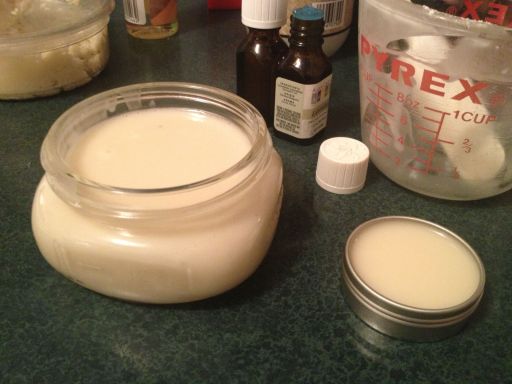
5. Pour it into your container, screw the lid on and put it in the fridge to harden. The consistency of the deodorant will depend on where you live, what season it is, if you have heating or air conditioning and how much sunlight it gets. I’d recommend keeping it out of direct sunlight to discourage anything exciting and disgusting from growing in there. If you live somewhere really hot and don’t want to use beeswax, you can even keep it in the fridge so that it feels cool and refreshing when it use it. It’ll melt on your fingertips and you’ll be able to spread it on.
6. Use it. You’re going to have to get a little friendlier with your underarms than you might have been in the past since you’ve got to rub it on, but this is actually a good thing because it means that the moisture gets fully rubbed in (meaning your skin gets all its benefits and your clothes won’t get stained) and that you won’t end up with little white lumps nestled in the folds of your skin half way through the day.
Sources: Hey Fran Hey, Crunchy Betty (a lot), Angry Chicken
* I really really really hate this word. I almost made it through the whole article without saying it once but I caved.
DIY Beauty Bar: Bottle Cap Clamshell

Click for more on A-Camp
So. You’ve been making all this fancy DIY beauty stuff. You’ve got your own tiny apothecary filled with chapstick and wax and face oil and dry shampoo, but where are you storing it all? True, it’s what’s on the inside that matters, but everyone appreciates a pretty little something, right?
Since Laneia and I are going to be making chapstick with our campers, we’ve got a how-to so you can play along at home. Before you mix up your lip balm, why not have a few beers and make a container for it? It’s a little bit time consuming and you just might super glue your fingers together, but the finished product is worth all the work.

Bottle Cap Clamshell
Ingredients
2 Bottle Caps
Wire
A straight pin
A rubber band
Superglue
A hammer
A nail
A piece of scrap wood
Wire cutters
Instructions
1. Use a hammer and nail to punch 2 holes right next to each other along the ridges of two bottle caps. Use the scrap wood as a surface so you don’t destroy your table.
2. On the opposite sides of each bottle cap, punch one more hole.

3. String wire through the two holes next to each other to make a little loop on the outside and twist it together on the inside to secure it. Do this on both bottle caps.
4. String wire through the single hole on one of the bottle caps to make a clasp. I twist the part on the outside into a hook and secure the inside by twisting the wire into a loop.
5. Cut the straight pin in half and bend it into an L shape. Poke it through the single hole on the other bottle cap and then twist the inside into a loop to secure it. This is what the hook with latch onto.

6. Superglue everything into place. This is important because it’ll keep chapstick (or whatever you store in it) from leaking out the tiny holes and it’ll keep the hinge and hook from moving the contents around every time you open and close the clamshell. Let everything dry overnight juuuust in case.
7. Cut a rubber band in half and string it through the little loops on each bottle cap and tie a knot.

8. Fill that baby up.
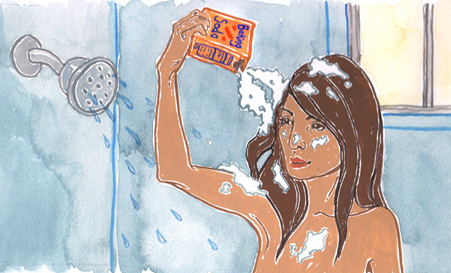
Where the Shampoo Ends: Tame Your Mane with Pantry Supplies
Being unemployed is interesting. For one, you have a lot of time to think and thus develop (and research) new obsessions. You also have time to reevaluate where you’re throwing your money. This is what happened when I moved to Montreal and had to restock my bathroom with shampoo and styling products. Apparently my ‘poo of choice is hard to come by without shelling out a ton, so by the time I made it to my sixth pharmacy and fourth organics store all I could say was, “Fuckit!”
It’s been six latherless months, but I still smell great.
Among my friends, I am late to go shampoo-free. We are not (all) hippies. We do not stink. And some of us now have glamorous shiny locks worthy of Pantene commercials.
Everyone had a different reason for converting away from ‘poo. One dude wanted to stop sending sulfates down the drain. My other friend started her dreadlocks last summer and couldn’t really wash anymore. My roomie was frustrated with the frizz ball that is fine, curly hair and humidity. Another friend could only deal with so much indoor snow before he decided to take drastic measures.
I put off going shampoo-free for years because I relied on styling products to maintain my ‘do. It sounded so weird and I couldn’t fathom how mere baking soda and vinegar could cleanse my hair of wax and spray. When I looked at my account balance, spending a chunk of change on shampoos and styling products seemed equally odd, so ‘poo-free it was.
Since I was a latecomer, my friends had already established a routine through research, experimentation and failure. Although a lot of them have backgrounds in science-type studies, the conclusions are anecdotal. In fact, trying to find the science behind our techniques makes me cry over the lack of consensus. So if anyone is a trichologist or happens to have a degree in sebum science and wants to yay or nay this article, please do so in the comments.
The Change
You’ll have to forget certain definitions and routines you’re accustomed to. Shampoo no longer means that gel that lets you turn your hair into a foamy mohawk. Conditioner no longer means opaque hair lotion. Lather, rinse, repeat has been struck from your mantras.
Your main goal in going shampoo-less is learning to embrace the Grease Beast by letting your scalp find its own sebum (ie. hair oil) production balance. Most shampoos use foamy sulfates to remove grease and debris, which also strips the hair of its natural oils. This means you’ll need to use conditioners and styling products with silicones to mask the dried out state and make your hair manageable again. These silicones are sticky little jerks that will stay on your hair shaft until there’s something strong enough to remove it like, oh say, a sulfate.
Given that this is a neverending cycle, you may have to just cold turkey it. It will not be that bad, but it’s great to do this when you have a lot of alone time in case you do become a grease monster.

VIA Earth911.com
Shampooing
Shampoo is supposed to clean your hair of grease and grime. Unless you work in a coal mine or run a marathon through the desert, your hair doesn’t get that nasty. Your scalp secretes your hair oils, so you’ll want to focus your attention there. Baking soda works as an abrasive to exfoliate your scalp of sebum, dirt and dead skin cells.
Fill a resealable container with baking soda and enough water to form a paste. Don’t overthink the water — you just want to be able to get the baking soda from the container to your head without out dropping it all on the shower floor.
Wet your hair and scoop a small amount of baking soda paste onto your hair. Focus on the roots and use your fingertips to scrub your scalp in small circular motions to remove buildup. Rub some more baking soda throughout your strands and rinse thoroughly.
Conditioning
Conditioner is supposed to smooth your hair and make it more manageable. You want to create a conditioner that neutralizes any remaining baking soda and leaves your hair slightly acidic. A low pH rinse closes your hair cuticle which will make the shaft reflect more light and sit closer to one another.
Fill a bottle with a combination of apple cider vinegar and water. My roomie and I use a 1:3 ratio, but some suggest as strong as 1:1 to dilute as 1:6. Experiment to see what works best for you and your hair. Do NOT use it straight out of the bottle since you could burn your scalp if you have sensitive skin. I kinda sorta like you, so I don’t want you to get hurt!
Pour the rinse over your head and massage it through your hair. Make sure you coat all of your strands and let it sit for a minute as you do other shower things. Rinse your hair thoroughly. Be warned, your damp hair will smell faintly vinegary, but it will go away when it dries. If this bothers you try adding an essential oil.
I promise this won’t happen unless you want it to. Jonathan Saunders Spring/Summer 2009 Via Juicy Mash Kulture
Waiting
It takes time for your scalp to rebalance its oil production. Everyone is different, there’s no way around it. Hold off on shampooing until your hair feels unbearably greasy. On non-wash days, you can choose to rinse your hair with plain water or leave it the fuck alone. Your scalp will slowly readjust so your greasy days won’t feel so gross and your in-between days will be fantastic. Currently I’m shampooing my hair every five days and no one has attacked me with Febreeze.
If you really want to continue washing with store-bought shampoo and conditioner, try to limit it to once a week. Use silicone-free products so you don’t have to deal with build up. They’ll be more expensive than your normal shampoo, but you’ll be using them at a slower rate. Anecdotal evidence says continuous shampooing causes a prolonged grease phase, but some people like their suds.
Styling
Natural grease tends to be a great styling product. Brush your hair with a natural bristle brush to distribute the sebum from the roots to the tips. Your hair will tend to stick to itself giving you volume and oomf that you didn’t know existed. Plus you can use the money you saved on waxes, pomades and sprays to support sites that help you save money.
Add texture with a beach spray. Fill a spray bottle with a tsp of sea salt and a cup of lukewarm water. Spritz your locks to add texture, separation and definition. If you want to add a bit more crunch you can try adding coconut oil or gel to your bottle.
Use starch as a dry shampoo when you’re short on time or have a particularly gross day. Simply shake some (I recommend tapioca or rice starch instead of cornstarch) onto your roots and use your fingertips to rub it in. Let it sit for a few minutes, then brush it out. The starch will absorb the excess oil and give your hair volume. If you have lighter hair straight starch is easy, but if you’re on the darker end of the spectrum you may want to try a tinted concoction.
You’ll find that the natural oils will give your hair weight, body and sheen. Like a fine wine, your hair will improve a bit more each day you go shampoo-free. People will comment on your hair and ask your secret. You can flip your mane directly into their face, wink and coyly say, “I secreted it myself!”
DIY Queer Beauty Bar: Wash Your F*cking Face
 I have a confession to make: I’m a closet hippie. I wouldn’t be caught dead in a pair of Birkenstocks and I wouldn’t go to a Phish concert if you paid me, but I’m a total sucker for all that close-to-the-earth natural stuff. Burn me at the stake; I’m a lesbian, it’s in my blood.
So anyway, as a sneaky (not dirty) hippie, I feel like it’s my duty to tell you about the oil cleansing method. It’s this totally weird way to clean your face where you use oils to get rid of the oil and dirt that likes to hang on all over your cheeks and forehead and nose. It sounds all counterintuitive, but I want to to harken back to high school chemistry for a minute. Remember how they were always talking about how like dissolves like and drawing pictures of Mickey Mouse water molecules? We’re gonna use that knowledge to make your skin beautiful.
Don’t believe me? Give yourself a month to try it out. It takes a little patience because your skin’s got to get used to the change in oils. Normal cleaning methods like soap and water strip your skins of its natural oils, which sends your pores into mini-overdrive to make up for what it lost. Since your skin’s used to making oil like there’s no tomorrow, it’ll take a little while to retrain it to cut back. Which means your face is probably going to feel like an oil slick for a few weeks. But hold on, young grasshopper, it’s worth it. It’s gobs cheaper than buying fancy ass department store potions or even the stuff from the drug store and it’s a nice little way to start your morning.
Materials
When it comes to the oil cleansing method, you’ve really got to find what works for you. A lot of people recommend starting out with a cleansing oil and a carrier oil to get a nice balance.
 |
Grape seed oil is really light and doesn’t have much of a smell. It’s also non-allergenic, so it might be a good place to start if you’ve got sensitive skin. |
 |
Olive oil is good for younger skin and dries slower than other oils, which means you may be left feeling oily for a while if you use too much. |
 |
Avocado oil is this really awesome green color. If you’re older, it might be the stuff for you because it’s crazy rich and moisturizing. It does leave a film on your skin even after you wash it off, so it’s good if you’re prone to dry patches or are used to using lotion after washing your face. |
 |
Sesame oil is a natural sun screen and is moisturizing. |
 |
Jojoba oil is actually a liquid wax. It’s absorbed easily and doesn’t leave your skin feeling greasy. |
 |
Sunflower Seed oil is anti-bacterial, which makes if good for fighting acne. |
 |
Almond oil helps remove itching and inflammation. It’s also great for dry skin. |
 |
Safflower oil is used to treat damaged skin. It’s very moisturizing, but doesn’t leave your skin feeling greasy because it penetrates quickly. |
 |
Argan oil is the superstar of the oil world. It comes from trees that only grow in Morocco, which means that you can easily pay $50 for a tiny bottle. It’s got all kinds of fancy vitamins and minerals, is anti-bacterial, anti-fungal and anti-inflammatory, slows cell aging and repairs dry skin. |
The mix you make should be at most 50% castor oil, with less than that if your skin is dry. I have a bottle of 20% castor oil and 80% grape seed oil that sits on my counter so that I don’t have to remix it every day.
Instructions
Using a dime-size amount of oil in your (clean!) hands, massage your face for about 2 minutes. After about a minute, you’ll feel little sand-like pellets start to form. Those are little pieces of dirt and oil from your pores. Gross, right? Right! But better out than in.

Give yourself a minute while you let your water heat up to as warm as you can handle without burning yourself; we’re going to steam that goo off your face. You can either run a washcloth under the faucet, wring it out and then let it sit on your face until it goes cold three times or you can splash the water directly onto your face. I opt for the splashing method because it’s important to use a clean washcloth when your pores are all open and vulnerable and I just don’t have that many washcloths. Afterward, splash some cold water onto your face to close your pores, pat your face dry, and you’re done — no toner, no lotion, just plain old oil.
Because I’m a product junkie and wholly incapable of simplifying anything, I dab tea tree oil onto anything that looks remotely impending-breakout-y after I wash my face to care those suckers away.
And ta-da, you’re done! Let me know if you don’t feel beautiful and luxurious and clean after a month or so.
DIY Beauty Bar: Wax On, Wax Off
You know how those nights go. You’re home alone, it’s late and you’re poking around on Netflix hoping to find a movie good enough to justify staying up until all hours of the morning. You eventually settle for the first decent looking movie with the word “lesbian” in the description, only to find yourself exhausted at work the next day, wondering why you thought it was a good idea to pass up sleep for Elena Undone.
 That’s how I found Caramel. The thing is, though, it didn’t suck. It was cute, the characters were interesting and insanely pretty, and I learned something new: you can wax your legs with sugar! Instead of feeling cranky the next morning, I leapt of of bed like an overexcited kangaroo and ran to the grocery. Three failed attempts and a melted candy thermometer later, I finally managed to make something usable.
Making caramel takes time and a little finesse. There are two ways you can go with it: the semi-solid, silly-putty route (like in the movie) or the painted-on liquid avenue. Today I’m going to teach you how to make the liquid version. The recipe is a little more forgiving because the temperature doesn’t have to be quite as precise for it to work, it doesn’t require nearly as much patience to use and you can easily bottle up your leftovers to use next time.
There’s something weirdly satisfying about waxing. Yeah, it’s time-consuming and messy, but it’s also a pretty fun way to spend an hour with yourself. That’s not to say it’s for everyone. Lots of people like shaving and lots of people like keeping their hair attached to their body and both of those things are more than fine. I’m okay, you’re okay.
But if waxing’s your thing (or might be your thing), start your crafty little engines. We’re talking honey-colored kitchen science candy that costs less than your tip at a salon.
Sugar Wax
Ingredients
2 cups of sugar
1/4 cup of water
1/4 cup of lemon juice
Other stuff
2 sauce pans
1 microwave safe jar
1 yard of 100% cotton fabric
1 knife

Instructions
1. Pour the sugar, water and lemon juice into a big sauce pan and turn the heat on medium-high.
2. Fill another sauce pan with water and boil it along with your wax. You’ll use this to clean the sticky mess out of your other pan a the end.
3. Stir the sugar water regularly to keep the bottom from burning.
4. When the sugar water starts boiling, turn the heat down to medium and start paying attention. This is when it gets tricky.
5. First, the sugar water will turn white and foamy, but eventually it’ll turn clear and bubbly again before it starts to brown.
6. If you’re using a dark pan, it’s hard to tell when the sugar water has changed into caramel. You could go out and buy a white pan or a candy thermometer, or you could just stick with the stuff you’ve got and count. Scoop up a spoonful of the stuff and count how long it takes for the bubbles in the spoon to disappear. You’ll know you’ve got the right consistency when the liquid in your spoon bubbles for three full seconds.
7. Pour the caramel into a microwave safe jar and then immediately pour your boiling water into the pan. It’ll save you a ton of time when you go to wash the dishes later.

Use
1. If you’re using the caramel right away, give it about an hour to cool down so you don’t burn yourself. If you’ve stored it, heat it up in the microwave for about 30 seconds.
2. Cut your fabric into strips. Mine are roughly 1″ x 3″, although I don’t try very hard to keep them uniform; I always end up needing one or two weird shape pieces.
3. Make sure whatever skin you’re waxing is clean. Dirt, sweat and dead skin will keep the wax from sticking to hair.
4. Grab a dollop of wax, smooth it against direction grain (the thinner the better), wait 10 seconds or so, slap on a fabric strip and the rip it off in the direction that the hair grows.
5. Lather, rinse. repeat. (Minus the later and rinse.)
DIY Beauty Bar: Make Your Own Lip Balm
 The summer after 7th grade, I spent most nights at my grandma’s house. After three or four rounds of Hand and Foot, everyone else would go to sleep and my cousin and I would tumble into our blowup bed in the basement and watch reruns of Whose Line Is It Anyway until The 700 Club came on at 2:00. One night, I remember Drew Carey switching up his usual lame joke about the winner getting to do “something special” with him at the end for a different prize: a lifetime supply of chapstick (one tube). My cousin, in all her sparkly-eyeshadowed and lip-lined glory, laughed along with the audience, but I knew this wasn’t something to be taken lightly. Winning a lifetime supply of chapstick would be a serious coup. Even as a fledgling gay, I was already going through a tube a month. Chapstick was and is my lifestyle choice. I buy bulk chapstick the way Mormons prepare for famine. Every bag, pocket and drawer I own has a tube of chapstick hiding in it somewhere.
With roughly 17% of my income going to chapstick (okay, not really, but I buy enough that it’s got its own line in my budget), you can imagine how thrilled I was when Laneia sent me a recipe for a homemade version. Although she was worried that we wouldn’t be able to figure out how to keep it from melting in the sun, with a little bit of tinkering we were able to come up with a formula that’ll stay solid all summer long and is stupid-easy to make. If you can find beeswax, you can make this stuff. Let us know how it goes, what flavors you come up with and if you figure out a way to duplicate Dr. Pepper chapstick in your kitchen. Seriously, I’ll buy you lunch.

Chapstick
Ingredients
+1 part beeswax
+1 part oil (we used olive, grapeseed, and coconut)
+Flavorings
+Containers (we used paint cups we found at the craft store and bottle caps)
Instructions
1. Grate the block of beeswax on a cheese grater.

2. Set up your melting station. We made this double-boiler type thing by putting a pyrex measuring cup in a pan filled with water on the stove. After the water initially boiled, we turned the stove down to medium low because the sound of the cup against the pan was driving us insane and crazy chapstick is not happy chapstick.
3. Decide how much chapstick you’re going to make. The first time we made it, we made tiny experimental batches (2 teaspoons of beeswax, 2 teaspoons of oil) of each flavor. The second time, we made two massive batches (6 tablespoons of beeswax, 6 tablespoons of oil) of the flavors we liked the most and it turned out spectacularly each time.
4. Pour the beeswax and oils into your measuring cup and stir until the wax melts. Add your favors, stir it for another minute and then quickly pour the mixture into a container.
5. Refrigerate it for at 5 to 10 minutes and you’re ready to pop it in your pocket and go.

Flavor Ideas
+Spiced Coffee: grind up coffee beans and spices like garam masala and cinnamon. The spices and coffee grounds rise to the top, so you’ll have to scrape them off before using the chapstick.
+Lemon: A little bit of lemon zest and some lemon-scented vitamin E oil make a refreshing chapstick if citrus is your thing.

+Buttermint: this one was inspired by a recipe for Jeni’s Savannah buttermint ice cream that I made last summer; you need 2 parts of butter flavor and 1 part of mint essential oil. It works best with a tasteless oil like (not extra virgin) olive oil.
+Coconut honey: use coconut oil and add honey. The honey will separate and go to the bottom, but the flavor gets infused through the whole thing.
+Cardamom Mint: grind up cardamom pods and add mint. This one is great with extra virgin olive oil for color and flavor.
+Vanilla Mint: all you need is half vanilla extract and half mint essential oil.
+Chocolate Cinnamon: Cocoa powder, honey, and cinnamon make a deep brown chapstick that tastes like brownies.
DIY Beauty Bar: Sweet and Tough Olive Oil Scrub

click for more on a-camp
As far as I can tell, camp is all about nature. Which means at some point you get dirty. Laneia and I planned ahead and made a face scrub that’s good enough to eat (literally) and strong enough to scrub off a hard day of play.

Sugar Scrub
Ingredients
Sugar
Olive Oil
+
Directions
Mix the sugar and olive oil together until you have a paste that’s the consistency of the sand you might use to build a sandcastle; not too wet and not too dry.

+
Use
This scrub is best to use at night because the oil washes off dirt and makeup and the sugar gets rid of dry and peeling skin. Take a dab the size of a quarter and massage it into your face in an upward motion. First your chin and cheeks, then your nose and lips, then your forehead. Use soap and lukewarm water (hot water can dissolve the sugar, leaving a sticky mess on your face) on a washcloth to wash it off. Don’t let directions stop you from being creative, though! Try it on your feet, elbows, legs, or whatever body part needs a little bit of help in the smooth skin department.
+
Etched Glass Jar
Ingredients
Glass container
Adhesive labels
Sharpie
Exacto Knife
Etching Cream
Paintbrush
+
Directions
1. First plan your design out. Draw it out on a piece of paper and then throw it away and draw something 8 times simpler. Trust me, you’re going to have to cut this thing out.
2. Draw your final design on an adhesive label and then stick the label on the jar.
3. Using an exacto knife, cut out the parts that you want to be etched.
4. Coat the cut-out parts with etching cream liberally (because that’s the only way we do things around here) and then wait 12 minutes.

5. Wash the etching cream and sticker off the jar and–this part’s really important–be careful not to touch your eyes. It’s probably goes without saying, but since I’m the one who has touched my eyes after cutting serrano peppers twice this week, I’m going to point it out anyway.
6. Pour your scrub into the jar and ta-da! You’re ready to launch your very own Esty store.

This post goes hand-in-hand with A-Camp’s DIY Body Care Products with Laura and Laneia.