
Homespun Love: Pour a Teacup Candle
It’s a well-known fact that making presents for people makes the world a better place. Not only are you taking time to create the perfect gift for your mom, brother, or girlfriend, you’re making sure there’s one fewer person at the mall and lessening the chance that someone will get trampled to death by the shopping masses. If you’ve got a little extra time and want to use your very own hands to show someone you love them, this is just the miniseries for you. See something you want to learn to make? Send me a picture to laura [at] autostraddle [dot] com and I’ll see what I can come up with.
Whether you’re living above the equator and could use a little extra light right now or chilling on the beach and need something to keep the bugs away, there’s a candle for that.
Inspiration
Candle Making
You will need:
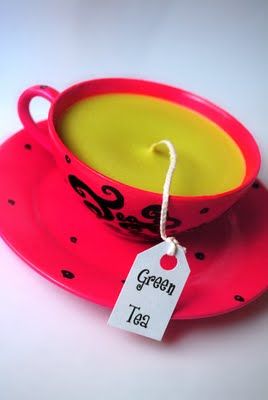
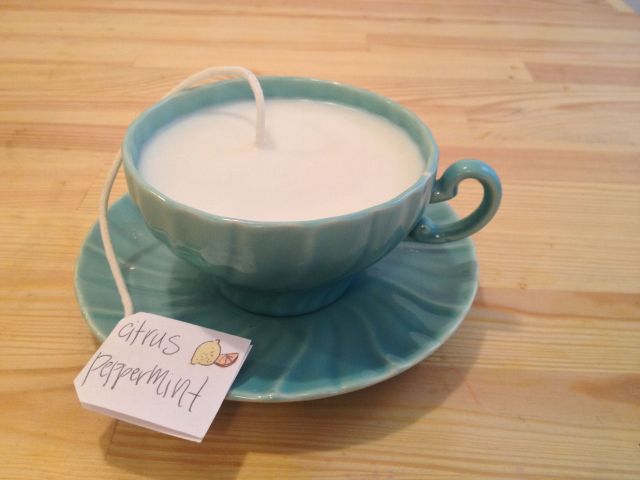
Teacups – Teacups are easy to find at any second-hand shop or antique store. Get a whole set or unmatching but complimentary singles.
Wax – Soy wax is a good alternative to paraffin, which is what most candles are made out of and a cheaper wax than beeswax. It’s basically just soybean oil that has had its melting point raised to that it’s solid at room temperature. Beeswax
is magical stuff that cleans your air and is good if you want something wholly natural.
Wicks – A candle works because the wick, well, wicks the fuel (usually wax or oil) up into the flame to keep it burning.
Wick clips – Besides being fun to say (wick clip, wick clip, wick clip), wick clips help keep your wick in place while you’re pouring your candle and keep the wick from floating to the top if all the wax melts.
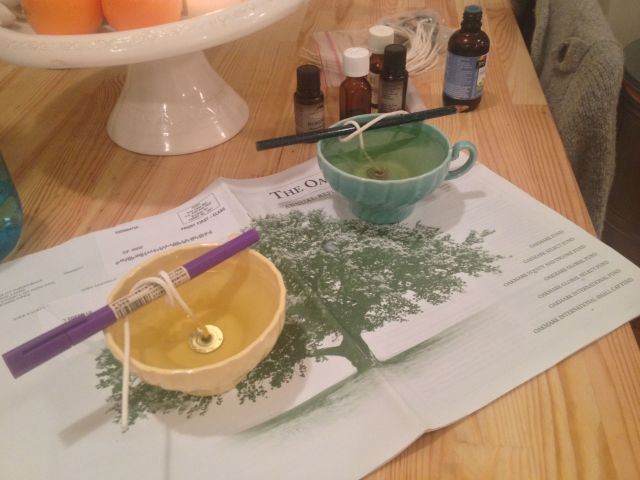
Essential oils – Optional for scent. Lavender is calming, peppermint
is seasonal, or something citrus-y
is nice and bright in the winter.
1. If your wick came separately from your wick clips, put those suckers together. All you’ve got to do and slide the wick into the clip and clamp the little metal stem around the hole shut with pliers.
2. Set your oven to the lowest possible temperature and pop your teacups in there to warm them up. they shouldn’t get any warmer than 125ºF/50ºC
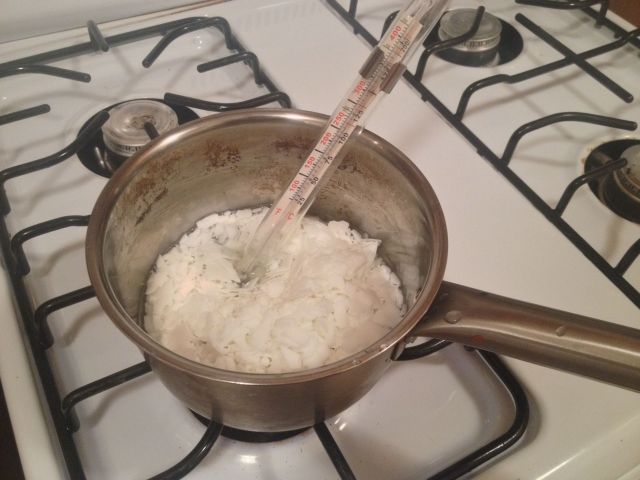
3. Set up a double boiler and melt your wax. It should reach about 185ºF/85ºC.
4. Turn off the heat and allow the wax to cool to 175ºF/80ºC. Now you can add your essential oil. Start with just a few drops and work up until you get the strength and scent you want.
5. Pull out your teacups one by one to affix the wick. Pour a little bit of wax into the cup and stick the wick clip to the bottom. Wrap the top of the wick around a chopstick or pencil rested on the top of the cup to keep the wick straight.
6. When the wax begins to solidify, you can start getting down to business. Put some newspaper under the teacup so that the wax doesn’t get everywhere (it’s possible to get off a surface or out of cloth but it’s really not a fun way to spend an hour, trust me) and then start pouring.
7. Wax expands when it’s warm, meaning that your really full teacup will be significantly less full as the candle cools. When the wax starts to set, poke a few holes in it to prevent air bubbles and then pour some more wax on top.
Decorating
You will need:
Matches
Paper
Scissors
Pens
Tape
1. To make the wick look like a tea bag, don’t cut it (yet). Instead, make a little label to hang off the end that looks like a tea bag label. Write the scent of the candle on one side and directions to trim the wick to 1/4″ before using it on the other side and attach it.
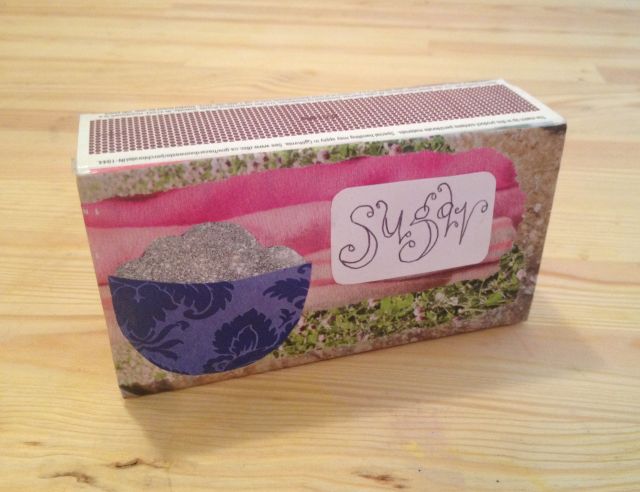
2. It’s hard to find pretty matchboxes at restaurants any more, so get a big box from a grocery or hardware store and decorate it. I’m sticking with the tea theme and making mine look like a box full of sugar cubes.