Back when I was a wee baby, taking my first college steps, I told myself that it was okay to sometimes drink gin and often smoke menthol cigarettes as long as I remained a vegetarian. You know, kind of like Christmas for little kids: “Please please please, I will feed Benji everyday for the rest of my life if I can just have that Furby!”
With grad school looming on the horizon, my drinking and smoking “habits” are beginning to seem more like “lifestyle choices.” So, in an attempt to restore balance — as a good Libra would — I have decided to take up composting.
Composting is really rad for the environment and you’ll have nice fertilizer for herbs and other small plants. It’s a great alternative to the store-bought, chemically infused junk. Using composted materials improves plant growth and nutrient intake!
Now, I live in a small house with my twin sister and my best dude friend and a dog and a cat and a miniature pig. What I’m saying is: we ain’t got room for nothing — plus: I spend a good majority of time pig-proofing the place. Thus I needed a small, odorless kitchen bin so as not attract cloven hoofed creatures. On top of all that, I’m usually flat broke, so I needed something cheap.
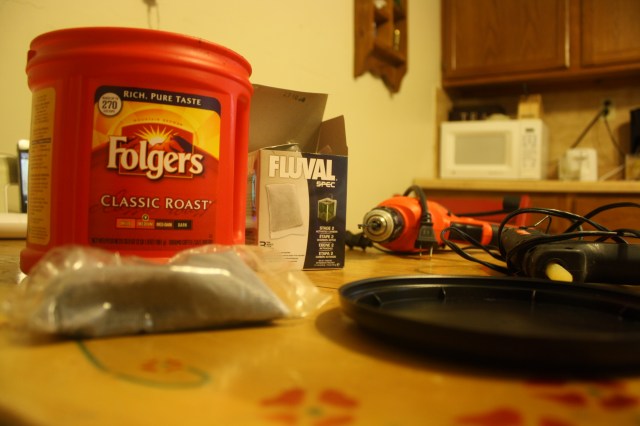
For those of you in similar situations: I have solved the problems of cost-effective, animal-proof, kitchen composting. Here is a photo of the materials I used.

You Will Need:
Container with a lid — Keep in mind it’s cheapest if you use what you’ve got around the house. I had an empty Folgers canister; others will have kitty litter tubs, Tupperware, etc, and those work fine too.
Charcoal filter — This traps odors. I used fish tank filters, but litter box filters are usually under five bucks and work great, too. If you do use a litter box filter, you’ll probably need scissors to trim excess.
Filter-securing plan — hot glue gun, super glue, wood glue, etc.
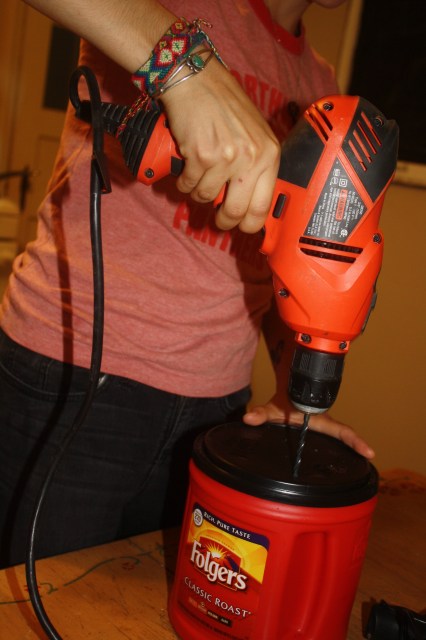
Hole-making plan — I used a drill with a ¼ bit piece, but you can always use a hammer and nail to punch holes in the lid.
After you’ve got your gear, you’ll want to begin by punching holes in the lid.

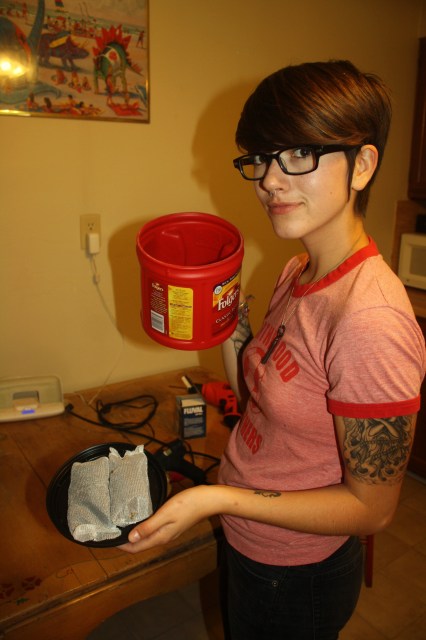
Next, you’ll take your filter and glue it into the underside of the lid, right over the holes. If you’re using fish tank filters like I did you’ll want to glue the packs together before you glue them into the lid so as to prevent gaps. If you’re using a litter filter, just trim the filter to fit snugly into the lid.
Let it dry.
And, boom! If you’re 5’4″ with short brown hair, your finished product will look like this!

Making a kitchen compost pail is quick and easy, so really, if you’re an environment loving queer you have no excuses not to DIY the shit out of this project. If you’re interested in making larger bins, go here to get started.
Don’t forget this trick of the trade: making compost requires oxygenation and celebration. So, about once a week you’ll wanna get that bad boy out and do a little victory dance. Shaking up the contents helps with aeration—the secret to good composting. And finally, here’s a learn what you can and cannot put in the bin. You’ll need to balance your carbon and nitrogen levels so it’s important to layer your kitchen bin properly.
Have any of you done this project before? Any tips, tricks, ideas for others interested in making their own garden magic?
![]()
This article was brought to you by the hardworking people of Autostraddle, the world’s leading independently owned queer-lady website! If you loved it, you should donate to our bitchin’ fundraiser and be part of the revolution! We’ve got until September 7th to reach our new fundraising goal and you can read more about what’s in it for you here. Every little bit counts. Thank you!


