Let’s DIY Some Cozy No-Sew Blankets!
It’s January, so you know what that means. It’s time to retreat to our beds and cuddle up! In honor of hibernation season, I’m coming to you with a very fun, simple DIY project: making no-sew blankets!
No-sew blankets were big when I was 13 (or maybe I just thought they were). I grew up with an older next-door neighbor who introduced me to the beauty of JOANN Fabrics. We used to regularly make trips to get different materials and make these super easy, mostly child-friendly crafts. Back then, the process of making these felt tedious and long. They still are, but it’s much more manageable as an adult. It takes two hours instead of two days. We’re going to keep it very, very simple here. All you’ll need is two different fabric patterns, a good pair of scissors, and a ruler.
How To Make a DIY No-Sew Blanket
The first thing I did was go to a fabrics store. Upon entering, you will inevitably see a fabric section with a million eye-catching patterns. Once you find the rolls of fleece, go wild! Search like you’re on Project Runway!
You’ll need two different fabrics, so choose whichever two you’d like. You don’t have to restrict the fabric to just fleece. but if you’re just starting your journey with us in DIY land, I’d recommend sticking to fleece.

I’ve done a million fleece blankets and sometimes the texture of fleece rubs me the wrong way, so I opted for one side of fleece with one side of non-fleece. Whales are my favorite animal, so I obviously went with the fleece whale pattern.

In a non-fleece section, I found this very soft baby blue fabric. I prefer coordinating my patterns together, but you can pretty much do whatever you want.
Once you find two rolls you like, you’ll take the roll up to the cutting counter where you can tell them how much you want. They only measure in yards, so you might need to do some converting. Or, if you’re like me, you can just eyeball it. I went with 2 ⅓ yards, but next time I might go a bit bigger. You pay for the fabric per yard, so that’s also an important factor in choosing how much you want. The width will be the same for the whole roll (this one was 57 inches), so you’re only adjusting the length. Make sure to have them cut the same yardage for both of your patterns.

Once you’re ready to start the crafting, you’ll want to determine which sides of the fleece you want facing outwards. Lay your fabric on top of each other, so that the outward-facing layers are the ones that will actually make up the blanket. If you notice that the two fabrics don’t completely line up, go ahead and cut off any leftover fabric so they match up.

The most important rule to follow is not to move the blankets once they are aligned!! Once you’ve placed the fabrics in their spot, they should not move until you’re completely done with the project.

You’ll start by cutting out the corners. Now that we’re ready to start cutting, on each corner measure out a 4-inch square and cut this out.

Once the corners are gone, it’s time to start cutting tassels!
You’re going to cut the edges of the blanket on all four sides into strips. They should be roughly one inch wide and match the four inch height we already marked by cutting out the corner squares. You will make many, many, many cuts. This part takes the longest and could be rough on your hands, so make sure to take breaks.

Tie the strands together in a double knot. Once you’re finished with an edge, or even half-finished, you can go in and start trying the bottom and top strands together in a double knot.
Make sure to leave the two strips next to each corner unknotted until you’ve cut most of the sides. Once you tie the corner pieces, the few inches around the corner will curve in, and that might throw off the measurements for your cuts.

Make these one inch cuts and double knot ties around all sides of the blanket. As you tie these cuts together, the two fabrics will become one thick, warm blanket.
Once you’re finished tying, you’re done! There may be some fabric straps lying around so I like to shake out the completed blanket before I throw it on the couch.


Congrats! You made a super easy, cozy DIY no-sew blanket to throw on your bed or give to your winter snuggle buddy.
Join Me in Making DIY Holigay Soap
It’s the holigay season! It’s time to do cozy things and get gifts for your loved ones. I figured I would do you a solid and tackle both of those things in one fun post! Last month we made a variety of homey candles and this month we’re learning how to make DIY soap. Nothing is more queer than making your own soap with intention and love to give to your holiday office/school/local barista/Trader Joe’s crush.
Unlike my candle adventures, soap-making is very new to me and I’m still trying to figure out the best mixtures and methods. This guide does not include making soap from scratch. We have less than a week until Christmas so no one has the emotional effort left in them for that. Or, even if you do, you don’t have time to experiment with what works best. We want a quick, homemade, fairly inexpensive gift to have at our disposal for those office Christmas parties happening next week or your in-laws who say that don’t want anything. Let’s do it!
How To Make Soap with An Aloe Soap Base
You’ll need to gather some ingredients from around the house, in addition to ordering some online.
The soap base and silicone molds create the foundation and personality of the soaps, so you’ll want to put some thought into what might work best for you. I decided to try an aloe base and an oatmeal base. The aloe will give the soap a translucent appearance and it will also have anti-inflammatory properties. The oatmeal will come out a creme color and will be more moisturizing. As for the molds, you can get a generic square or rectangle for pretty cheap. I decided to try a pack with the classic rectangle, a round flower design, and a rectangular wave-looking design. Soap is pretty easy to get out of silicone, so you won’t need to worry about the intricacy of the design as much as you would with, for example, resin.
Once you have your soap base and mold picked out, you’ll need your mix-ins ready to go. I am an essential oils hoarder, so I used a variety of little potions I have. A classic oil like lavender or eucalyptus will always be a big hit. Additionally, you can add other properties to give the soap texture or style. I have a collection of dried flowers I bought from Amazon just for craft making, so I paired the lavender flowers with the lavender scent. You can also use natural ingredients from around the house like lemon zest or whole oats. Many blogs online suggest using food coloring, but the thought of rubbing the chemicals into my hands repeatedly didn’t feel comfortable to me. I didn’t have any vibrant fruit on me, but if you have any type of berry you can blend that to a puree, strain it, and use a little bit in the soap to make a natural dye.

Melt the aloe soap base first. I melted mine over the stove on low heat, but you can also melt the base in sections in a microwave safe bowl.

Once the base melts down, you can either pour it into each individual mold and then mix in the scents and add-ons, or you can do it all in the pot. I chose to make each bar individually since I wanted to try different methods.

For the first three bars I decided to go out on a limb and combine tea tree essential oil with a little water and matcha powder to give it a naturally green hue. I’ll be honest, it didn’t turn out well. You’ll want to vigorously mix the matcha into the water, but even then the matcha can come out grainy and uneven. Use at your own risk.

For the other three bars I mixed a drop or two of lavender essential oil with a bit of water and dried lavender for each individual rectangle. I, then, poured the hot soap base into all of the molds, making sure to mix them each so the oils spread throughout the bar.

Now, just let it sit overnight so that it can harden and dry.
How To Make Soap with An Oatmeal Soap Base
Melt the oatmeal soap base first. Once again, I melted mine over the stove on low heat, but you can also melt the base in sections in a microwave safe bowl. I used the oatmeal soap base and the two decorative molds.

While the oatmeal bars melt down, prepare your mix-ins. I decided that all four of my wave-looking bars would be menthol-scented. I have an oil mix created for clogged sinuses, so this can be a fun gift to give during cold weather months. Two of my flowery round molds will be peppermint scented and the other two will have hints of lemon.

Similar to the water and oil technique I used for the aloe bars, I put a few drops of my scent into the base of the molds and mixed it with a little water. I poured it into the base, mixed it together, and let it sit overnight.

I, then, melted more blocks of oatmeal soap base and prepared my round soap molds. For two of the molds, I dropped in a hint of peppermint oil with some water, and for the other two molds I decided to be adventorous. I took some black unsweetened tea from our fridge and mixed it into the bottom of the mold with the lemon oil to create the effect of a warm cup tea. I also wanted to make sure I could visually tell each grouping of bars from each other.

Remember to use different utensils for bars with different scents so you don’t mix two scents together. I used chopsticks… it’s truly DIY in my home.

Now, you just let all of it set overnight! I let mine cool for about 9 hours before removing them from the molds, but they could’ve sit a few hours more.
In the end, the aloe texture came out slimier than I expected, but the oatmeal bars held their shape and texture almost perfectly! If I were to do this again, I would make them in larger batches where I mix the oils in with the soap base in the pot. I think mixing them in with the water individually left the bars slightly uncured.

All you need to do now is wrap it up to make it look like a little hallmark handmade present! I bought some rustic string from IKEA for about $3 and tried a few different yarn wraps. While this certainly doesn’t look perfect, it gives you that fireplace winter vibe that we’re craving. Another great option is finding cute fabric gift bags to pop them in.

Let me know in the comments if you have any tips or tricks. Happy soap making and happy holigays!
Join Me in Making Some DIY Holigay Candles
The holiday season is quickly approaching so you know what that means… decor! gifts! homey things!
Putting aside all the stress that these next few months will bring, I want to invite you to join me in utilizing this time to make things for other people with lots of love. Even if gift-giving isn’t your love language, making little crafts can be a “productive” way to decompress. We’ve made bracelets together, but I’ve been itching to take my crafting skills up a notch!
Deep in the caves of the pandemic, I picked up candle making. I can’t remember what exactly sparked this new interest, but I remember being extremely let down by my lack of success with resin. Maybe this was my redemption craft? The good news for you and me is that candle making is much easier than resin, and it makes very personal, thoughtful, and inexpensive gifts for the loved ones in your life.
I’m going to walk you through making your own classic wax candles, but I’m also going to show you a method I’ve become fixated on (truly, I’ve had many dreams and sleepless nights over this) via TikTok: The floating vase candle. Most importantly, we’re going to avoid making generic candles and I’ll offer some simple ways to make your candles unique to the person you’re gifting them to.
First up Is the Really Simple, Suburban Mom TikTok Vase Candle!
You’ll want some type of transparent vase. I used this tall, glass vase I found on Amazon, but you could really use anything you find in the thrift store as long as it’s completely see-through. You’ll also need some small floating candles, transparent water beads, and any small decorations of your choosing.
Before you can assemble your floating candle, you’ll need to soak a few teaspoons of the minuscule water beads in water for at least six hours. For my vase, I scooped in about three teaspoons of little beads, filled it about ¾ up with water, and let it sit while I went to work. When I came back it looked like this!


Once you’re ready to assemble, drain the beads in a strainer so you can place your decorations step-by-step. I decided to get some fall-colored ribbons and pumpkin charms to spread throughout my vase.


So, I started by pouring in a base layer of beads. Then, I cut the ribbon, stuck it in the bottom with a charm, and filled up the base with more beads. You can repeat this with any of the little trinkets you want to put in the vase. The beads hold the items in place, which will eventually give off the floating effect.


Once you’ve filled the vase with all your decorations and beads, fill the vase up with water and place the floating candles on top. Look at that! You now have a decorative candle that can change with every season. I am planning to personalize a few of these and give them as gifts!

Now, a More Traditional Candle!
This is a bit more involved, but I promise not impossible.
To create a basic candle you’ll need:
- wax (or other candles like tea lights)
- wicks
- a hot glue gun
- popsicle sticks
- something to hold the candle in
- a metal contraption to heat up the wax like a pan or double boiler.
I’ve added more colors, scents, and decorations, but we’ll get to that in the next step.

This process moves pretty fast so you’ll want to do most of the prep work before you get the wax melting.
You’ll first need to plug in the hot glue gun and then glue the base of the candle wicks to the candle container. I’ve used two small square glasses I found at the thrift store, but you can use anything as long as it has a balanced shape and can hold hot temperatures.
After this, I cut the wicks to the candle height and got out my decorative pieces. Since I like making things personal, I usually order dried flowers off Amazon (or if you are able to forage them that’s even better) and small gemstones to incorporate throughout the wax. Again, you don’t need this part but I often make little thoughtful personalized candles under a theme, such as “inviting love” where I put dried rose petals and rose quartz in with a fruit or citrusy scent. For this candle, I decided to go with chrysanthemums, garnet, and citrine to stay with colors and a general theme of healing. If you have metal wick stabilizers you’ll want to throw those on as well. I found mine at Goodwill, but you can also just use two parallel popsicle sticks.

Now that you have a plan for what will go in your candle, it’s time to start melting wax! For this part, you can use a regular sauce pot or get a metal wax melter (the one shown in the first picture) and hold it in a boiling pot of water or put it on a hot plate. I find the double boiler situation a bit clunky and I don’t have a hot plate, so I got this saucepan for $5 at Goodwill that I dedicate only to crafting. The little candle-making kit I also found at Goodwill included candle coloring as well, so I threw some red dye in there. I typically don’t color my candles, but it seemed fun this time.

Use a popsicle stick to continuously stir the wax until it’s melted. If you’d like a add a scent in, you can do this once it’s melted. This random candle-making kit I found at Goodwill even had scents, so I added a few drops of the apple pie one!

Once that’s all mixed in you can start pouring the wax into the vases. I decided to put flowers up against the glass to create an imprinted effect, but again at this point, it’s all the artist’s choice.

After pouring in half the wax, I realized I didn’t have enough melted so I improvised (here’s where the “other” candles come into play). I have a cheap box of tea lights I keep around for this exact reason, so I pulled the wick out and plopped one in.

Now that our candles are full to the brim, it’s mostly a waiting game. If you drop the crystal gemstones in now, they’ll just sink to the bottom, so I typically wait an hour or so before I add them to the solidified top. As you can see below, the flowers didn’t totally come out as planned, but the crystals on top add a nice touch (especially if you are giving them to someone and explaining what it’s charged with).

Now that you’ve made all different types of candles, you can give them away or arrange them on your coffee table like this!

Happy fall candle-making cozy queers!
Wanna Trade? A DIY Guide to Making Friendship Bracelets
Friendship bracelets, keychains, and shrinky dinks were my go-to during play times or while away at summer camp. Even as a summer camp counselor, I opted out of rock climbing, hiking, swimming, and pretty much all sports to craft with a bunch of kids all day. Whether I was making it for a camp crush or my new BFF, it was always made with thoughtfulness and love. Something with that much intention, especially at a sleepaway summer camp, feels very gay, don’t you think?
While I’d like to think this whole trend stems from a group of millennials getting together and reminiscing about the innocence of youth, credit is due to rave culture where festival attendees have been swapping kandi for years. I don’t personally have experience with kandi, but I have quite a few friends who have pointed out that Taylor Swift concert bracelets are anything but novel. However, I am forever grateful for this growing trend, because I am SO here for making bracelets for literally any and every event. I did, indeed, go to the Eras tour, but I made it gay.
In addition to lyrics and references, I made a batch of bracelets that said “I’M GAY UR HOT” with my phone number. During our specific night, MUNA opened for Taylor Swift, so my game plan was to look around in my nosebleed seats to see who else knew all the lyrics to every MUNA song. Unsurprisingly, most of the crowd was uninterested, except for this group of people in the adjacent section who were screaming “Silk Chiffon.” We instantly acknowledged each other and playfully gestured to each other. It got real when lead singer Katie kissed her ex and current band member Naomi. I turned around and screamed at the other MUNA queers. I knew I had to give at least one of them a bracelet. So, after their set, I went to the bathroom and happened to pass by one of the cute folks from the group. I made some small talk, said something about how pretty she was, and gave her my bracelet! Nothing happened after that, but I got to relive my camp days as a queer adult, and at the end of the day, that’s what bracelets are made for.
I’m going to make some more gay bracelets to wear proudly and maybe even give out. Want to join me?

Let’s start with the clay beads first. These are much smaller, much more delicate, and much more time-consuming than plastic beads. Typically, these beads come in kits such as the one in the photo above. The opening for these beads is very small, so you’ll want to use a thin, elastic string. You know, the annoying kind that’s difficult to knot (we’ll get to that). I usually wrap the string around my wrist and then add a few inches for good measure before making the cut.

Once I have my string situated, I take my little bead pliers and pick out the letters for what I want to spell. For this bracelet, I went with “HI BI.” Then, I decided what colors I wanted and which order and placed them right next to the beads. For this bracelet, I kept it simple with a bisexual pink, purple, and blue alternating pattern.


This next part everyone does a bit differently, but because I’m not the most detail-oriented and simply get confused easily, I like to string the letter beads in the order I want them to appear, and leave room on the left and right to add the colors afterward. For this bracelet, I wanted the little hearts between each of the words, so I started with the pink heart, then the “H,” and then “I,” etc., stringing them from the right side of the string to the left side of the string. If you’re going to do it my way, you MUST hold on to the left end of the string so that the beads don’t immediately fall off once you slide them on.


Once I have the words in place, I add my pink-purple-blue pattern to the right side and count out six sections of this combination. Then, I do this to the left side. Again, make sure you are holding on to both ends so the beads don’t slip away.

After this, it’s pretty much a copy and paste situation. Sometimes I like to add little charms like these gold squares to visually break up the pattern (and because this process takes less time the thicker the beads are). The most important part is the symmetry, so make sure you’re counting out how many units of your combination you want between each charm.

When you’re finished with your beading, carefully bring the two ends together and knot them as many times as you possibly can. I’ve tried all the little tricks for tying elastic string more effectively, but they just don’t work for me. After each knot, pull the string tightly before knotting again. You should need to do it about four to five times.

You did it! Now, onto the easier, less time-consuming bracelet!
For this type of bracelet, it’s easiest to go with a thicker, more knot-friendly string. Since the bead holes are fairly large, you can’t really go wrong with any type of string or pattern. Just like the previous bracelet, measure the string around your wrist but factor in a few more inches since the beads will take up a bit more room. You’ll want to decide your color/pattern scheme and lay that out with the words. Since I live in good old Florida, I decided to stick with the classic “SAY GAY” in rainbow, but to break it up I decided to add some pearls to it.

Again, I like to complete the phrase I’m putting in the middle before I add the colored beads, so I strung them right to left with the pearls. I completed the rainbow pattern on the right side, and then on the left, making sure to hold both ends so the beads don’t fall off!

The knot for this type of string is so much easier than the string for the clay beads! You can just do a regular tight double knot, and it should hold.

Now you have the gay friendship bracelets of your dreams! Happy crafting!

How To Make Valentine’s Day Cards for Your Friends
Feature image by Anna Kurzaeva via Getty Images
It’s my favorite month! The month of love! It’s like Ashton Kutcher says in Valentine’s Day: Why can’t we make every day Valentine’s Day and leave only one day for hate and negativity? While the logistics of that actually scare me a bit, I think he makes an excellent point. I’ve been trying to work on showing more gratitude and appreciation for the people in my life on a regular basis. Just the other day, I told a friend “thanks for not giving up on me,” and I think that’s the goal with creating little love messages for your friends: We’ve been through shit, and sometimes we need to thank the people who got us through it.
This Valentine’s Day, consider sending your BFFs one (or all) of the following vessels of love.
DIY Valentine’s
nastya_ph via Getty Images
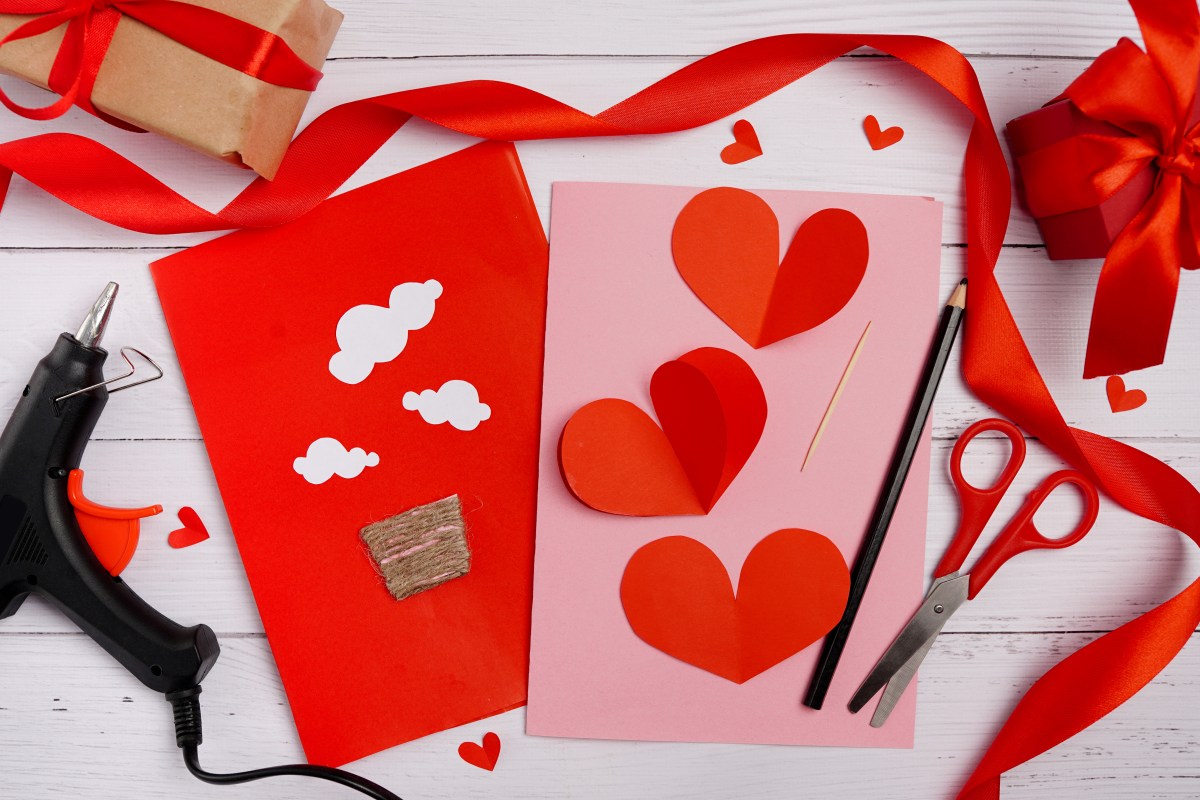
Remember in second grade when you spent an hour cutting up red and pink paper and gluing shiny things to it so your teacher could hang them up for the week? Or maybe in fourth grade when you were required to come in with little cardboard Valentines Day cards for everyone in the class? Let’s bring this back (but only for people we actually like)!
This particular expression of appreciation isn’t so much about the message as it is about the craft. You don’t need to be a DIY expert or even that creative. The end product should give 1st grade school project. Grab some colored paper, glue sticks, glitter, or anything that feels like love to you, and stick it all together! You could go for the classic heart cutout, or if you want to get really crafty you could print out a picture of the two of you to tape on with a bunch of fun stickers.
Pros: It’s nostalgic and heartfelt
Cons: It requires physical supplies and at least a few days of prep work
Card-Printing Services

Anna Kurzaeva via Getty Images
We’re talking places like Tinyprints, Shutterfly, or even Canva. Because these platforms have made basic graphic design super accessible, your creative options are endless. You can choose pre-made Valentine’s designs or make your own. You can upload personal photos to add to pre-made designs, too. Ideally, you would want to create a card you could send out in bulk (so, not super personalized). Since one of my resolutions is to become the friend I want to be (the helper, not the one always in survival mode), I opted for the Canva card this year. I don’t want to share too much detail since they are on their way to my friends’ mailboxes now, but I included a fun photo of me with the phrase “YOU’RE A BAD$$. Never forget how much you are loved!”
Pros: It’s creative and heartfelt
Cons: It can get expensive and will require planning in advance
Virtual Valentine’s

Malte Mueller via Getty Images
I feel like I’ve only ever received these from distant family members or semi-questionable bosses, but I think it’s time we reclaim them! Jib Jab, Renderforest, and Smilebox are a few of the sites that come to mind, but you can find them everywhere nowadays. Each site will pretty much walk you through how to create one of their cards, so all you’ll really need are the photos you want to use (close-up photos are the best) and your friends’ email addresses. The mood of these cards is typically energetic and over-the-top, so goofy pictures are encouraged!
Pros: There is practically no prep time involved and it’s typically free
Cons: People will know that you spent practically no time on it
A Good, ‘Ol Fashioned Email

Juj Winn via Getty Images
I came up with this in college. It’s not that it’s any revolutionary idea, but for a broke student with no time it seemed pretty inventive: all the love, none of the investment. Instead of a flashy email with moving pictures and audio, this is a straightforward, deeper version of a “thinking of you” text, which I guess is the modern version of an Anne Lister diary entry/love letter.
The typical outline I use consists of: setting up the context with a little explanation (this is a love letter to you, my friend), an overview of all we’ve been through over the past year or so, a genuine list of qualities you love about them, and a note of gratitude. The more specific and descriptive, the better! It could take you 10 minutes or an hour, but the easy part is sending the email straightaway.
Pros: It’s free and allows you a lot of space for all your feelings
Cons: Not as flashy and can visibly come of a little like a business memo
No matter what avenue you choose, remember the one thing these all have in common: love. As long as your thoughtfulness shines through, you’ve done it right. Now go spread the love!
To Hobbies I Have Loved (and Lost) Before
It all started with a banjo.
It was years ago. I’d just moved to Seattle, and I was brimming with the optimism of a youth who thinks a new place can turn them into a brand-new person. I thought hard about who I’d be in this strange new place, and finally, somehow, landed on an instrument. I would be a person who played the banjo. I made my way to the perfect basement music shop across the street from my new job, Dusty Strings, and I signed up for a six-week class. On the first day of lessons, I lugged my brand-new banjo in its heavy case the six blocks to the bus stop, then hoisted it onto the bus. I stowed it under my desk at the office, waiting eagerly for six o’clock.
And then I fell down the stairs at work and broke my finger. First week on the job, too!
What followed were six weeks of banjo classes — I still went! — but, sadly, I couldn’t learn the chords, not really. I learned the rolls, which were played with the right hand. The chords remained elusive. Later, when my finger healed, I went to learn my chords on Youtube, but by then the magic had worn off. I wasn’t a new person, in this new place. I was just me.
I have ADHD, and I love learning new things, but I have all the stick to-itiveness of a bumblebee in a field of wildflowers. I buzz here, I buzz there, sometimes intense about my new hobbies, sometimes lazy. And so: here are some of the hobbies I have loved and lost, in no particular order, which gave me great joy, sometimes for a whole entire two-week span! But never longer.
Cross-Stitch
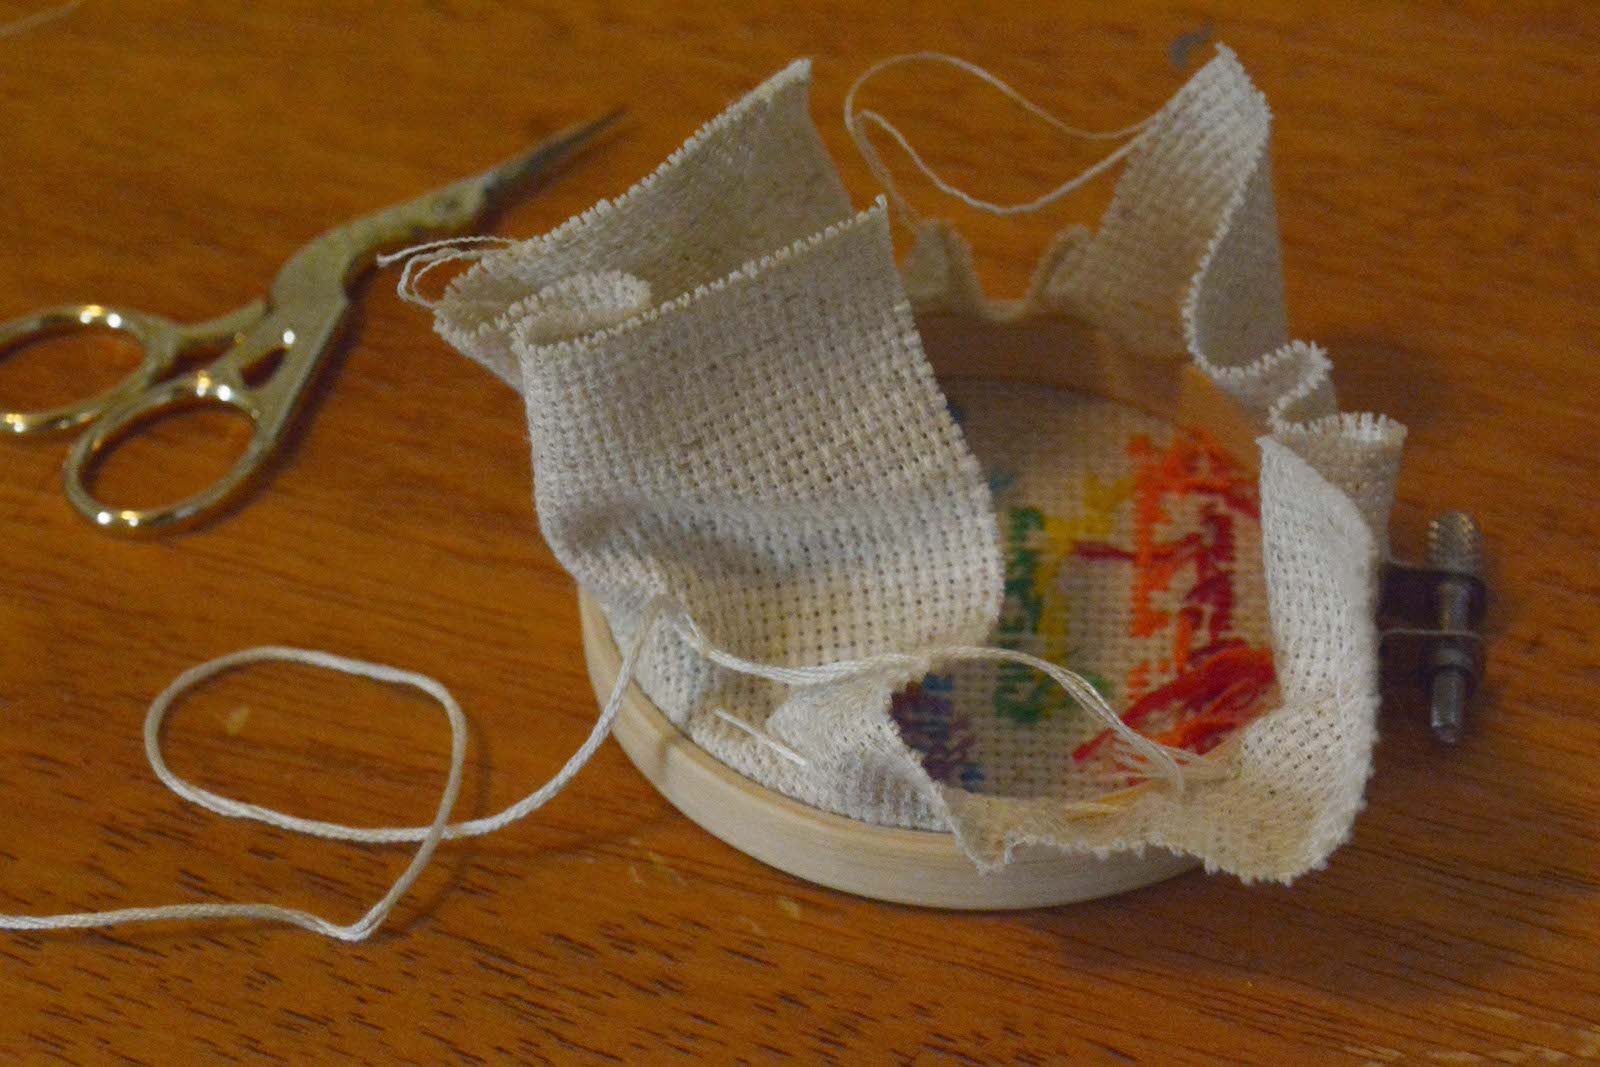
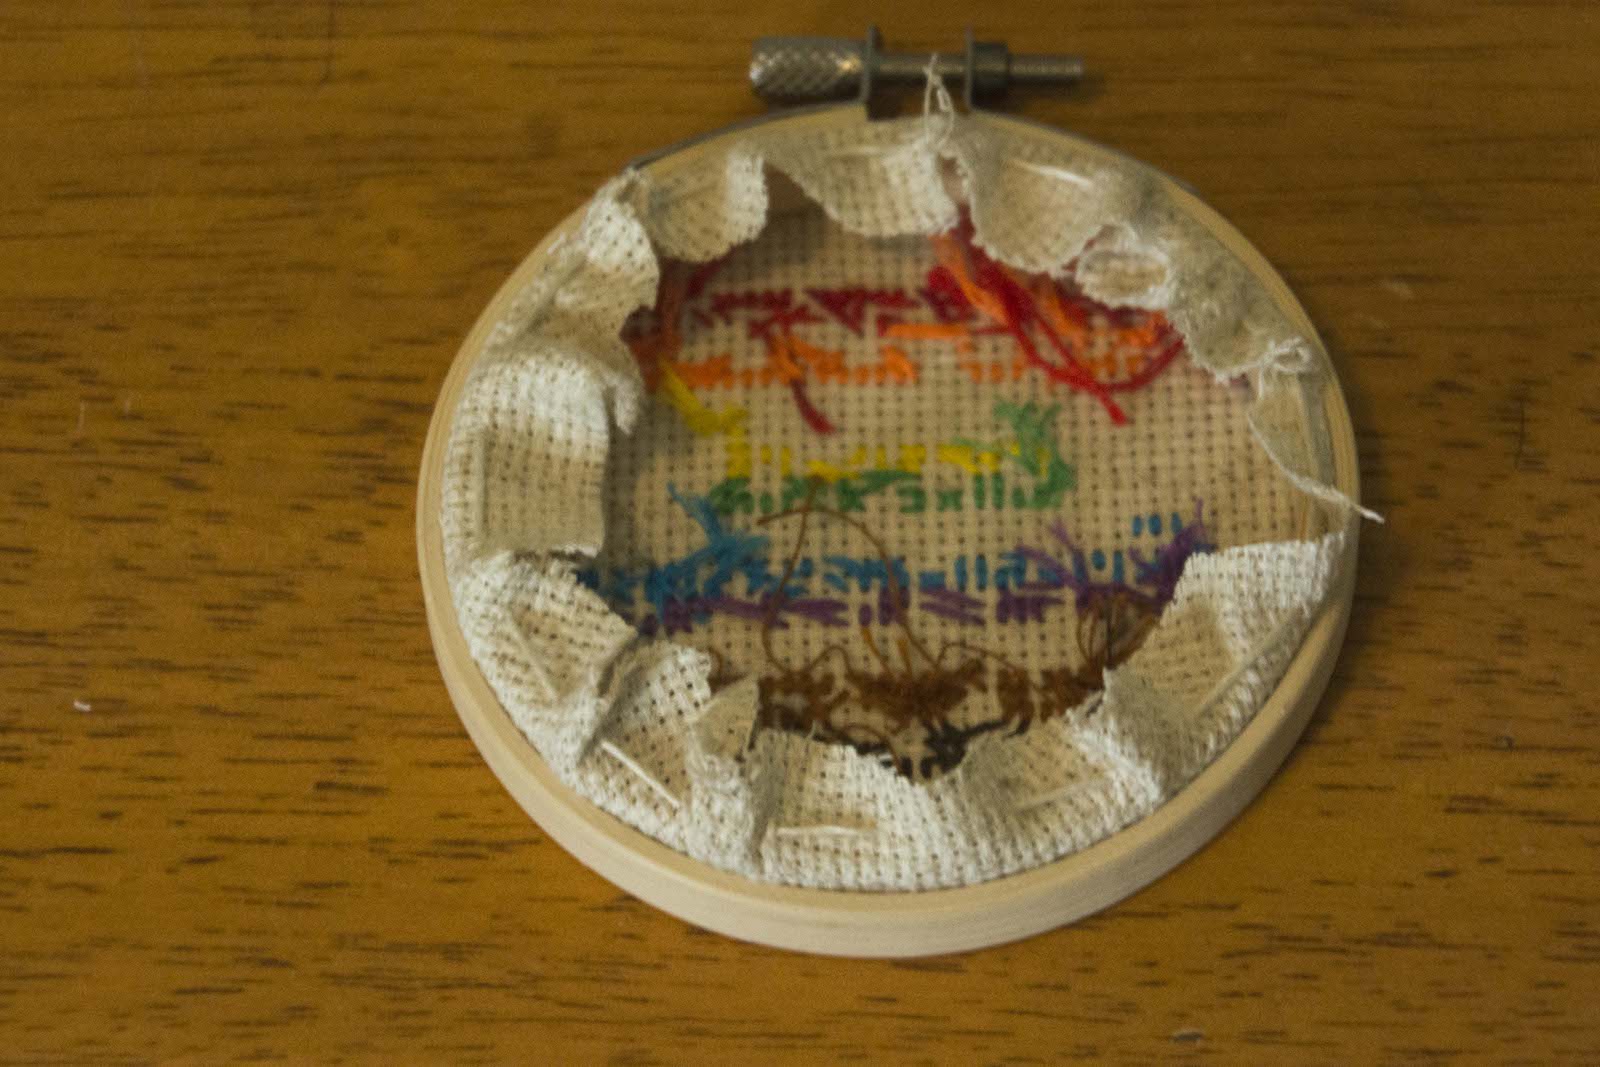
This was an early Pandemic brainstorm. I bought a little kit, and a book full of feminist cross-stitch patterns on Etsy. Imagine the Christmas gifts I’d churn out!
I still have the singular piece I made. It’s not actually a cross-stitch at all, because I abhor reading directions, and I hate a pattern telling me what to do. It’s just a piece of cross-stitch cloth on which I have embroidered the word FUCK in soothing shades of green and teal, without a pattern, completely willy-nilly.
High School Biology
I know, this sounds…bananas, but hear me out. It was right around when the Covid-19 vaccine was coming out, and there was a lot of science on Twitter that I didn’t understand. The first time I took high school biology, it was during an exchange year, and everything was in French. I passed, somehow, by memorizing words I did not actually understand. What better time than the Pandemic to finally get some of this stuff?
I made it almost all the way through the very first section of the Khan Academy lessons. I took copious, color-coded notes, which I stayed up late into the night to copy over with neater handwriting several times. Then, about six days after I’d begun, I abandoned it forever.
The Ukulele
So much more practical than a banjo! I would so easily be able to take a ukulele on a bus!
Listen: I haven’t given up on this one. I still fiddle with it sometimes! My finger isn’t even broken anymore. And I only need two chords to play Amazing Grace!
Improving my Spanish
Right before writing for Autostraddle started eating up a lot of my spare time, I found this website where you can work with a Spanish tutor over Zoom from their home country. It was amazing! My Spanish was just so much more abysmally rusty than I thought it might be, and my tutor was so patient, and gracious, and funny!
Rocío: I hope you are well! ¡Gracias por todo! I treasure the four whole weeks we spent together!
Miniature Bookmaking
I did this one for awhile, actually! Maybe two whole months? I even wrote a tutorial about it for you all. Right before I stopped, I’d started printing out favorite poems on tiny accordion pages, and designing my own covers for them. I loved it. Maybe I’ll do it again someday!
Baking
Once upon a time, Donald Trump was elected President, and I was jumping out of my skin. I didn’t know what to do with myself, so I decided to make a pound cake. And for three long hours, I didn’t even think about politics, or the world. It was heaven.
A family member loaned me my grandma’s Kitchenaid, and soon I was pulling recipes from everywhere. I found a recipe for snickerdoodles that took two kinds of shortening and were melt-in-your-mouth perfect, even a whole week later. I made them three times. I even took them to a protest, where everyone loved them except for my ex, who said “no thanks, I’m watching what I eat.”
There were still pound cake leftovers in my fridge when, one day about three weeks later, I stopped baking. Forever.
Sewing Dog Bandanas
This is a recent one, so I can’t be sure I’ve sewn my last! My dog Milo goes hard on bandanas, though, and my hand-sewn ones just don’t hold up like the ones I get on Etsy. I still have a whole pile of fat quarters in cute fabrics to try again! Just like with the embroidery: Imagine the Christmas gifts!
Teaching Myself Latin
Once, long ago, because I am THIS kind of procrastinator, I was a 19 year-old college student with a six-page paper due in the morning. It was maybe 4 PM, and I’d been staring at my laptop in horror for hours. There was only one thing to do: pick a random book off the shelf, called Latin for the People, and start to teach myself a dead language.
That paper got in on time, but surely that was down to the chocolate-covered espresso beans and the fugue state.
To this day, I know no Latin.
Honey, I Shrunk the Books: A DIY Guide to Making Miniature Book Replicas

Here is something true about me: I forget things a lot. All the time, really. Maybe it’s an ADHD thing. I forget to text people back; I forget what stories I’ve told. I forget my friends’ birthdays — sorry, friends! I love you! I forget what season of a TV show I’m on and whether I ate lunch today. And maybe more than anything else, I forget which books I’ve read.
When I used to spend way too much money on books, this wasn’t much of a problem; I could just check my shelves. But last year, when I started checking books out from the library, I realized I was putting books on my waiting list over and over again, only to get five chapters in and remember I’d already read them. The problem was compounded when I started checking e-books out from the library and reading them without ever even seeing their covers.
Then, on one of those days when I’d accidentally ended up on the crafty straight mom side of TikTok, I saw a video by a woman who was creating small replicas of the books she’d read that year and tossing them into a decorative jar. I scoffed at her jar — is it even TikTok if you’re not judging, just a little bit? But I knew right away that I wanted to start making tiny books.
I began with office supplies, a few colored pencils, and a dream. Those first books I made were cute, but very crooked. They were cut unevenly with sewing scissors and held together with staples. They didn’t even open. I can’t do these things halfway! So I bought some craft supplies and tried to remember what I’d learned in my one-hour bookbinding seminar in college. Now, every time I finish reading a book, I get to work on its tiny counterpart, and I’ve got a shelf full of minis that make me happy every single time I look at them.
Wanna make one with me?
Today, we’ll be recreating the cover of Odd Girl Out, a pulp fiction classic by Ann Bannon. I haven’t read this one in years, but the cover is so gloriously pulpy, I couldn’t help myself.

First, we’ll make our inner pages. Using your white paper, cut 15 sheets that measure four by three centimeters each. I use a ruler and an exacto knife, but you can use scissors too.

Fold your sheets in half, hamburger style (was that a thing at your elementary school, too?). If you want to get fancy, use a folding bone to set the crease; I’m using the little red tool that came with my iPhone’s screen protector. Then, sort your pages into three sets of five sheets each. Nestle the five sheets into one another.

Once you have your little signatures of five sheets each, you can sew each signature together. I usually use white thread, but I used red here for visibility. My stitches definitely aren’t proper bookbinding technique, but they work! If you want to be fancy, you can create a miniature awl by pushing the eye of a needle into a cork and poke your holes before you sew them together so you don’t wrinkle your pages while sewing.
Once you’ve sewn up your signatures and tied them off, set them aside. You may want to put them under a heavy book — or clip them with a binder clip — so they’ll stay flat later.

Now it’s time to design your cover! I use Canva, but you could easily use Microsoft Word if you’re comfortable working with images and text boxes. I find my cover images on Goodreads. If you’re artistic and don’t have a printer, you can also hand-draw your cover! You’ll want the cover to be slightly larger than your signatures, so the front and back covers should be about 2.4 cm wide by 3.4 cm tall, with a spine that’s about a half centimeter. Print or draw your cover on card stock, if you have it. Cut your cover down to size.

I find that scoring the card stock makes it much easier to fold. Placing the cover right side-up, use a nail or the blunt end of your needle to press four dots into your cover to delineate the edges of your book’s spine. Turn the book over, and run the blunt end of the needle along the ruler to score your two folding lines.
Now that you’ve got your cover, you can put it together with your signatures! Pressing your three signatures together, run some glue down the spine, and then place them directly into your cover. Wipe away excess glue and put your book under something heavy to dry. We did it!
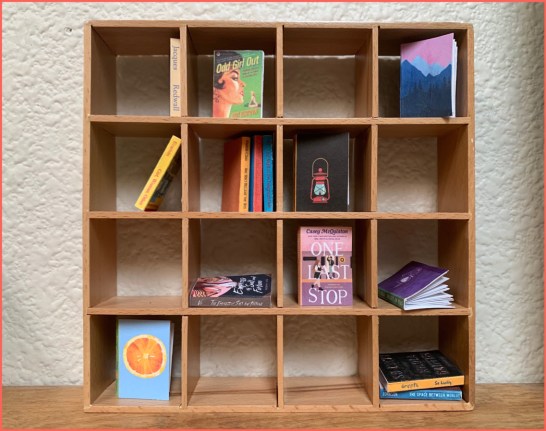
These books fit in some 1:12 scale dollhouse bookshelves, like this one I found on Etsy!
Someday, maybe, I’ll get to the stage where I’m printing a chapter of the actual book inside. For now, these tiny blank pages are there to do what I like with. How will you fill yours?
Crafts I Intended To Try This Winter but Now It’s Almost Spring so I Guess I’ll Put Them Off for Another Year
I don’t know about you, but every single year when the cold depressing months come around, I cheer myself up by putting together a list of potential crafts I could do to pass the time. Sometimes they’re crafts I’m very familiar with, like collaging, but more often than not, I dream big — there’s nothing I love more than a long list of crafts I haven’t yet tried. Ideally they’ll be multi-step huge projects that seem totally manageable when I daydream about them in October… and then slowly but surely get moved to the back burner of my life all winter long because they seem daunting, expensive, time-consuming, unrealistic… etc etc etc. Perhaps you experience this too? Perhaps you have no idea what I’m talking about? I feel like this is the right crowd to be like, “surely everyone does this, right, wanna share your list, hmmm?” but sometimes I’m wrong! I’m open to being wrong.
Just like I was super open to attempting all these crafts this winter… ALAS.
1. Knitting joggers
I’m actually pretty good at knitting! I knit hats, blankets, the occasional doll… I’ve been knitting since I was 8 years old and decided my tiny Polly Pocket dolls needed individual blankets. Knitting is not really the problem. It’s the knitting joggers part that really through a wrench in this plan.
A fat babe I used to work with is always posting photos of the incredible clothing she knits for herself and I’ve always been extremely envious but not envious enough that I’m motivated to actually knit any clothing for myself. Until she posted this jogger set! Oh my god! Knit joggers sized for fat babes that, when complimented on, I could casually say, “oh thanks so much, I knit them myself!”?!?!?!? The allure was so great. And yet… it’s March and I haven’t so much as bought the knitting pattern or the yarn, much less taught myself how to make this dream project happen.
2. Making miniatures, specifically miniature breakfast food
Oh my god, have you seen the Miniature Movement on Instagram?!?! Okay perhaps that’s not what it’s officially called, but I am calling it that! All these people make miniatures of everything and it’s amazing, I am obsessed. I started following like 20+ random suburban moms who all furnish their dollhouses with the wildest DIY tiny stuff and wow, it’s really made social media fun for me again!
Within the Miniature Movement I’ve recently discovered the Breakfast Food Miniature Movement which is exactly what it sounds like. Do you know the only thing better than a perfectly plated poached egg and croissant? A fucking tiny perfectly plated poached egg and croissant made out of clay and painted with a single strand brush to get the glaze and the shading just right. Good lord! Anyway these people have blown my whole mind and I thought maybe I could join. them, but so far, no.
3. Decoupaging furniture
I’ve wanted to do this since I was a kid. “Wouldn’t the desk that you paid good money to have painted the exact right shade of pink look better if I collaged a bunch of images from Teen Vogue and CosmoGirl all over it?” I asked my mother frequently. She did not think the desk would look better that way, no. To be fair, she was 100% correct.
But now I’m an adult! Now I have Taste! Surely I could find a genuinely beautiful way to decoupage my furniture, no? Honestly maybe not but in the meanwhile it doesn’t matter because I surely haven’t made any moves to make this two-decade-old dream a reality.
4. Needlepoint
I got really into embroidery a few years ago and I thought a natural progression of that interest might be needlepoint. But it’s been more than five years and it hasn’t happened yet, so it might be time to accept it never will. OR MAYBE NEXT WINTER WILL BE MY YEAR!
5. Woodworking of all kinds
I’m always jealous of queer people who can build shelves and garden boxes and treehouses and what not. Seems like a good skill to have. When I was 10 and went to summer camp I made a small crooked book shelf and an ugly chair in woodworking. I liked the smell of the shop and I was terrified of the saws. Anyway what I’m saying is I have very little experience with “woodworking” and a very unclear framework of what “woodworking” as a 33 year old dyke in the suburbs would look like, but it feels like a craft one could just kinda pick up, and I’d like to. One day. Maybe.
6. Intricate nail art
OKAY. I have never had long nails in my life before but then something happened during the pandemic (probably all that Staying At Home and Not Really Doing Anything I Used To Do) and my nails grew long and I became obsessed with manicures! First I did them myself, then I started getting manicures, and I recently graduated to gel manicures with really amazing intricate nail art. My nail tech blows me away with her skill. She is a genuine Artiste! I could never aspire to be at her level. But I thought maybe I could like, be the hobbyist version.
I did a pretty decent DIY cow print manicure for myself a few months ago, so when a friend asked me if I’d put flames on their nails in celebration of their birthday I said hell yeah. Um… DO YOU KNOW HOW MUCH HARDER IT IS TO PAINT A FLAME THAN TO SIMPLY PAINT SOME BLACK BLOBS ON YOUR WHITE MANICURE AND CALL IT A COW PRINT DAY?! So anyway, my goal to become a legit DIY intricate nail artist this winter failed, but I have some hope for the future. A girl can dream.
7. Creating stationary with pressed flowers
I pressed some pink flowers last spring and all year I thought, I should do something really creative and beautiful with these flowers, like make personalized stationary and write long heartfelt letters to my loved ones letting them know how much I care about them.
It’s spring again and I have made zero stationary and I have written zero letters. The pressed flowers remain untouched in my art supply drawer as new flowers bloom on the trees outside my window. Whoops.
8. Glasswork
A few weeks ago, a friend confided that she’s always wanted to get into glasswork. I don’t know what this is, really, but as soon as she said it I thought, that sounds complicated and potentially expensive — I should look into it! I haven’t yet, but I will. Next year.
Tell me about the crafts you intended to try this winter, or, even wilder, tell me if you actually succeeded in trying any new crafts this winter! I’d love to have more creative things to add to my to do list for next year’s hibernation season. I’m a Capricorn, after all — it’s never too early to start planning crafts I’ll probably put off indefinitely for the rest of my life, you know?
Show Me Your 2022 Vision Board!
This week my therapist told me she thought it’d be fun and helpful if I made a vision board for 2022. I kind of balked at first because I’m not very good at arts and crafts, and, like every normal person, I want my therapist to think I’m the coolest and most talented human being in the world (which is why I’ve only shared my favorite and highly edited personal essays with her so far). But then I remembered how cute Autostraddle Editor in Chief Carmen Phillips looked when she was making her Ultimate Skeptic’s Guide to Mood Boards back in 2018, and decided to give it a go. Worst case, it’d force me to fix the printer, which my wife has been asking me to do since last tax season. Best case, I’d learn something about myself — and my cats would get some good play time with the cap from the glue stick which they would inevitably steal and turn into a hockey puck.
The immediate problem I ran into is that, two years into Long Covid, I still don’t know, from day to day, what I’m capable of accomplishing. So it’s hard to set goals, because I’m afraid I’ll fail at them because my body will act out, and then won’t I feel worse than if I never even set any goals in the first place!? And, like, how do you dream for things in the middle of a pandemic that seems like it’s never going to end? Would I like to spend more time in greenspaces? I sure would! But I’m risking it all every time I got to the laundromat, or the pharmacy, and those are absolute necessities! How do you imagine great things when you don’t have control over basically anything, not even whether or not your blood’s going to cooperate on any given day and pump itself up into your brain so you can make words! How can I daydream of bigger things when the world keeps getting smaller and smaller? Also, how do you get an A+ on an assignment you have no experience with and who even am I if I don’t get an A+?
Well, APPARENTLY, the joke’s on me because grappling with all that was the entire point of asking me to make a vision board. Working through these questions is a lot less intimidating when you’re cutting out photos of Viola Davis at the same time. My therapist guessed it would take me two hours to do a vision board. It actually took me four days. But I am very proud of it, because what I learned in the process is that there’s still plenty of things I can dream about, reach for, and try to do and feel, even when I don’t have control over almost anything.
I also learned, once again, that there is truly no limit to my gayness. Here’s my vision board for 2022. I’d love to see yours too!

Notes for a Queer Homemaker: Spells and Potions
If homemaking is world building, the tools you use to complete your little domestic tasks become the magic that makes world building happen — like spells and potions. How you use them depends on what you want to get done, but you need to have a well stocked potion cabinet in order to build the world you want.
Start With the Basics: Dish Soap and Hot Water
The truth of the matter is that all you need to clean your home well is dish soap, very very hot water, and some sort of cleaning rag. That’s it! Dish soap and hot water can are the tools to clean the majority of surfaces within your home. And maybe that’s enough for you! Maybe you didn’t know you could clean your bathtub with just soap and hot water and now you’re done learning. You can absolutely stop reading here! Go clean that tub! But with a few other key tools that’ll cost you less than $10 total, you can begin to build a DIY cleaning arsenal that will offer you everything you need to feel like an adept homemaker.
A Quick Note on Natural vs. Chemical and Cleaning Solution Safety
A quick note on some ever present queer questions whenever I bring up my love of cleaning solutions: Are they chemical free? Are they safe? Will my pets die if I clean with them? No, these tools aren’t chemical free, because I’m pretty sure everything has chemicals in it (chemists, back me up). They are as safe as any cleaning solution can be, and if you handle the materials with care, I can almost guarantee your pets’ safety.
While I’m all about natural cleaners — primarily because they’re cheaper and I love a bargain — “natural” doesn’t mean “safe,” and that’s important to highlight. Bleaching absolutely can happen naturally, but even the most natural form of bleach isn’t “safe,” but it absolutely can be used safely, and if stored correctly is not inherently dangerous to have around. I always suggest cleaning in a well insulated environment, not only because of the fumes that any chemicals you might use may produce, but because your home is probably musty as hell! When was the last time you purposefully facilitated a cross-breeze, hmm? As a matter of fact, go love yourself a little and crack open a few windows before you finish reading.
Let’s Talk About Vinegar
If you want to advance a little further from soap and water, vinegar is the first place to start. White vinegar to be exact, but I have absolutely used ACV in a pinch. The best vinegar/cleaning solution recipe I have found is: 1:1 vinegar to water, a squirt of dish soap, and your favorite essential oil. Vinegar is great for every day stuff — wiping down the counters between meals, cleaning up a quick spill. It is also very good for buildup. Soap is a great tool, but soap can, if you aren’t great about rinsing, create a film sometimes. Maybe your floors look a little cloudy after you mopped; throw some vinegar in the mopping water next time. Towels gunked up with hair supplies and lotion and laundry detergent? Add some vinegar to the wash and watch them come out like new.
Vinegar does NOT sanitize, so if you’re immunocompromised and/or need to think about sanitation, vinegar is not that girl! But she will help to get rid of that weird gross smell in your sink and get rid of the spaghetti sauce stains on the wall behind your stove. My favorite use of vinegar is when washing dishes. I like to have two sinks full of water: one with scaldingly hot water and soap, the other with cold water and about ¼ cup of vinegar for the rinse. They dry quicker, my glasses aren’t streaky, and you can really feel when the soap gets off.
Here Comes Rubbing Alcohol
You’ve added vinegar to your under-the-sink collection of cleaning supplies and you’re loving it, but you’re also a little concerned about germs! Sometimes something really absolutely nasty comes into your house, and you want to make sure you’re killing any gross things that might harm you. Here comes rubbing alcohol!! Specifically, Isopropyl Alcohol 91%. The antiseptic can be used as an antibacterial cleansing agent for your cuts and scrapes, and it can also be used on high touch areas like doorknobs and window ledges.
Personally, I choose not to use alcohol where I cook, I use it mostly in the bathroom on the faucet and handles and for a once a week (or more if I’m sick) wipe down of high touch areas. Have you ever cleaned around your doorknob? It’s absolutely disgusting there, pal. Just… absolutely disgusting. Go right now and mix a 1:1 solution of alcohol and water and wipe off your doorknobs. You deserve it.
Alcohol also has two other amazing uses around the house. Nothing cleans windows quite like rubbing alcohol and a recycled newspaper. Add a little dish soap to the 1:1 solution you just made, and spray and wipe down from the top to the bottom of the window. Windows are also unfortunately another thing that get surprisingly dirty, just like the doorknobs, so maybe this weekend do TWO nice things for yourself and take care of them both. Other than windows, as all good glass using stoners know, alcohol is the go to for cleaning out a bong. Rubbing alcohol, kosher salt, time, and maybe pipe cleaners if you’ve got some really stuck on resin. But remember how I said I don’t use alcohol where I cook? The same thing applies for the pieces I smoke out of. If I clean a piece with alcohol, I rinse it out with boiling water and then let it completely dry. Yes, completely, you do not want to risk inhaling rubbing alcohol fumes. Maybe spend the time it’s drying learning how to roll joints?
My Favorite Cleaning Supply: Bleach
The big boss of cleaning supplies is bleach. Is bleach safe? No! Is bleach my favorite cleaning supply? Yes! And none of my cats have been harmed because of my use of it. What can’t you use bleach for! It unclogs pipes, it whitens whites (to an extent), it sanitizes. Bleach is what I use in my toilets and bathrooms, it’s what I use to scrub out the cats’ litter box every 6 weeks, and every single kitchen linen I own has been bleached at least once because I’m constantly just like “eh, can’t hurt!”
You do need to be safe when cleaning with bleach though — just as you need to be safe cleaning with anything! Clearly label anything you have bleach in. Absolutely open the windows and/or turn on some fans when you’re using it. Find something to busy your pets with something more fun than being around you while you clean. Always, always, rinse off a surface you’ve bleached with clean, hot water, especially if you’ll cook on it. Never mix bleach with ammonia or any other cleaner. Always wear gloves.
Put Intention Into Your Cleaning and Build a New World
So you know you want to build a new world, you have all these potions and spells under your sink, and now what? There’s this idea in Jewish rituals of hiddur mitzvah, that we purposefully choose beautiful items to conduct our rituals with in order to elevate them to higher statuses. Sure, you can clean your home with the recycled spray bottle from some old Lysol, or you can make the choice to buy matching, beautiful glass spray bottles. You can use the essential oils you keep on your altar, or the rind of a citrus fruit you ate on a perfect date and add it to your solutions before your weekly day of rest. You can recycle your favorite tattered shirt and use it as a cleaning rag.
Putting intention into your cleaning gives it purpose. You aren’t just cleaning your space, you’re making it more liveable, you’re making a world where you feel like you can breathe deeply and be your whole self. Put some love into it.
Notes for a Queer Homemaker is a new column that will publish on the fourth Friday of every month!
Happy Hour at Home: Have Some Very Gay Zoom Backgrounds
Be our guest for Happy Hour at Home, a small series about the joys of lesbian socializing from home, because let’s be honest with ourselves — we’re going to be here for a while.
I read a piece that was essentially about Zoom happy hours kinda sucking in comparison to “real life” happy hours (what exactly is real life these days: discuss), and when I got to the end, I was like……. OK, duh.
I dunno. I don’t think anyone is out here claiming that virtual happy hours with friends are seamless. Technology makes it a little clunkier, a little more awkward, than standing in a room together. Maybe it’s a little annoying, but to me these also seem like pretty minor trade-offs for getting to socialize with friends in some form.
Or maybe I’m just getting a little cranky about people complaining about the virtualization of social lives! Of course it’s not the same! Nothing is the same! We gotta make do with what we can! That’s pretty much the entire undercurrent of this Happy Hour at Home series. Socializing during a pandemic isn’t easy or seamless, but connecting with friends is so important!
Anyway, one way to make a Zoom happy hour a little more escapist is to use a virtual background. You can be ANYWHERE you want! I received a particularly deranged email from Airbnb (the Brands have been wilding out more than usual) providing “beautiful,” “scenic” images of people’s homes? That they suggested would make “great backgrounds for video calls”?? And I found it supremely dumb and upsetting. And yet, here I am! About to hit you with some free virtual background ideas! But listen, these are better than those!!!!!
Click the image to open in full size.
1. The Chart
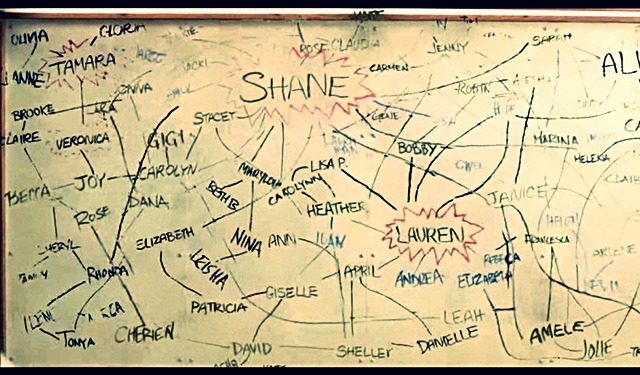
For when you’re bringing goss to the happy hour.
2. The Good Place

For when you remember we do indeed live in the Bad Place.
3. The Alleyway Behind SUR
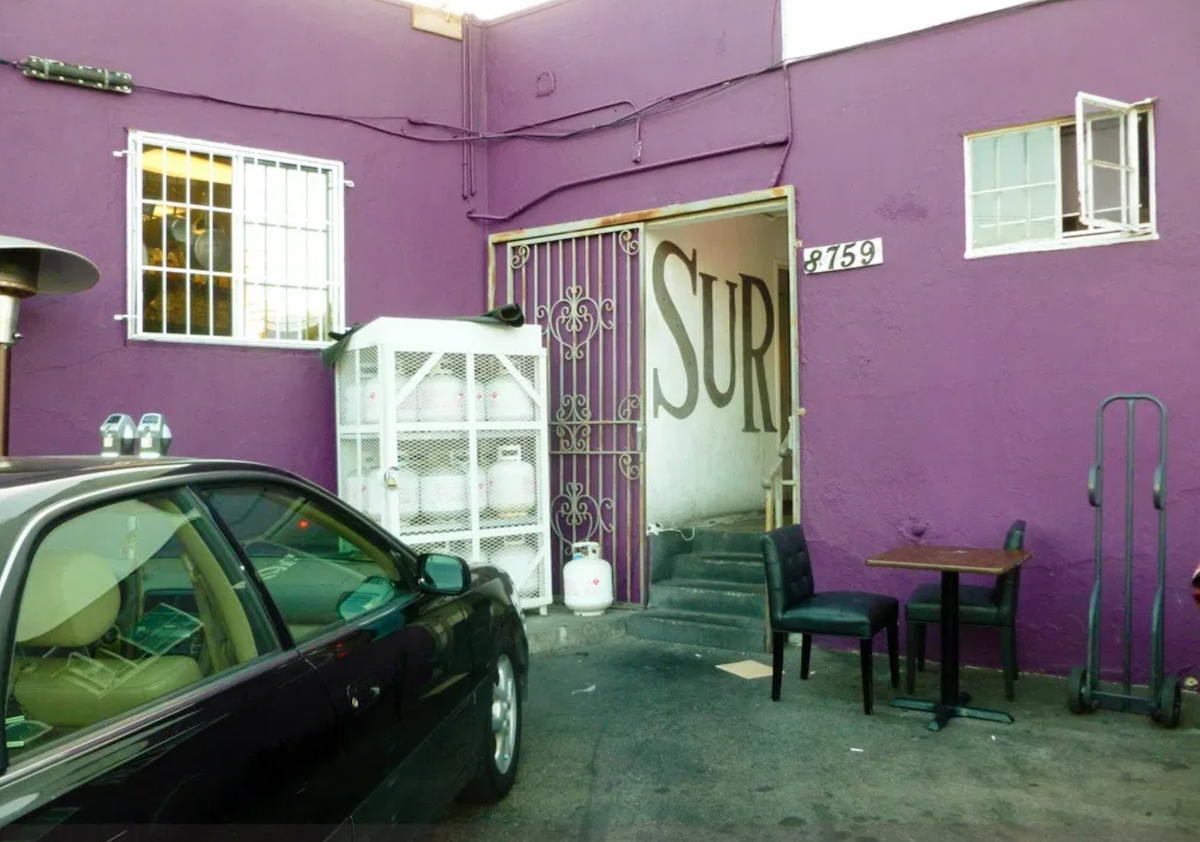
For when you want to confront someone about something demonic they did while drinking a very full glass of wine.
4. The It’s Complicated kitchen
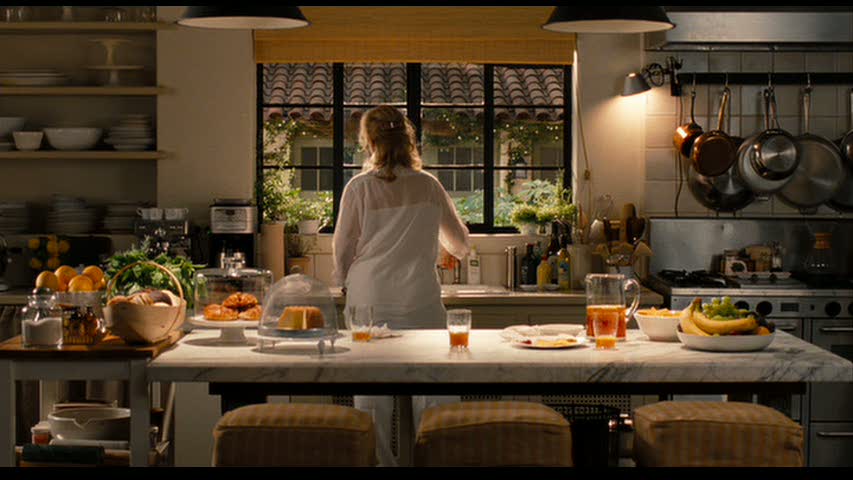
For when you’re dreaming of excess counter space for all your regrowing scallions.
5. Vida’s

For when you’re missing the gay bars — even fictional ones.
6. Bette and Tina’s Pool
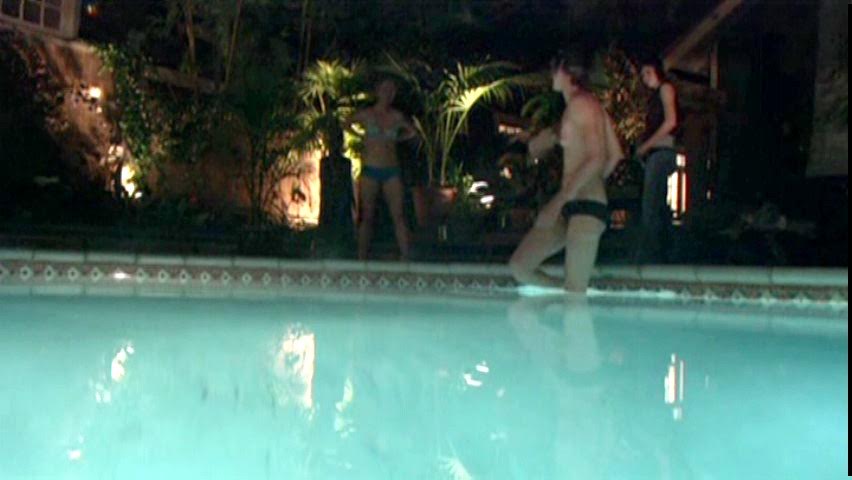
For when happy hour feels more like horny hour.
7. Pop’s Chock’lit Shoppe
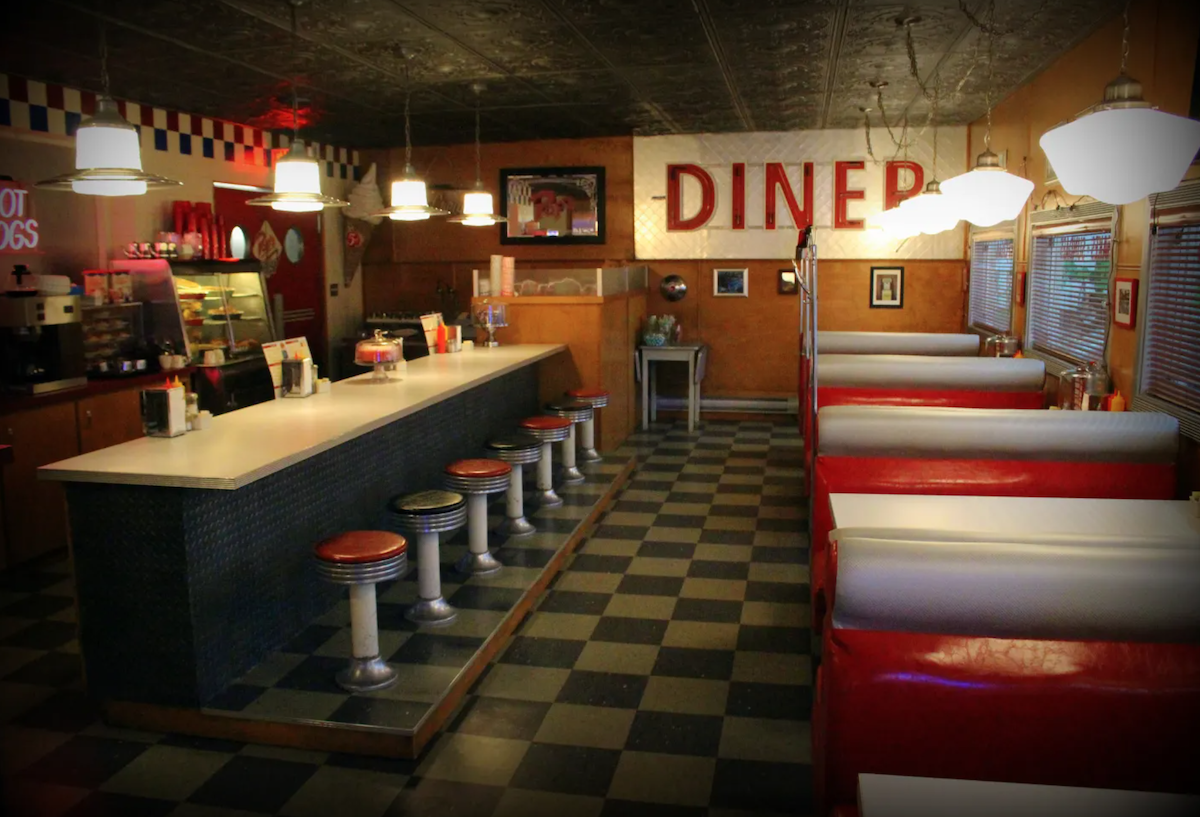
For when you’re processing drama over a milkshake.
8. Betty Cooper’s Murder Board

For when you’re doing some online detective work to figure out which couples in your social circle are breaking up.
9. Villanelle’s Paris Apartment
For when you’ve got a fridge full of just champagne.
10. This Stock Photo of Houseplants
For when you accidentally kill all your houseplants mid-quarantine.
How to Make DIY Face Masks for Coronavirus
feature image contributed by Sam Manzella
We’re in the midst of a global pandemic. Words most of us never thought about before are suddenly crowding our brains: novel coronavirus, droplet, community spread, containment, drive-through testing, social distancing, curbside pickup, masks. Even at the best of times during a public health crisis, new information is immense and best practices can change quickly, leading to confusion and panic. In the United States, we are not exactly experiencing the best of times during a public health crisis, and finding clear, direct information about how we should be proceeding during this scary and destabilizing time has not been easy.
The latest confusing issue? Masks. For a deep dive reported piece on what’s been going on with masks, read Ed Young’s Everyone Thinks They’re Right About Masks for The Atlantic. Basically, the people of the United States were told not to wear face masks, with a clear campaign endorsed by The World Health Organization (WHO) and the Centers for Disease Control and Prevention (CDC) that civilians should avoid buying masks and leave them for medical professionals. But with continued community spread and the acceptance that humans with zero symptoms can carry and pass on the virus for up to 14 days, the CDC has changed its recommendation and now says everyone should wear a mask when leaving home. One major important thing to note: a mask is simply an extra defense for when you have to go outside – it should not make you feel as though you are free to stop practicing social distancing. Also, when making masks at home, not all fabrics are created equally – here are some guidelines from scientists about which fabrics work best for DIY face masks.
Hoarding medical masks is still obviously a no (you as a civilian don’t need an N95 mask and you absolutely should donate any of those you may stored in your house to hospitals where the staff on the frontlines really need them!), and in many places it’s impossible to find any kind of mask to purchase at all. Lucky for us, queers have been crafty since the dawn of time, so this should not deter us. As soon as the mask conversation shifted, no fewer than ten queers on my Instagram feed started showing off their skills by creating their own DIY face masks. I have faith in us.
Here are some of my favorite tutorials for making DIY face masks. If you’ve found other ones you like please drop the link in the comment section, and if you or another queer you love are selling handmade face masks on Etsy (or elsewhere), let us know so those of us who would rather let someone else make a mask for us can support you!
How to Make DIY Face Masks for Coronavirus
1. No-Sew T-Shirt & Bandana Mask Tutorial from the CDC
2. More No-Sew Options compiled by HuffPost
3. Easy Sew T-Shirt Mask from MasksNow.org
4. Serious Sewing Option from CraftPassion
5. Another Serious Sewing Option from MakerMask
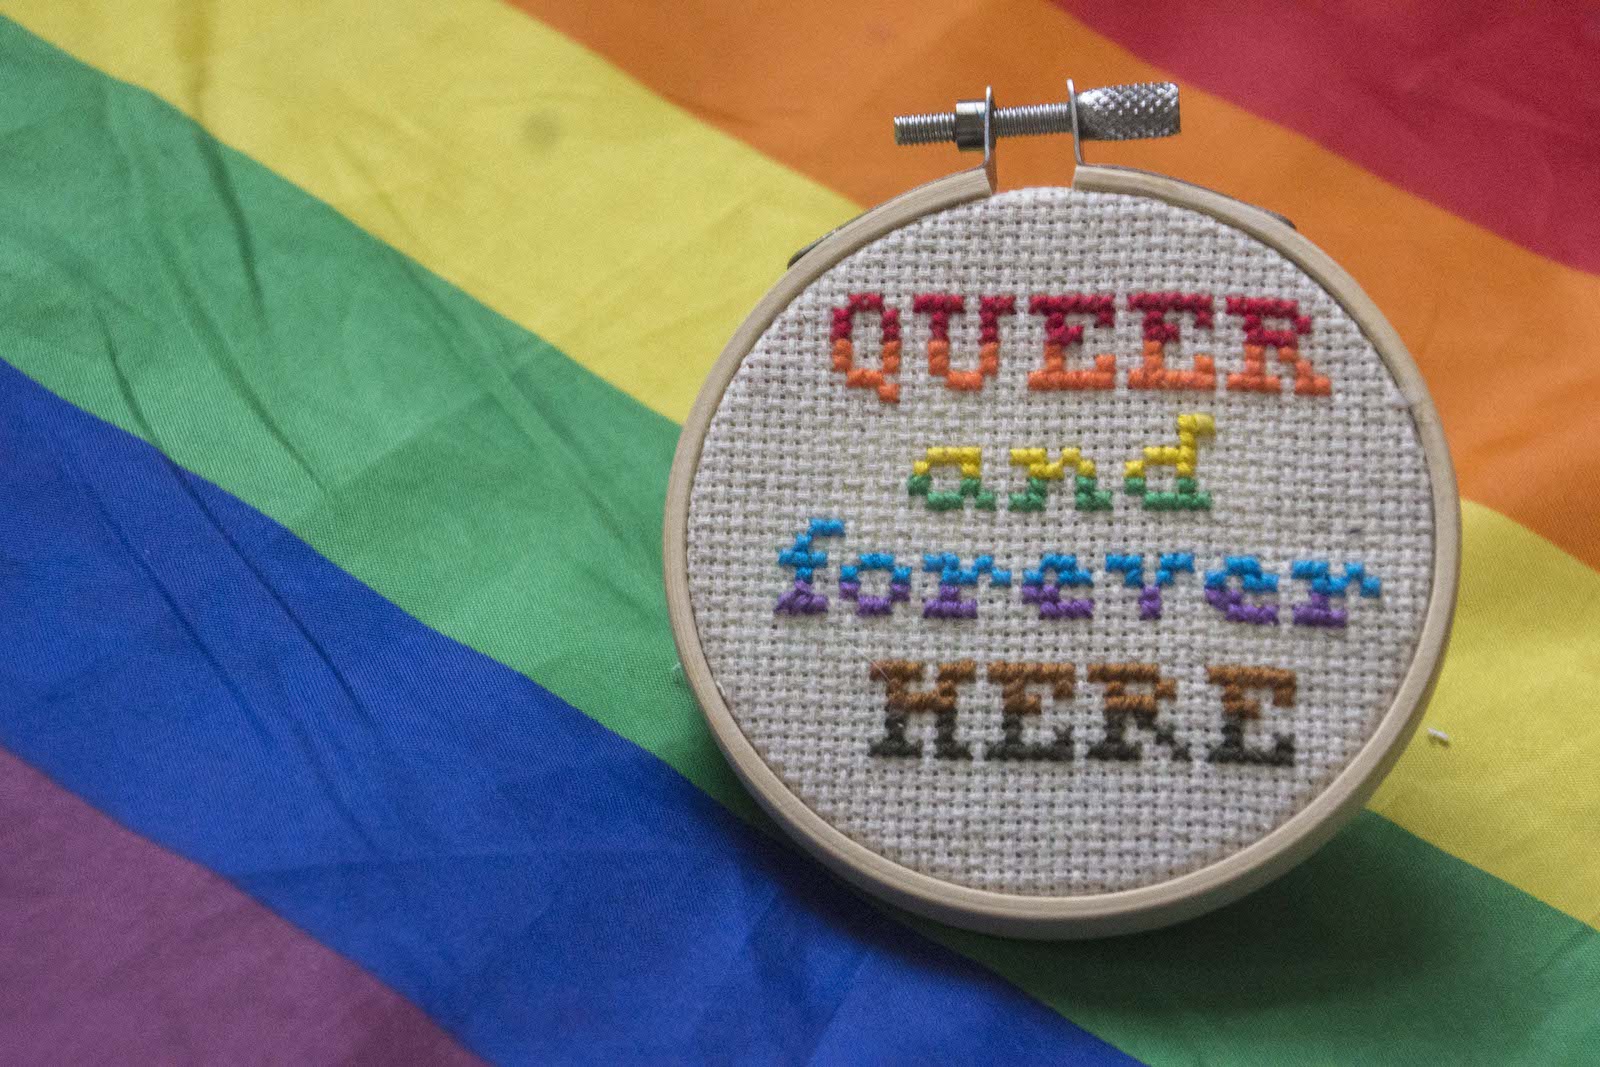
Get Cozy With This Custom Queer Cross Stitch Pattern

It’s cozy season, and I’m done with going outside. So, for those of us who haven’t entirely succumbed to cuffing season, I propose an alternative way to spend hours netflix and chilling: cross stitch!
Hear me out: cross stitch is simple. It involves stabbing things with needles thousands of times, so it’s great for getting out all the frustration you’re holding. You can make some really cool patterns, creating a great juxtaposition between the assumed traditionality of the craft and whatever wild things you queerdos come up with. It’s a great fidget to channel antsiness for those of us who can’t sit still while watching TV. It’s also extremely inexpensive as far as crafts go, doesn’t involve any fancy equipment, and you can have hours of fruitful crafting for less than $10.
Inspired by one of my favorite t-shirts by Kristin Russo, I developed a super simple, super queer pattern to share with y’all.
There have been a bunch of previous cross stitchers here on Autostraddle, and we’ve published tons of tutorials on how to do this, so if you want some great basics, check out Hansen’s round up of how-to’s and Subversive Cross Stitch’s truly glorious Vapid Fluff pattern & instructions. Subversive Cross Stitch’s how-to page is really comprehensive as well. If you’re interested in getting cozy this week and making the Queer and Forever Here cross stitch design I created for you, here’s what you need to get and what you need to do.
Supplies
- Fabric: 14-count Aida cloth. The number refers to the number of little squares per inch – you can absolutely do this with a different size if you want, but if you’re going out to buy something, this is a good all-purpose size.
- 3″ Embroidery Hoop: This design fits in a basic 3″ wooden hoop, which you can then display the finished piece, if you want!
- Embroidery Needles: Get at least two, you’ll almost certainly lose one. Look for an eye that is large enough to easily thread.
- Embroidery Floss: Standard DMC embroidery thread, or whatever you happen to have around. If you want to buy a starter variety pack, these colors will almost definitely be in it. If you want to get individual ones, there are some recommended shades on the pattern.
- Scissors: A pair of scissors. I have a cool pair of bird embroidery scissors, you can literally use anything that cuts.

Steps
1. Cut your Aida cloth to a square about an inch larger than the 3″ hoop.
2. Secure cloth in the hoop. Place it on the smaller (inner) hoop, then pull the outer hoop on top, sandwiching the fabric. Make sure the fabric is taut like a drum – it will help make sure your stitches are even.
3. Cut a length of the first color you’re working with, about 15 – 18 inches long. I do this pattern with 3 strands, out of the six strands that make up standard embroidery thread. You can also do it with two, it’ll just be slightly less full. Take your cut piece, and gently pull three strands apart. I’d recommend starting with the red.
4. There are several strategies for dealing with the ends of threads. I tend to tie a double knot at the end of my thread, about 1/2 – 1 cm from the end. You can also leave it unknotted, and hold it in place manually while you make the first few stitches so the thread doesn’t pull through.
5. Thread your needle!
6. While many patterns recommend starting in the middle to make sure you don’t run out of space, this pattern is fairly simple and you should be able to start in the top left – leave 3 empty squares up and left before the first row of the Q.
7. Start stitching! Come forward from the back, so your knots are hidden. Each stitch will become an X, but start with half stitches (/////) to create the shape, and then go back over it afterwards (\\\\\) for the second half of the X. This way, you only need to be actively looking at a pattern half the time, and can more easily pay attention to the TV/audiobook/meeting that you’re doing this during.
8. Switching colors: Cut off the remaining thread, leaving about 2 inches behind. If you cut it too short, you risk it falling back to the front. Start with a new color.
9. Finishing! Cut a long (24 inches or so) thread of a light color you have extra of, tie a knot at the end, and weave through the border outside the hoop, on the back side. Do this about a centimeter from the hoop. Each stitch should be somewhere in the range of 1 cm to 1 inch. Once you’ve done a full circle, pull tight to draw the excess fabric in. Do a few loops with the thread to make it stay at the very end, and then cut the tail short. (If you have a different preferred method of finishing, go for it).
10. Once you’re done, take a moment to trim up any long tails in the back (but not too short, or they’ll fall through the cloth!). Trim the edges of the cloth to round, leaving about 1 – 1 1/2 inch border.
11. Display or gift your beautiful creation!
Be a Holigay Potion Master with These Three DIY Bottled Gifts
With winter on the horizon and four inches of snow already under our belts here in Brooklyn, I’m hunkering down in my apartment with a stack of Harry Potter books and a list of Christmas crafts that I’m ready to share. This series may not be Magical Drafts and Potions by Arsenius Jigger, but it’s the closest things we muggles can get. All you need is a stove, a few fancy ingredients, and some time to whip of an apothecary full of gifts.
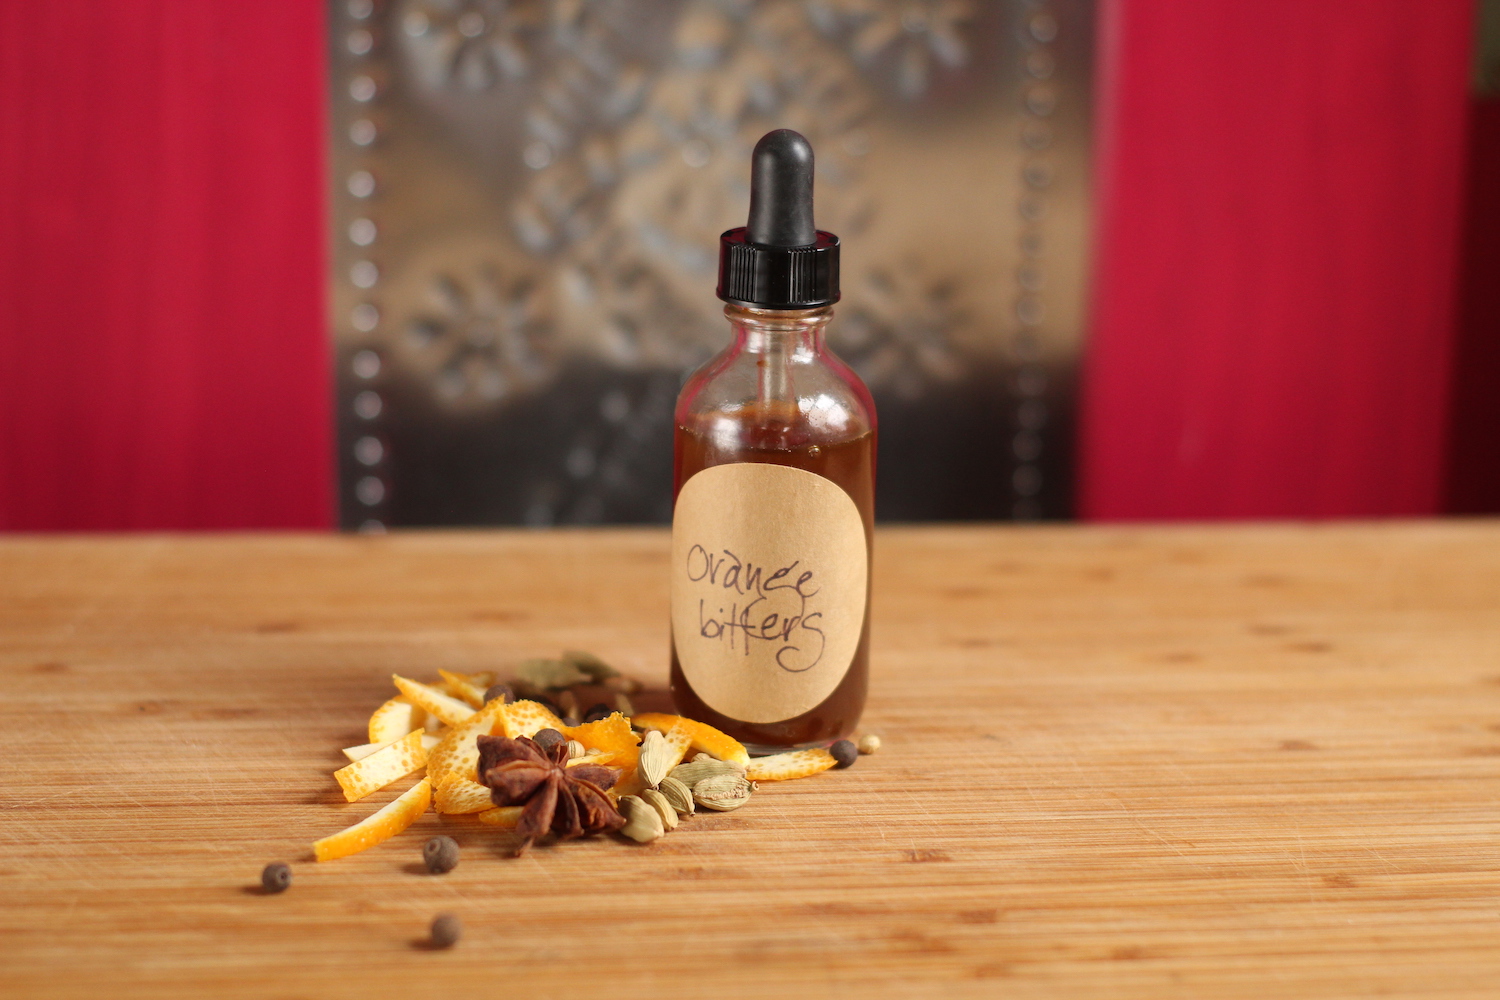
Amortensia Cocktail Bitters
For our first recipe, we’re sticking with a good old-fashioned… well, Old Fashioned. Bitters are a quintessential ingredient to an Old Fashioned and you are perfectly poised to whip up your own homemade version. Just be ready for your bitters recipient to develop a full-on crush on your culinary skills.
For this recipe, you should be able to pick up almost the ingredients at a regular grocery store and a liquor store. Gentian is a little tougher if you don’t have an herb store close by, but you can pick some up at Mountain Rose Herbs or Amazon.
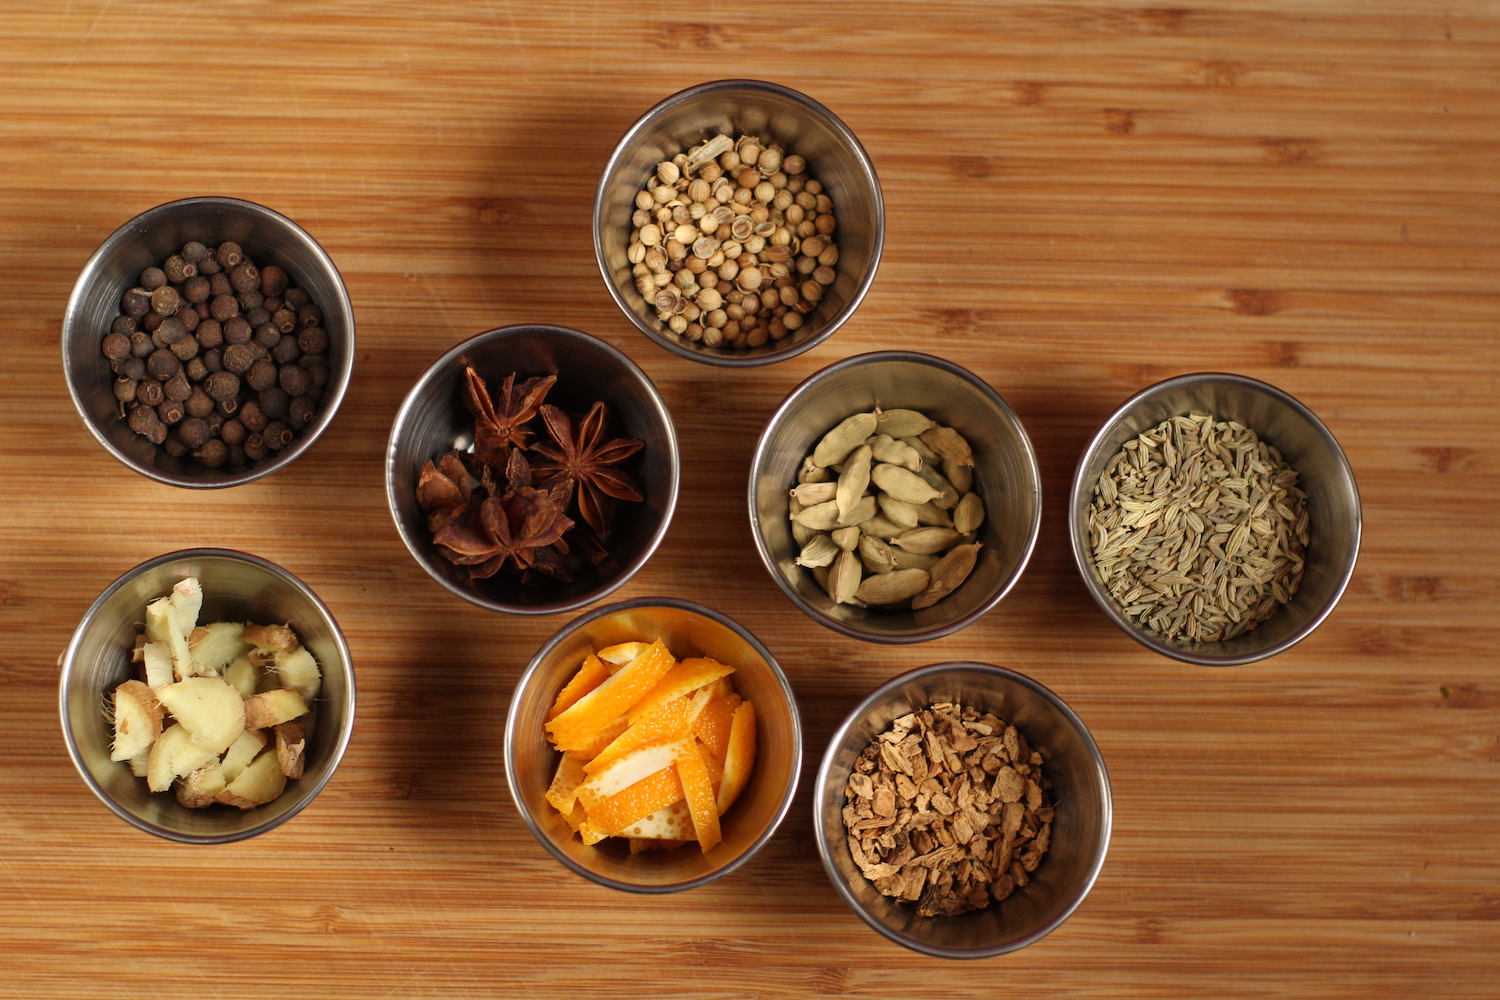
Ingredients:
1 Orange
3 g Gentian root
3 g Green cardamom pods
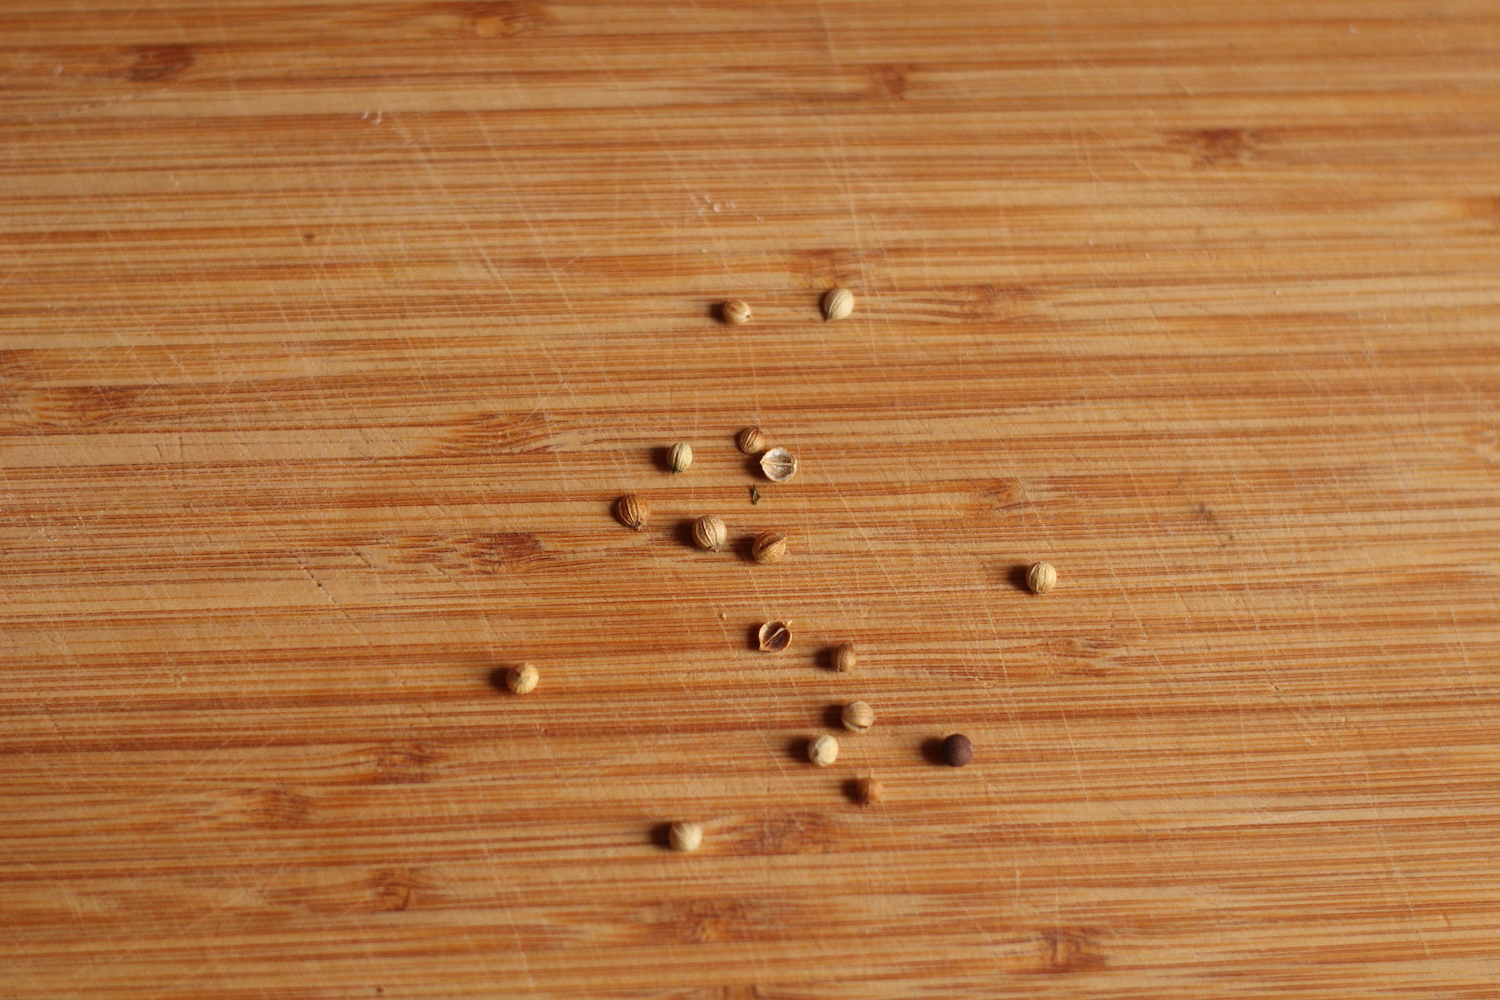
3 g Coriander
1 g Allspice
1g Fennel
1g Star anise
1 g Ginger, chopped fresh or dry
155 g ≥ 100 proof Liquor
31 g Water – you’ll need this another day so don’t both measuring it now
19 g Sugar – you’ll need this on the same day as the water
Materials:
Kitchen scale
Wide-mouthed jar with a tight-fitting lid
Mesh strainer, cheesecloth, or nut milk bag
Saucepan
Jar or bottle for storing
Instructions:
1. Zest the orange with a knife. Don’t worry too much about getting all the white pith off the back; it’s bitter, but we’re making bitters so we’re all good.

2. Add the orange peel, aromatics, and liquor to the wide-mouthed jar.
3. Seal the jar, label it with the ingredients and today’s date, and store it in a warm, dark place.
4. For the next two weeks, shake the jar every day. You can check in on how the infusing is going by smelling the jar, by putting a few drops between your palms and rubbing, or by putting a few drops in still or sparkling water.
5. Strain out the solids and store the infused liquor in a clean jar.
6. Pour the water in a saucepan and add the solids. Bring the water to a boil, then remove from the heat.
7. When the water cools, strain out the solids. This time, you can throw them away.
8. Add the infused water and sugar to the infused liquor.
9. Shake the jar every day for four days.
10. For the next three days, let the jar sit so that any sediment settles to the bottom.
11. Pour the bitters into small jars or bottles, being careful not to disturb the sediment on the bottom. Label the bottles and give them as gifts alone or with other cocktail ingredients, drinking glasses, or a recipe for an old fashioned.
Draught of Peace Motherwort Tincture
Between the U.S.’s long run as world champion of oppression, catastrophic climate change, the Trump presidency, and the bad news of the day, we’ve all got a reason or twelve to be high-strung. And while motherwort might not be the solution to all our troubles, it just might help us find one.

The best way that I can describe taking motherwort is that it makes me feel like I’m sitting on a cloud. Not a cloud that makes me high or a cloud that hides all my problems, though. A cloud that snuggles me while letting me calmly survey the things that have been bothering me and see how they fit into my life. In one of my favorite articles to grace the internet, the author describes the feeling as “subdued euphoria.” Motherwort is what I imagine a hug from mother nature is like.
This summer, I grew motherwort in my garden to make a gallon of tincture for my increasingly-anxious family and friends. With holidays just around the corner, you don’t quite have time to grow it from seed, but you can pick up a bag of dried motherwort from an herb store, Mountain Rose Herbs, Bulk Apothecary, or Amazon and have emergency bottles ready to deploy as gifts or in just a few weeks.
Tinctures are medicines made by extracting the medicinal constituents of plants in a liquid. Tinctures are particularly beneficial in the winter because they preserve plants’ medicinal properties long after the growing season is over. While a motherwort tea is too bitter to drink, a dropperful can be taken under the tongue with minimal lingering grossness.
Ingredients:
Motherwort (fresh or dried)
Grain alcohol (120 to 160 proof, check step 1 to see what you need) or apple cider vinegar
Materials:
Wide-mouthed jar with tight-sealing lid
Mesh strainer, nut milk bag, or cheesecloth
Permanent marker
Storage jar or bottle
Optional:
Kitchen scale
Liquid measuring cup
Instructions:
1. Decide on your method and recipe. There are two general ways to determine a tincture recipe: the simpler’s or folkloric method and the weight to volume method.
Simpler’s method
The simpler’s method is exactly how it sounds: simple! Put your herbs in a jar, leaving about an inch at the top, then fill the jar with menstruum. The simpler’s method requires no special tools or math and is generally safe to use with gentle herbs. On the other hand, if you’re using herbs that have specific dosages or want to create a tincture that can be duplicated, the simpler’ method isn’t gonna cut it.
Weight to volume method
The weight to volume method initially sounds a little finicky, but is easy to master. I like using the weight to volume method because it lets people know exactly what they’re getting and can be remade year after year. It takes into account the ratio of marc (what we call the plant matter in tinctures) to menstruum (what we call the liquid) and the strength of the menstruum. You’ll see it written as a ratio and a percentage.
Let’s decode our recipes:
Fresh motherwort in alcohol
1:2 80%
This means that for ever ounce or gram of motherwort, there are two ounces or mL of alcohol. The alcohol is 80% ethanol and 20% water.
Fresh motherwort in vinegar
1:4 60%
This means that for ever ounce or gram of motherwort, there are four ounces or mL of alcohol. The alcohol is 60% ethanol and 40% water.
Dried motherwort in alcohol
1:2 100%
This means that for ever ounce or gram of motherwort, there are two ounces or mL of vinegar.
Dried motherwort in vinegar
1:4 100%
This means that for ever ounce or gram of motherwort, there are four ounces or mL of vinegar.
If you’re into the nerdy details about why we use different ratios of marc and menstruum and different strengths of alcohol, you can hop on over to my blog.
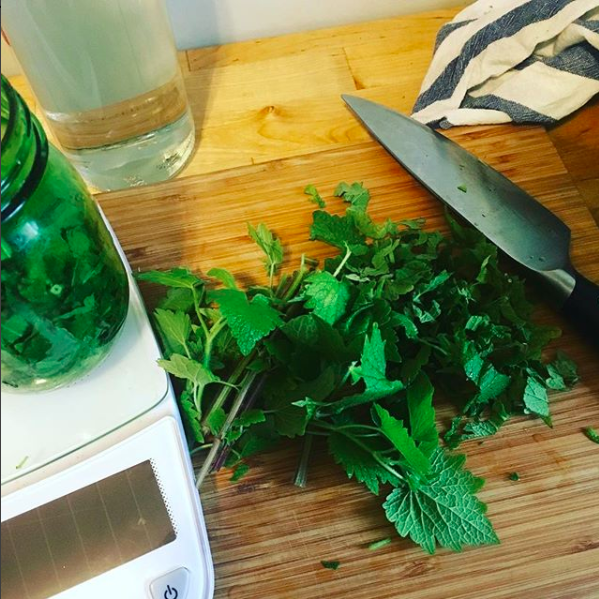
2. Prepare your marc.
If you’re using fresh motherwort, now is the time to chop those babies up as small as possible so that as much plant as possible is exposed to the menstruum.
If you’re using the simpler’s method, pack your jar full of motherwort, leaving about an inch at the top.
If you’re using the weight to ratio method, weigh out your motherwort and add it to the jar.
3. Prepare your menstruum.
If you’re using vinegar, warm it up in the saucepan. You want it to feel warm to the touch, but not to boil and kill off the probiotics.
If you’re using the simpler’s method, pour the menstruum into the jar, covering the marc by about an inch.
If you’re using the weight to ratio method, measure the menstruum in the volume measuring cup and pour it into the jar.
4. Label your tincture. You might think that you’ll remember but trust me, a prolific maker of tinctures and oils and other potions, you won’t. Write today’s date, the marc, the menstruum, and the ratio and percentage if you used the weight to volume method.
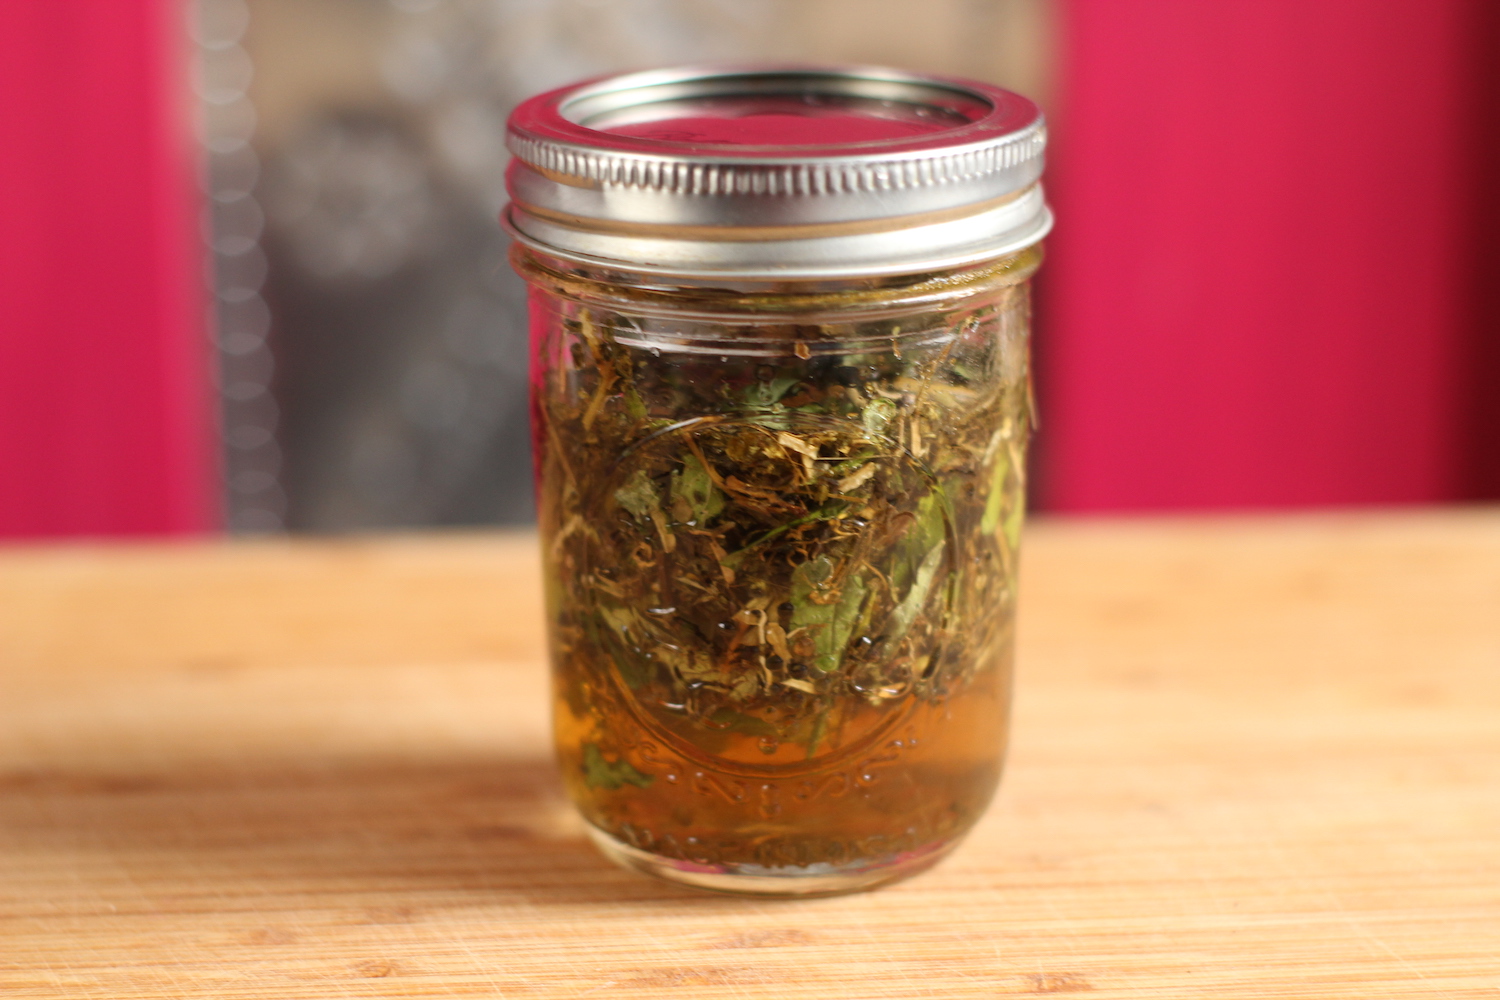
5. Over the next 3-4 weeks, store your menstruum in a shady but warm place. Once a day, give it a good shake to mix everything up and take a second to think about how much you love the person you’re making it for.
6. After about a month, use a fine mesh strainer, a nut milk bag, or cheesecloth to strain out the used plant material. Make sure to push with a push or squeeze to get every last bit of the liquid out of the plants.
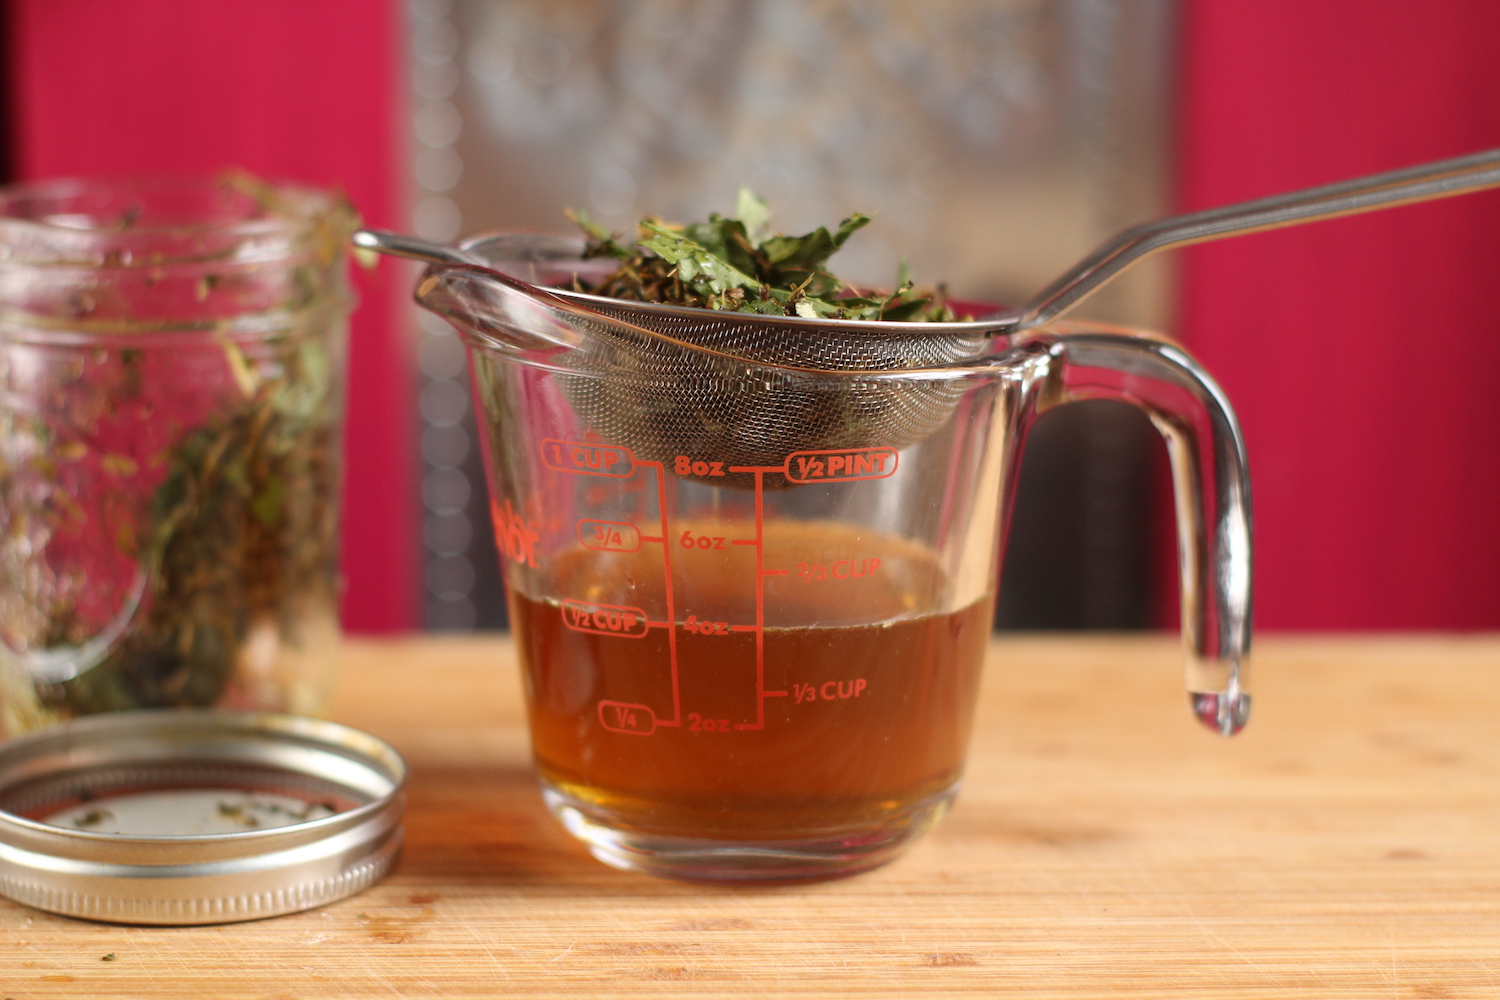
7. Pour your finished tincture into a jar or bottle and label it with the date, ingredients, and ratio and percentage if you used the weight to volume method. Alcohol-based tinctures will last for 5 years and vinegar-based tinctures will last for 1-2 years.
Uses
– A dropper-full under the tongue can ease worry. Try it for insomnia that is accompanied by racing or intrusive thoughts, an immediate feeling of stress or anxiety, or an upset stomach caused by nerves.
– Motherwort is traditionally used to promote a sense of calm and openness. Women have often used it during times of transition.
– This bitter herb is an emmenagogue, which means that it can stimulate blood flow in the pelvic region. For people who menstruate, this may bring on an early or intense period.
Warnings
A few words of caution: people who are pregnant, taking benzodiazepines, or have low blood pressure should check with a doctor before consuming motherwort.
Pepperup Potion Elderberry Syrup
Now that you’ve met the worst-tasting herbal medicine, it’s time to get to know one of the best.
Unlike most herbal remedies, elderberries have actually received some attention in mainstream medical research and the results have been pretty great. Taken preventatively or as a treatment, elderberry syrup handles colds and flus like a champ.
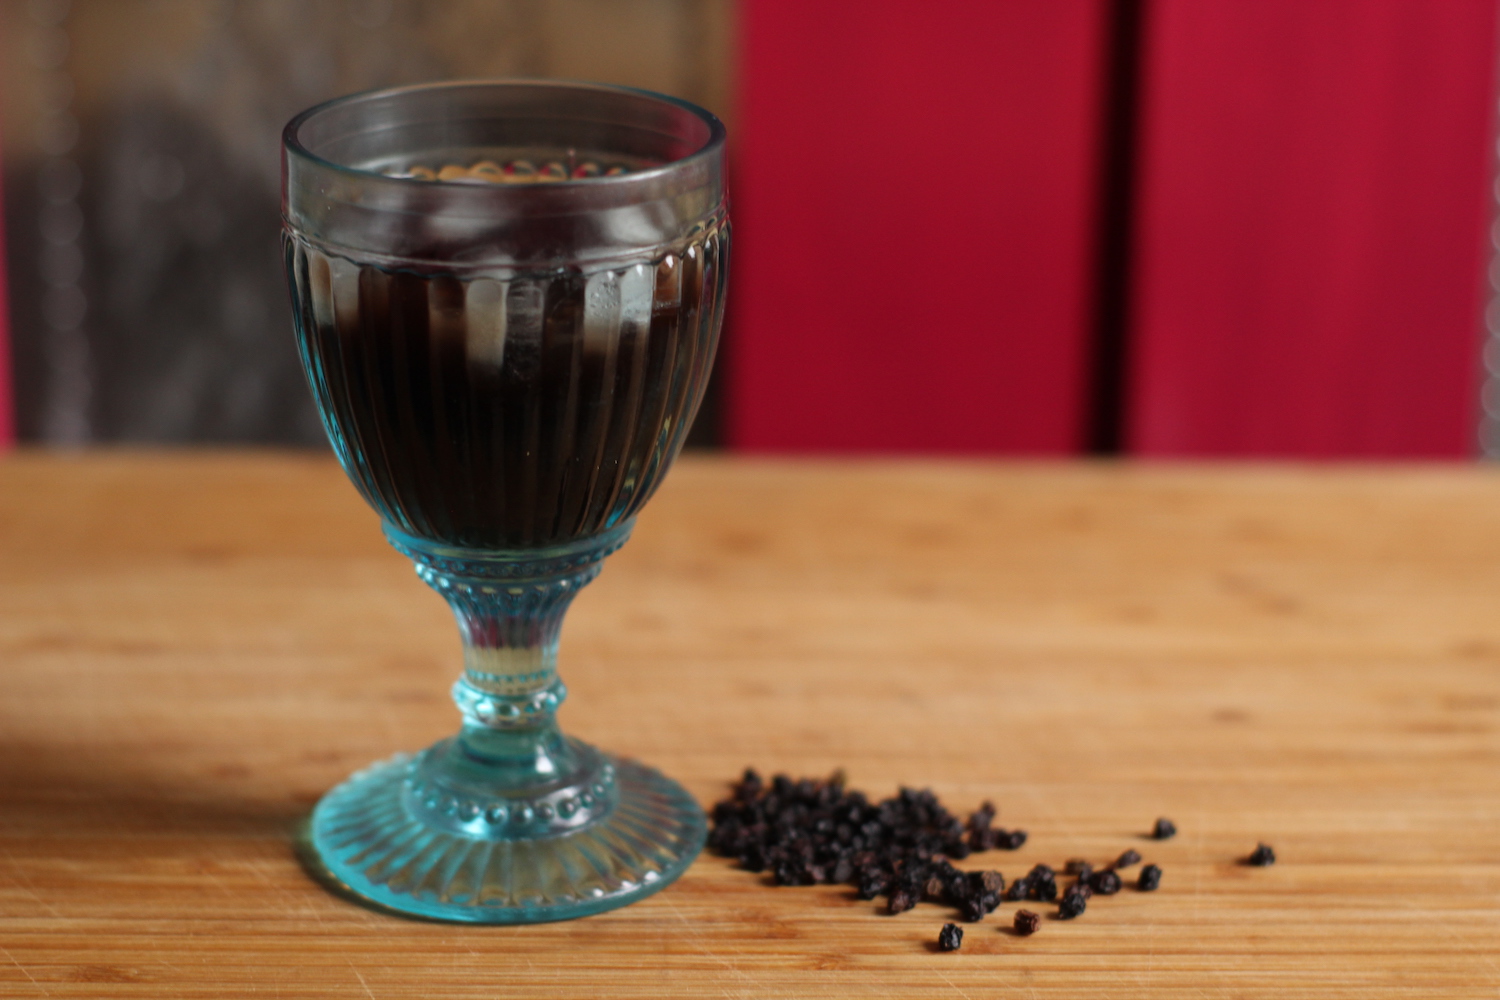
Elderberry is good for more than just the winter sniffles; it’s downright delicious. You can add a squirt to seltzer, use it to sweeten your tea, or even flavor a wintery cocktail with it.
When buying dried elderberries, look for the species Sambucus nigra (black elderberries). It can be hard to find reasonable-priced elderberries when flu season hits, but I’ve had some luck at Frontier Co-Op and Amazon.
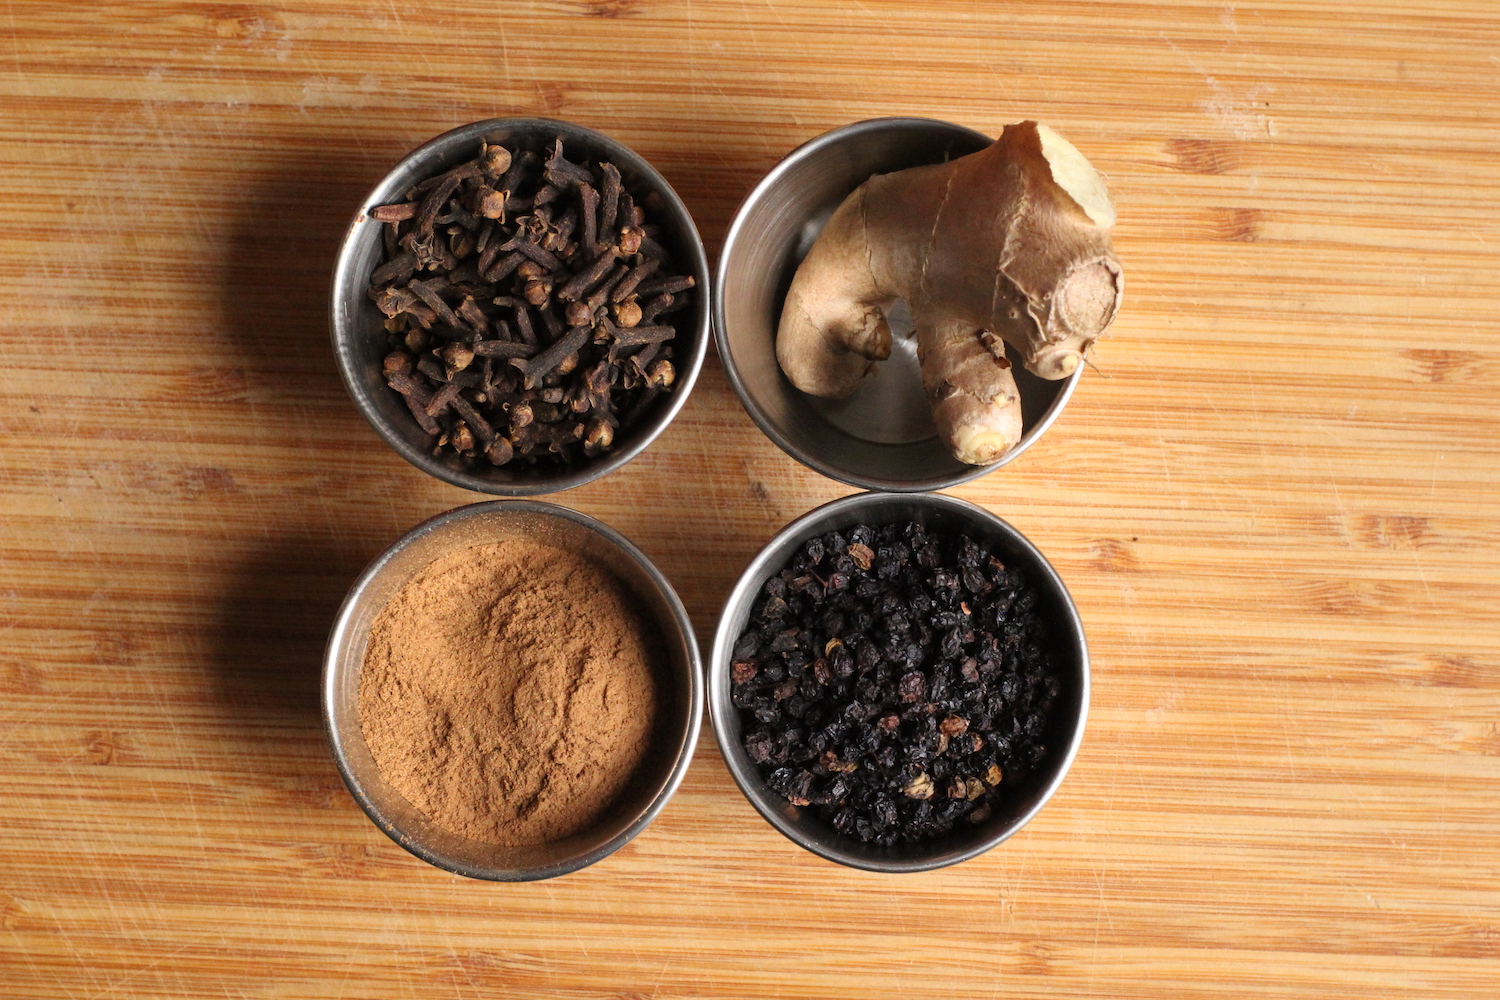
Ingredients:
50 g Dried elderberries (Sambucus nigra)
2 cups of water (if you live at a high altitude, use 3-4 cups of water)
200 g sugar or honey
2.5 tablespoons ginger, chopped fresh or dried
1 teaspoon cinnamon
½ teaspoon cloves
Materials:
Saucepan
Mesh strainer or nut milk bag
Storage jar or bottle
Instructions:
1. Add the water and elderberries to a pan and let the berries soak for an hour
2. Place the pan on the stove, add the ginger, cinnamon, and cloves, and bring the pan to a boil. Don’t cover the pan, though; elderberry seeds have a poison that is eliminated by cooking. This is one of the reasons we make elderberries into a syrup instead of a tincture or a tea.
3. Boil the liquid until it has been reduced by about half. This should take about an hour. Again, don’t cover the pan.
4. Strain off the solids and measure your liquid. You should have a cup. If you have less, add water until you’ve got a whole cup. If you have less, keep cooking until you reach one cup.
5. Add the sugar or honey to the liquid and return the pan to the stove. Cook for 10-30 minutes until the mixture is thick.
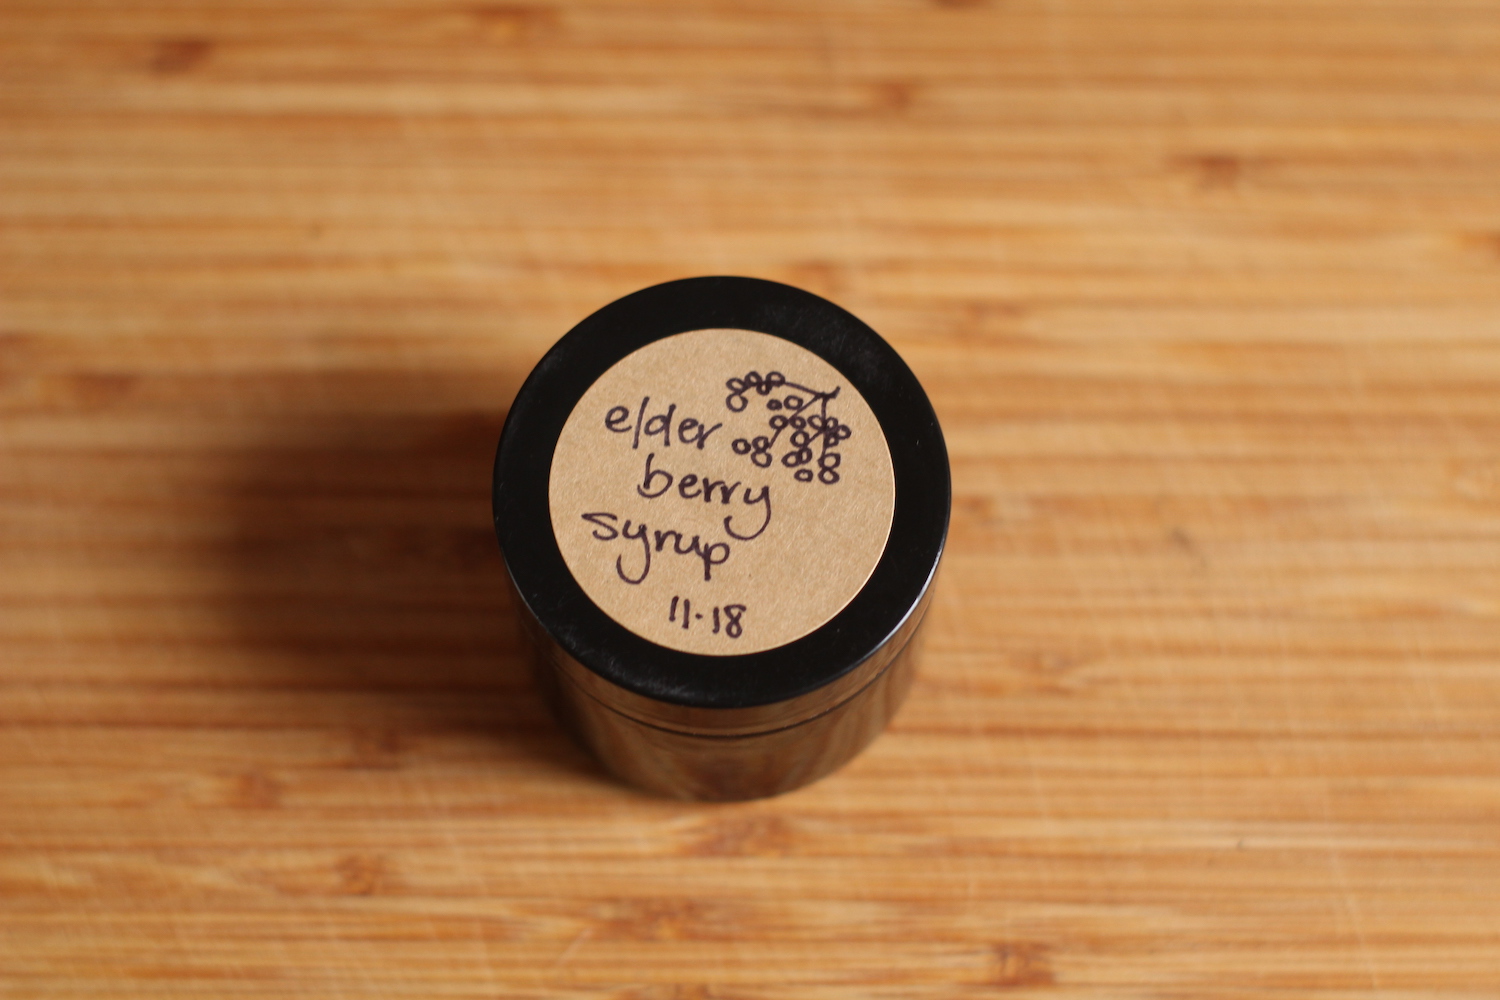
6. Allow the syrup to cool and bottle it. It will last up to a month when stored in a refrigerator.
How to Make a Sexy Leather Wallet (and Learn Basic Leatherworking Skills!)
At last year’s A-camp, we hosted a leather key fob workshop, aka Ring of Keys, and this year we will be building on those skills by making a simple leather wallet. Whether you wait to make this baby at A-camp X this week or make it at home with this tutorial, this wallet is the perfect size for all your essentials and won’t weigh you down while you’re romping around.
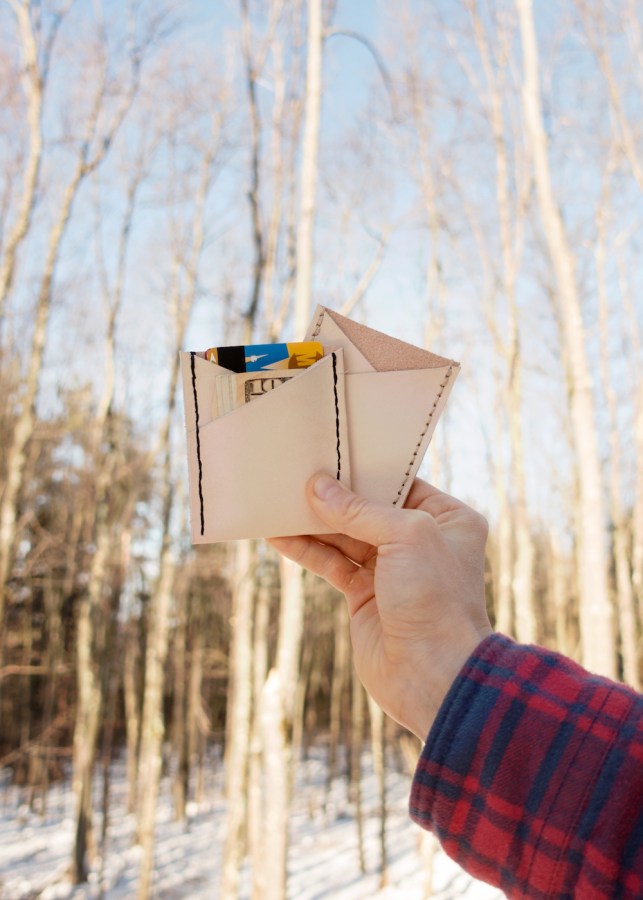
As you make this wallet, you’ll learn how to add shape to leather, create holes for stitching, and use waxed thread to saddle stitch. At A-camp X, we will be using optional letter punches to add initials or your favorite phrase, such as my favorite combination of letters from last year, “BUTT STUFF.”
Supplies:
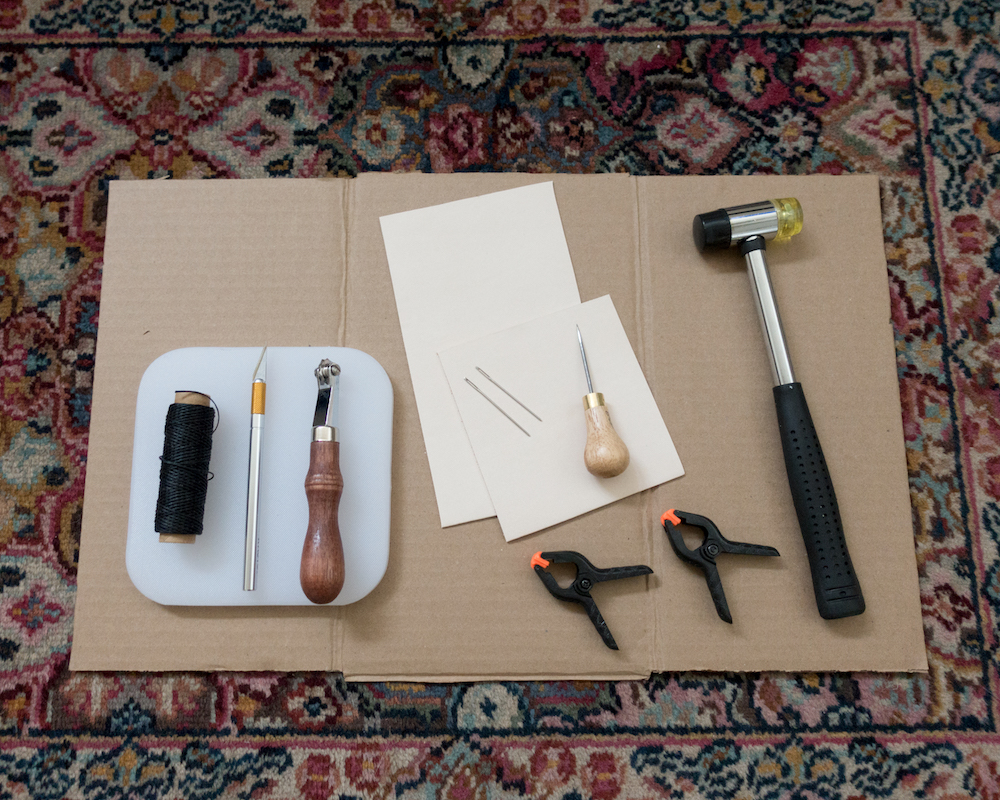
-
- Leather: approx. 9″ x 7″ inches of 2-3oz veg tan tooling leather
- Hammering Surface: Poly tooling board or a soft block of wood
- Cutting Surface: Cardboard or a self-healing cutting mat
- Clamps: Binder clips work great too!
- Thread: Strong braided waxed cord
- Rubber mallet or hammer
- Leather Needles
- Stitch Spacer
- Exacto Knife
- Cork-backed ruler
- Awl
Prepare the Leather:

- Trace the following dimensions directly onto the wrong side of the leather with a pencil.
- Body: 7″ x 3”
- Pocket: 3 ½” x 3”
Create the diagonal line on the body piece by measuring 1 ½” down from the top-right corner and mark. Connect this mark with the top-left corner of the body piece. This is now your diagonal cutting line.
Create the diagonal line on the pocket piece by measuring 1 ½” down from the top-left corner and mark. Connect this mark with the top-right corner of the body piece. This line is now the diagonal cutting line.
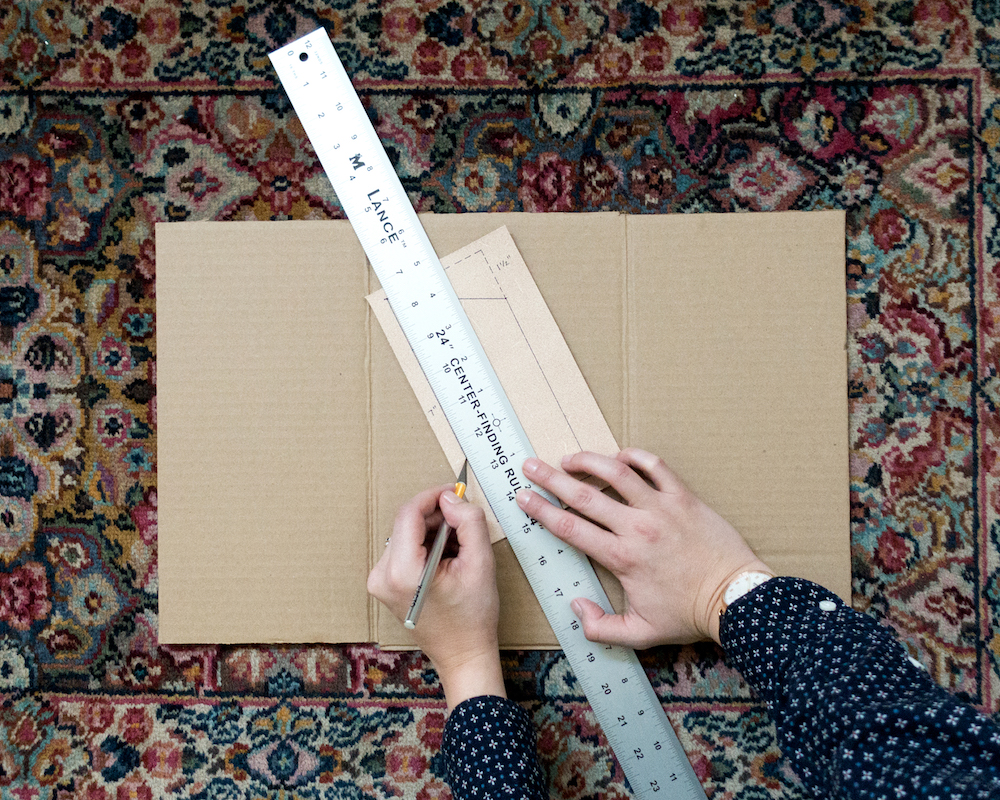
- Place the leather on top of a cutting surface and use an exacto knife and ruler to cut the body and pocket pieces out.

- With wrong sides together, align the diagonal point of the body piece to the opposite corner of the body (fold it like a hamburger bun, not hot dog).
While holding the wallet fold in place, lightly dampen the fold on both sides.
Wrap the fold in either scrap leather or a paper towel and clamp in place. The scrap leather or paper towel will keep the clamps from making marks in your wallet.
Let the wallet sit and dry for approximately 5 minutes
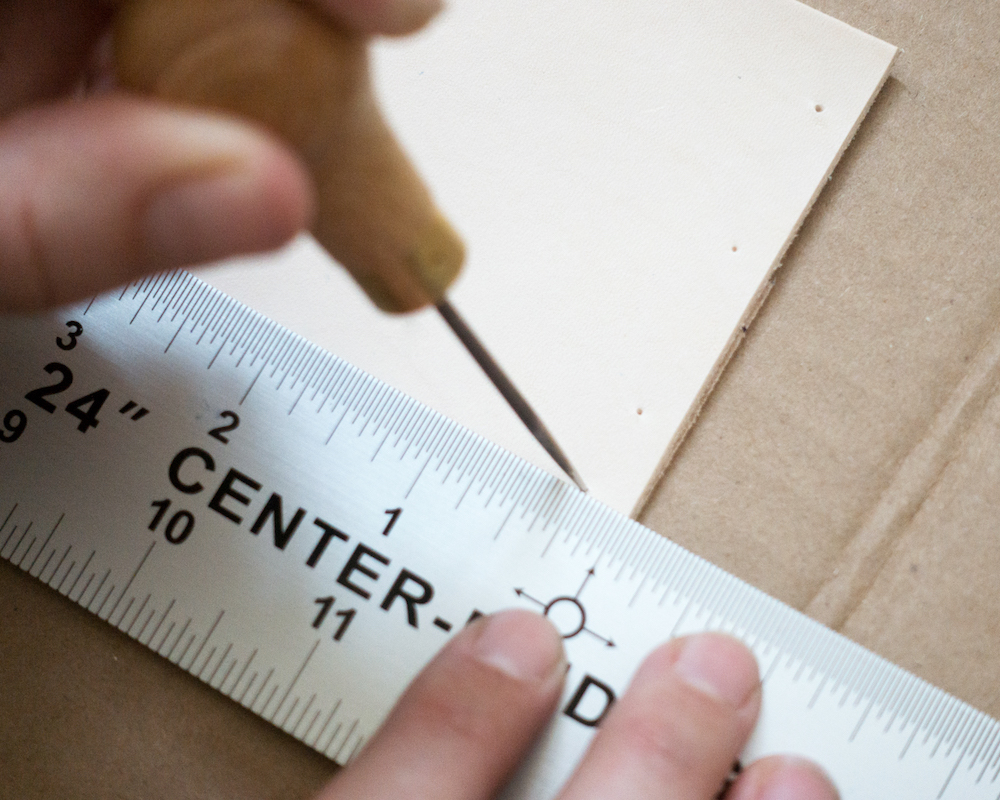
- Remove the clamps. On the back of the wallet, measure ¼” in from each long edge and make a few marks with the awl.

Align the long edge of the ruler with the ¼” marks and trace along the ruler with the stitch spacer. Use a good amount of pressure as you roll to make even stitch markings.

- Insert the pocket piece into the wallet body. Clamp one long side of the wallet to keep all the parts in place and set on a hammering surface.
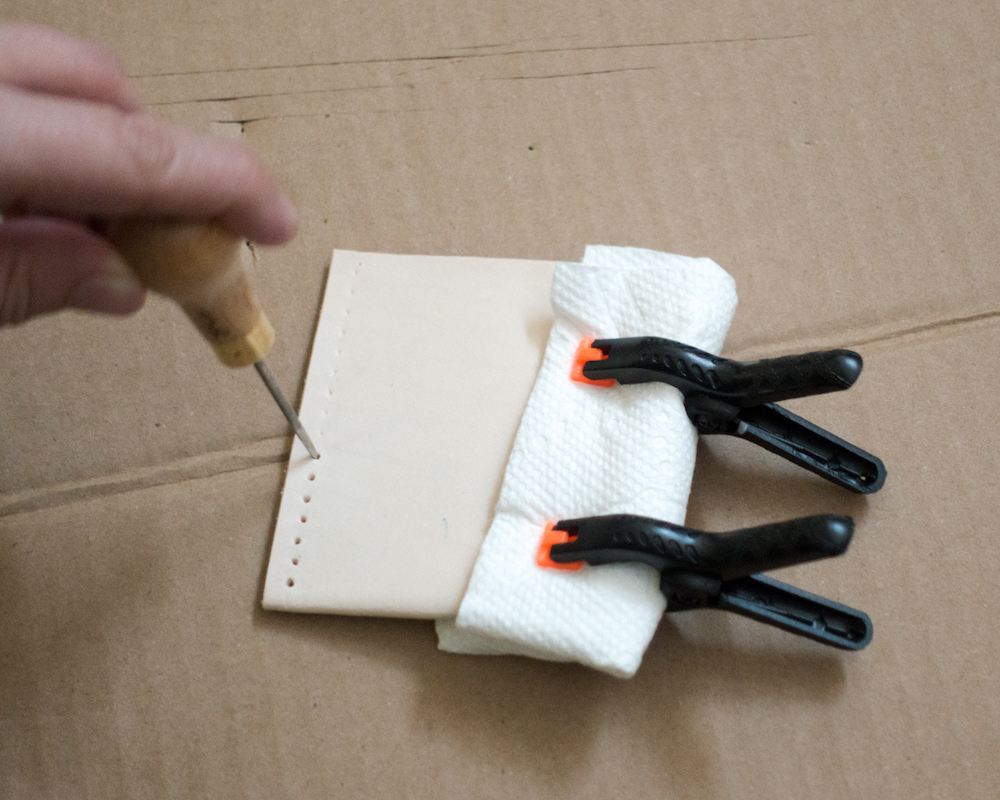
Working from the bottom of the pocket upwards, place the tip of the awl into each stitch marking and use a hammer to punch through all layers.
At this point in the process, you may also choose to barnish the raw edges of the leather. This technique will give your wallet a more professional look, but it is not necessary for functionality. Barnishing requires more supplies and is more advanced but will make your wallet look even sexier.
Get Stitching:
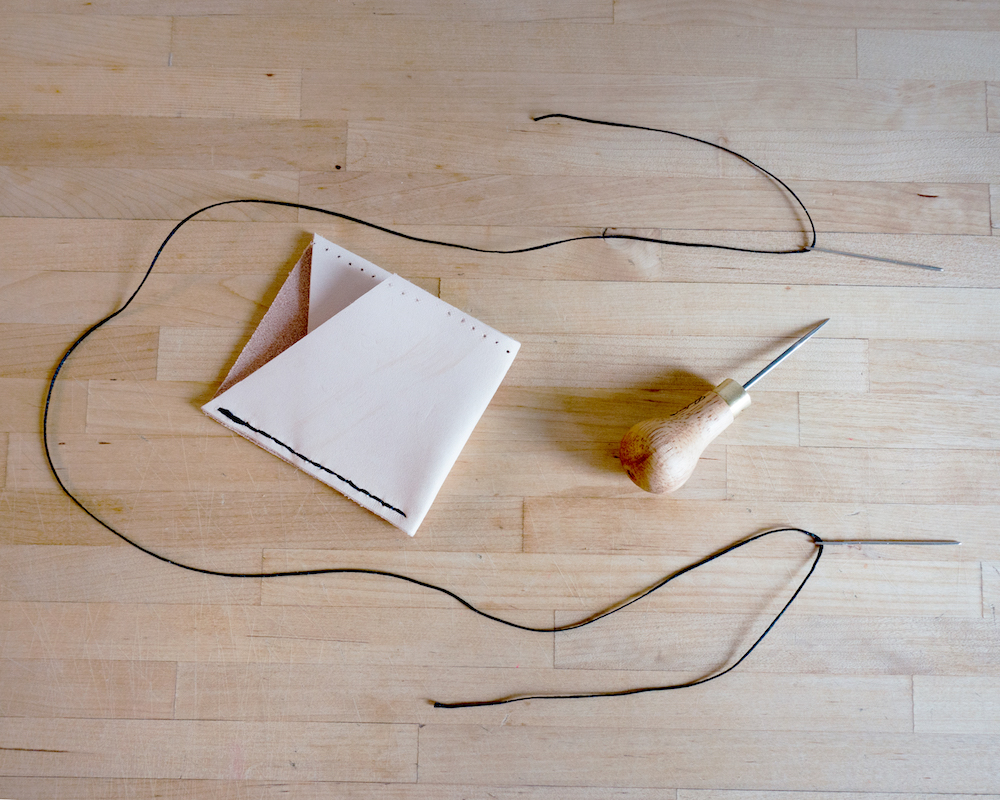
Now it’s time to get stitching! Some folks like to glue the edges in place before sewing or use a stitching pony to keep the pieces from shifting. I prefer to use clamps or just to go rogue; it’s the simplest and will get the job done.
- To begin, cut a piece of thread approximately 4x the length of the edge of the wallet.
Thread one needle through one end of the thread and another needle through the opposite end.

- Insert one of the needles through the hole where you want to start and pull it until the workpiece is in the middle of the thread
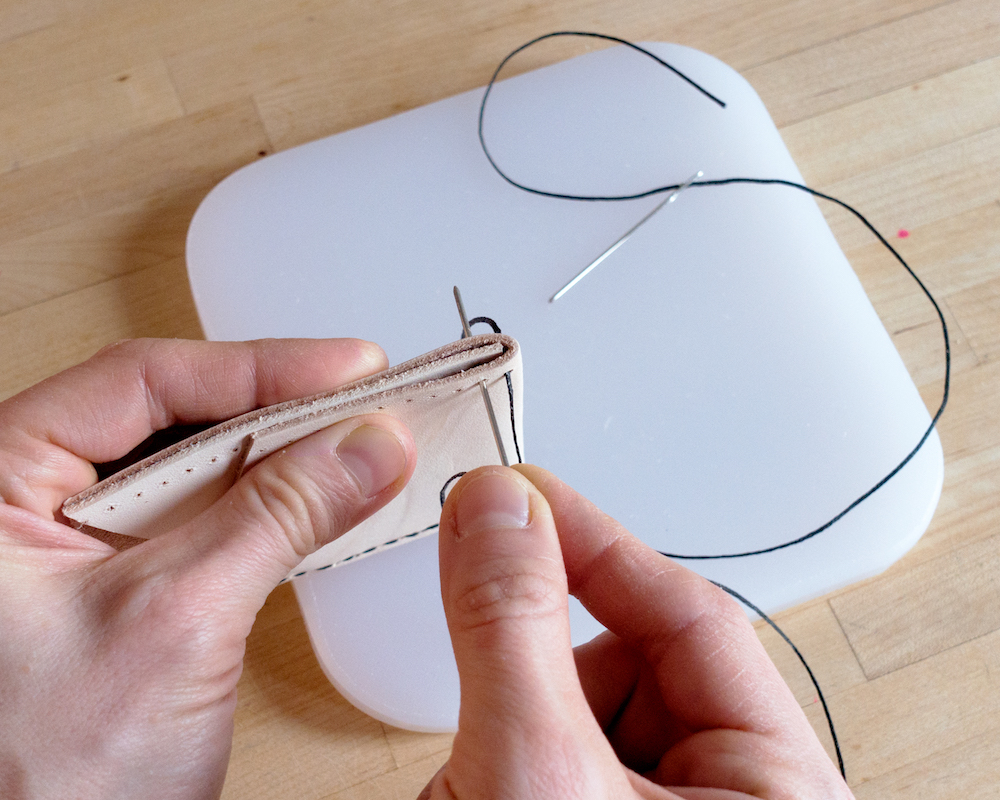
- Take the needle on the front of the wallet and bring it through the next hole. Do not tug on the threads, keep the stitch nice and loose.

- Take the needle in the back of the wallet and bring it through that same second hole. Now that both threads have gone through the second hold, take a needle in each hand and pull evenly until the stitch tightens. Notice that the needles alternate sides with every stitch. Remember that each needle is going through each stitching hole. Repeat this same technique up the line of stitching holes until you come to an end.
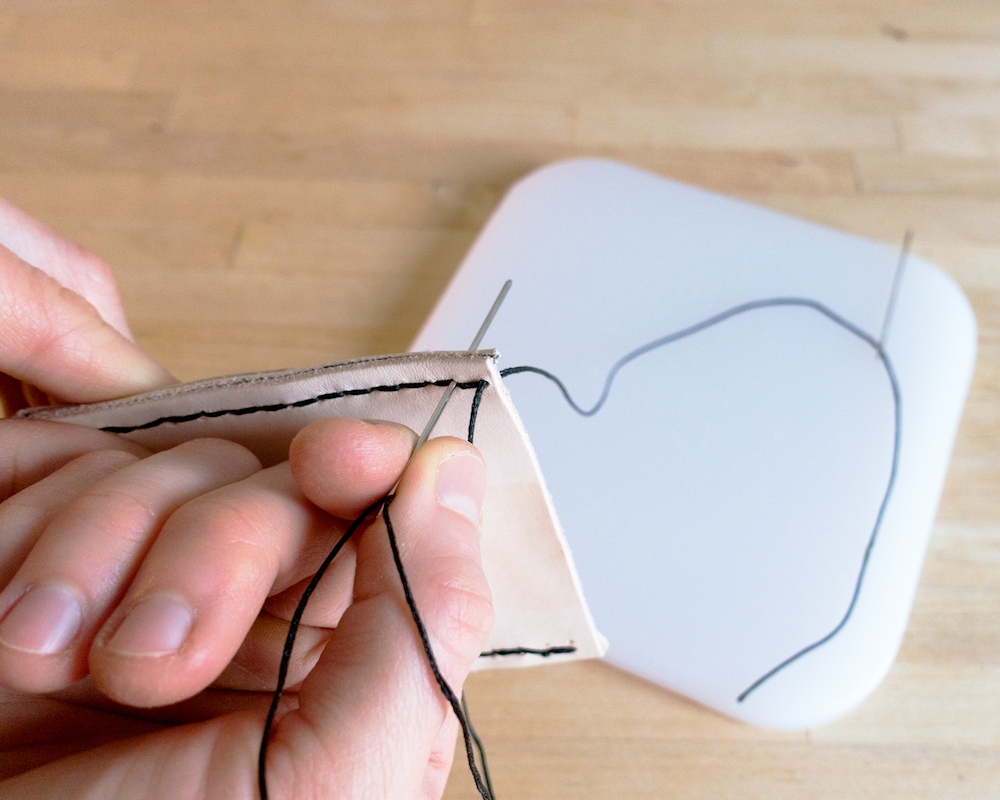
- To finish and secure the threads at the end, reverse the direction of sewing and stitch back over the last two stitches. This backstitch will create a double thickness of thread in the last two holes. If you are having difficulty pulling the needle through, use some pliers.
If you need a bit more help with the saddle stitch, take a look at this instructional video.
- Use the Exacto knife to cut the thread tails nice and close to the leather. Use a lighter to slightly melt any remaining thread.
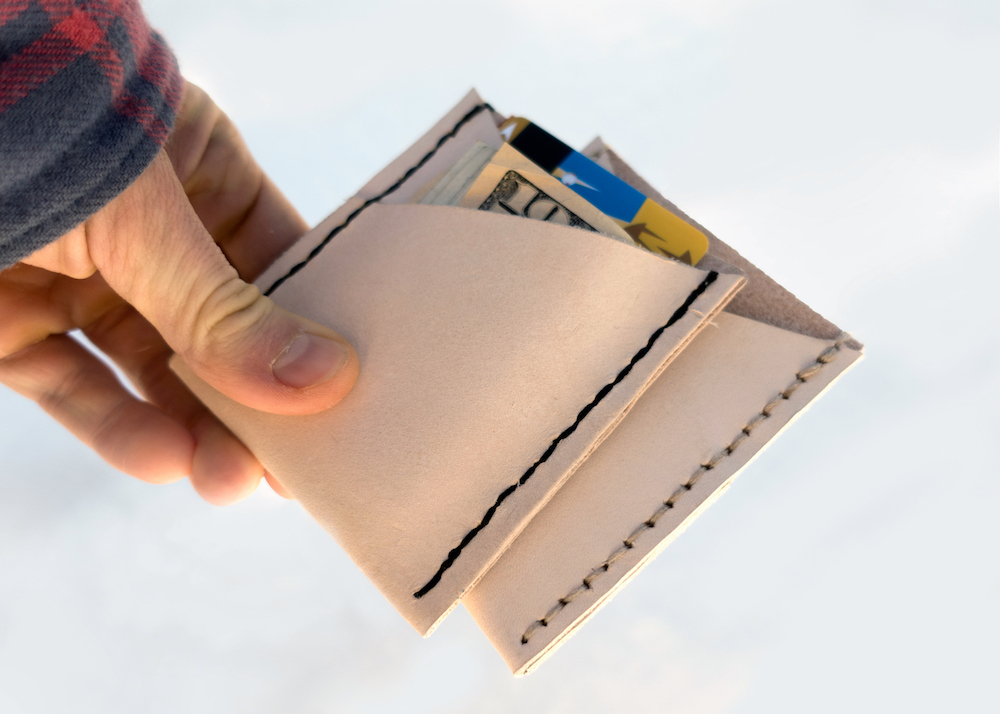
Now go and enjoy your new butt stuff and I’ll be seeing y’all at A-camp X!
How to Make a Vision Board (From a Vision Board Skeptic Willing to Change Her Ways)
Up until this year, I have never believed in vision boards. I’ve always thought: How is a collage of images, words, and affirmations that reflect my innermost desires actually going to help me? But Olympic athletes, Oprah, and even our Prime Minister of Lesbianism, Ellen Degeneres, have all sworn by them. Last year our staff vision boarded the hell out of their years. Supposedly, vision boards can help change your life, or at least move your mindset because positive visualization is one of our most powerful tools.
Every December or January without fail, groups of my friends get together to have vision board parties where they map out their next year and encourage each other to “dream big” over wine or hot chocolate. I always decline their invitation. It’s not that I don’t believe in the power of manifestation —I do. I’m pretty witchy, spiritually speaking. I believe that when I light candles, I am taking charge of my destiny. I also love a good craft project! Especially on a cold winter night. Still, the idea that I could glue magazine cut outs together and “keep good thoughts” until positive changes happen in my life always seemed a bit far fetched for me.
But then, 2016 happened. And then 2017 happened. And honestly, I am feeling pretty beat up by the universe right about now. At this point, I am willing to try anything that might help me keep my life on track. So, I returned back to vision boarding. This time with an open mind and heart.
What I’ve learned is that there’s no strict rules on how to make a vision board. They can be as elaborate or inexpensive as you want. A lot of times you can just use what’s on hand. Some people prefer to use a app on their phone or computer and create their collages digitally. The sky’s the limit. The point is to create something that resonates for you, and keeps you focused on where you want your future self to end up. You’ll need quiet time (either alone or a date with friends) to calm your thoughts and open yourself up.
The trick is to keep this in mind: Focus on Your Feelings. Some people make their vision boards about material things, say making more money or losing weight. But for the boards to really work, you want to push yourself deeper. How will making more money make you feel? Are you perhaps looking for security instead? Then keep security in mind. Are you attempting to lose weight because you associate it with health? Then keep health or strength in your mind. Maybe you are a bit like me and feeling lost at the crossroads, then you can use your vision board for self-discovery. And, so on. It is difficult to manifest an item, but you can manifest a feeling. Having a vision board in your home will keep those desired feelings at the forefront of your thoughts.
What you’ll need:
- A board to glue your items on. Don’t worry about getting something specific, almost anything will work. Try to think about what is functional, but also aesthetically pleases you and is in your budget. Examples include: heavy poster board, cork board, an old piece of plywood, a frame that still has it’s blank cardboard backing (make your vision board on the included cardboard backing, and poof! You have a framed piece of art!). The limits are endless.
- Pictures. From magazines and/or printed off the internet. The more magazines you have available, the better because it will give you choices. At the same time, I am always shocked by how much magazines cost these days! I did this vision board with two magazines and my home printer, it worked out fine.
- Affirmative Sayings and Quotes. Once again, magazines and the internet are useful here! You can also handwrite messages or quotes from books with colorful paper and markers.
- Construction paper, tissue paper, glitter, stickers. Anything that’s colorful, really (Optional)
- Random trinkets that make you happy. Feathers, bookmarks, inspirational notecards from your best friend. Anything that feels like you and reminds you to feel good about yourself. (Optional)
- Writing Instruments. Markers, pens, crayons, colored pencils, paint brushes. You do you.
- Cutting Tools. Scissors or an exacto knife.
- Adhesive. Glue sticks, paste, tape, pushpins, rubber cement, you name it.
What To Do:
1. Get Your Supplies. It’s very possible that you already have everything you need laying around your house. If so, way to go! Proceed to the next step. If not, it’s time to make a supply run. Any big box, convenience, or craft store will have what you need.

Don’t feel like leaving the house or have time in your busy schedule to carve out an extra errand run? That’s what Amazon is for!
I had most of these items hanging around from past craft projects, but was short on poster board and magazines. So I bundled up and braved the frigid January temps to go shopping.
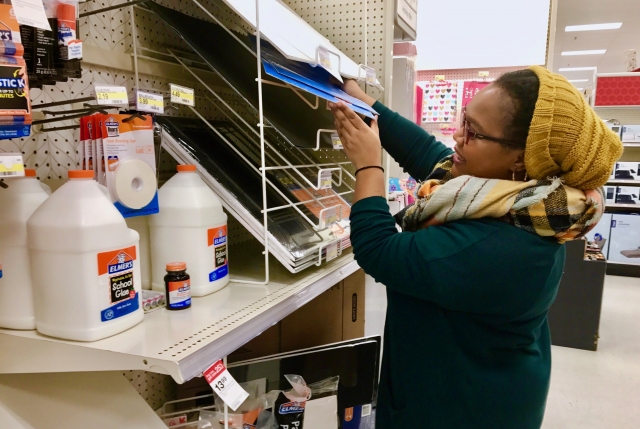
Honey, you haven’t lived until you have made a middle-of-the-night run for poster board.
https://www.instagram.com/p/Bd2-YZIgS3s/?taken-by=carmencitaloves
2. Set Up Your Space. Now you have gathered your supplies, great! Next you want find a space in your home that you are comfortable in and that is large enough to spread. A kitchen table, your living room floor, a writing desk are all good places to start. If you are thinking about doing your vision board as a part of a group activity with friends, make sure there is enough work and sitting room for everyone.
Once you’ve identified your space, clean it up a little. You don’t have to go overboard, just organize what’s around you and clear off open areas for your craft supplies. I find that when I’m about to set intentions, I always work best from a fresh palate.
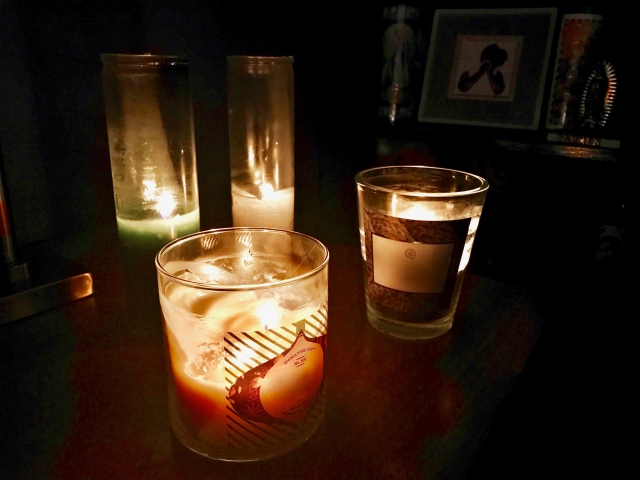
Now, the fun part! Light candles, burn a little incense, gather your crystals if that’s your thing. Make yourself a cup of hot chocolate, lay out snacks. You are creating an environment that will support you, help you relax, and allow you tap into your inner desires. As with all things, music is helpful in setting tone. Don’t have a mix in mind? I heard a rumor that Team Autostraddle is rounding up our 2018 playlists, just for you! Get into it.
3. Work On Your Intentions. We have our supplies, our space is ready — it is time to finally dig deep into this vision boarding thing. Pull out a notebook or some spare paper from your craft materials. Write the following questions at the top of your paper:
- What Do I Want?
- What Do I Need?
- What Do I Value?
Spend at least five minutes writing answers to those questions. You can go with single word lists or you can free write paragraphs. Be gentle with yourself and open when thinking about your feelings, don’t shut yourself down. This is just your starting point, but it will help you focus your mind on the task at hand. (if writing makes you anxious, set a timer. You can also feel free to go longer if the words start to flow).
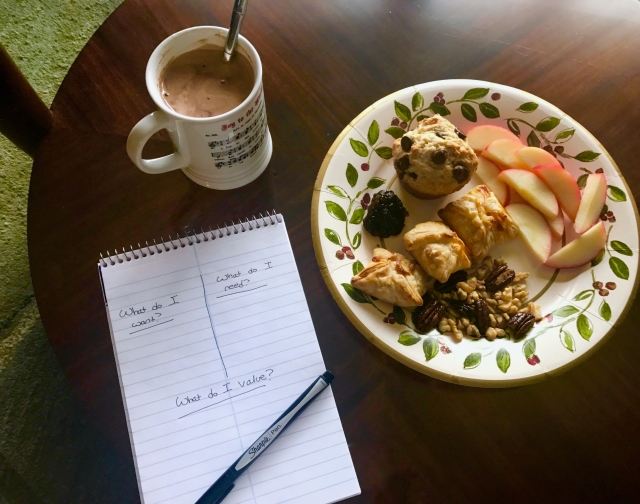
Looking for a snack suggestion? Laneia made this Cheese Board Demonstration that you are going to love!
4. Find Your Images and Words. Go through your magazines and cut out images or phrases that appeal to you. If you have friends over, feel free to share materials. If you have something specific in mind, and your magazines aren’t giving you what you need, print from the internet. There are no set rules to follow, as long as it makes you feel good and represents what you want for this next year. Be generous with what you collect; this will give you more to choose from later. Make a pile of all of your cutouts together.
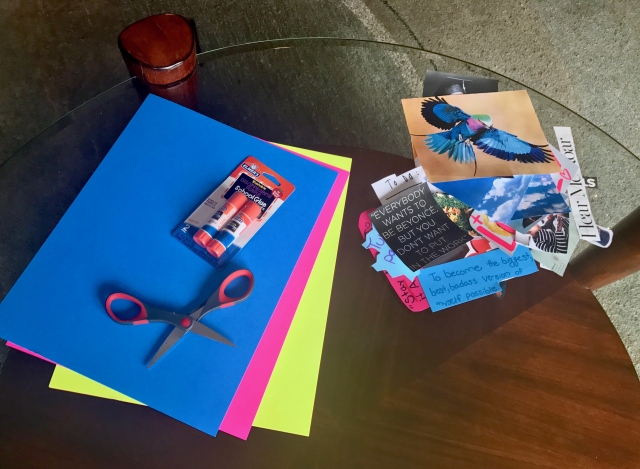
5. Paste or Otherwise Adhere Your Items to Your Board. Go through your pile and look specifically for those items that invoke your strongest positive feelings, or best represent your intentions, and start arranging them on your page.
This process will be individual to you — no two vision boards will look alike. Some people will like to leave space in between each item on their board, because it will feel calmer to them. Others may love the feeling of closeness and want everything to touch and overlap. Both are fine. I found that I liked gluing tissue paper as background to my board because it gave off a texture that made me happy.
Once you have everything arranged in a way that aesthetically pleases you, start gluing or pinning your items down. If you would like, embellish your finished board with additional decorations (stickers, glitter, markers, doodles, etc).
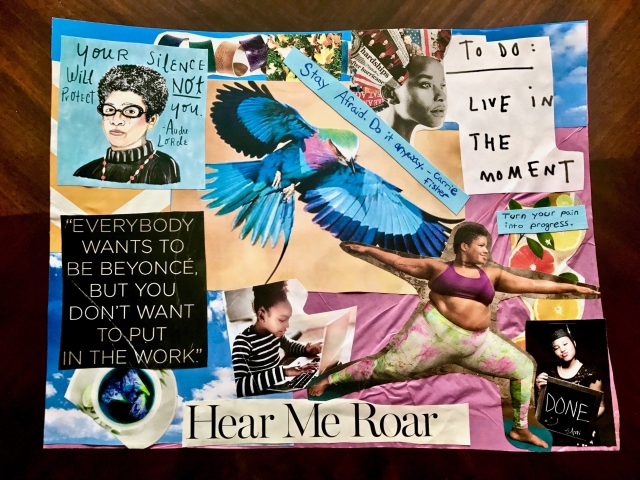
6. Hang Your Vision Board Somewhere You Can See It. This is key, your board is a visual reminder of what you are working towards. Looking at it often will help you connect with why you created it. You don’t need to stare at it 24/7, but it should live somewhere you’ll encounter it often. Try hanging it on your refrigerator door or in a well traveled hallway. Perhaps above your desk? Let’s be real, if you shove it under your bed, you’re going to forget all about it. That is NOT the point.
7. Write Your “Action List”. Not everyone seems to do this last step, but I think it’s useful. Go back to your notebook and make a list of the small things you can start working towards your goals or living out your intentions RIGHT NOW. Write down as many things as you can think of. Be sure to ground your list in actions that you personally can be in control of, not things that you have to depend on others for. Try to get as specific as possible. If you have already formed some helpful habits, include those as well.
Circle three items from that list. These are your “Right Now” goals for this month. Next month, you can revisit this list, adjust, build, reassess, and pick out more items to accomplish.
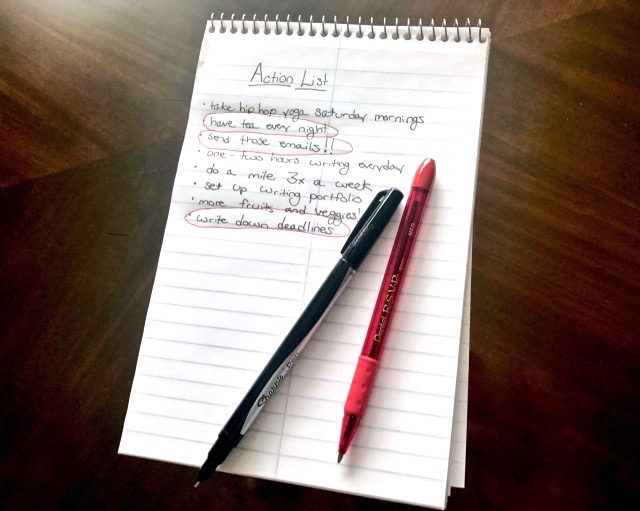
This will help you convert your vision board and into small, tangible, actionable change that you can feel in your life immediately.
That’s it! You have Vision Board-ed! Congratulations, my friend. It’s recommended that you be flexible about your vision board as your desires shift or change throughout your year. Feel free to add or take down items from your board as necessary and consider completing a new vision board from scratch after six-to-twelve months. That will ensure that it’s updated to reflect your new values and priorities.
So did the process of making a vision board change my views? I was hoping to have a definitive answer for you, but the truth is that I do not know. I was surprised how setting a mood before writing out my intention list and then writing an action list at the end both helped to focus my priorities. I also found the cutting and gluing the collage to be incredibly meditative. I feel more sure-footed about my path and spiritually aligned than I did a few hours ago. I’m not sure about the lasting results (yet) — but I can definitely say it was an evening well spent. I am in a better place than I started, and perhaps that’s all I could really ask for. I’m look forward to revisiting this project again in a few months and see how I have changed.
If you are looking for some other examples of vision boards, check out this amazing photo gallery that the team put together last year. They are gorgeous!
Talk to this skeptic about your own vision board feelings! Have you ever tried one before? Have you found the practice to work for you? Do you have other ways that you like to set intentions for your goals and dreams? I want to know all about it!
DIY Soy Massage Candles For The Holigays (and Beyond)
Click banner for Holigays 2017. Recipe adapted from The Hippy Homemaker.
Looking for a sweet DIY gift to whip up for the Holigays? A fun new way of connecting with your activity partner and/or friends who like massages? An excuse to use the last of your bath bomb ingredients (to make room for more)? What a coincidence! Me too!
I present you with: DIY soy massage candles. They’re quick and super easy to make, and the effect at the end is magical. Just light a candle, wait a few minutes for the wax to melt into a moisturizing massage oil, then pour directly onto your partner’s body for use. Soy wax melts at a lower temperature than paraffin, so while it’s warm, it shouldn’t be uncomfortable. Perfect for chilly winter nights (and beyond)!

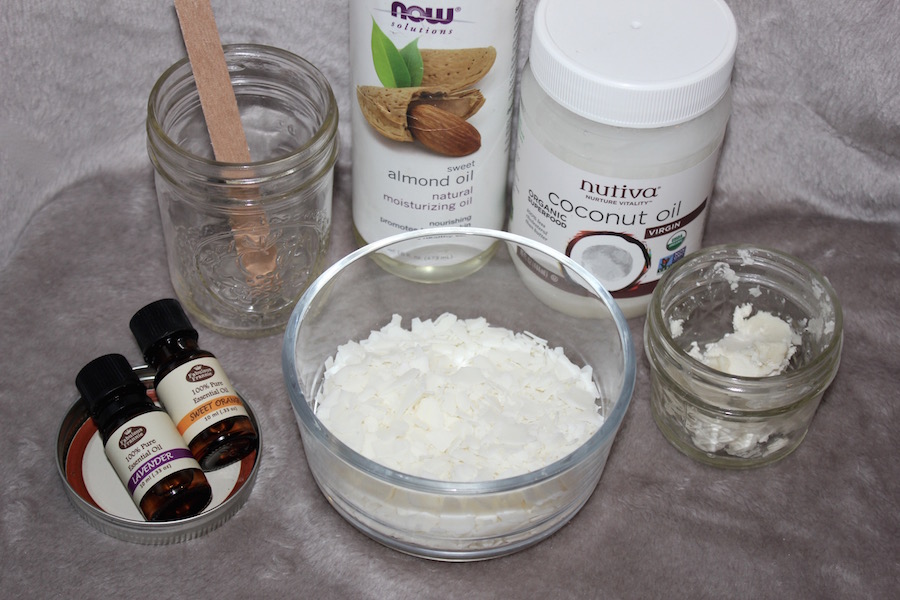
Ingredients
- 2.5 oz. soy wax flakes
- .75 oz. shea butter
- 1.5 Tbsp unrefined coconut oil
- 1.5 Tbsp sweet almond oil
- 20 drops lavender essential oil
- 10 drops sweet orange essential oil
- 1 mason jar, 8 oz.
- 1 wooden candle wick, plus anchor
Note: I particularly love wood wick candles during the winter for the koselig crackling sounds they make, but you’re welcome to use cotton wicks if that’s your preference. Feel free to get funky on the essential oils, too, or to swap in other carrier oils!

Instructions
1. Make a double boiler by filling a small pot 1/4 full of water, bringing it to a boil, and placing a glass bowl inside or on top. Place the soy wax flakes, shea butter and coconut oil in the bowl, stirring until fully mixed and melted.
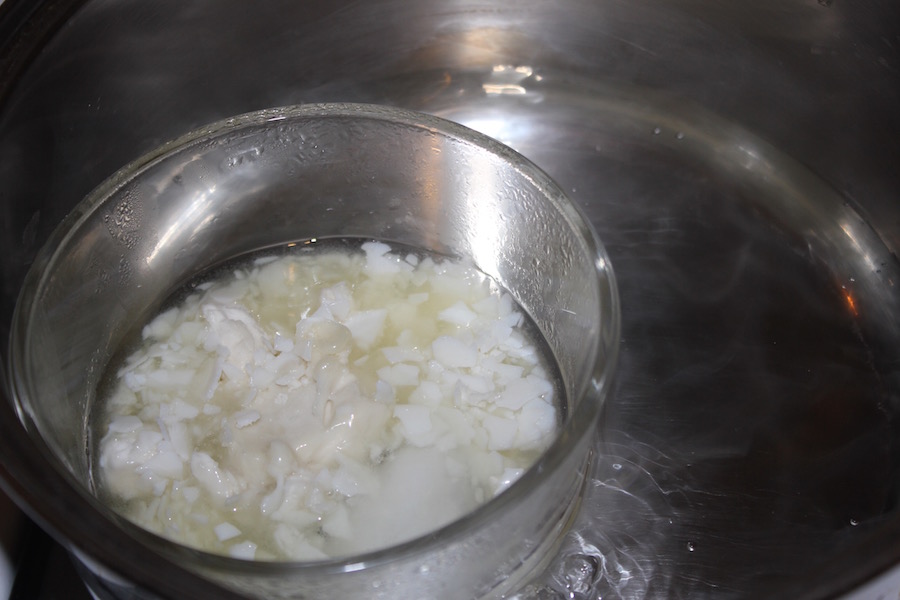
2. Remove from heat. Add the sweet almond oil and essential oils.
3. Place the wick in the anchor and stand upright in your mason jar. Carefully pour your mixture in and let cool for a couple hours.

4. Using a pair of scissors, trim your wick down to about 1/4 inch exposed wood above the wax. If you’re not sure, go longer; it will just burn down and blow itself out without drawing any of the wax up, then you can try again.
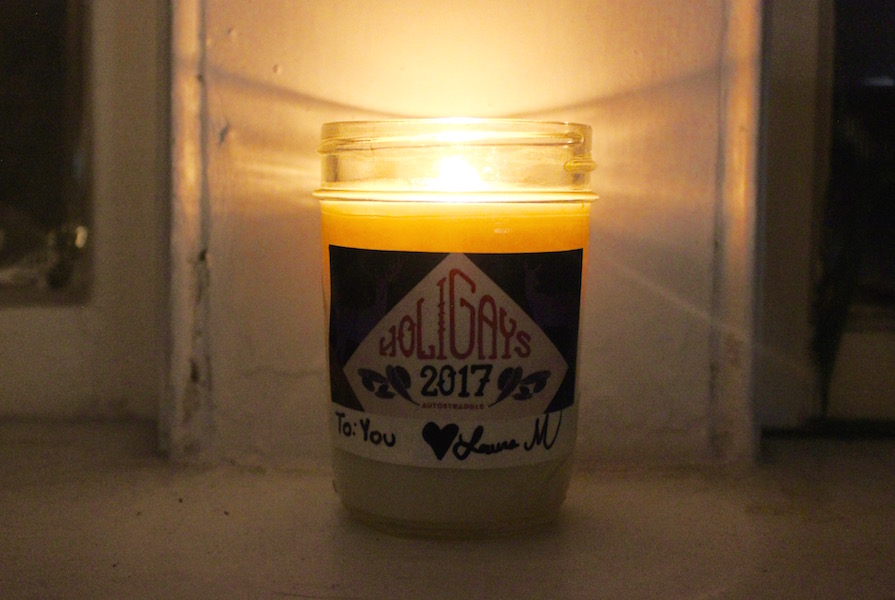
5. Add a cute label and gift away!
Make Your Own Chapstick and Lipstick For Every Pocket

Depending on the day, you may be feeling more lipstick or chapstick, and with this simple recipe, you can make both!
There’s no need to make any decisions, just keep one of each in your pocket and listen to your heart. Thankfully, this lip stain recipe uses herbal powders to create a natural pigment, and the rest of the ingredients can be easily found at Whole Foods and Amazon.
Everything comes together quickly, leaving you with a fistful of super-moisturizing little gifts for you and your buddies in no time.
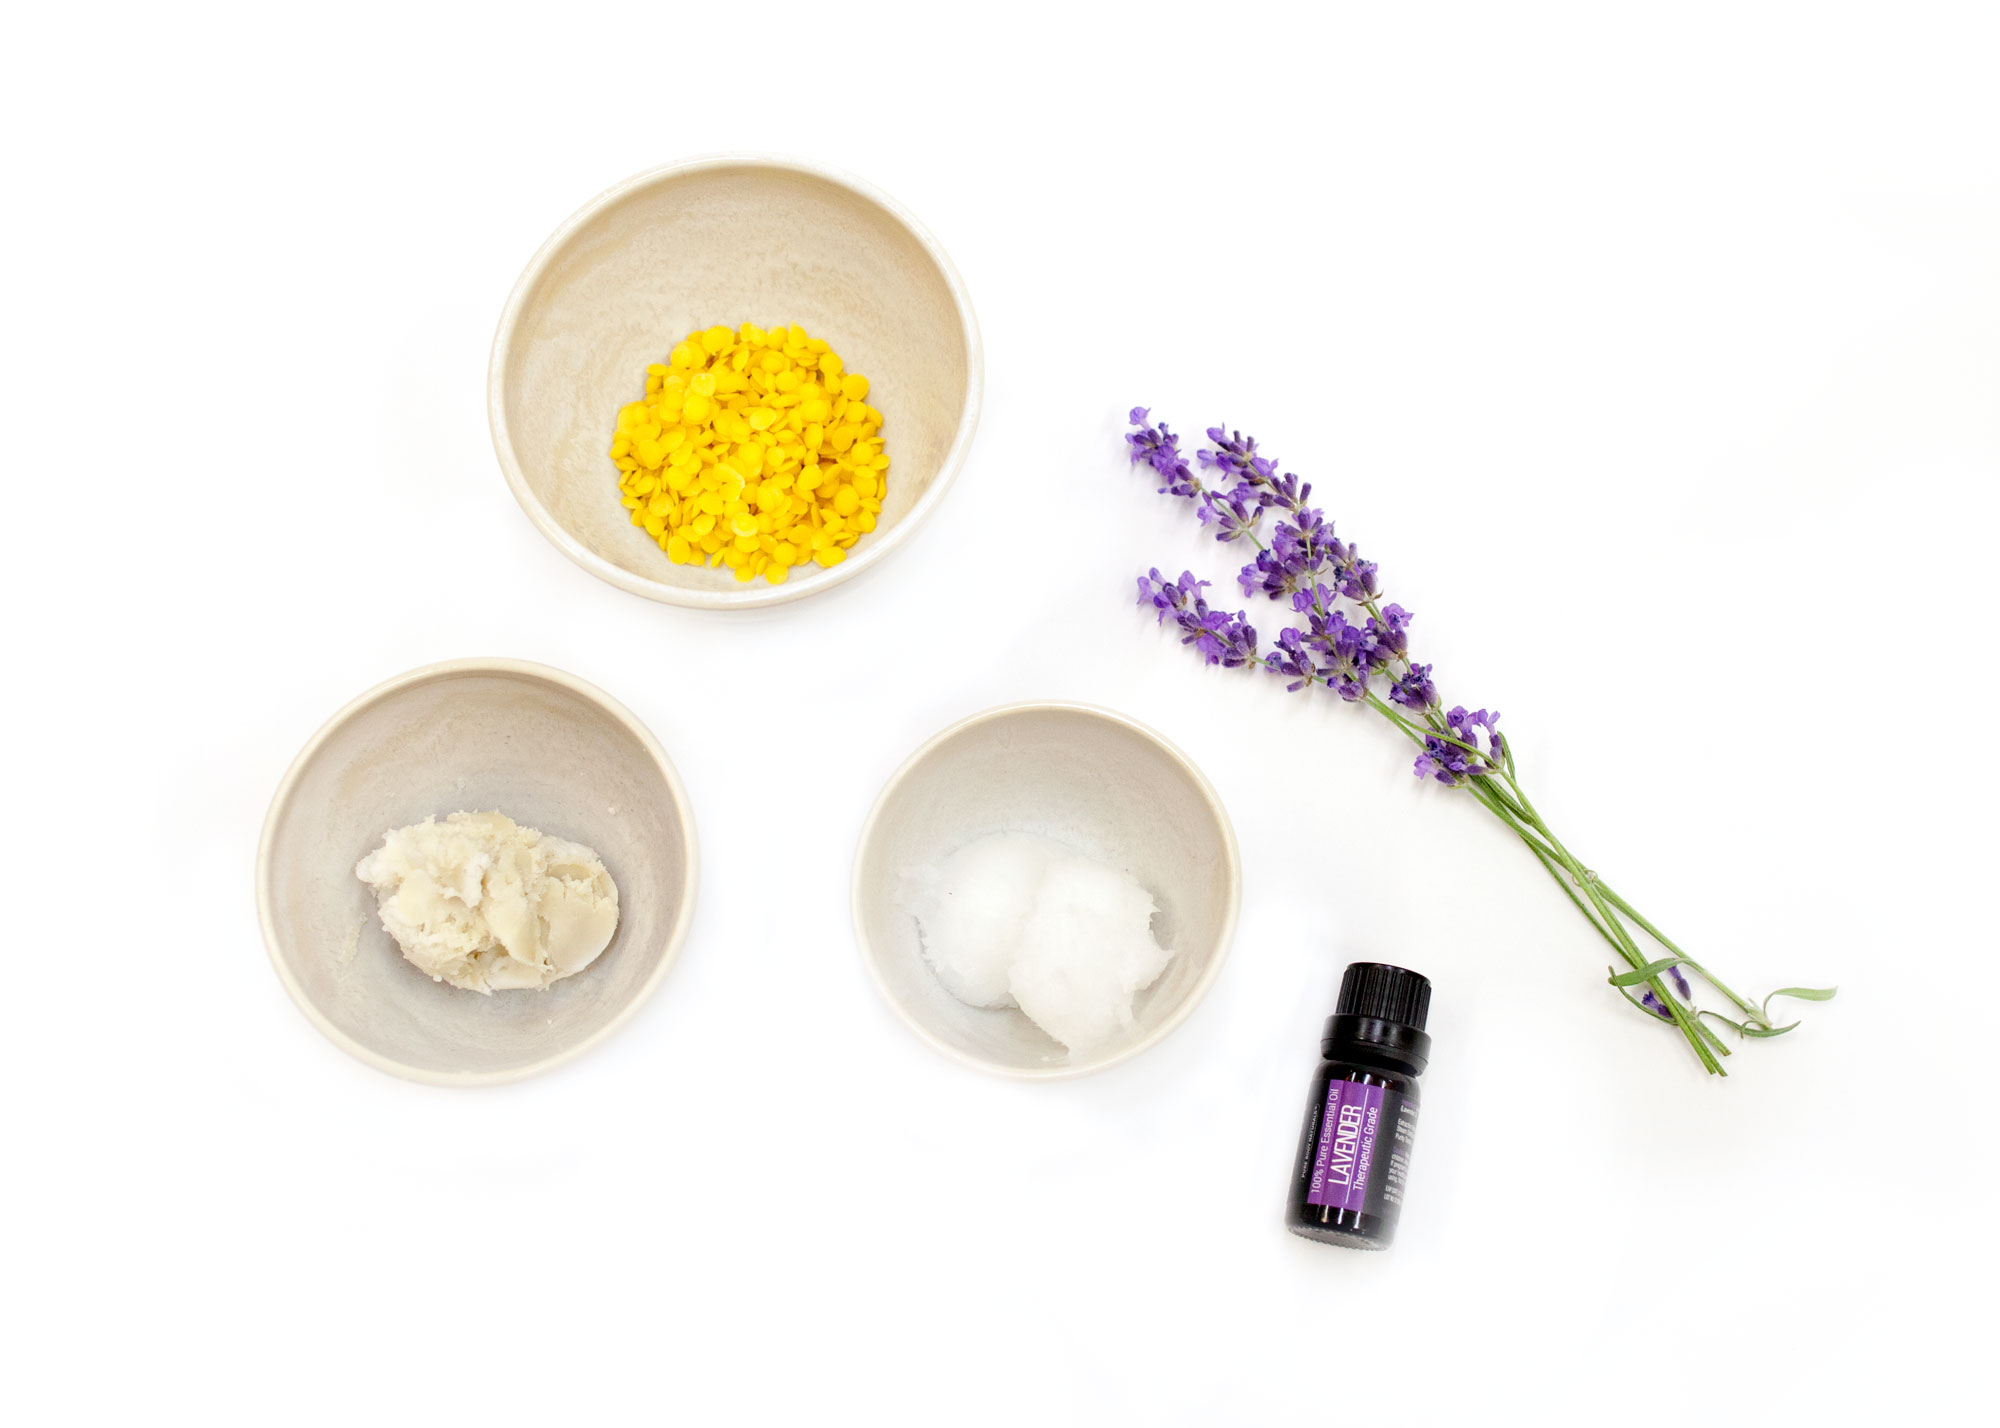
Ingredients:
- 2 TBS Coconut oil
- 2 TBS Shea butter
- 2 TBS Beeswax
- 10 drops of essential oil for scent and tingles.
For Stain:
- Dark Raspberry: 1 1/2 TBS Alkanet root powder
- Pink-Red: 1 1/2 TBS Beet root powder
- Pink: 1 1/2 TBS Hibiscus flower powder
Supplies:
- 25 Lip Balm Tubes or 25 Lip Balm Containers
- Glass measuring cup
- Microwave safe bowl
- Measuring spoons
- Stirring spoon
- Microwave
Optional Supplies:
- Dried herbs or flowers that corrdinate with scent
- Lip Balm Rack
- Little funnel
Making Lip Balm Base

Step 1: Add shea butter, coconut oil, beeswax, and essential oil into a medium sized measuring cup. Add about 1/2 cup of water to a microwave-safe bowl. Place the measuring cup in the bowl; this will act as a make-shift double boiler. If you have an aversion to using a microwave, this same technique can be used on a stove top with a pot.
I made lavender lemon lip balm by adding five drops of lavender oil and five drops of peppermint. It makes my lips all tingly and florally. There are a ton of other combinations that are equally as pleasant including, cinnamon+mint+clove for a bit of plumping or chamomile+rose to soothe.
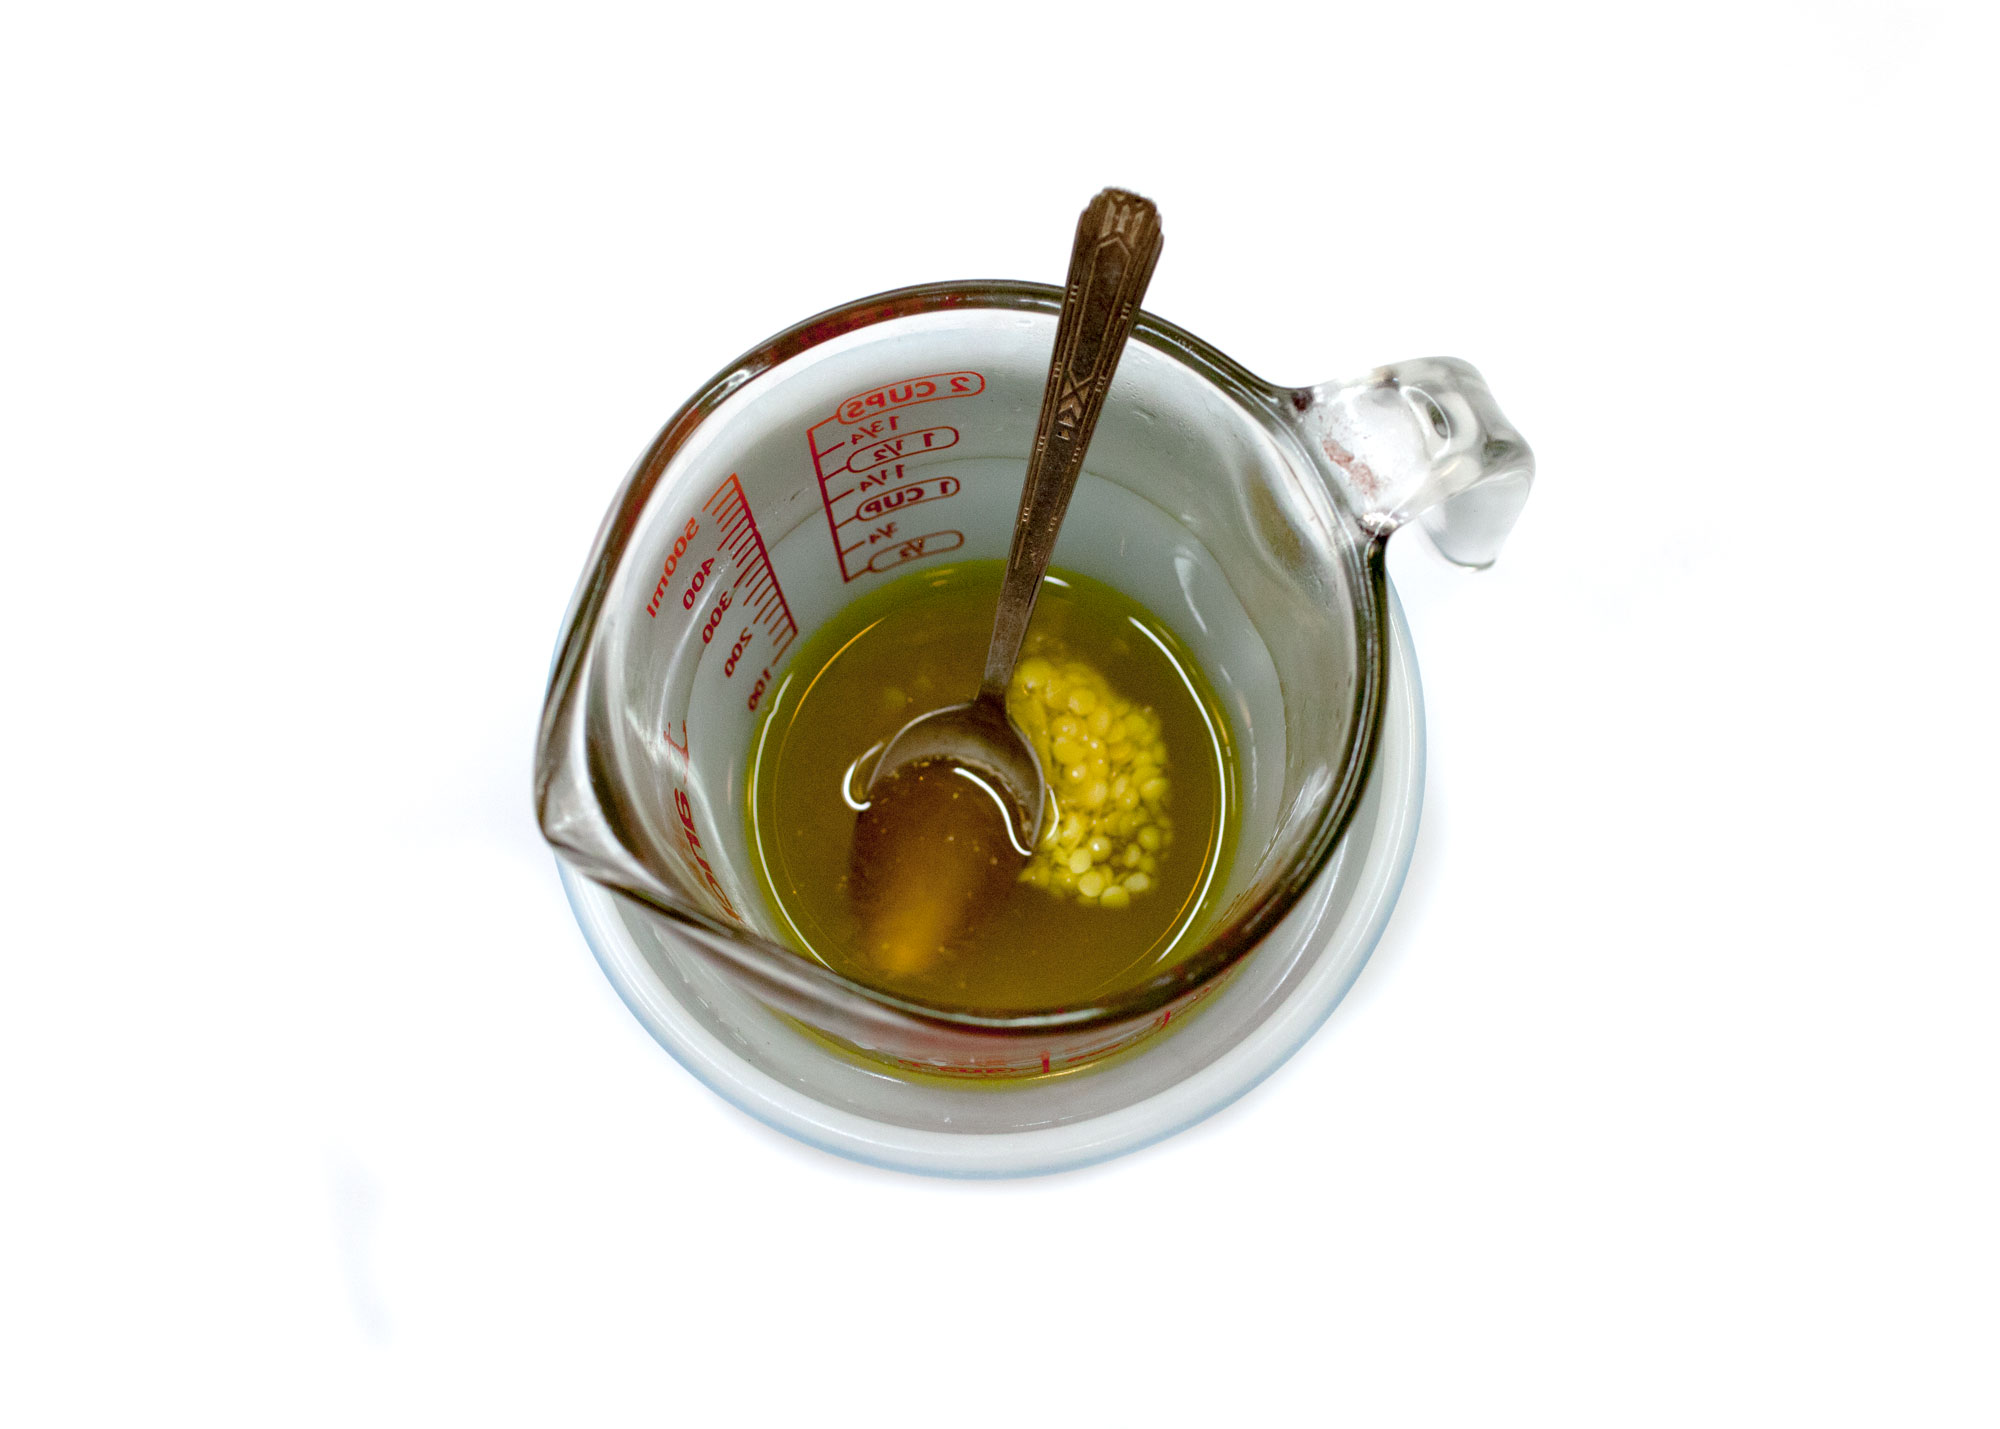
Step 2: Microwave for 2 minutes on high. Stir to dissolve the beeswax into the oil.
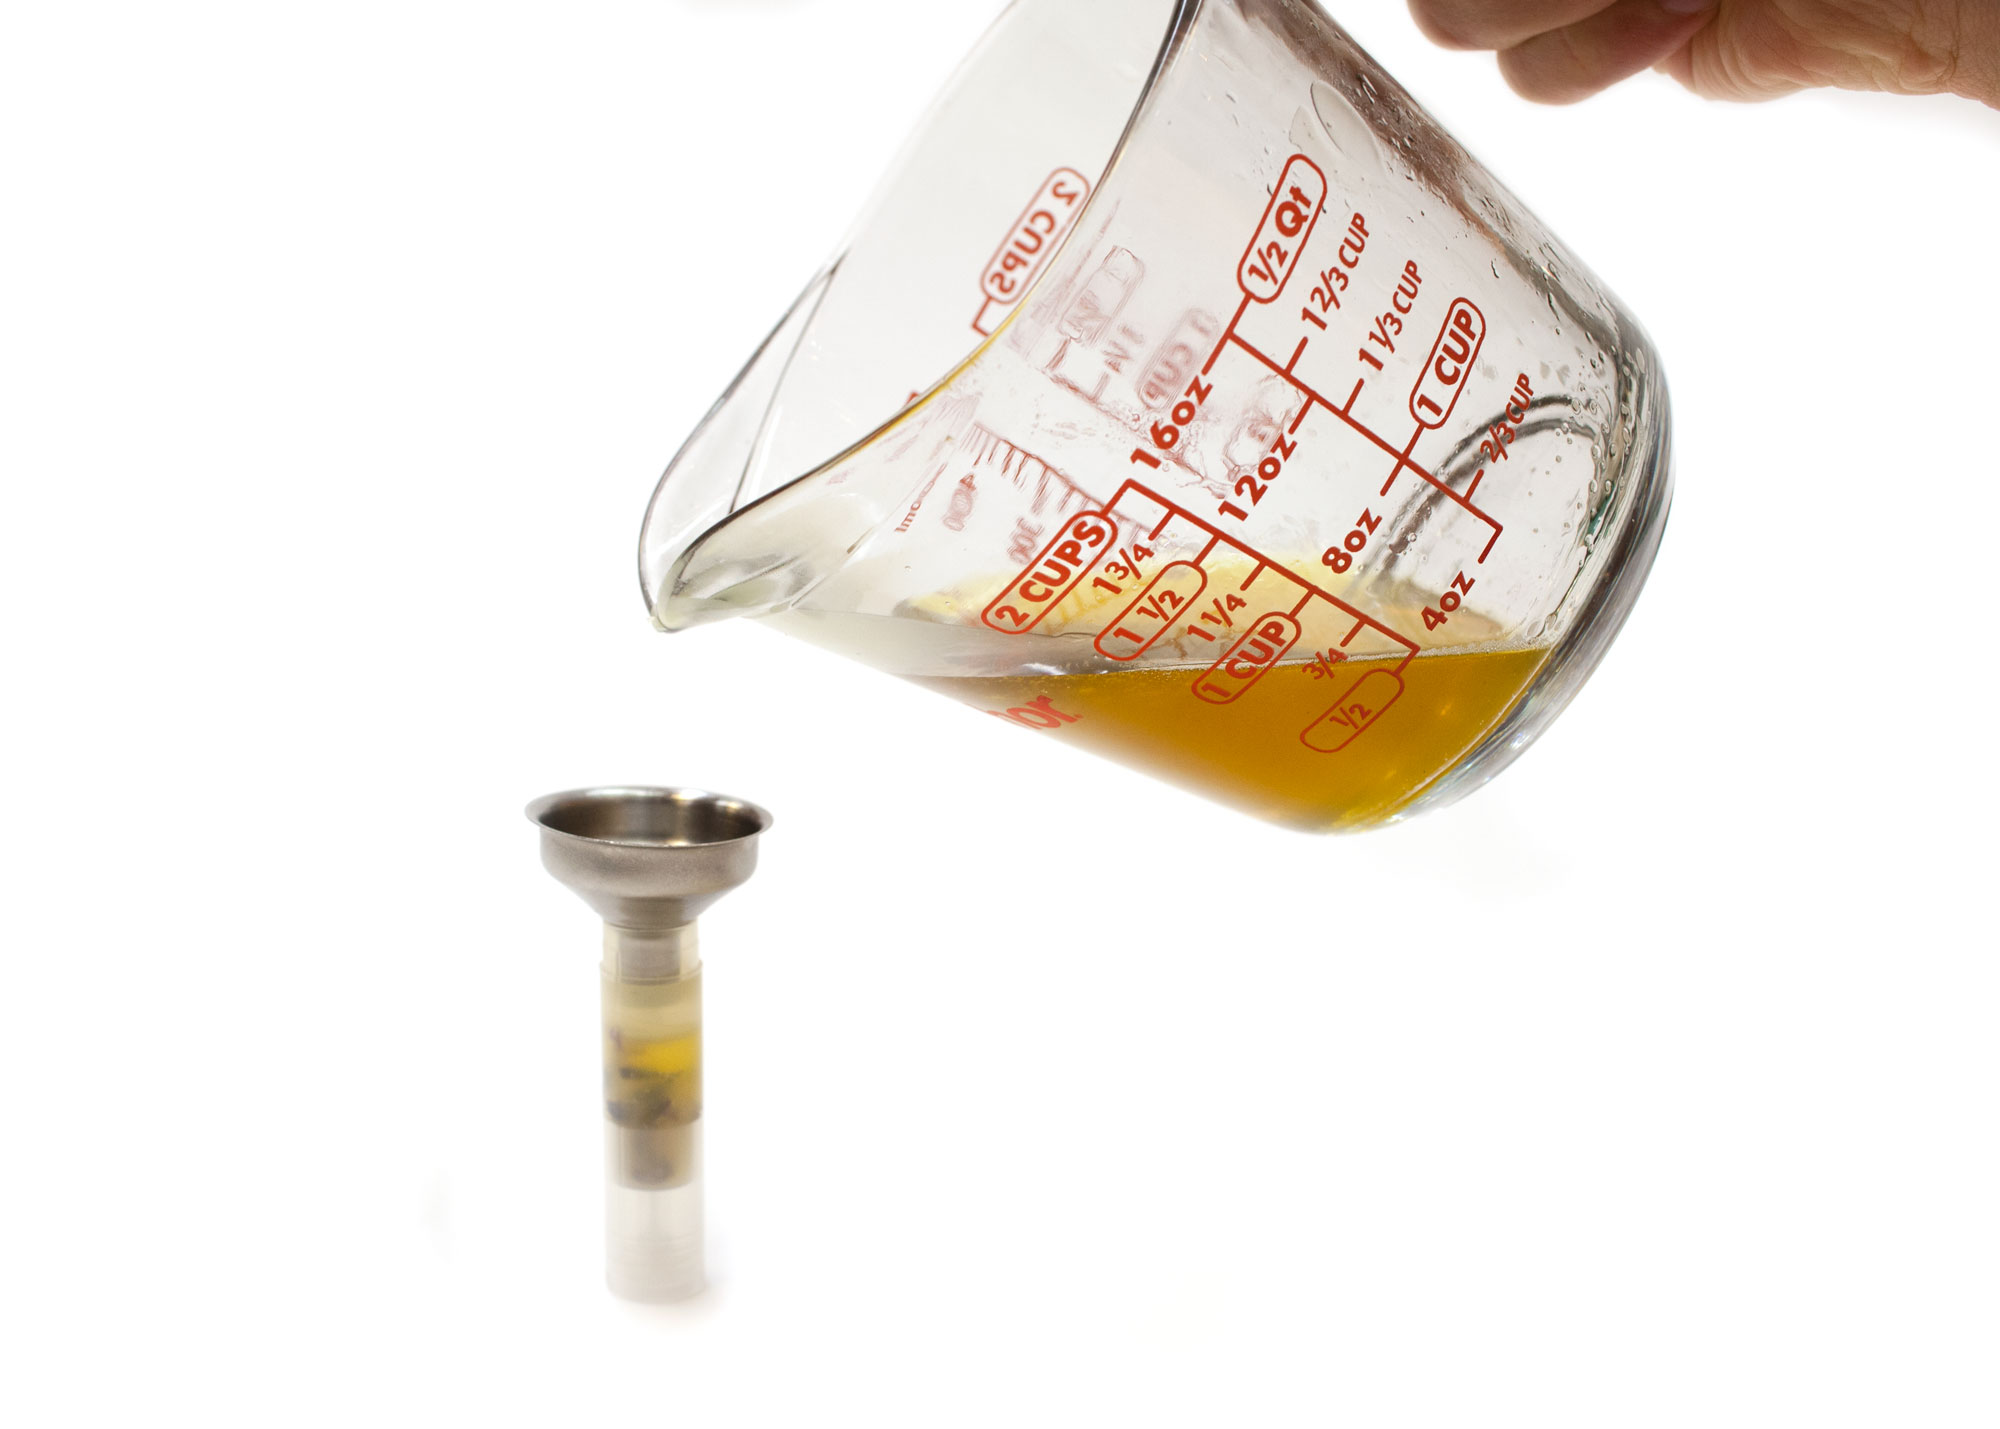
Step 3: Pour the melted mixture into lip balm containers. Take your time when pouring, it’ll fill up way faster than you think it will.
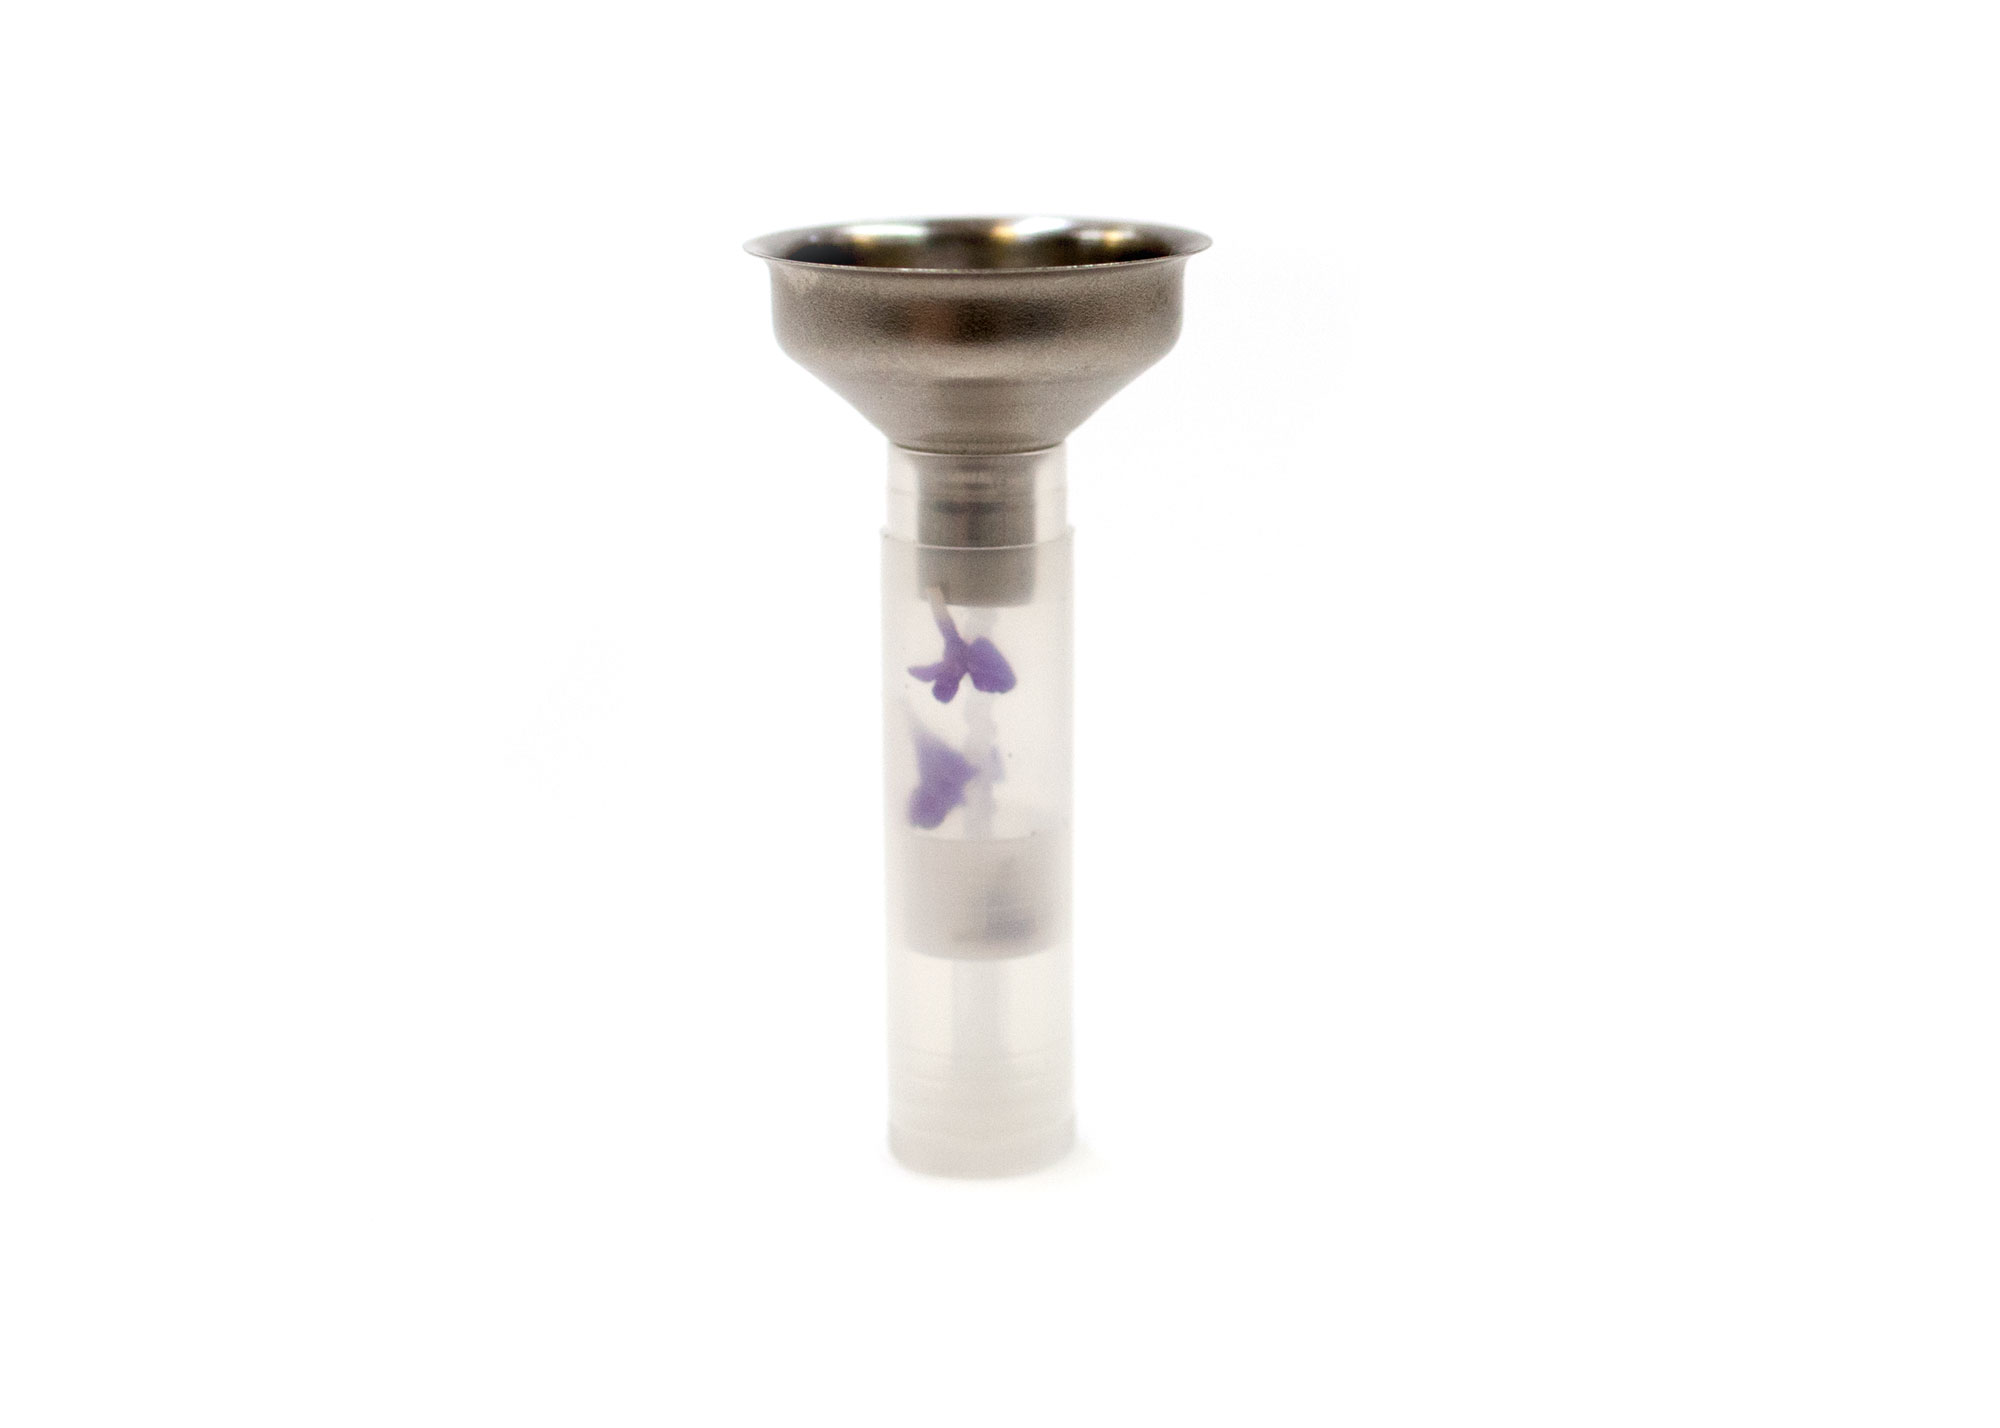
If you’ve got some dried goodies to add into the balm, prefill all of the balm containers before pouring the melted balm.
Making Lip Stain
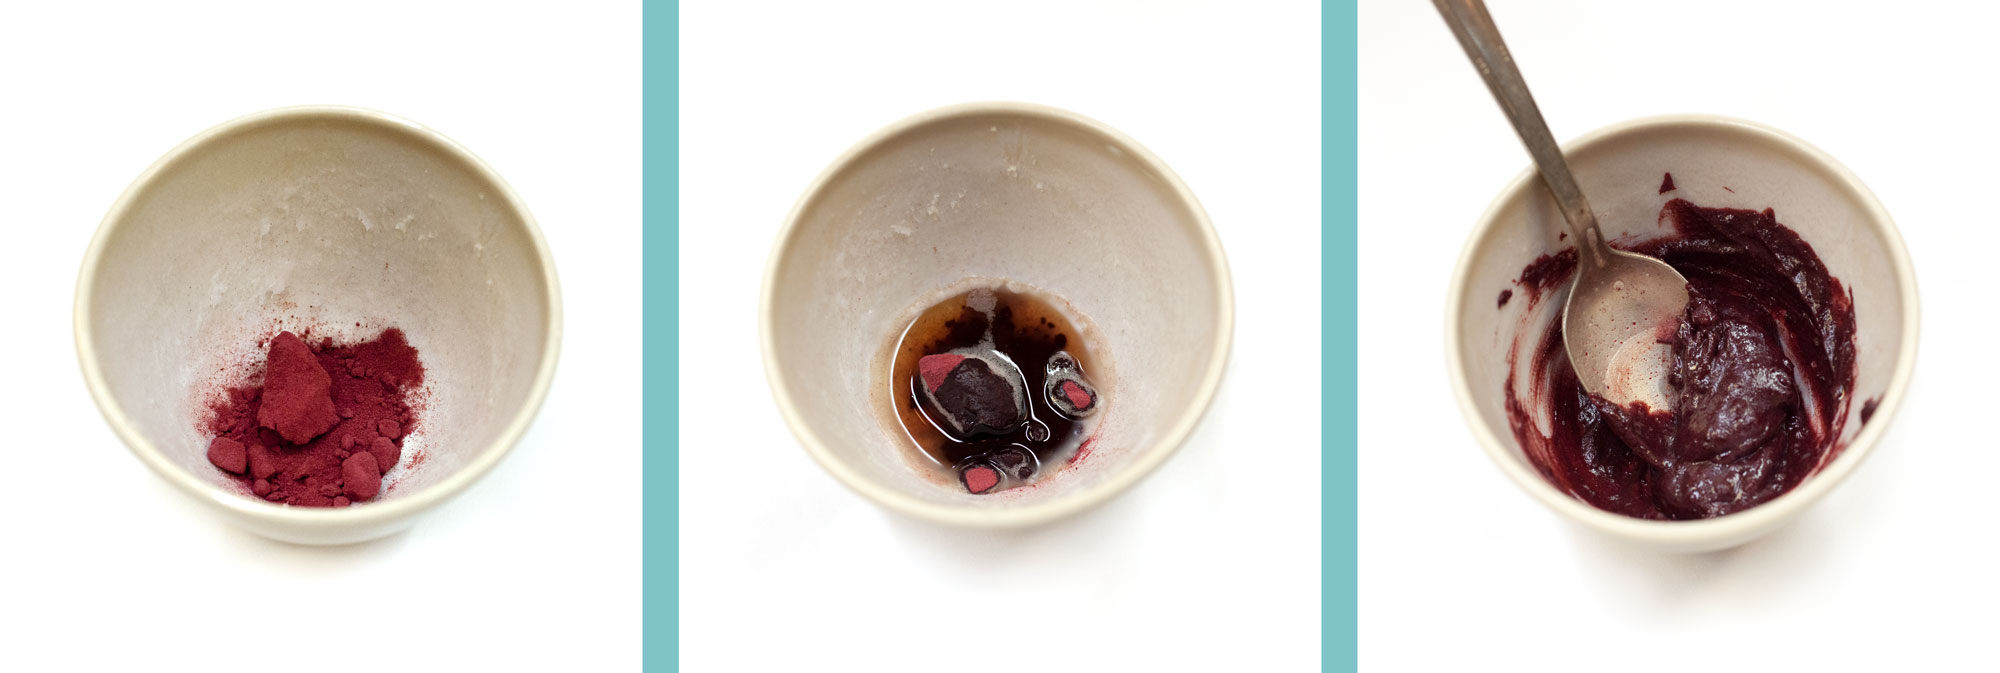
Step 1: Prepare lip balm base by following steps 1 and 2 above.
Add 1 1/2 TBS of stain powder to a small bowl. Pour a small amount of the warm lip balm mixture in the bowl and stir to create a paste. Making a stain paste will help the powder dissolve.
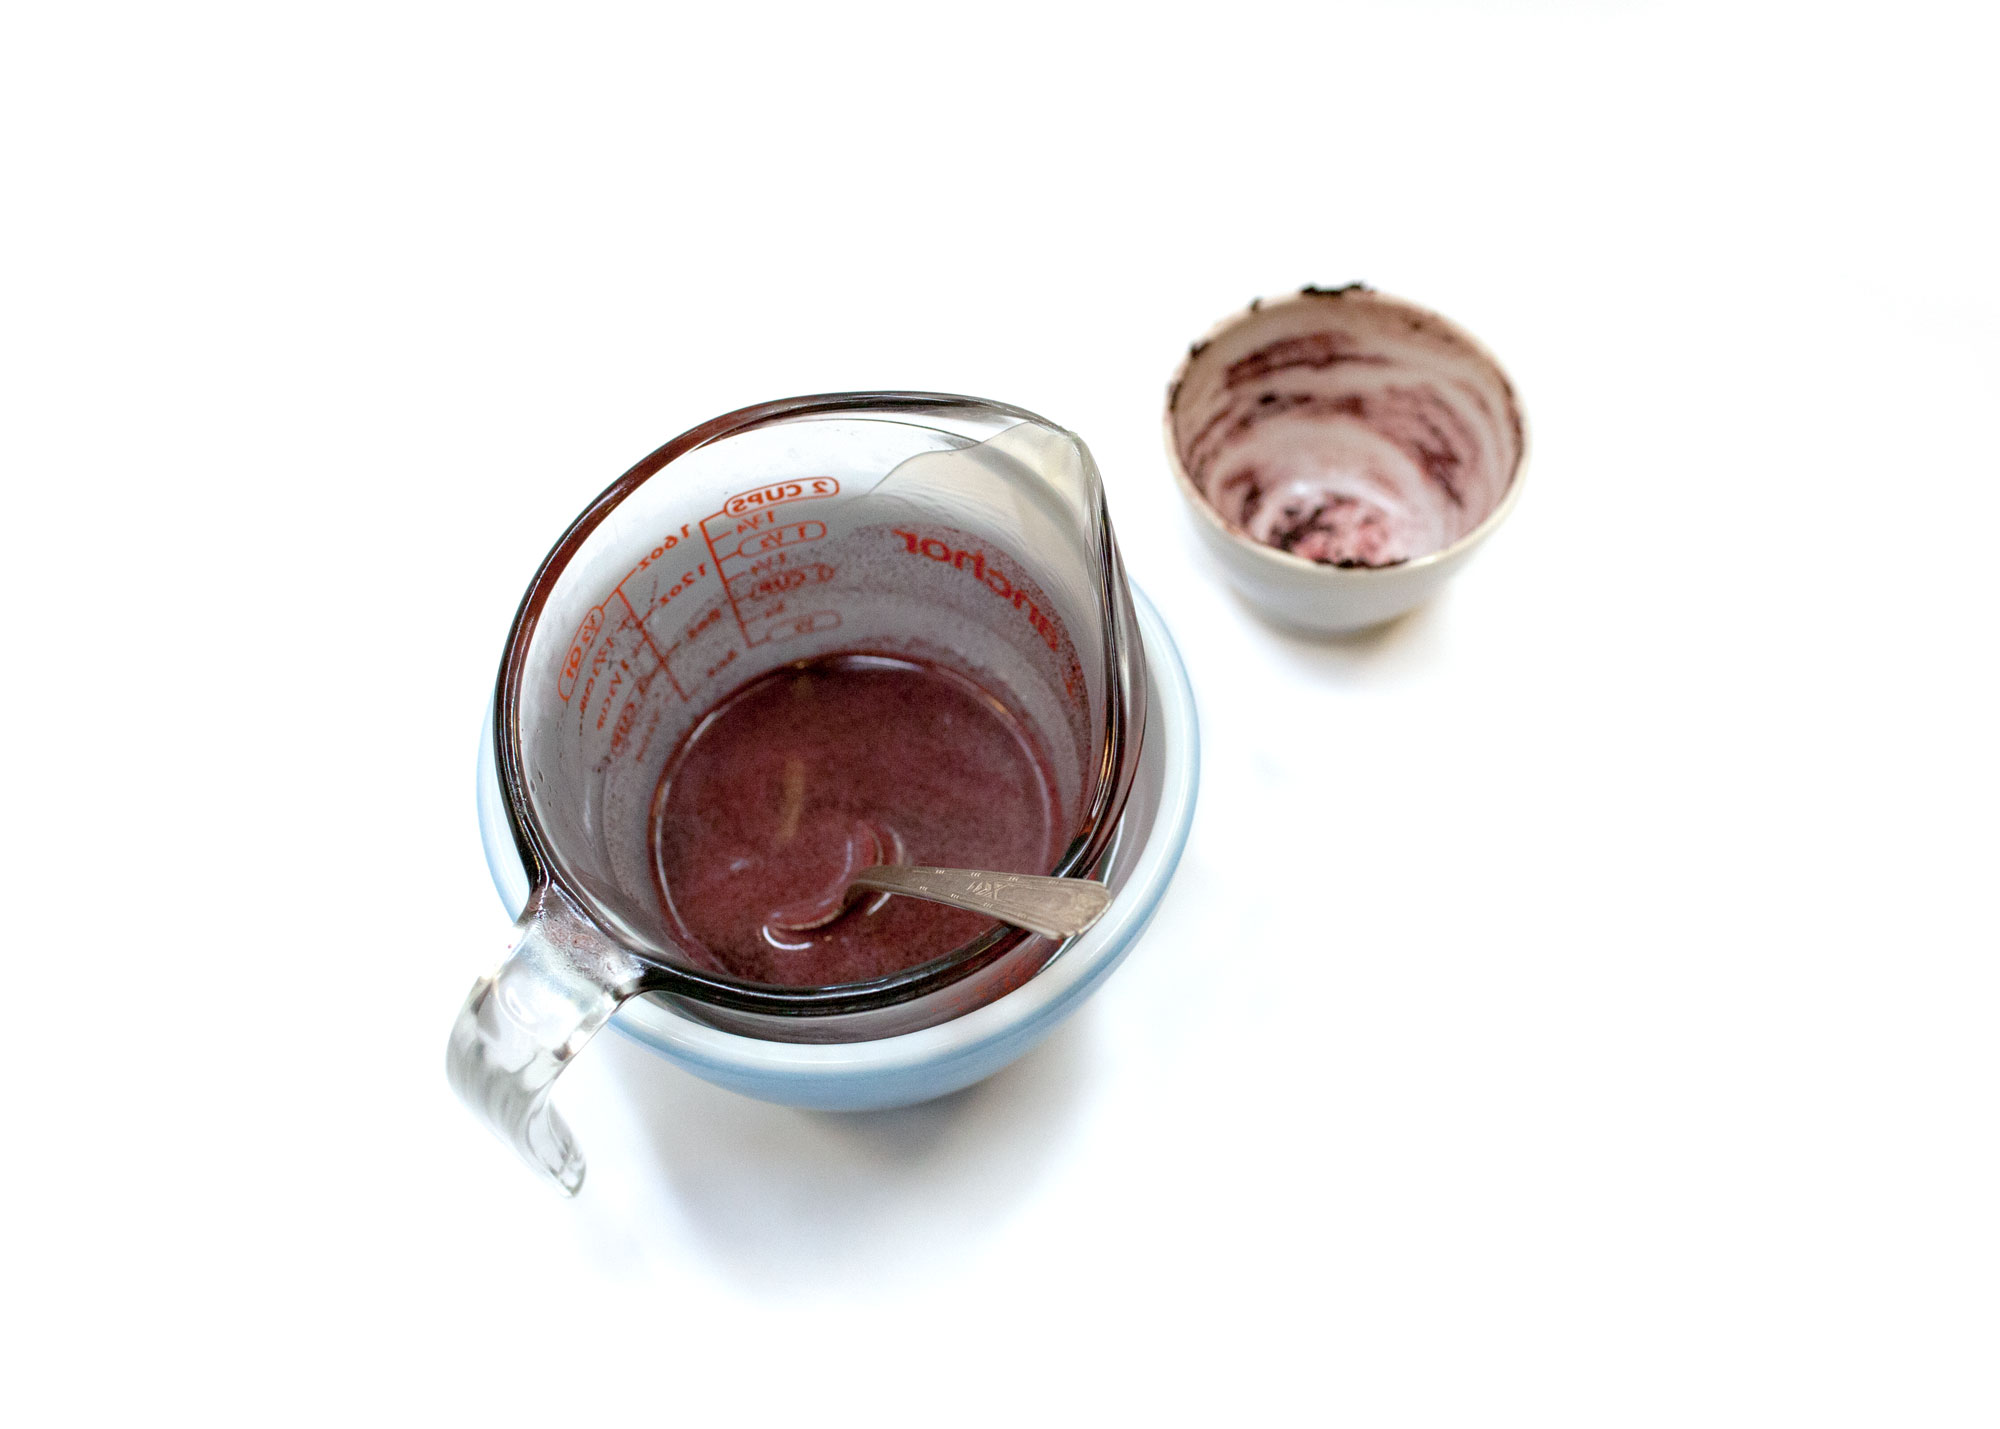
Step 2: Add the stain paste to the balm mixture and stir to combine. Follow the rest of the balm instructions as written.

If you still end of up having problems with graininess, try steeping the stain powder in the oil. To do this, you’ll need to use the stove-top method. Measure and add the powder into a disposable paper tea bag and let it steep in the balm mixture on a warm stove top for about an hour.
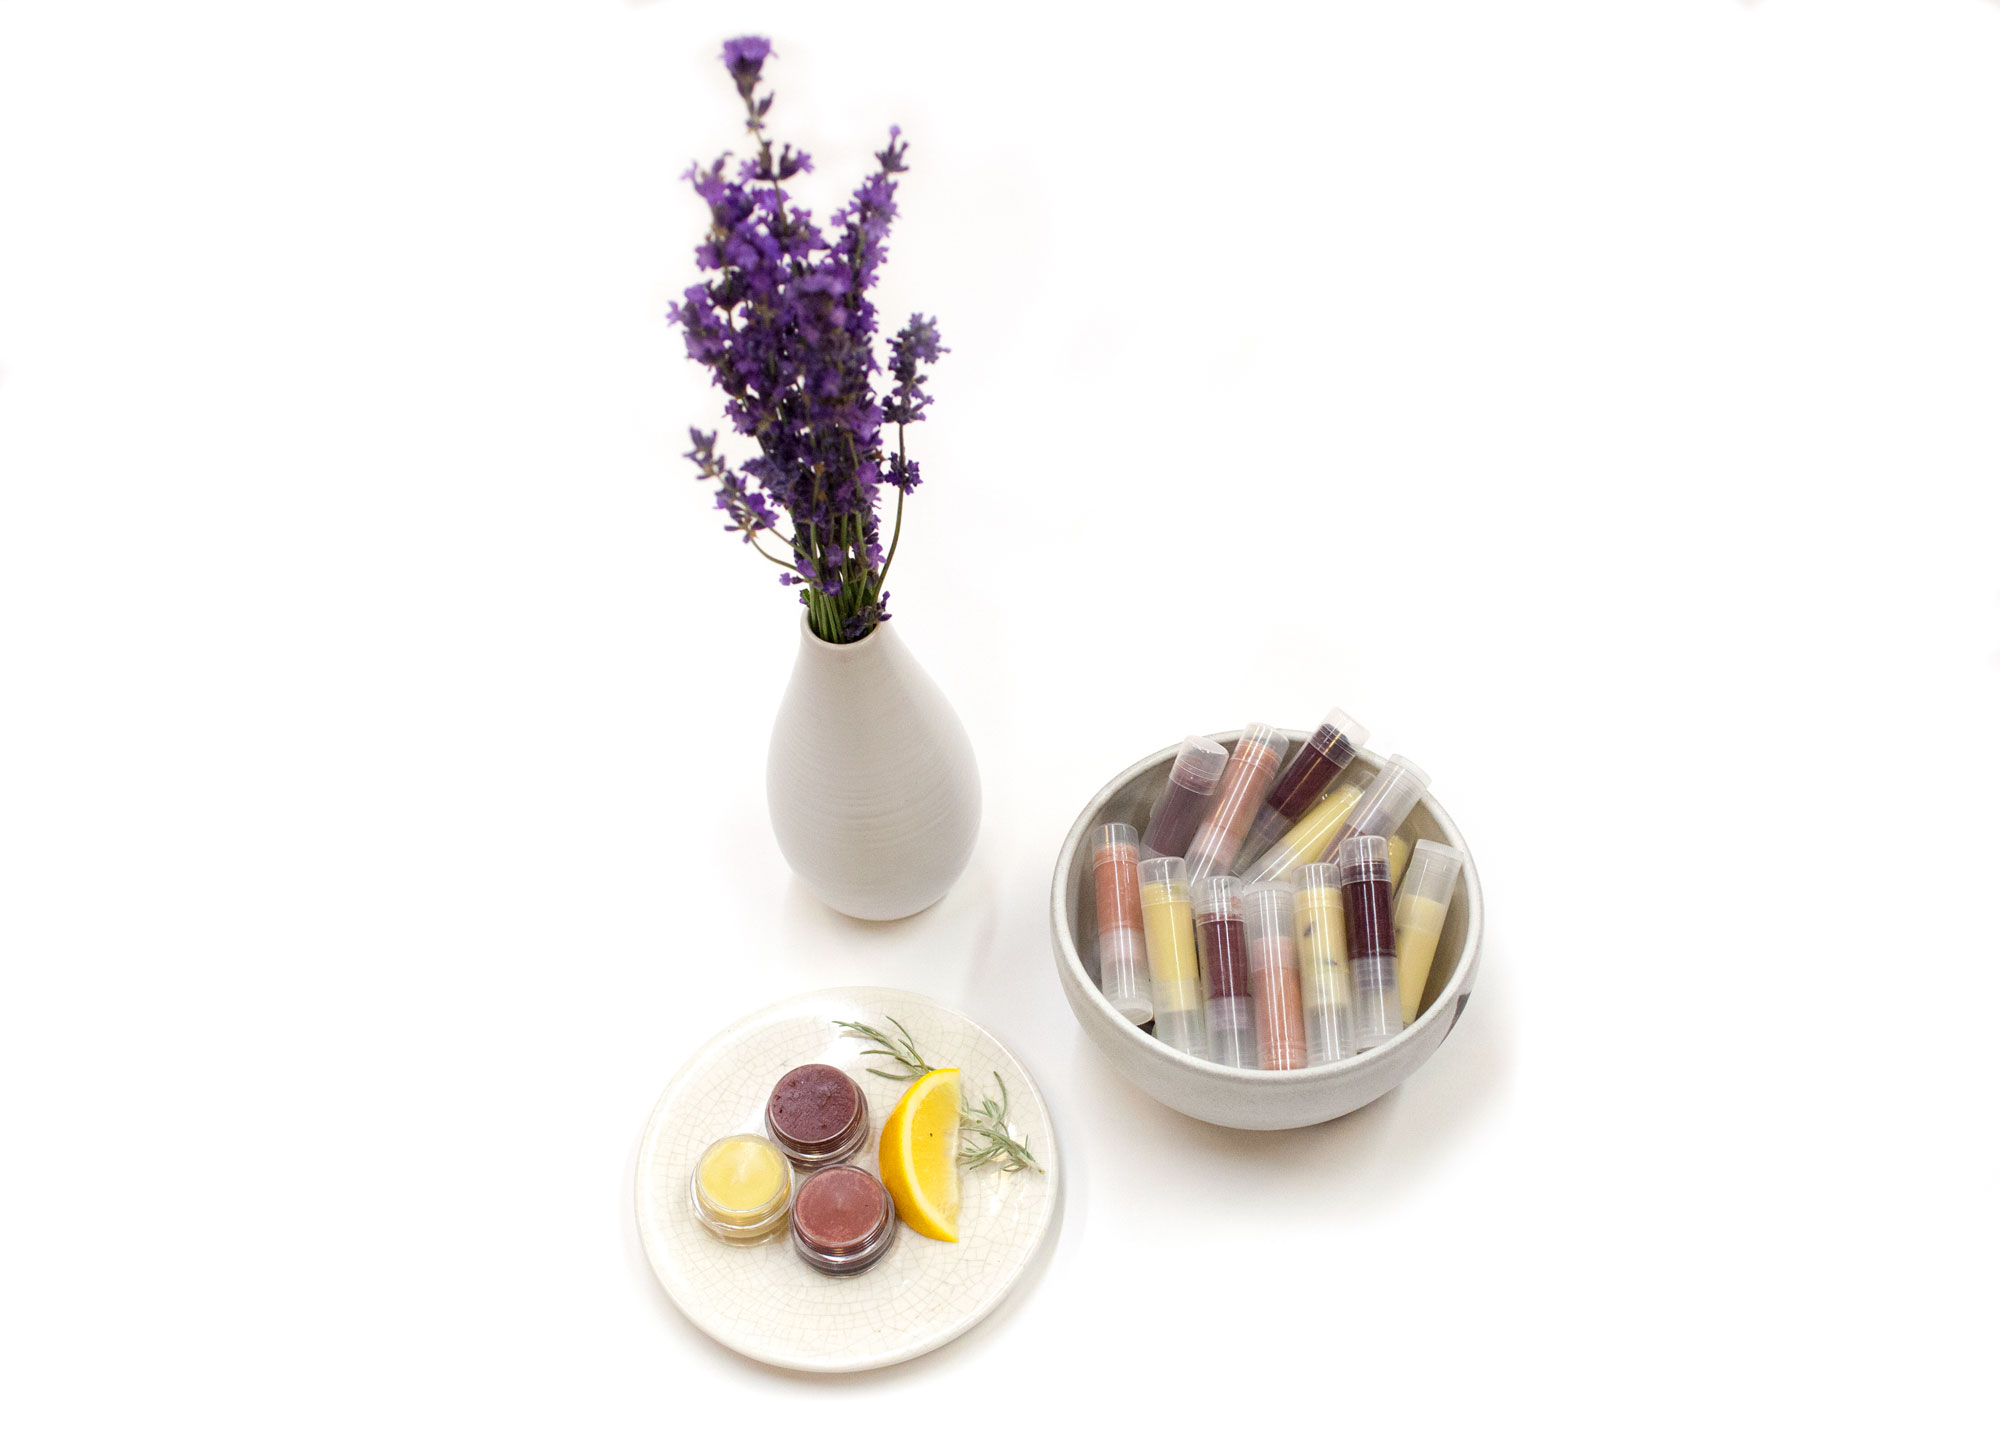
Sew Your Own: Your Favorite Queer Characters’ Wardrobes
Queer women on screen seem to be universally – and distinctively – stylish. Of course, fictional characters have the benefit of stylists and costume designers, but if you’re handy with a sewing machine, you don’t need either! For Halloween or for every day, here’s how to stitch up a look inspired by your favorite fictional queer women.
Bette Porter

Showtime
This list can only start with The L Word‘s foremost executive lesbian, Bette Porter. Bette’s signature looks center around clean lines and architectural details in solid-colored fabrics.
On top, you can’t go wrong with a classic Oxford like the Cashmerette Harrison (12-28) or Butterick 5526 (6-22) shirts. Alternatively, get some of Bette’s signature ruffles with the Vogue 9029 Top (8-24), or drape to your heart’s content StyleArc Rosemary Blouse (0-26) in a jewel tone silk.
For your bottoms, try high-waisted, medium-wide leg trousers like the StyleArc Katherine Pants (sizes 0-26), or the Vogue 7881 (6-22) in a drapey, neutral wool.
Denise
Netflix
Lena Waithe’s Denise on Master of None always looks sharp in athleisure with modern prints and textures. To get her look, try the Burda Style 6489 Bomber Jacket (18-32) paired with the Patterns for Pirates Bear Joggers (women’s and men’s XXS-3XL) in a soft French terry fabric. Printed jerseys and sweatshirt fleeces make a bold statement even on the basics, like the Seamwork Jane Tee (XS-3XL), Green Style Creations Centerfield Sweatshirt (XXS-3XL), or Hey June Halifax Hoodie (XS-2XL).
For a more formal Denise look, try the Burda Style Stinchcomb Blazer (chest sizes 44-60) or the StyleArc Bronnie Tux Jacket (0-26) over the Simplicity 1538 Button-down Shirt (6-22) in a graphic print.
Carol
StudioCanal
For something a little more vintage (think solid colors with subtle textures in well-tailored ’50s silhouettes), look no further than Carol Aird of the eponymous Carol. A fitted skirt suit like the Simplicity 8508 (10-28) is perfect for a thank you lunch with that girl you like, while the slim skirt and slight dolman sleeve of Butterick 6242 (6-22) works equally well in a wintery blue or retro plaid. For a more modern spin on things, try a cardinal red boxy jacket like the Seamwork Lilliana (0-26) with a plaid pencil skirt like the Butterick 5466 (8-24).
Alternatively, glam up for your road trip with silk sleepwear like the Closet Case Patterns Carolyn (0-20) or Simplicity 3971 (S-XXXL) pajamas, topped with a classic plaid bathrobe like the Simplicity 5314 (S-XXXL).
Waverly

SyFy
Wynonna Earp‘s badass little sister Waverly has captured our hearts not just with her demon-hunting abilities, but with her playful, trendy looks. If you too have never met a crop top you didn’t like, try the Ellie and Mac Sweetheart Crop Top Pattern (XXS-5XL), or the Simplicity 1283 Multi-Way Set (6-24). Next, get yourself some sky-high stonewashed denim with the Simplicity 8516 (6-22) or Seamwork Tessa (0-26) jeans (if you’re going for cut-offs, the shorter, the better).
Finally, since nobody layers like Waverly, try a loose wrapper like the Sew Caroline Florence (XS-XXL) in a silky printed fabric, a bomber like the Papercut Patterns Rigel Jacket (XXS-XL) in denim, or the Kommatia Parka (XS-XL) in a heavy twill with faux fur trim.
For more of Shannon’s sewing tips, check out 4 Dapper Plus-Size Sewing Projects for Beginners and Pros, Summer Project: Sew Your Own Gender-Affirming Swimwear, and Sew Your Own: Pants Projects for Any Skill Level.
Sew Your Own: Pants Projects for Any Skill Level
Pants, amirite? On the one hand, they carry with them a long and storied history of signifying independence and queer identity, from Rosa Bonheur’s permit to work in men’s clothes to Marlene Dietrich’s iconic tuxedos to the working wardrobe of many women during World War II. On the other, modern ready-to-wear trousers and jeans are often plagued by flimsy fabrics, incomprehensible sizing, and an unfortunate tendency toward heterosexual gender roles (no, I did not borrow these jeans from my boyfriend).
Luckily, sewing your own trousers is a great way to get pants that fit both your body and your gender expression, in a wide range of fabrics and with just about any detail you can dream up!
For Beginners: Slouchy Slacks
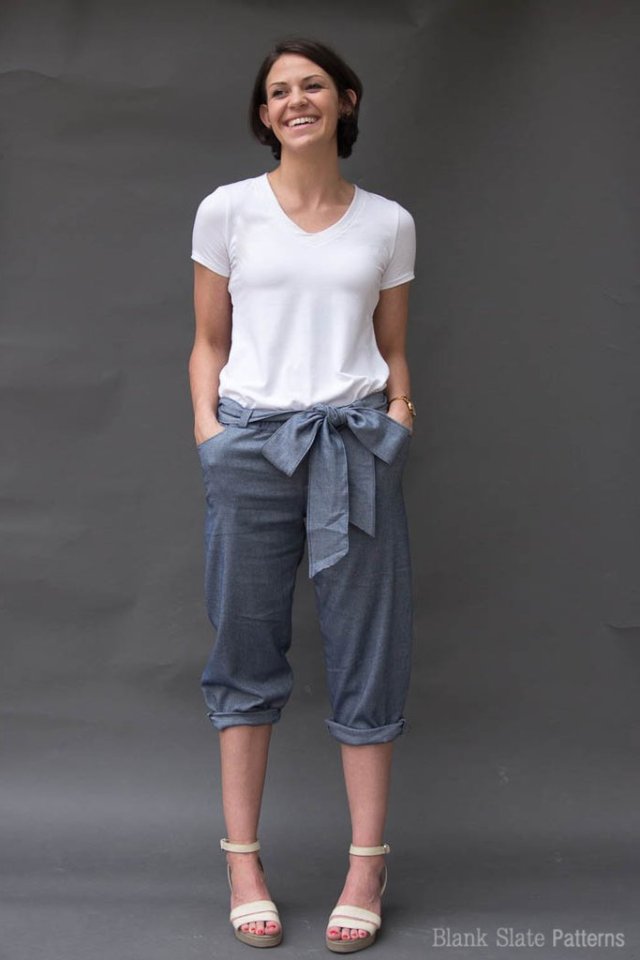
If you’re new to sewing, look for patterns with drawstring or elastic waists and looser fits — think joggers, culottes, and secret pajamas. They’ll give you the chance to play with different fabrics and learn how each work on your body before trying a pattern that uses a bit more tailoring. For tie-waist pants, try the Blank Slate Forsyth (XXS-3X) or the Seamwork Moji (0-26). For joggers, try the Hot Patterns Sunday Morning Sweatpants (6-26) or the Patterns for Pirates Bear Joggers (men’s and women’s XXS-3X). For culottes, try Butterick 6223 (XS-6X).
For The Somewhat-Experienced Sewist: Super Duper Fly(s)
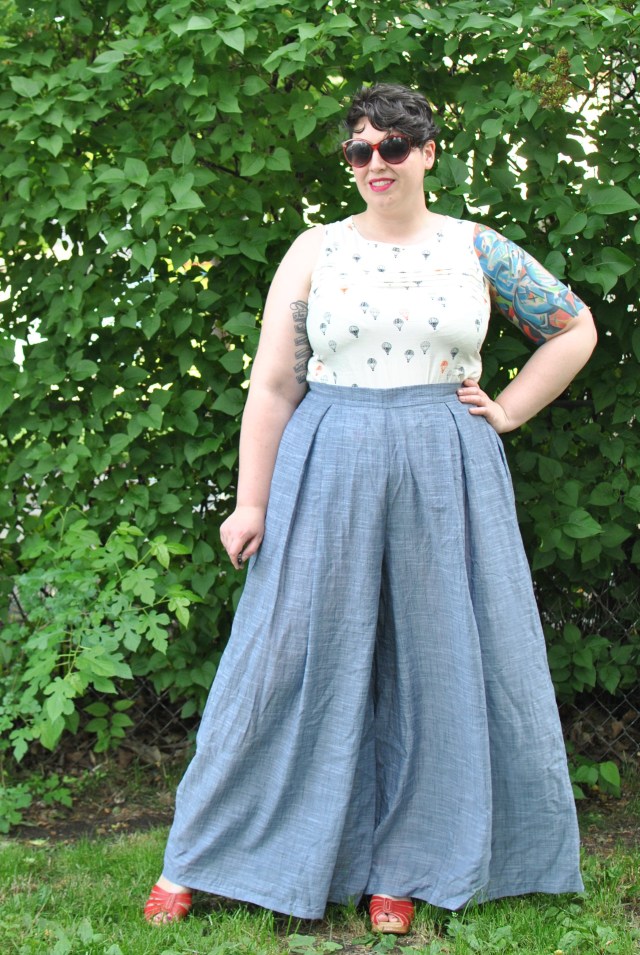
Helen’s Closet Winslow palazzo pants in lightweight chambray
If you’ve sewn once or twice before and feel ready to tackle a zipper, the world of trousers opens up to you! High-waisted, wide-legged pants feel very vintage dapper; try the Helen’s Closet Winslows (0-20), Simplicty 8092 (6-22), or Simplicity 8447 (6-24, with bonus overalls!).
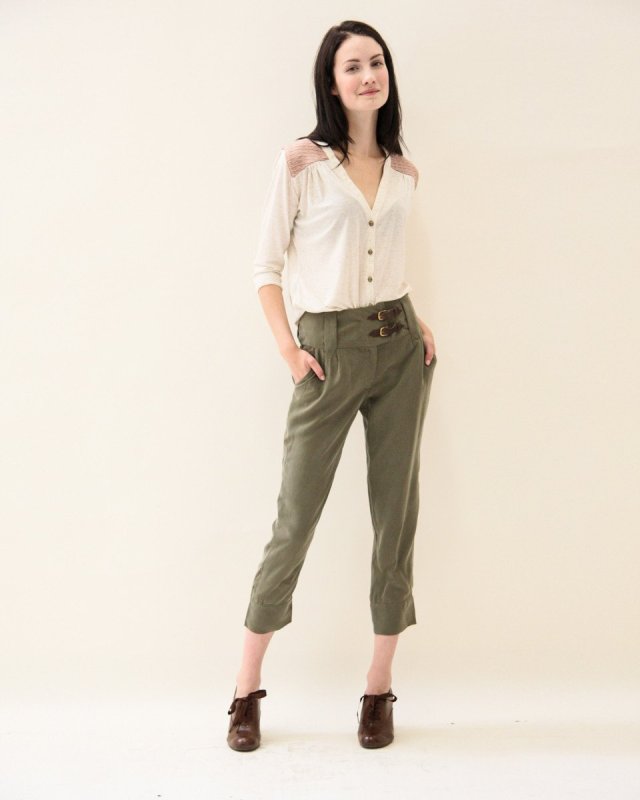
Ankle pants with interesting details work great whether you’re a sporty queer or a dandy. Check out cargo pants like the Hot Patterns Weekender Utility Cargo Pants (6-26) or dapper trousers like Thread Theory’s Lazlo Trousers (0-18).
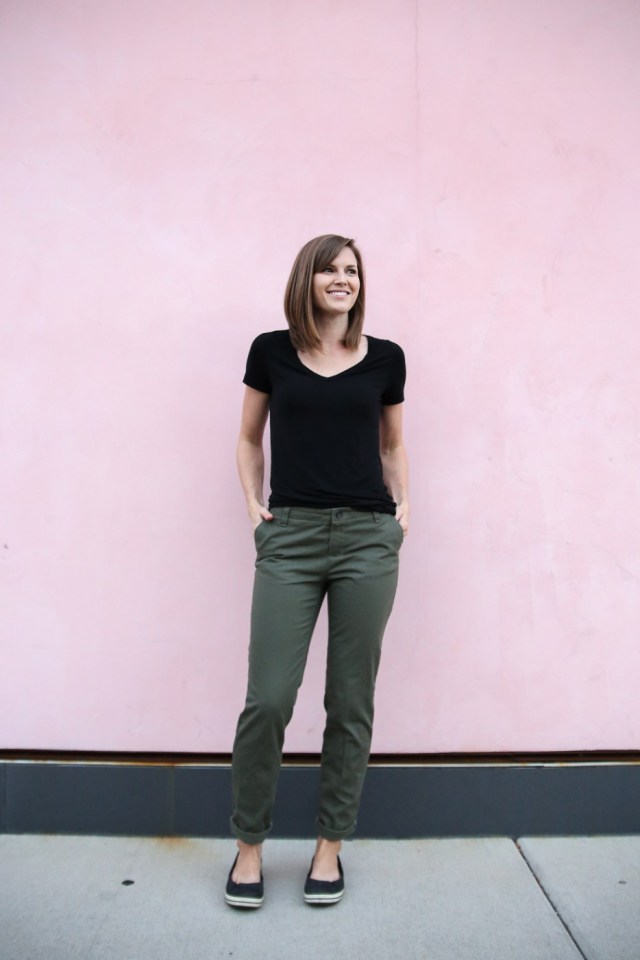
One awesome thing about making your own clothes? Workwear no longer has to be boring! Try out a pair of classic trousers like the Alina Chi-Town Chinos (0-18), Simplicty 8056 (10-28), or the Make My Pattern Textbook Trousers (sized to your measurements). For business casual with a vintage flair, try the ’40s menswear look of Butterick 6503 (hip measurements 39-53″). The True Bias Lander Pants (0-18) have a great ’70s vibe, while slim-cut trousers like Butterick 6327 (8-24) feel both ’60s retro and modern.
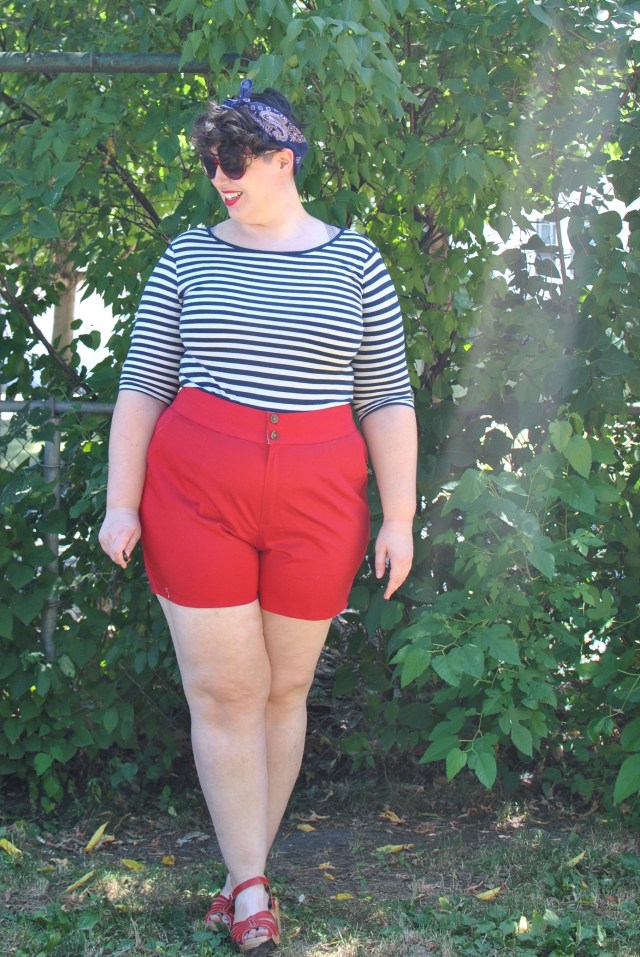
Seamwork Weston shorts (0-26) in red stretch cotton sateen
Constructing a fly-front might be intimidating at first, but with a good step-by-step guide, it’s totally doable! I like the one from Closet Case Files. Many of the patterns featured have shorts options, or can be cropped to any length you prefer – a godsend for battling chub rub.
For The Pros: The Denim of Your Dreams
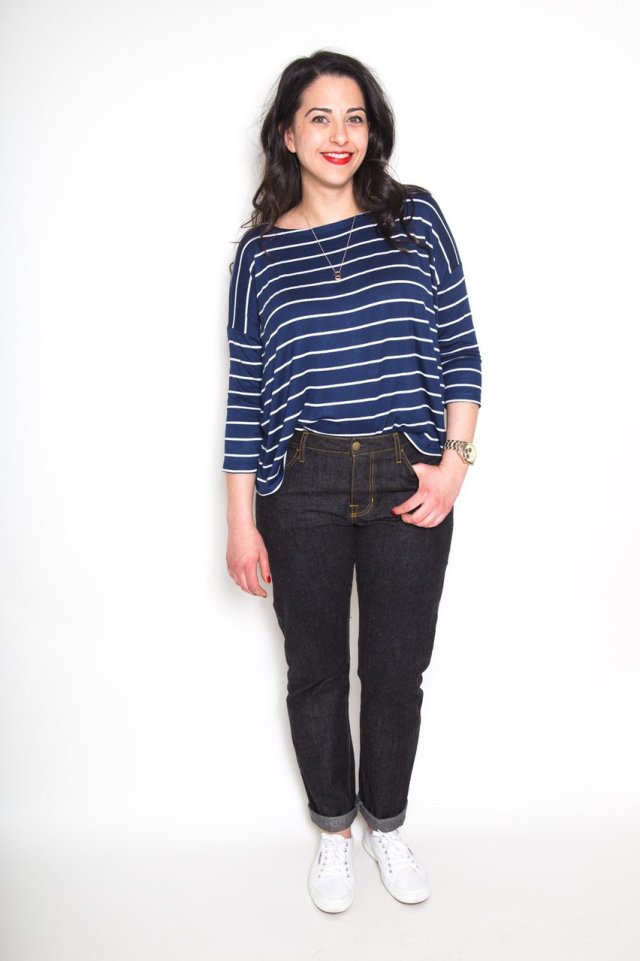
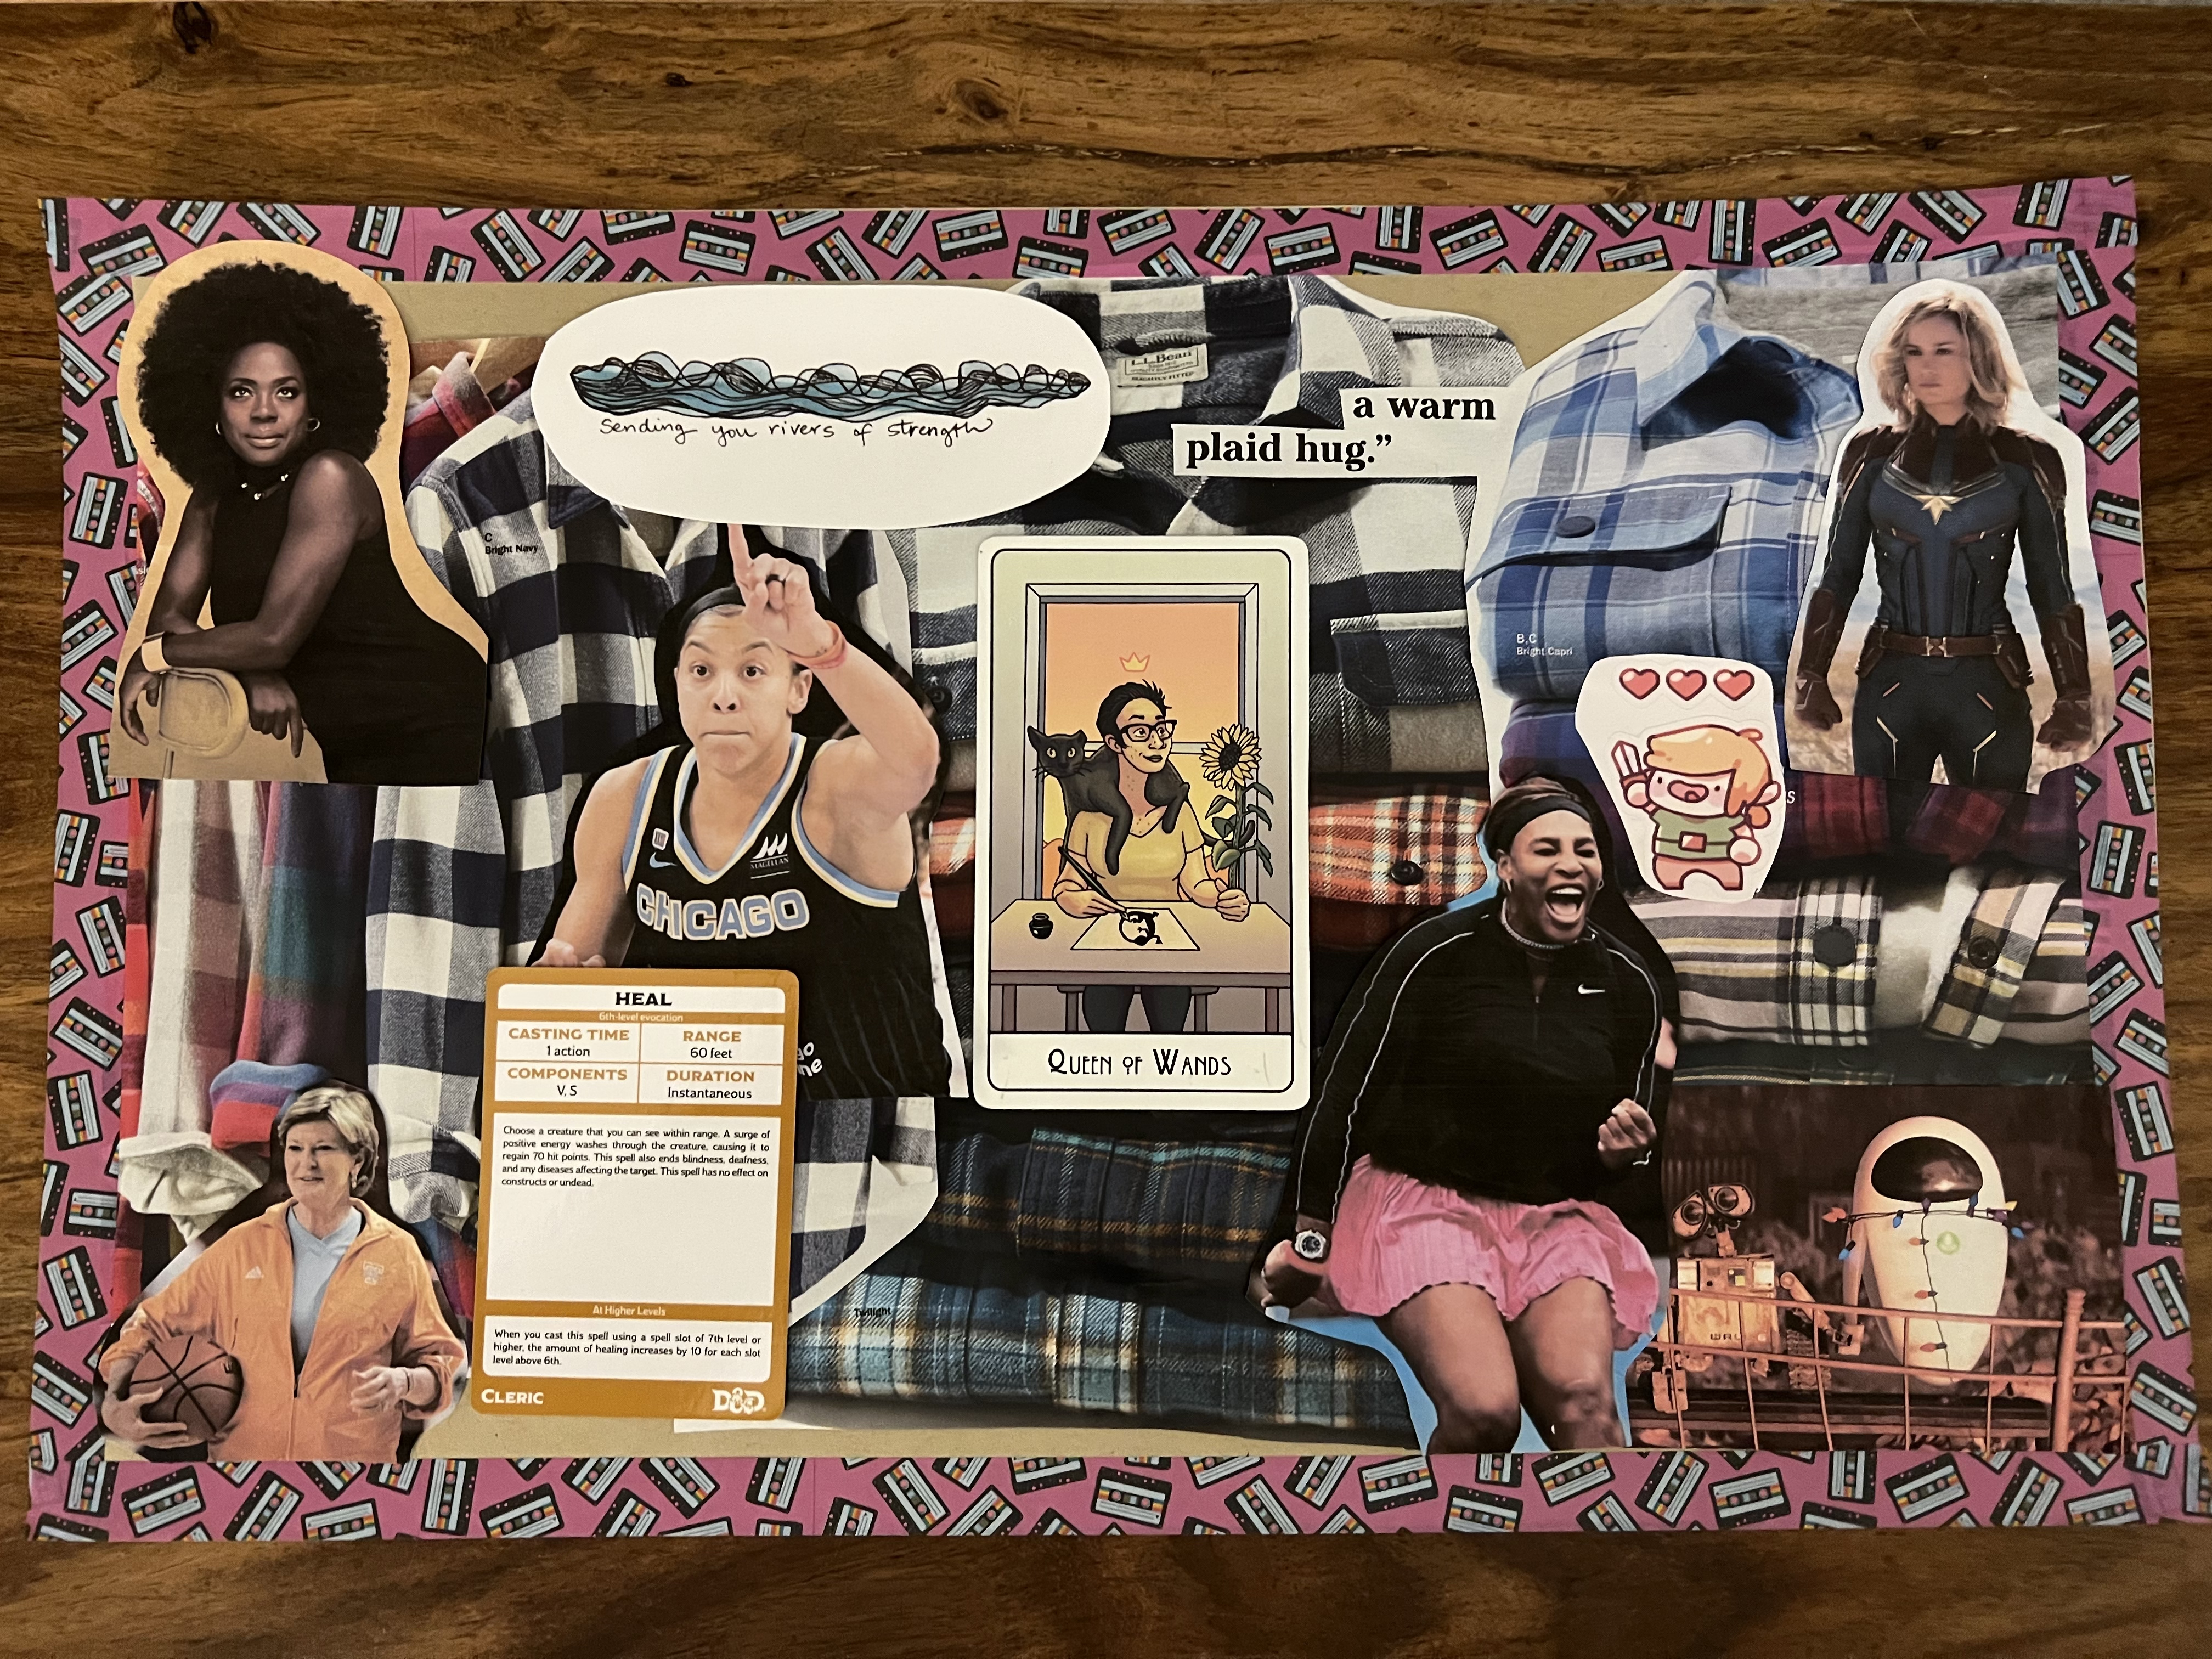
With some patience and a little research, custom handmade jeans are well within the reach of any sewist with some garments already under their belt; by picking out just the right shade of denim, fine-tuning the fit, and working your DIY skills with well-placed distressing, you’re the master of your own perfect pair. Want a sky-high waist? Try the Closet Case Pattern Skinny Jeans (0-20). What about a classic fit with an easily customizable leg shape? The Seamwork Tessa (0-26) or Butterick 5682 (6-22) are great options. Want a relaxed fit that you don’t have to call “boyfriend jeans” (even if the pattern does)? Try the Closet Case Patterns Morgan Jeans (0-20) or the Hot Patterns Weekend Jeans (6-26).
So, what kind of pants will you make? And perhaps more importantly, will they have big, functional pockets?
For more of Shannon’s sewing tips, check out 4 Dapper Plus-Size Sewing Projects for Beginners and Pros and Summer Project: Sew Your Own Gender-Affirming Swimwear.