I Didn’t Know How to Be Poor, Black, Biracial, AND Queer; So I Wasn’t
feature image photo credit Taylor Hatmaker
Many years ago I attended college, right here in the beautiful state of North Carolina, and I had a lot of close friends that were girls. My friends were smart girls, talented girls, beautiful girls who were charming and had great senses of humor. We would hang out together in our dorm rooms, giggling and telling secrets and eating cookies til late at night. I would paint their nails, braid their hair, spend hours getting ready with them before heading off to some campus party where we would stay for only twenty minutes before heading back to our dorms because it was more fun when it was just us. I felt jealous when these girls spent a lot of time with their boyfriends. I thought it was because their boyfriends were, more often than not, pieces of crap who treated my friends like doormats, but years later I would be able to look back on many of my relationships with girls and realize that I hated the way they were treated because I knew I could treat them better. Turns out, I was actually crazy about them.
Coming to grips with my various identities was a long, weird process. I grew up in Birmingham, AL as one of the only biracial kids in a predominantly white school. We were poor and my parents weren’t together any more, and nothing about me or my family fit in with the community in which I grew up. Everyone always looked at me like they felt pity for me; pity for the color of my skin, pity for our socio-economic status, pity that we weren’t active members of the Baptist church. So I made it my job to assimilate as much as possible. I refused to stand out for anything but excellence. I was always on the honor roll; I didn’t do drugs, drink alcohol, or have sex; I held a part time job; I made the cheerleading squad and the dance team; I straightened my hair so it looked more like the other girls’; I won state theatre competitions and I got all the solos in show choir. It was easy to immerse myself in school because I had no dating life — the guys who flirted with me did so mostly in secret, afraid of what others would think of their interest in a girl that looked like me. At the time I thought that my dedication to school was an effort to prove to people that I didn’t need any pity, that I was doing just fine, but as much as it pains me to say it now, I think there was a part of me that was trying to apologize for my blackness since everyone outside of my family seemed to dislike it so much.
As you can imagine, this was not a very nurturing environment in which to grow up, let alone come out. Once, and only once, did I ever let my brain consider the possibility that I might like girls in a way that was different than what was expected of me. I considered this thought, honestly and quietly, knowing that this had the potential to rip my world apart, and then I reminded myself that I barely knew how to survive with the identity I already had. I didn’t know how to be poor, and black, and biracial, AND queer. So I wasn’t. I shut it down. I quieted the voice inside of me, convincing it that this was not a world in which it could survive. I had seen no examples of anyone like me, not in my life, not on tv, not in books, so rather than be the first of my kind, I decided not to exist.
Do you know how traumatizing it is to live your life thinking that you don’t exist?
I couldn’t wait for high school to be over, and my only prerequisite for college was that it be far away from Alabama. My good grades landed me at a private school in Salisbury, NC, the majority of my four years of tuition paid for by scholarships, and, finally, several hundred miles away from everything I had ever known, I began the process of shedding the armor I had learned how to wear as a kid. It was scary. It was exhilarating. I learned what to keep and what to discard through a complicated process of trial and error. My college was more diverse than my high school, filled with people of all ethnicities from all over the country. They seemed to appreciate all the things that made me unique — my goofiness, my ability to break out in dance with absolutely no warning, my love of theatre, the color of my skin, the curls in my hair. I started to embrace my blackness in a way that I never had before. Even though my Mom and Dad raised us to feel proud of our brown skin and our biracial identity, the opinions of the rest of the world had a much bigger impact on how I felt about myself growing up. But in college, my community was suddenly a mirror; not only did I see aspects of myself reflected in others, I also felt love and acceptance and appreciation from people who were not like me at all. I had never experienced anything like it before.
And yet there I was, still unknowingly harboring crushes on the amazing women in my life, completely oblivious to the implications of my fierce loyalty to them. I wasn’t in denial, I had just become extremely successful at compartmentalizing difficult emotions that I had no idea what to do with. My college years concluded with a newfound pride for my beautiful skin but with no better understanding of what love was than when I had left Alabama. And that’s what is tricky about having and acknowledging one’s own intersecting identities — the rules for certain parts of your life don’t always apply to the others. I am a feminist and I am a woman of color and I am queer. None of these parts of me exists alone, yet the pace at which I was finally able to begin healing from the oppressive, racist environment that I grew up in is not the same pace at which I was able to recognize my sexuality, accept it, and live my life proudly and openly. The discrimination that I experience as a woman feels different from what I face as a member of the LGBTQIA community and still different from what I face as a biracial individual. The only thing that connects all the various ways in which I navigate this world is the pride I take in doing it.
Being proud of all our parts, from the ones that are easy to share to the ones that aren’t, takes tremendous courage and faith. And there might be times in life, because of who we are with or where we live or how we feel, where our own acceptance of ourselves may falter. But this doesn’t make us failures. Protecting ourselves doesn’t make us failures. Nothing can make us a failure as long as we are patient, as long as we treat ourselves with grace and kindness and allow ourselves the space to have a complex identity that can grow and change. We are allowed to have complex identities and not have to apologize for them. I know this now to be true.
When I finally came out to myself, it was peaceful. I was 25 years old. I was filming on location and wandering through a new city when I met a woman in a store who was beautiful and charming and had a nice sense of humor. I was very familiar with women like this — they had accompanied me through all my years of college. What I wasn’t familiar with was one of them asking for my number. Surprisingly, even with an imagination as adept as mine, I had never before actually considered that an impressive woman would be interested in me. The prospect did rip my world apart, in the best possible way.
Sew You Want to Learn to Sew: Fabric, Patterns, and Resources, Oh My!
Now you know all about sewing machines — are you ready to pick out something to sew on one? Let’s talk about fabric!
First, let’s talk about the different kinds you can choose from. In addition to being visually inspiring, fabrics have different combinations of textures, material components and manufacturing processes which can make them really hard to sort through when figuring out what is best for your sewing project. For me, the most effective way to maneuver the gigantic vortex of apparel textiles is to divide them into two types: knits and wovens.
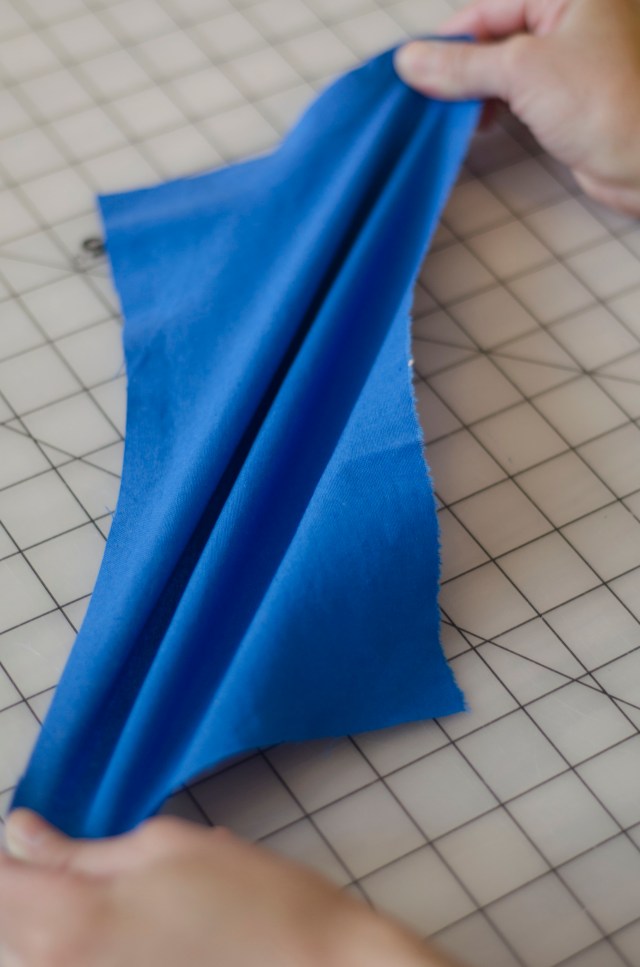
This a woven fabric being stretched on the bias- it doesn’t have much stretch when pulled straight up and down or from side to side.
Woven fabrics are created by weaving threads together in two intersecting directions called the warp and the weft. An example of clothing made out of woven fabric is a standard button-up shirt with a collar, the kind you would wear under a blazer. These fabrics generally don’t have a lot of give longitudinally or latitudinally, but if you stretch them on the diagonal grain (from one corner edge to the opposite corner edge) you will find a little bit of stretch. This directionality of stretch is called the “bias” and it is often used to affect the way a garment hangs off of the body. Because most woven fabrics don’t have much (if any) stretch aside from the bias, they are used in tandem with design features like darts, gathers, and pleats that help the fabric fit onto the body.
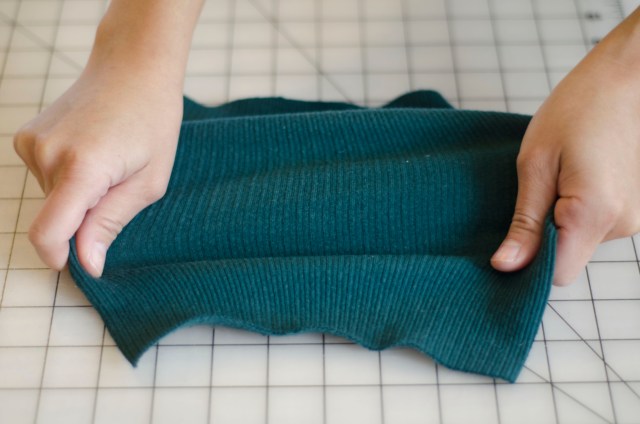
This ribbed knit fabric has a significant amount of stretch when pulled in any direction.
Knit fabric, on the other hand, is comprised of rows of tiny loops of thread hooked through other tiny loops- if you look closely, it resembles the work that you would see on a pair of knitting needles. There is a lot more give with these fabrics and they can be stretched out not only on the bias, but in other directions as well. Many knits are categorized as having 2-way stretch (like a plain t-shirt) or 4-way stretch (yoga pants), and their tensility will depend on what percentage stretch the fabric has.
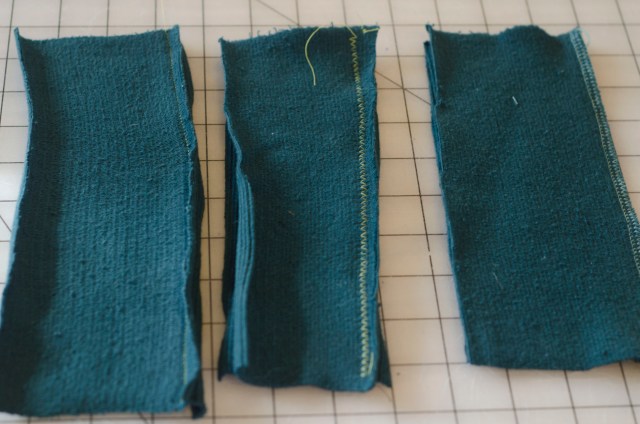
Three different ways to sew knit fabric: from left to right, a straight stitch (not recommended for seams that will need to be stretch out a lot because they may pop open), a zig zag stitch, and a serged seam.
Wovens and knits behave very differently when sewn on a machine. With wovens, you will almost always use a straight stitch to sew your seams together, which will create a sturdy bind that will not easily tear or come undone. But because knit fabrics have so much stretch, you can’t often use a straight stitch to sew it together- the seams will pop open as soon as the fabric is pulled and stretched. This is why a zig zag function is key to sewing knits on a regular sewing machine; the zig zag design allows for the knit fabric to move and stretch on the body while still keeping the seams intact. I personally prefer to use a serger for sewing knit fabrics, a machine that we briefly touched on in the first part of this article. A serger uses a combination of threads to sew flexible seams which allows the fabric to stretch and pull without popping open, and it simultaneously finishes your seams so that you don’t have any raw edges.

A serged seam is great for knits because it sews the fabric together and trims off the raw edges, reducing bulk and creating a strong, professional finish. You can pull and stretch these seams and they won’t pop open.
Do you NEED to have a serger if you want to start sewing your own clothing? Absolutely not! You can sew virtually any and everything on a regular sewing machine, while a serger on the other hand has a much more limited use. But a serger might be a worthy purchase somewhere down the line if sewing knits becomes a big part of your routine. Sewing with knit fabric is awesome because you can create garments in a fraction of the time that it takes to make something out of a woven material, and the reason for this is because wovens require much more fitting adjustments and alterations to fit well on specific bodies. Imagine shopping for a pair of sweatpants versus a pair of jeans. Many of us whose bodies fit into RTW (Ready-To-Wear) standard sizing can go to a store, pick out a pair of sweats within the XXS-XXL range and find something that fits relatively well. But for jeans, the fit needs to be much more specific; they need to match our measurements in the thighs, the waist and the hips, and if you’re anything like me, you usually end up finding something that works in some places but not in others (all my RTW jeans have big waistline gaps in the back).
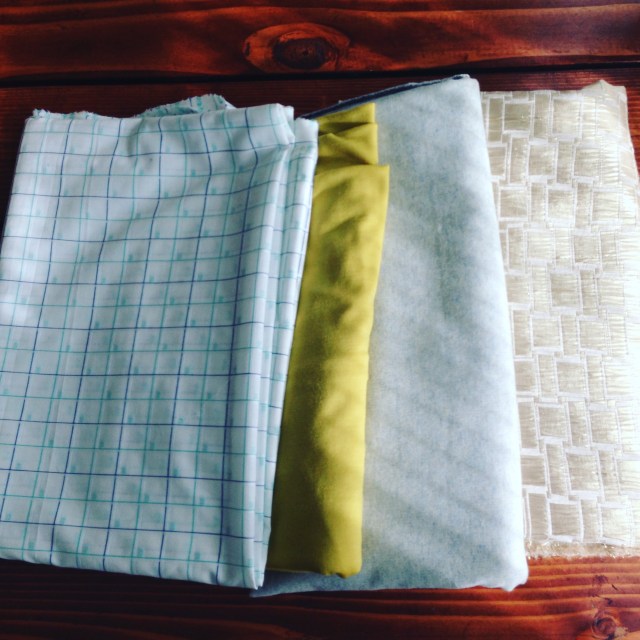
A fabric haul from one of my favorite stores that sources their wool from New Zealand. From left to right, a checkered cotton, a brightly colored knit merino wool, a woven wool blend, and a decorative gold brocade.
The distinction between knits and wovens is only one of many ways to navigate through the big world of fabric, and the more you sew, the more you will figure out what your preferences are. In making decisions about what projects you want to work on, it will also be helpful to have an idea of what kind of qualities you are looking for in your fabric. Do you want your fabric to be cheap? Do you want it to be eco-friendly? Do you want it to be a natural fiber, like silk or bamboo? Do you want to know where it was manufactured? Do you want to buy local? Do you want to buy in bulk? Do you care who made it and how they were compensated for their work?
My own preferences about how and where I buy my fabric has changed a lot over the years, due in no small part to the garment factory collapse in Rana Plaza a few years ago. I was impacted by how tragic the stories of the surviving family members were, and how ashamed I felt about my own culpability as a consumer. Fabric is manufactured in the same way that a lot of RTW clothing is: made in mills that are run by large companies with horrible policies in place for the care and safety of their workers. On top of that, textile production is a huge threat to our ecosystem thanks to the massive amounts of water, toxic dyes and energy consumption it requires. I am not a perfect consumer and not all of my choices for buying fabric are made with these global implications prioritized, but I try to be thoughtful and honest with myself with every purchase I make, and that has made a big difference in how, when, and where I buy my fabric.

This shark and rainbows short sleeve button down was made for my wife, Claire, and it is always a conversation starter.
Shopping at local and independently owned shops is my first and favorite choice for purchasing fabric (a bonus is that you can usually get on-site information about where the merchandise has come from if that is important to you), but there are also a lot of great indie online fabric stores like hartsfabric.com, hawthornethreads.com, lafinchfabrics.com, hellgatesfabric.com, girlcharlee.com, organiccottonplus.com, lowpricefabric.com and thefabricstore.com. Etsy.com also has a growing number of fabric retailers from all over the world (Miss Matabi is a personal favorite) where you can find unique prints and organic/eco-friendly textiles. There are probably hundreds more reputable sites selling fabric that I don’t even know about, so let google be your friend here! Fabric.com and Joanne’s Fabric are two larger, more well known fabric retailers that offer a lot of choices (online and in-store, respectively). There’s also the wildly popular Mood Fabrics, which carries a lot of amazing choices, but who I have had several frustrating exchanges with due to their poor customer service. When learning how to sew, it’s understandable to not want to spend a lot of money on fabric that will be surrendered to your learning curve, and I have found that searching through thrift stores for old sheets and tablecloths is a great way to get big pieces of fabric for a small amount of money. I use old sheets as muslins for working on fitting and alterations on new patterns, and I once made a really cute dress out of a floral duvet cover that I bought for $1.50. Curtains are another option to thrift for your sewing needs, but be aware that many window coverings are treated with a fire resistant chemical and that might not be the sort of thing you want to wear next to your skin.
Finally, another really fun way to buy fabric is to design your own! An online company called Spoonflower takes your original graphic and puts it onto fabric which you can then buy by the yard. It can be pricey but the quality is decent, and you can choose the layout and type of fabric you want (they carry everything from lycra, which is a type of swimsuit fabric, to organic cotton).
Patterns

A vintage Vogue pattern by designer Givenchy; I recently wore this dress to a fundraiser.
The phrase “Big Four” refers to the four companies that have dominated the sewing pattern industry for over a century, and you can find them in nearly any big retail fabric store. While McCalls, Butterick, Simplicity and Vogue have historically been known as the biggest game changer for the at-home sewist, providing the first graded patterns to fit a multitude of sizes and shapes that one could sew on a regular sewing machine, it is the advent of the internet that has elevated the modern pattern industry and provided the next big surge of momentum for the sewing community.
Now, online entities are able to virtually create and share sewing patterns by formatting them so that they can be printed out on home printers and pieced together to create full scale pattern sheets. All kinds of contributors, from large companies to independent blogger-cum-designers, are able to create content, share their patterns and gain a solid following of customers thanks to the direct access the internet gives them. The Big Four companies once had a monopoly on the sewing pattern industry, but now the wealth is being more evenly distributed, which has raised the bar for the quality and types of designs available, as well as making sewing more accessible to a broader range of individuals. Jenny of cashmerette.com, a popular sewing blogger, started her own line of sewing patterns this past year, and it is the first ever designed specifically for curvy/plus-sized bodies. Heather Lou of closetcasefiles.com designed a skinny jeans pattern that took the sewing community by storm, introducing lot’s of sewists to successful pants-making for the first time. Taylor of taylortailor.com introduced his first pattern for purchase, a rolltop backpack, to critical acclaim, and recently Colette Patterns launched Seamwork, an online magazine that sewists can subscribe to to read thoughtful articles written by members of the sewing community; subscribers also receive two easy-to-sew patterns (they can be made in three hours or less) every month in their email inbox.
A well known fact of buying Big Four patterns is that you almost never have to pay full price for them — they are more often than not on sale at retail stores like Joanne’s and Michael Levine’s, and Joanne’s is also famous for offering 40% off coupons which makes the discounts even deeper. For this reason, indie patterns tend to be more expensive than Big Four patterns; depending on whether you purchase them as a PDF or a printed pattern, they can run anywhere from $12-$20. To me, the cost is totally worthwhile: it’s the price you pay for supporting an independent artist as opposed to something mass-produced by a large corporation, and in my experience, indie designers offer much more effective sizing than the Big 4 companies, whose measurements are generally understood as being at least one or two sizes bigger than advertised. But even more importantly, many indie pattern designers offer sew-alongs on their blogs to accompany their pattern releases, which is usually a multi-day event that takes the maker step-by-step through the pattern instructions using photographs, videos and question/answer sections. In addition, sew-alongs usually offer information on what kind of fabrics, tools and notions should be used and ideas on where to purchase them. Sew-alongs have become an invaluable aspect of being a member of the online sewing community, and they can provide insight for even the most novice seamster.
Resources
Individuals who begin learning how to sew during this day and age are very lucky; the wealth of information that exists for free on the internet is mind-boggling! And as we discussed before, the internet has given voices to lots of creatives around the world who would otherwise never have had an audience with which to share their work and know-how. Many blogger-cum-pattern-designers have written books with accompanying patterns that include a wealth of information for seamsters about sewing techniques and methods. Gertie’s New Book for Better Sewing is one of my favorites because it breaks down a lot of complicated vintage and couture techniques for the home sewer. This book is, in my opinion, better suited for people who are already familiar with sewing and looking to expand their knowledge or brush up on old skills, but a book like The Great British Sewing Bee, inspired by the popular TV show, is a good start for people who are completely new to the craft, breaking down all the necessary parts of sewing into easily understood chunks. For learning to work with knits, which, as mentioned previously, is much different than working with wovens, I found that The Colette Guide To Sewing Knits was an indispensable how-to guide. It provides detailed information on why knits work the way they do, the differences between various fabric blends and types of knits, and how to use them in tandem with assorted projects and machines.
There are hundreds of other fantastic books available to help you learn to sew and/or get better at sewing, but if books aren’t your thing there are also video tutorials and online classes. Youtube is excellent for looking up specific information and approaches (for example, how to thread a sewing machine), but if you want something more comprehensive, sites like Craftsy.com offer loads of classes for reasonable prices on everything from ‘learning how to sew’ for beginners to ‘drafting your own sloper’ for advanced seamsters. Incredibly gifted teachers from all over the world can access an eager student base via Craftsy’s unique platform, and it gives students the ability to stop and start the class at their leisure. Independent and big-box fabric stores alike also offer sewing classes to the public if your prefer your learning environment to be more hands-on, and if you are unfamiliar with what is available in your area, just do some google searching; there are wonderful indie fabric shops and sewing studios popping up all over the place that offer lots of educational tools for new seamsters.

I made this suit for Claire to wear to a wedding she was attending; she has always had trouble finding suits that fit both her body and style, so I tried my hand at making one for her- I still have a lot to learn about tailoring techniques, but I think she looks fantastic in this ensemble!
Finally, for some general inspiration, check out Seamwork Radio started by Colette Patterns, a podcast that tells personal stories of how sewing has influenced and guided the lives of different people across the globe. The stories are always honest, relatable and thoughtful, and I love hearing about how this age-old craft cuts across across different cultures. And then there’s the brilliant missive written by Heather Lou urging us to JUST MAKE IT, ALREADY and stop procrastinating and worrying whether or not our creations will be perfect. I also loved reading this candid post by blogger Marie from A Stitching Odyssey where she talks about her partner recently coming out as trans. I don’t know much more about their journey as a couple other than what is posted on her blog and instagram, but my heart swelled up reading the sewing community’s comments on her post; there seems to have been an outpouring of love, support and respect from friends and strangers alike, which is so rare on the internet.
For me, there is nothing more gratifying than recognizing the ways in which my various identities and interests intersect, and I hope I continue to learn about more non-traditional stories within the sewing community, be they centered on queerness, non-conforming body types and gender identities, differently abled individuals, or all the above. And this brings me to one of the most wonderful things that I have discovered about this special craft: sewing is empowering! To feel proud of one’s body and style, no matter how much or how little it complies with society’s standards, is an act of courage in and of itself. Sewing allows you to create what it is you want to see in the world, one stitch at a time, and it isn’t just limited to clothing: you can make scarves, bags, slippers, head wraps, toys, purses, quilts, pillows, curtains, towels, bowties, bibs, napkins, all decked out in unicorns and rainbows if you’d like, catered to your own personal sensibilities and made to fit whatever space you need it to.
You don’t have to start out big or bold. You can start out with a tiny scrap of fabric, folded and sewn down the edges, to make a little handkerchief. I guarantee you that every time you use it, you will be reminded of how capable you are, how your vision can be manifested into something tangible and functional, how soft and lovely your nose feels after you blow it. Maybe this handkerchief will be all you create, and that will be enough. Or maybe, just maybe, this will only be the start…
Sew You Want to Learn to Sew: All About Sewing Machines
Way back a long, long time ago, people would gather in close circles in their homes and sew garments with their hands, their work illuminated only by flickering candlelight. They darned socks, made christening gowns from scratch, sewed buttonholes, embroidered beautiful designs onto the edges of collars and onto the pockets of aprons — there were many items of clothing they needed, and they made most of it themselves. The first sewing machine was invented in 1755, and within a hundred years the device was commercially available to middle class families around the world who were overjoyed at the prospect of making quick work of sewing clothing. A man’s shirt could now be completed in only an hour with the aid of a sewing machine, compared to the 14 hours it once took to sew by hand. The construction of clothing had been changed forever, and so had the lives of the housewives, children and servants who had been depended upon to create the bulk of a family’s essential wardrobe items.
There is something astonishing, even magical about sewing with your hands. Most tools of the trade are tiny, but effective — little thimbles that fit over the fatty parts of your fingers to keep them from bleeding when you inevitably stick yourself with a “sharp;” needle eyes and points of various sizes and widths, each combination made for sliding easily in and out of a specific type of material; thin ribbons of thread that you double knot at the end and pull through a tiny ball of wax to keep it smooth and free of twists when it travels through the surface of your cloth.
Alabama Chanin, a designer and seamstress based out of Florence, AL, has even dedicated several books to the art of hand stitching articles of clothing from scratch. In a world where fast fashion is the norm and even the sewing community gets fixated on the newest gadgets and gizmos to make clothing construction easier and quicker, Chanin’s books stand out. There is a definitively anachronistic feel to them, and yet her books include fresh, simple patterns and provide an interesting element of clarity to the age-old craft. While I so admire her work and the unique perspective she offers the modern seamster, for the purposes of this article I am going to focus on machine sewing and all the tools, notions, and know-how that one needs to get started with familiarizing themselves with the craft.
For intermediate and advanced sewers, most of what I will cover here will probably be very basic to you, but my hope is that you still might find a little something new in the discussion. For brand new and beginner-level sewers, please note that this series of articles is not meant to be a comprehensive guide to All Things Sewing, but rather a jumping off point for you to feel inspired to learn more. There’s tons of information to be found on the internet, in libraries, in textile museums, in vintage stores and in conversations with other makers, and I hope that all of you continue learning and unearthing more knowledge about slow fashion and making and recycling clothing on your own terms.
Sewing Machine 101
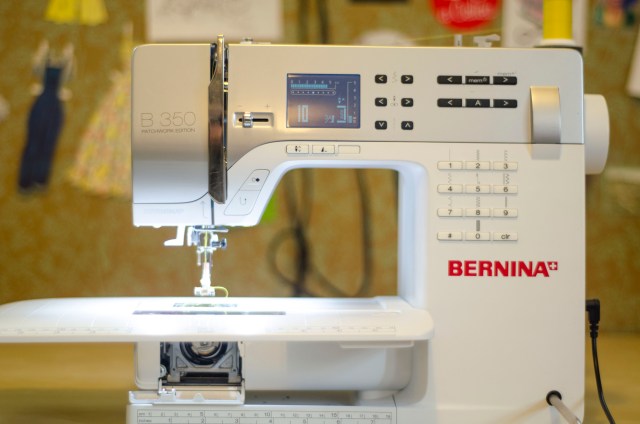
This is the machine I use the most; it’s a really fantastic model with a computerized screen, a function for an embroidered alphabet, and dozens of decorative stitches. But most importantly, it can handle sewing through several layers of thick fabric which is useful when I am working with denim, upholstery and leather.
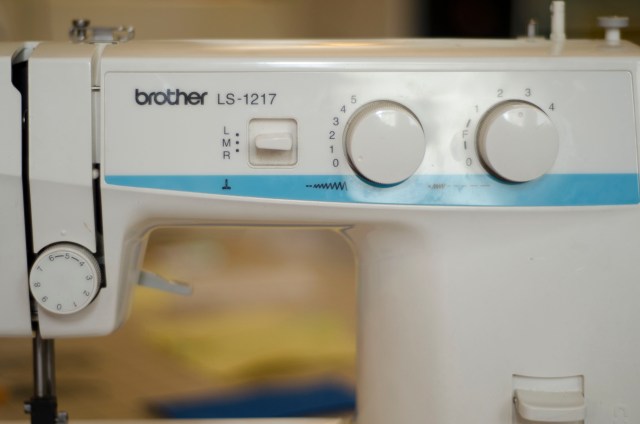
First on the agenda: Sewing Machines. As I mentioned, it is completely possible to build beautiful, durable clothing without the use of a machine, but there is no denying that machines are much quicker to work with, and the learning curve is not very steep. There are machines on the market that can do virtually everything but clean your house for you and they are very fun to watch work, but for the purposes of sewing seams and making garments, you only need a machine with a handful of basic functions to do the job. As with any community of die-hard hobbyists, there is a lot of brand loyalty amongst sewers, and finding a machine for yourself, whether you are just now learning to sew or have been sewing for years, can be pretty daunting. It’s generally true that older machines were made a bit better than the newer ones that are currently on the market; most older machines have metal parts which can stand the test of the time when regularly serviced, compared to the plastic bits and pieces in newer, cheaper models which break and wear down more easily. But as long as you aren’t carting your sewing machine around with you unprotected and you know it’s limitations, even a cheap model is likely to last you a long time; I’ve had my inexpensive Brother brand sewing machine for about 14 years and it’s still going strong. It has its restrictions (it doesn’t sew super thick material very well), but it’s great at the job it is supposed to perform, which is sewing straight and zig zag stitches on light and medium weight material.
Singers and Brothers are probably the best known commonplace brands on the market, while Elna, Bernina, Juki, Husqvarna Viking and Janome make up the higher-end of the spectrum, but here’s the catch: all of these brands are spread far and wide in terms of price range. I’ve seen some inexpensive Janome machines and I’ve seen some unexpectedly pricey Singers. As with any big purchase, do your research. Bells and whistles included on a machine are really neat, but they are generally reserved for proficient seamsters with special needs.
Here is what you DO need in a machine:
- straight stitch
- reverse stitch
- zig-zag stitch
- (not entirely necessary but SUPER helpful in the long run:) an auto or multi-step button function.
By manually changing the stitch length and width at specified intervals, you can create buttonholes with any machine that has a zig zag function.
To clarify, an auto button function allows you to choose a pre-determined length for your buttonhole, and then your machine will stitch the entire thing on its own. A multi-step function will come with directions in your machine’s manual on what to press and when to press it in order to achieve a perfect buttonhole; usually a machine will have a numbered dial or lever of some sort that lets you choose the step you need to complete in the correct order.
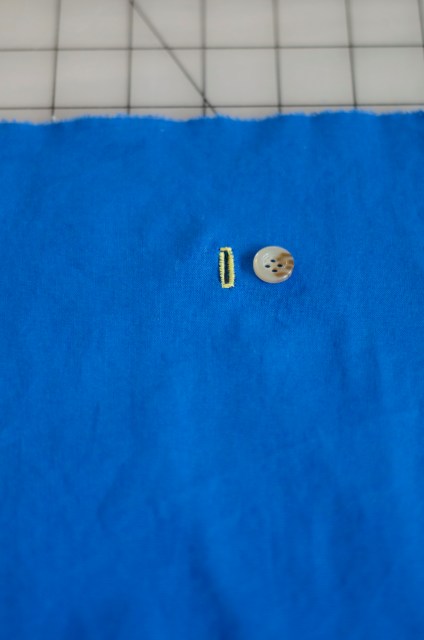
A beautiful buttonhole!
Each step changes the stitch length and width to create a small, sturdy box of stitching on your fabric — once it is complete, you cut open the fabric inside of the box which gives you a hole in which to fit around your button! In sewing, you will use a straight stitch 90% of the time. A reverse or backstitch is also important because it makes the beginning and ends of your lines of stitching more durable.
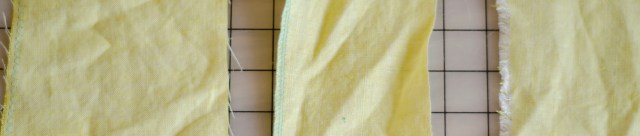
From left to right: linen with zigzag stitching, linen with a serged edge, and linen with a raw/ unfinished edge.
A zig zag stitch is mostly useful for creating buttonholes as we just discussed, but it is also helpful when finishing the raw edges of fabric; some fabrics unravel very easily (like linen), and to keep those fabrics from wearing down to the stitching lines and creating holes at the seams, you “finish” the raw edges. You can finish raw edges in lots of different ways, and using a zig zag stitch is just one of many. Lastly, a zig zag stitch is important if you want to sew with knits. And sewing with knits is my absolute favorite! But I’ll get to that in a minute.
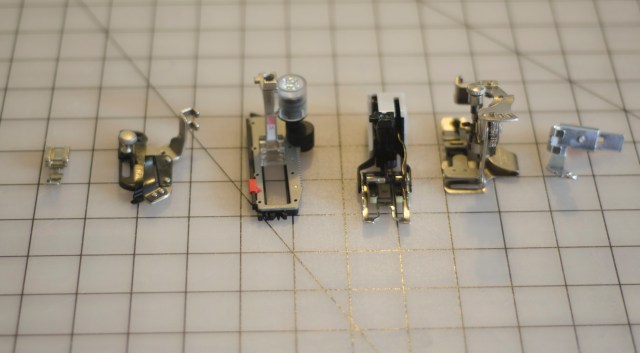
For some reason a lot of feet for vintage machines look very steampunk. The middle two feet are an auto-button making foot and a walking foot.
The next order of business in talking sewing machines is talking FEET. A foot, also called a “presser foot” is the little metal or plastic implement that connects onto your sewing machine where the needle is. Feet work in tandem with the feed dogs on the bottom of the machine to guide your fabric through in order for it to be stitched by the needle and thread, and there are lots of different kinds of feet that you can use for certain tasks.
Again, for a beginning sewist, you won’t need much in the ways of feet — new machines will come with several different attachments that will work for your device, and if you buy a used machine it’s pretty easy to purchase extra feet online or from a sewing machine store. The only essential feet you will need for the majority of your sewing is a regular straight stitch foot, a zipper foot, and, if you are planning on making dresses and skirts, an invisible zipper foot (you need two different feet for the two different kinds of zippers). I also get a lot of use out of an attachment called a “walking foot” which is weirdly bulky looking but super effective. Walking feet are essential for quilting because they help to keep all your layers of fabric from sliding around under the needle, but they can also be really helpful for sewing silky fabrics and certain stretchy knit materials, which tend to behave outrageously when being sewn.
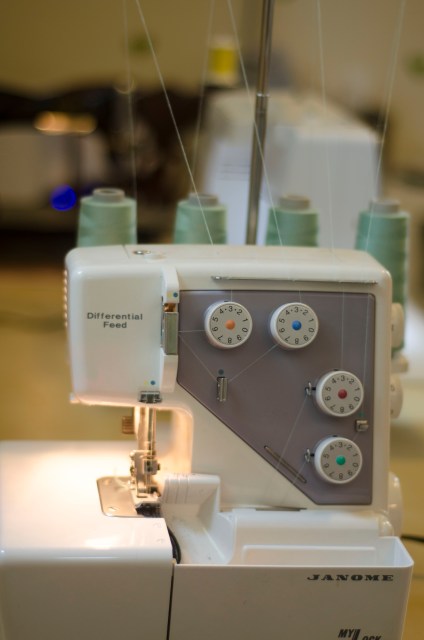
This is my 4 thread serger, and although it is frustrating to thread and change colors, it makes quick work of sewing with knits and finishing seams. This machine is a must-have for my sewing room now.
In addition to your run-of-the-mill straight stitching sewing machine, there is another type of device that is a great addition to a sewist’s arsenal. I will be referring to it a serger, but it can also be called an overlock machine. Sergers have many functions, but most notably they can “finish” your seams (an unfinished seam is one in which the edges of the fabric are “bare” or “raw”) by enclosing them in a three or four-thread stitch that keeps the edges from unraveling and gives them a professional finish. Sergers can also sew two pieces of fabric together while simultaneously finishing the edges, and here is where we get back to my love of sewing with knit fabric. To fully understand how awesome sergers are, you need to have a firm grasp on the main differences between apparel fabrics which we will get to in part 2 of this article.

My vintage Singer is a dream to sew on, even though it sounds like a locomotive when it’s working at it’s top speed.
After deciding on what kind of machine you would ideally like to have, you will need to figure out where you plan on getting it, and I (unsurprisingly) have some pretty strong opinions on this topic. I’ve always wanted to see some projected statistics on how many sewing machines currently exist in the world, because my theory is that there are a lot more than we as a population would even know what to do with. This is why I am a big fan of working with used sewing machines — there are already a LOT out there, and they are wonderful!
Four of the five sewing machines I have owned have been used: one was purchased from Craigslist, one from eBay, one was bought at a tea shop that was having a going-out-of-business sale, one was given to me by a real estate agent who had it in her basement for 20 years, and one was the Brother that my mom bought me from WalMart for $100. It doesn’t matter who manufactures your machine, how old it is or how often it has been in use — none of that will determine how well a machine will run and how well it will serve you. So instead of running out and spending a lot of money on the newest piece of equipment on the market, I urge you to take the time to research and find something that speaks to you and works for your needs and space.
Since you don’t get to see the insides of a serged garment, you can make really fun and unexpected thread color choices.
Craigslist and eBay are fantastic sources to find great deals on both working vintage and top notch newer model machines, but you should also check out local estate sales in your area. Using keywords like “sewing,” “quilting,” and “crafting” on sites like estatesales.net to get notified of potential sales has led me to some great bargains that I otherwise would never have found. Hunting around at vacuum and sewing machine repair shops is also a great way to find a good machine. These shops almost always have older floor models that have been replaced or used machines which have been left by non-returning customers over the years, and the shop may be looking to get rid of some of these pieces (which means you might be able to do a little negotiating, if that’s your thing).
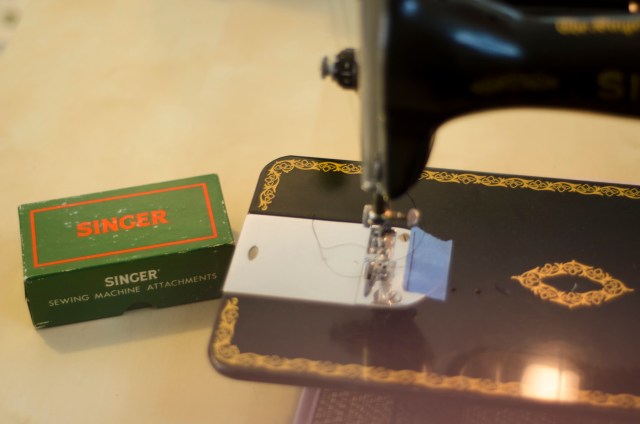
Glamour shot of the vintage Singer.
Also, if you have a sewing machine that was passed down to you or is hiding in your grandma’s coat closet and you aren’t sure if it’s in working order, it’s usually worth taking to a repair shop to get it checked out. I took my real estate agent’s vintage machine that she had never used off her hands because I wanted to do a good deed after she worked so hard to help us get our house. It was very old and dusty and I assumed it was broken, so it sat in a corner of my craft room for over a year while I planned to sell it on craigslist for parts. Imagine my surprise when I looked up the machine online to get information for my listing and I found out that it was one of the most popular Singer machines from the 1950s, with a reputation for being exceptionally good at sewing everything from leather to silk! For $125 my local sewing machine repair shop cleaned it up, oiled it, gave it a new lightbulb and replaced the frayed power cord. Now, apart from being a beautiful vintage machine, it makes quick and efficient work of all my straight stitch sewing needs and I use it all the time. It’s a lesson to keep your options open; you never know where the machine of your dreams will come from!
Stay tuned for Part 2 of this series, where we’ll tackle fabric, patterns, and resources!
I Reclaimed Christmas With DIY Gifting: Here’s 6 Ways You Can Too
For as long as I can remember, my relationship with Christmas has been complicated and wrought. As a child I never truly believed in the concept of this “Santa Claus” entity whom adults were so obsessed with; all my life I had lived in second floor apartments without chimneys, so the logistics of a white-bearded man entering our home unbeknownst to me and my single, ultra-cautious mother was just a bit too much for me to chew. Like any eager-to-please child would, I played along, but I always knew what was really going on behind my Mom’s closed doors on Christmas Eve — it was not a coincidence that Santa’s handwriting on the gift tags of my presents was an exact replica of my mother’s. Add to that the fact that every Thanksgiving, like clockwork, my Mom would start to stress out about money and wonder aloud how she was going to give me a “good Christmas” that year.
Her verbalized anxiety had less to do with debunking the myth of Santa and more to do with cementing Christmas in my mind as a less-than-jolly season — what was there to be excited about, knowing that getting the Peaches & Cream Barbie you had been pining over might be the reason your family didn’t have hot water for a week? I learned early on how to settle for less, how to exaggerate thankfulness and hide disappointment, how to never be the cause of undo stress for my Mom. This was probably easy for me to navigate as a kid because Christmas with my Dad was such a different experience; a boisterous, joyful occasion spent with my cousins and my grandma, my uncles and aunt, opening presents whose cost never concerned me. This was the privilege my Dad got to have; since he only had custody of me for two weekends out of the month, he could make sure that every moment we spent together was precious and perfect. If he struggled with money issues, he only voiced his concerns during the weekdays when I wasn’t around. But this is also the effect of having grandparents who didn’t want to be a part of your life. My white mother had been shunned by her parents for dating outside her race, and they were estranged for most of my childhood. Christmas with just my Mom felt quiet and sad. She did her best to make the day exciting for me, but on a holiday that is supposed to celebrate love, family and togetherness, she could never recreate the experience I had at my Dad’s house. I remember feeling guilty about being excited for my Dad to pick me up to spend Christmas with him — I hated to leave my Mom by herself with nothing to keep her company but our beautiful tree and the never-ending loop of Christmas songs on the radio. The insidious trickle-down effect of racism was never more prevalent for me than during the Christmas holidays.
As an adult, when I was presented with the option of creating my own Christmas traditions with my partner, my instinct was to completely ignore the holiday altogether. I didn’t grow up very religious, and by the time I met Claire, I was becoming more comfortable with identifying as an atheist. Participating in Christmas rituals seemed borderline appropriative, and I also hated the consumerist ideals that the holidays seemed to be synonymous with; a whole childhood spent watching my Mom bust her ass to cover extra shifts at work just so that she could buy us more things in order for us to feel loved and taken care of left a horrible taste in my mouth. But eventually I learned to compromise, because my wife (bless her heart) had nothing but lovely, sweet memories of the holiday season spent with her family, and I needed to make room for her life inside of my own.
My first Christmas with her family was a bottomless crockpot of steaming apple cider, a big Christmas dinner where every chair in the home got pushed into the dining room so that everyone could sit and eat together, Secret Santa gifts being carefully opened as we sat in a circle surrounding a pile of wrapping paper that grew as tall as the Christmas tree. I could appreciate the feelings of of love and thoughtfulness that were present with Claire’s family, and I wondered for the first time if I could develop a relationship with Christmas on my own terms. That’s what being an adult is about, right? Taking what works for you and respectfully discarding what doesn’t? I knew that I wanted to experience the good feelings that are tied in with the holidays, the ones where you celebrate your family and friends, the ones where you show appreciation and love for all the good times you have shared with them. But I also knew that I didn’t want to partake in the mad shopping frenzy that the holiday season had become famous for. So I started racking my brain for fun, easy DIYs that I could create in bulk for Christmas gifts. Over the past several years I’ve fine-tuned my methods, narrowed down my favorite gifts to make and to give, and come up with a pretty decent list of DIYs that all exist on the easy-to-intermediate scale of how-to. I promise, you can do it too!
Give A Mouse A Homemade Cookie
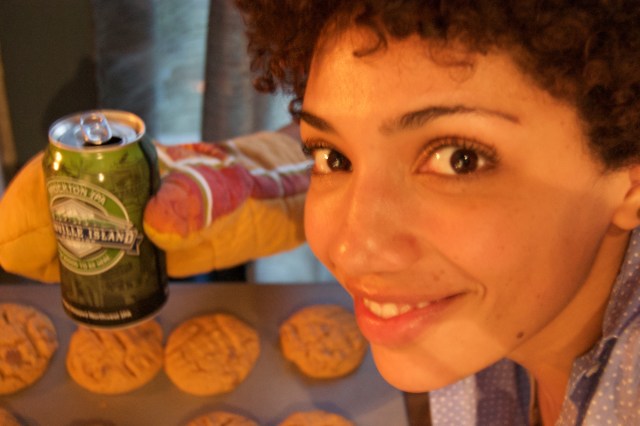
When baking batch after batch of homemade cookies, a little beer goes a long way.
One of the most popular Christmas DIYs of course is to bake: the holiday season is filled with sweets and treats to create a festive, feel-good mood, and nothing says comfort food like COOKIES! My favorite recipe for gifted cookies is one that uses cashew butter because it keeps the cookies slightly soft and moist so they don’t turn into rocks while waiting to be delivered (I made a gigantic batch of these cookies for presents one year, mailed them all across the country and they still showed up soft and edible for the recipients). My go-to recipe is one that I adapted from several recipes and uses cashew butter in place of oil and butter. You can trade out the cashew butter for almond; peanut butter is also fine to use in a pinch, but it changes the final flavor of the cookies.
DIY Cookies for A DIY Christmas Recipe:
Ingredients:
- 1 egg
- 1/2 cup sugar
- 1 tsp baking soda
- 1 tbs ground cinnamon
- 1/4 ground cloves
- 1 1/4 tsp ground ginger
- 3 tbs baking molasses
- 1 cup cashew butter
- 1 tsp lemon zest
- candied ginger, finely diced (optional)
Directions:
- Set oven to 350F
- Whisk the egg and sugar together until well blended. Beat in the baking soda, spices, molasses, cashew butter and lemon zest, then fold in the candied ginger, if using.
- Using a spoon, space 1 1/2 inch balls of dough 2 inches apart on a parchment lined baking sheet.
- Flatten the balls of dough just slightly with your palm or fingers.
- Bake for about 12-13 minutes. The cookies will puff up and just barely begin to get golden on the edges. They will look soft and a little under done, but they will firm up as they cool.
- Cool the cookies for a few minutes on the pan, then transfer to a rack.
To package these cookies, you can stack them into a wide-mouthed jar, or roll a small stack of cookies in parchment paper and tie with string. For mailing, I purchased a small quantity of pastry boxes which came in different widths and heights, and stuffed bits of parchment paper into the boxes around the cookies to keep them fresh.
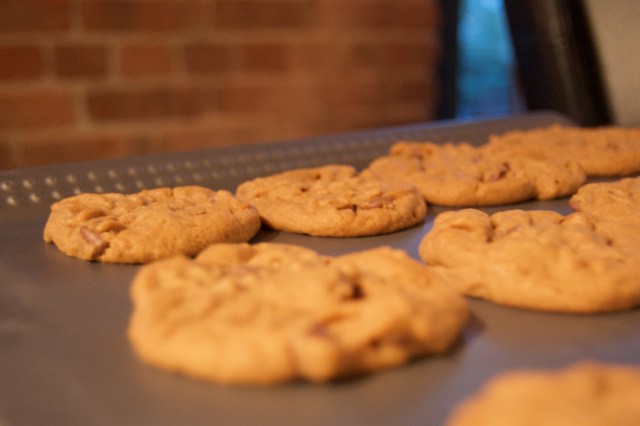
There is a celiac in our household so all our cookies and baked goods are made with alternative flours and ingredients; thankfully I have stumbled upon some truly excellent recipes I never would have tried before.
Truffle Your Way Into Holiday Gifting Glory
Perhaps you don’t want to bake, or you prefer to make a vegan edible instead, seeing as how the cookie recipe calls for eggs, an ingredient that is not easily replaced in this specific recipe (although no one is stopping you from experimenting!). Instead, consider making homemade truffles! There are lot’s of ways that you can make these — as always, google is your friend. I make mine with tempered chocolate because it involves less steps and makes the whole process quicker, and I usually make some sort of ganache to put in the center. The chocolate I use most often is a brand called (don’t laugh) Bada Bing Bada Boom and it’s great; silky smooth when melted, and it firms up into a crispy, melt-in-your-mouth truffle. For me, the art of presentation is just as important as the actual product, so I invested in some silicone molds that give my chocolates a shiny, perfectly smooth finish. Silicone molds are pricier than plastic molds, but they are also easier to use and they work great as molds for other fun projects, too, like making ice cubes, small soaps, and lotions. Depending on the amount of money you have (or don’t have) to spend, you might want to forgo purchasing molds and just hand roll your chocolates into little balls, dust them with cocoa powder and stick a sea salt flake on the top — this visual also packs a big punch, and if you package your truffles up in a little paper box with maybe three or four chocolates inside and wrap the whole thing with a little yarn ribbon, the end result will be so sweet! Chocoley.com has lots of recipes and ideas for holidays treats, so even if you don’t use their brand of chocolate, it’s a great resource for candy making.

These heart chocolates were filled with a peanut butter ganache and were a real hit last year!
Homemade Treats for Bathing Beauties
Bath and beauty products are some of the easiest DIYs I’ve ever done, and it’s my go-to for making fun, unique holiday gifts. Making a gigantic batch of of products can take a bit of time, but you can knock out a lot of presents at once and you can rest assured that the recipients will be incredibly thankful for getting such a unique and thoughtful gift. Gifts like bath bombs and massage oils are cool, but I prefer to make everyday items that I know will get used often. Homemade sunscreen, all-natural deodorant, anti-wrinkle creams and lotion bars are some of my favorite things to make for others and I usually use shea butter as my base, which has a lot of healing properties for all types of skin (lotion bars, by the way, are made with melted butters, oils, essential oils and beeswax, then poured into a mold to cool; the end result is a moisturizing bar in a solid instead of creamy form — lotion bars are great for people who travel on planes often because you can put the bar in your carry on without having to limit yourself to a 3 oz bottle).
When shopping for shea butter, it might be important to you to find a company that specializes in fair trade agreements with the mostly women who farm and process the products overseas. I found a company called Better Shea Butter that at one point had an informative page on their site that discussed their dedication to fair trade with group of West African women who manufactured the shea butter from start to finish, but I can’t find that information anymore and I am not positive that they are still operating off those same standards. As always, do your research if this is important to you! There are lots of other places to buy organic fair trade shea butter, whether at a physical store or online (africantradesociety.com looks promising and I will probably purchase there next time I need to re-up). Even if you don’t purchase your shea butter from bettersheabutter.com, they have a fantastic FREE book of recipes that you can download as a PDF, and Pinterest is also a great source for DIY organic bath and beauty products. These products work beautifully, you can create your own smell with your favorite essential oils, and often they inspire other people to start learning how to make their own products — sometimes I even stick a handwritten recipe book with info on the products I made for them so that they can try their hand at making the products themselves. Packaging these items is really fun and gives you another chance to be creative. When I gave these products as gifts, I designed a simple logo for our “brand” (we called it SugarbootyBlackout), printed them onto round sticker labels, then attached them to the BPA-free plastic jars I bought. But you don’t have to get that fancy; you can buy some chalkboard paper, cut little labels out in fun shapes, and then stick those onto the containers, writing the product names in chalk, or you can just use decorative paper and tape. You also don’t have to purchase plastic containers to fill up with DIY goodness — small jars work beautifully for the lotions and creams, and baby food jars in particular are a great size because most of the recipes are made for 4 oz sizes or less (just double/triple/quadruple the recipes to make bigger quantities).

I used natural dyes to color these soaps and some beautiful silicone flowered molds that I found on amazon.
Soap is another super easy and fun gift to make and give for the holidays. If any of you are lucky enough to have been at A-Camp this past summer then you might have had the opportunity to take Laura’s awesome DIY soap class; she is the real deal of soap makers — she uses lye! — and I wish I had a chance to learn from her! I make soap the easy way, by buying a block of soap base which is basically already lyed-up and ready for sudsing. (Here is an example of a popular soap base, but there are lots more brands and places to buy from). Like pretty much all the other DIY bath and beauty products, all you have to do is melt the soap base in a double boiler, add your essential oils and soap coloring and/or exfoliants (if using), pour it into your mold and then let it cool; also, using special molds in the shapes of letters or flowers or animals adds a little oomph to a super simple DIY make. Laura’s method gives you way more bragging rights and lets you cater every single ingredient to your tastes, but using a soap base is totally acceptable, too; do whatever fits into your time, budget and skill set. When making things like soaps and lotion bars, I like to wrap them up in a bit of brown paper or even plastic/saran wrap if I have any on hand, then tie it with some pretty ribbon or yarn (if you haven’t noticed, I tie EVERYTHING up with pretty ribbon or yarn); the bars keep their shape in this packaging and they make everything around it smell good!
A Million Outfits in One Wrap
Nowadays, lots of the holiday gifts that I make are garments that I sew myself, but the projects are very time-consuming (gifted clothing is pretty much all I have been working on since October). For the sake of making quick and simple DIY Christmas gifts, sewing labor-intensive garments is not recommended, but there are some cool garment related gifts you can make that don’t require an advanced understanding of sewing or needlecraft. One such item is the Bina Bianca wrap, named after it’s creator, and the concept is super simple: three fabric panels made of varying widths are sewn together with space for one hole at each of the two seam lines. The wrap can then be styled dozens of different ways, with the holes of the wrap being used for the arms or the head. You can drape it into a shawl, a top, a scarf, a hooded blouse — the possibilities are endless, and there’s youtube videos and a couple of blogs dedicated to showing news ways to fashion the wrap.
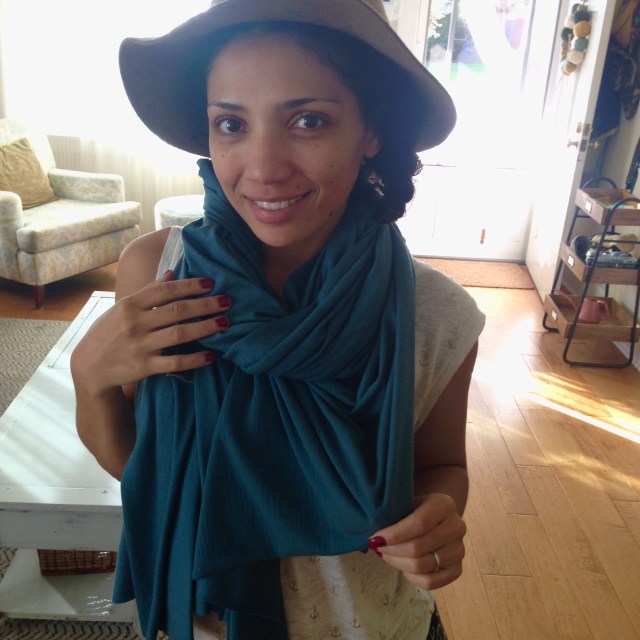
This is one of several different ways to wear the Bina; this one is wrapped around the neck like a thick scarf, and can also be pulled over the head as a hood.
Anyone with even a modicum of sewing machine know-how can easily put this together, but according to the information on the website, there is a no-sew version of this wrap, too; because the pattern calls for a knit jersey material, which is stretchy and forgiving, the cut edges of the fabric won’t fringe, unravel or come undone, so the slits you cut for the head/arm holes will maintain their shape. I love this pattern so much that I actually bought enough knit jersey material to make three of them: one for myself and two for holiday gifts. You don’t need any measurements for this garment other than the straight width of the hips (not circumference), and the whole wrap has a loose enough shape that it doesn’t need to be exact — you can probably guesstimate that number based on your own measurements. I imagine that this wrap will take no more than 15 minutes to cut and sew together, but despite the quick make, I think it could become a staple for anyone who was lucky enough to receive it. I appreciate all the different shapes that this one piece can create; it’s a cool accessory that can fit a whole spectrum of looks and styles.
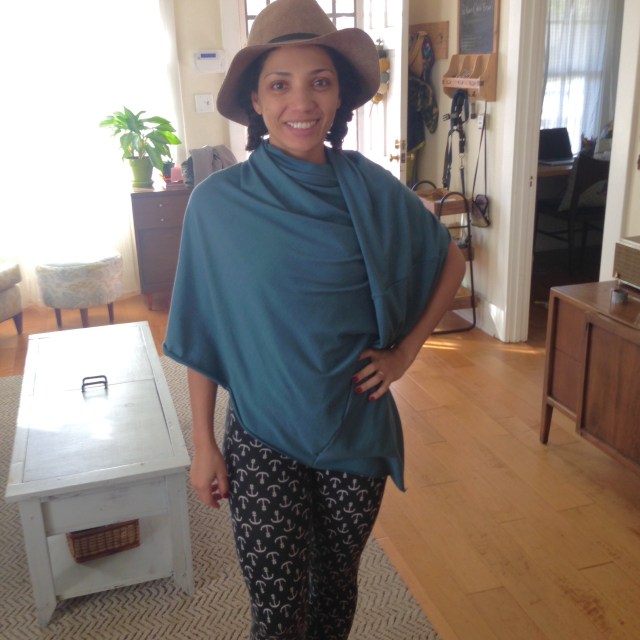
This version of the Bina holds true to it’s “wrap” status — long and draped over the shoulder for a little Dorothy Zborniak realness.
Super Cute Finger-knit Scarf/Necklace
Another fashion accessory DIY gift (and the basis for a class I taught at A-Camp this past summer!) is finger knitting. It’s a close relative of knitting, but you don’t need anything other than five fingers on one hand and some yarn to complete it. The yarn you use for this project should be super bulky (meaning the width of the yarn is very thick), squishy and soft, and because of this, the project works up super fast — in our hour and a half long class most people had twice the length needed for one finger knitted chain scarf. You can find everything you need to learn how to finger knit online, and depending on how you learn best, this video is super helpful — slow and repetitious to guide even the most non-crafty people to finger knitting success. These chains of yarn can be connected at the ends to make a cute, funky necklace, lengthened significantly to make a long skinny scarf , or used as decoration around the house — I have even made a finger knit chain in white to hang on our tree. There are a whole list of fun ways to use this simple make once it’s finished, but even better, the process is really fun. Finger knitting is meditative in the way that knitting and crochet can be, and you can even do it while you’re watching TV!

This is me at camp after my finger knitting class with campers. I made this in under an hour but it was a real crowd favorite!
Sweet Homemade Holiday Cards
The last DIY holiday gift idea I have to share is so simple that I am sure most readers will have already done it at some point in their lives, but I don’t think that should diminish it’s impact. Handmade Christmas cards are another of my favorite things to make during the holidays because they don’t take a lot of time to create, and people seem to absolutely love them! In the packages I sent last year, I got not one. but TWO emails thanking me specifically for the “beautiful hand painted” cards we made (and I assure you that they were nothing special). My wife and I had about twenty cards to knock out, so we bought a box of blank greeting cards with envelopes, laid them out on the table, and then took turns passing over each card with a few strokes of our paint brush. We came up with a super simple motif — several strokes of green paint to resemble the silhouette of a tree, quick blobs of red, blue and yellow for ornaments, a few painted squares at the bottom to resemble presents, and one bright flash of gold at the top for the star. It took us no time at all to get through all of the cards, but they still looked really impressive with their simple shapes and spare use of paint. Of course, to make a holiday card you wouldn’t have to use the image of a tree or use paints or even use blank greeting cards. Cut outs of Christmas-inspired images from magazines glued onto thick paper would be really cool looking, and so would re-using pieces of paper bags decorated with glitter and glue. You don’t even have to stay with the Christmas theme — years ago when I was struggling so much with how to participate in Christmas cheer without actually celebrating the holiday, I sent out Happy New Year cards instead of Christmas cards. I wanted people to know that I loved them and that they were important to me without feeling like I was doing something I no longer felt comfortable with.
Now that I’m in my mid-thirties, I’ve had plenty of time to test the boundaries of how much or how little Christmas-ing I can handle, and, as with most things, I have found myself somewhere in the middle. My wife and I decided early on to alternate our Christmases with our family and ourselves: one year is spent with her family, one with mine, and then one with just us, where we usually take a trip to some place beautiful, quiet, and relaxing. When we’re spending Christmas with family I long for Hawaii, and when we’re by ourselves on the beach I long for a Christmas tree. I’m sure that it’s this balance that has allowed me to fully explore what this holiday means to me as an adult, all the ways my past has influenced the season for me and all the ways the future will continue to change it. Already my Christmases are different from my childhood memories. My mother still worries and complains about having enough money to buy everyone good Christmas gifts, but this year when we visit her in Florida, we’ll be spending part of the day with her parents, whom she reunited with several years ago. My father will fly down from Alabama to spend the holiday with us, too, because he wants to be close to his kids, and he considers my mother a part of his family even though they aren’t together anymore. And now we have the chance to introduce Christmas to a new member of our family: Baby Levi, the firstborn of my brother and his wife, a child who has made me more excited about going home and dealing with family drama than I ever thought possible.
I will land in Florida with a suitcase full of handmade gifts that have taken me months and months to make, gifts that I have worried over and struggled to complete in time. But for every second that I was hemming a skirt, I thought of my Mom and how much she was going to like the fabric I chose for her. For every button that I sewed onto the Henley I made for my brother, so barrel chested and stocky that he can’t find well-fitting shirts in stores, I thought about how happy he was going to be to finally have the perfect sleeve length.
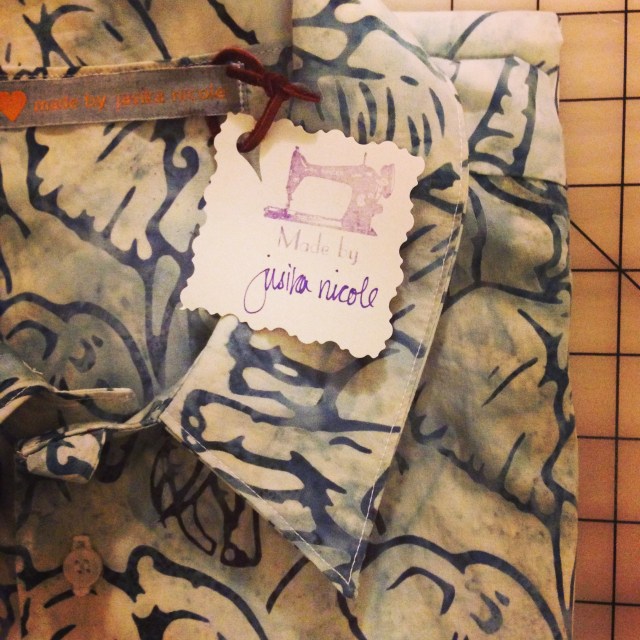
No matter how big or little the gift is, making a special tag for it puts it into super fancy territory. This is a shirt I made for my brother, a huge Alabama fan (roll tiiiiide!), and I used special scissors to cut out a piece of cardboard, then stamped it with a cool rubber stamp someone gave me as a gift.
For every day that I’ve hunched over the wheel in my pottery class, churning out bowl after mug after vase, I think about how thrilled my best friend will be to display it on his windowsill, how happy my Dad is going to be when he drinks out of the handmade coffee mug that I made just for him. Every single moment of my gift giving is focused on how much I adore the person I’m making it for, of my favorite moments with them and how much our time together means to me.
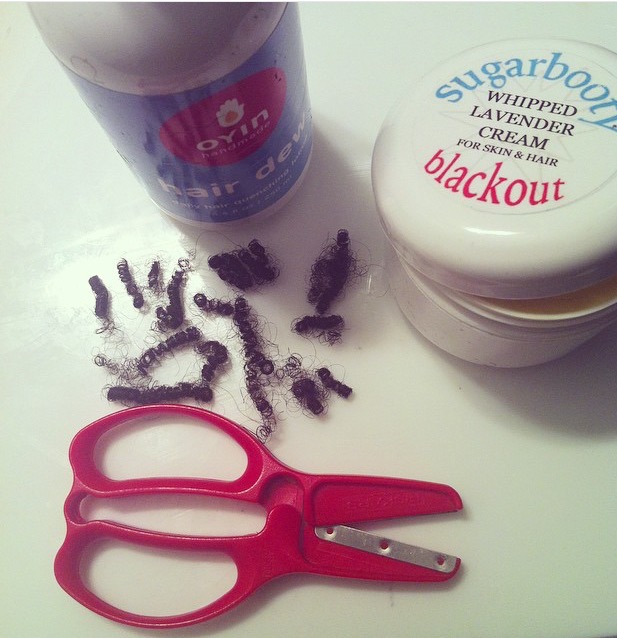
I printed lots of labels up for each of the different products I made which gave them a nice finished touch, but you could easily just write the names of the products on a blank piece of paper and tie it to the jar with some pretty ribbon. This is a photo that my friend Kristy took for me — her son took the cream I made him, massaged it into his hair, and then gave himself a tiny haircut with it!
I’m filled with happiness when I think about all the loves in my life, and how lucky I am to have so many people to make gifts for that I have to ration my time out. Is Christmas about being overwhelmed with gratitude and love and appreciation for all the amazing people in your life? For the sacrifices they have made for you, for the ones you have made for them (and would continue to make, again and again?)
If so, consider me Santa’s Helper.
Yes, I Made It: Slow Fashion and Making My Own Clothes Changed My Life
Clothing has always been one of my favorite avenues of self expression, providing a way for me to fit in (or out of) whatever environment I found myself. My love of fashion didn’t correlate with having style, as proven by my college years where I was decked out in khaki JNCOs and glittery butterfly barrettes. I struggled to fit in at my mostly-white elementary school, where I wore knock-off Keds from Payless, meticulously gluing the little blue rubber tabs from discarded pairs onto the backs of my new ones so that the kids would think I could afford the real thing (I couldn’t). At my Dad’s house, in a neighborhood literally on the other side of the tracks from where I lived with my Mom, I wore K-Swiss sneakers to better fit in with my black friends. I learned quickly that clothing was not only a form of self expression; it was also armor. I chose attire that helped me conform, attire that made me feel like I belonged, attire that didn’t belie the fact that I was poor.
As a kid I was good with my hands and very interested in creating things, but making my own clothing never even occurred to me until college. In order to meet the requirements for my Studio Art minor I had to take several design courses, and as luck would have it, costume design was on the list of classes offered. Turns out that I was not actually good at designing costumes at all, but I was great at constructing them! My first completed project in class was a gorgeous, embellished gown for Lady Capulet in our production of Romeo and Juliet, and although I had a lot of guidance from my teacher in the process, I still felt a gigantic sense of pride at what I had accomplished. Up to this point, my years in theatre were signified by my being onstage. I had built flats for theatre sets and done lighting design. I could work a sound board, direct a scene, and choreograph dancers for competitions. But none of those experiences felt as good as performing… until I built this costume.
The gown was comprised of several yards of red brocade fabric, with sheer sleeves that spilled out in huge silky puffs around the arms. The gown was cut low around the neckline and emphasized with gold braided ribbon so that Lady Capulet’s décolletage was beautifully, tactfully presented, and there was a break in the front of the dress where the deep brocade gave way to a smooth, drapey red fabric that floated around underneath. The dress was heavy as shit and probably really hot under those stage lights, but the actor who wore it never complained — I think she was thrilled to wear such a beautiful costume, and she looked amazing in it.
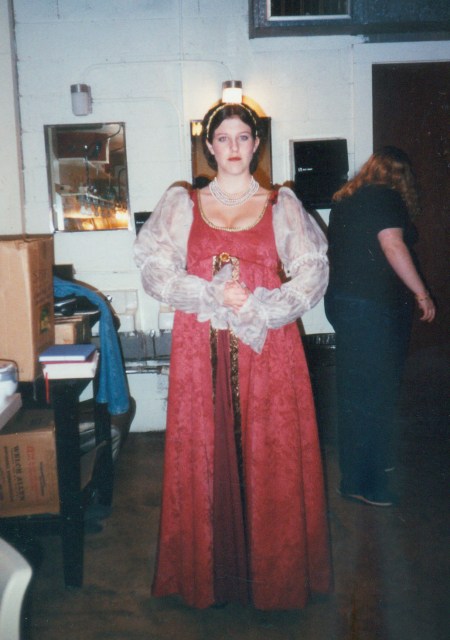
This is the actor who played Lady Capulet in my college’s production of Romeo and Juliet wearing the first garment I ever sewed. She was wonderful onstage, and so was that gown.
For Christmas that year my Mom bought me my first sewing machine, the cheapest Brother that Walmart sold at the time. I brought it back to college with me for spring semester, where I would sew in my dorm room late into the night working on personal projects.
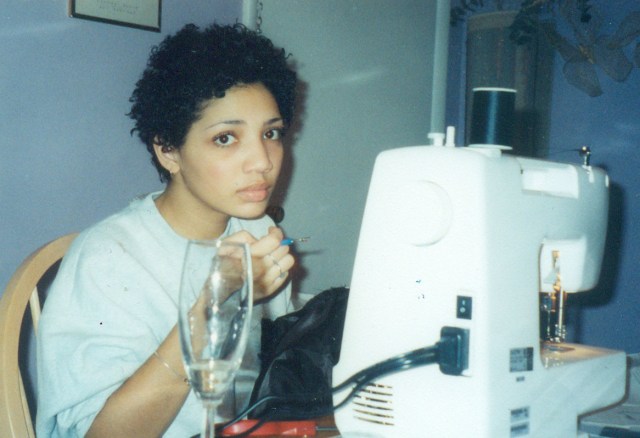
This photo was taken on New Years Eve, hence the glass of champagne; I do NOT condone drinking and sewing unless you are completely fine with making lots of drunken mistakes and doing your work all over again the next day. I had just received this sewing machine as a Christmas present from my Mom, and I still have it and use it! Expensive sewing machines are lovely, but cheap ones from reputable companies will still get the job done!
The very first garment I made for myself came from a Vogue pattern. It was a simple strapless summer dress with a darted bodice that attached to a slightly flared skirt, and it had a zipper in the back (which took me a REALLY long time to get right). I made it out of an earth-toned floral linen that I bought from Joann’s Fabrics, and I made a straight size in the pattern, meaning that I didn’t grade from one size to another or alter the fit at all. To my surprise, the dress fit me perfectly, and I was even more proud of it than Lady Capulet’s gown; I loved it because it was a wardrobe staple that didn’t look handmade or costume-y, and I had finally made something for ME! It’s been 14 years since I sewed that summer dress and it is still hanging in my closet, getting every bit as much wear as it did when I was in college. I don’t know what’s more impressive — the classic silhouette that has stood the test of time over a decade after it was made, or the fact that I can still fit into the thing. After all my years of sewing, I’m still convinced that this is the most perfect garment I have ever made.
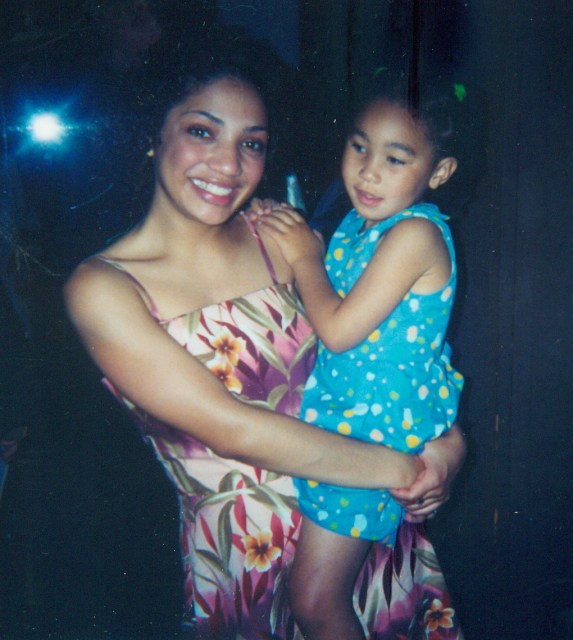
This is the first garment I ever made for myself! This is the night I graduated from college and I am holding my sister Sedric at some event on campus. I would never pick out this fabric at a store today, but for some reason I think it works well on this dress; this dress is the equivalent of a security blanket.
My run of making awesome garments took a pretty long hiatus after the success of the Vogue pattern. There was the time I made a dress in light blue polka dot cotton that looked sort of okay but just wasn’t quite right. It was tight in the bodice and my fabric choice was all wrong, proving to be too stiff for the design of the dress which made the skirt stick out like a tent around my legs and the hem fold and gape. Although the fit was off, I still wore the dress because I was proud of learning how to gather fabric to create the neat little ruffles around the armholes, and I had gotten better at my zipper insertion. But the garment didn’t last very long in my closet.
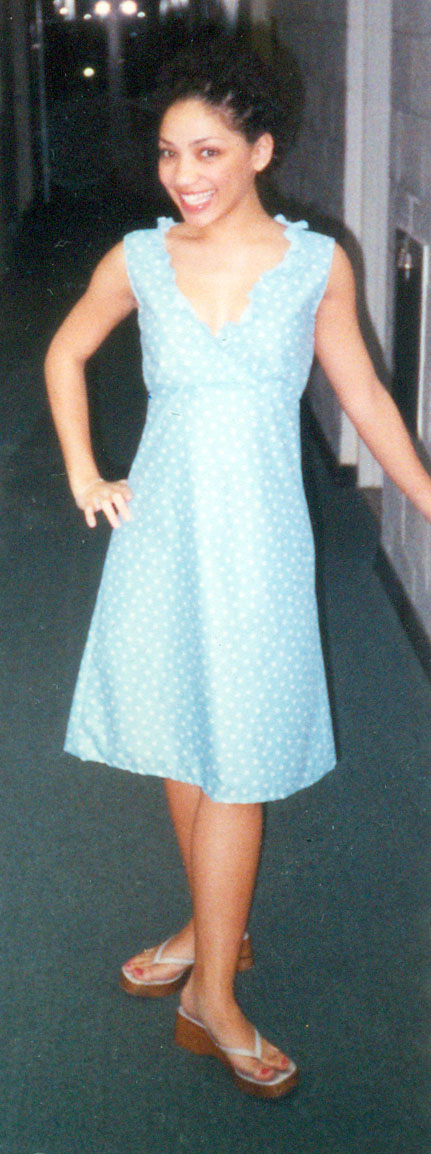
This dress doesn’t look so bad in the photo, especially for just starting out with sewing, but I wasn’t very happy with it at all. I have learned that if I have to try and convince myself a garment I have made is worth keeping, it’s usually not. I’m sure I donated this dress to a thrift store after I was done with it, but now I try and salvage as many of my makes as possible by either re-sewing the garment or saving the fabric for scraps- anything to keep it from the garbage dump.
Then there was the time I made my costume for my theatre department’s annual masquerade ball! I went as a fairy and bought a pattern for a dress that I adapted to suit the needs of my design. I made a straight size of the pattern, but this time the fit was horribly off — way too big in every way. I hadn’t yet learned how to customize fit from flat pattern pieces, so when I tried the garment on and saw that it was huge, I just kept re-sewing the side seams to take in more fabric, as opposed to taking the pieces apart and recutting them and rearranging the darts. The costume was okay enough to wear to the event and I was proud to tell people that I had made it, but I wasn’t very comfortable in it. It bagged around my bust, was too big in the waist, and my wire and silk wings kept drooping and stretching out the back of the bodice; I spent the whole night hoisting it up because I was constantly on the brink of having a wardrobe malfunction.
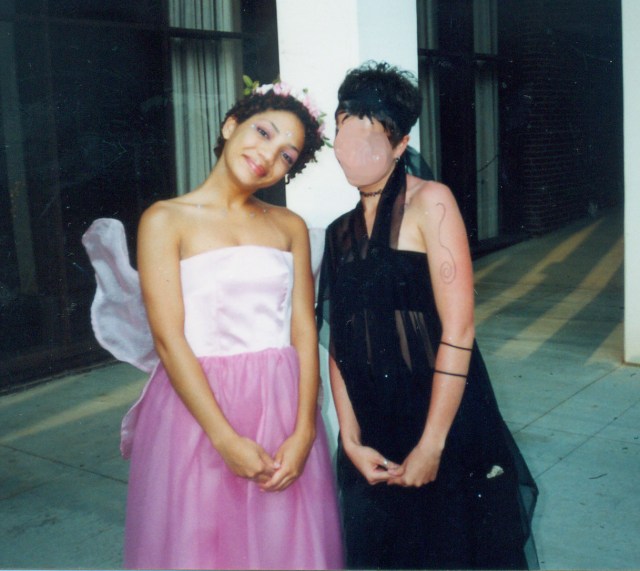
I wore this pink number to the Blue Masque Banquet, an event our theatre department held at the end of every year. You can’t tell how ill-fitting this dress is from this picture, so you will just have to trust me. Also the Dark Fairy in this photo is blurred because I am not really in touch with her anymore and I am too lazy to write her and I didn’t want to be an asshole by posting her face all over the internet without her permission.
Oh! And then there was the time I became obsessed with the dress forms in the costume shop and would spend hours late into the night trying to draft my own patterns. I remember designing a piece consisting of a tiny scrap of sequined fabric that I snipped and fussed over and sewed until it fit the bust of the dress form perfectly. Then I sewed several skinny elastic straps to the back of it and called it my “Going To The Club” top. I wouldn’t have been able to breathe in this top without flashing my goodies, let alone go to the club and dance in it, so it never actually got worn, but I still carried it around with me and showed it off to my friends. I think even then I understood that getting good at sewing was a process, and despite my earlier triumphs, I still had a lot to learn.

I honest to goodness thought I was going to wear this sequined shirt in public. This photo was taken the night I finished sewing it, meaning I did indeed spend MORE than one night sewing this 4 inches of fabric. Astonishing that one could spend so much time on something so tiny and flimsy.
It took a while before I made something I was proud of again, but eventually I tried my hand at another Vogue pattern, a blouse made out of a stretchy woven material with a little bit of sheen. The style was perfectly suited to the early 2000s; a merlot-colored one-sleeved wrap top with an asymmetrical hem and a cut-out at the shoulder. It had a lot of competing design elements and it’s clearly not something that I would wear again in a million years, but for that little snippet of my life, it was my absolute favorite thing to wear. It fit me like a glove, and it really spoke to my sensibilities at the time — it was unique and cool and expensive-looking (well, expensive for a poor college student). At this point in my life I was beginning to feel more at-ease in my skin, and this shirt was a testament to how much my tastes and ideas about myself were maturing. In college I stopped struggling so hard to fit in like I had in high school, and I started experimenting more with how I could set myself apart. Despite the protests of my friends, I cut my long hair really short for the first time. I was just beginning to reject the beauty ideals that I had grown up with, proving to myself that I, a woman of color, didn’t have to have long hair to be feminine or pretty. I didn’t have to bare a lot of skin to feel sexy and desired. I could define my style on my own terms, and not feel ashamed or embarrassed if someone didn’t like it.
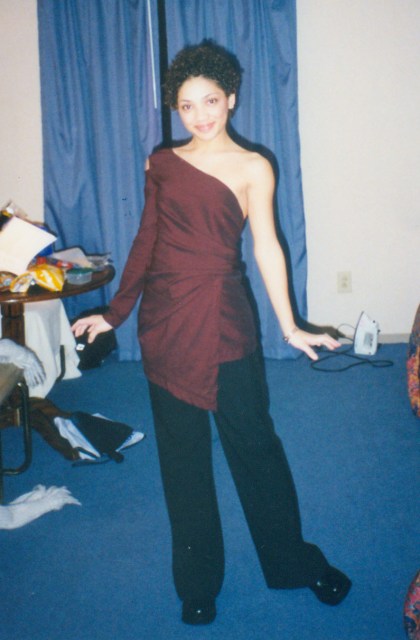
This photo speaks for itself. We were out of town at a theatre conference which is why I am in a messy and poorly decorated hotel room. This was my outfit for “hanging out in the hotel lobby with all the other college theatre kids.” I had a terrible time and was convinced that the best part of my night was this here outfit.
When I moved to NYC after college, my Brother sewing machine came with me, crammed onto the top shelf of a tiny closet in each of the seven apartments I lived in during my eight years there. I didn’t use it much because I spent most of my time either working or auditioning, so several years later, when my partner and I moved to Vancouver indefinitely for my work, I decided to leave it with the rest of our belongings in a storage unit in Brooklyn. But it was only a matter of months before I had replaced it with the ‘Euro-Pro Denim SEW-lution’, a used machine I bought for $40 at a going-out-of-business sale. I didn’t exactly need to have a sewing machine in my possession in Vancouver, but there was (and still is) something reassuring about always having one around. Plus, I’m not one to say no to such a great pun. During our first few years in Canada I didn’t accomplish much on the machine other than making curtains and hemming some vintage clothing, and I eventually found out that “Denim SEW-lution” was a complete misnomer (it could barely get through several layers of wool, much less hefty denim seams). But it had some good sewing mojo in it yet; it was on this machine that I made my first quilt, which I gave as a gift to my co-star’s new baby. I also sewed my first garment for my partner, a cute button-up made from a lovely quilting cotton that she picked out herself. The shirt was much too big for her and we ended up giving it to my Dad, but I didn’t consider it as a failure — after taking such a long hiatus from sewing, my interest in the craft had been re-ignited and I dove in again head first.
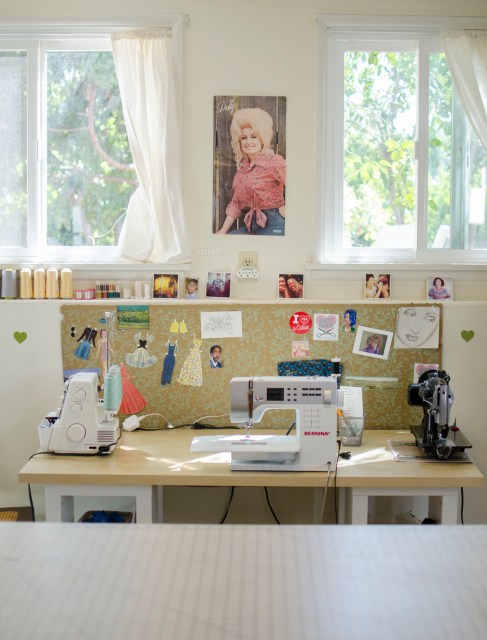
This is the sewing machine workspace in my craft room. One of the reasons I wanted to buy the house we live in is because it has sizeable detached basement which I have devoted to all things craftastic. Photo by Claire J Savage
I discovered that after so many years away from sewing, there was now a booming online community of at-home sewers, and I read blog posts from all over the world by entrepreneurial individuals who were writing sewing books and designing patterns printable from home. My immersion into the indie pattern world began with Gretchen Hirsch, a sewing blogger who published a book of vintage-inspired patterns and construction methods, and she became my sewing guru. The first successful garment I made from Gertie’s Book for Better Sewing was the Wiggle Dress, and it marks the first time I put significant effort into ensuring that a garment would fit me. For starters, I made a muslin and worked on it for hours until it fit — something I had been too lazy to do before. A muslin is a piece of clothing you make from a pattern intended for fitting purposes only — you construct the garment as per the directions, then you adjust the pieces as necessary, usually using an inexpensive fabric or a lightweight cotton called muslin. I thoughtfully chose my garment fabric to make sure that it would work well with the design, and I learned a few new techniques in the construction of the dress, like making gussets so that there was extra fabric in the underarms to keep the dress from riding up when I raised my arms. I feel stunning when I wear this dress. I had spent decades thinking that I didn’t have the kind of body type that looked good in close fitting dresses like this, but when it was completed, I realized that that wasn’t true at all — I had just never before tried on a slim-fitting dress that actually fit my measurements. Learning how to create the clothes that fit my body instead of trying to make my body fit the clothes has been a powerful revelation.
This is the first dress that I spent a substantial amount of time working on to ensure that it fit me well, and it’s one of my all time favorites. The insides don’t look very good- I have gotten much better at finishing seams in the past few years, but even the messy innards can’t keep this dress from fitting beautifully. photo by Robin Roemer
Since making the Wiggle Dress I have become… well, obsessed. My style is more refined now because I can make virtually anything I want for the price of fabric and my time. I buy new patterns as fast as the indie designers can make them, and my arsenal of sewing machines has grown to include a Bernina 350, a Janome serger, and a beautiful Singer from the 1950s that my real estate agent insisted I rid her of. My cheap Brother machine is still going strong, too! Unsurprisingly, my shopping habits have decreased significantly since I traded visits to Bloomingdales for visits to fabric stores, but most importantly, I am learning about the concept of “slow fashion,” becoming increasingly aware of the poor impact that the global fashion industry is having on the environment and the lives of the garment factory workers they employ. Sewing began as a creative outlet for me, an activity that married my love for theatre with my love for DIY, but it has since progressed into a more nuanced understanding of my body, my style, and the consequences that my personal choices have on the world. Of course, sewing your own clothing isn’t going to singlehandedly solve the issues that the fashion industry is causing, nor is having the money, time, and skill set a privilege that everyone is afforded. Sewing has, however, made me more conscious of what I am supporting when I shop at a store, and it has affected the way I understand my participation in consumerism.
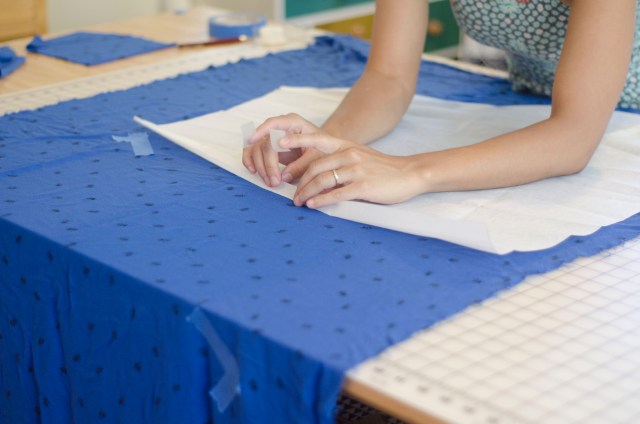
Me working on a dress that I am wearing in the next photo. photo by Claire J Savage
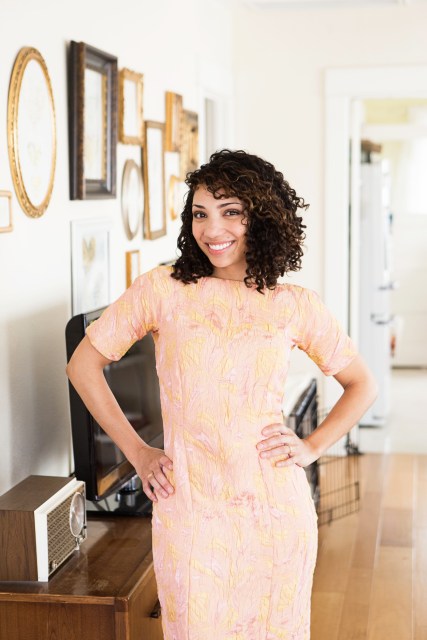
A photo of me in my craft room below a gigantic portrait of my parents. photo by Claire J Savage
My goal is not to abstain from ever buying ready-to-wear clothing again, and I’m not particularly interested in hand-making every single item I wear for the rest of my life. But I would be lying if I said that wearing a store-bought item has the same significance for me as wearing something me-made; when I wear a dress that I put a lot of thought into — from choosing the fabric to cutting out the pattern pieces to making fit adjustments for my body — it shows. It shows in the way I carry myself, in the way I interact with others. The added oomph I get from wearing clothing I made with my own two hands outweighs that of wearing an item I bought from the store. Clothing is still a way for me to communicate to the world how I feel and who I am, but now that I have learned to make most of it it myself — everything from bras to jeans — clothing also makes me feel empowered. I might be having a shitty day that makes me feel inferior and daft, but at least I look amazing in this handmade dress! Hilton Al’s White Girls might have been so far over my head that I barely made it through a hundred pages, but hey, I know how to make shoes! The zombie apocalypse may be looming ominously in our future, but guess what — I’ll be able to knit all of us chunky sweaters to keep us warm in the darkest of winters!
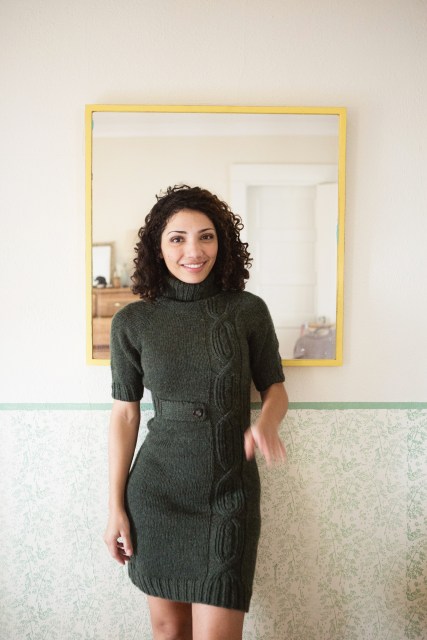
This is the first dress I ever knitted and I love it. Photo courtesy of Robin Roemer.
I haven’t worn my clothing as protection in years; now it serves as insight into the kind of person I am, the kind of person I want to be. My clothing is an invitation: Hey! I love horror novels and I know all the words to RENT! I am a queer biracial woman of color. I am creative. I am ambitious. I am an introvert. I have a lot of patience, with myself and with you. I am proud of myself and the things I make, but I am also enthusiastic about sharing my knowledge with others. Every time someone comes up to me at an audition and compliments me on what I am wearing, I thank them and tell them I made it myself. Their first question is always “Where can I buy your stuff??” I explain that, for a multitude of reasons, I don’t sell the clothing I make, but that I would be happy to teach them how to make something for themselves. And I mean it. I’m still waiting for someone to take me up on the offer.